A multi-channel screen and audio recording tool designed for creating tutorials with synchronized separate tracks.
I needed to create tutorials and save each channel separately, but I was too lazy to start 3 separate recordings and use a clapperboard to synchronize by sound, so I coded this solution.
This tool allows you to record multiple audio inputs (microphones), webcam, and screen capture simultaneously, all perfectly synchronized with timestamps. Each source is saved as a separate file, making post-production editing much easier.
Watch how TutorialRecorder works:
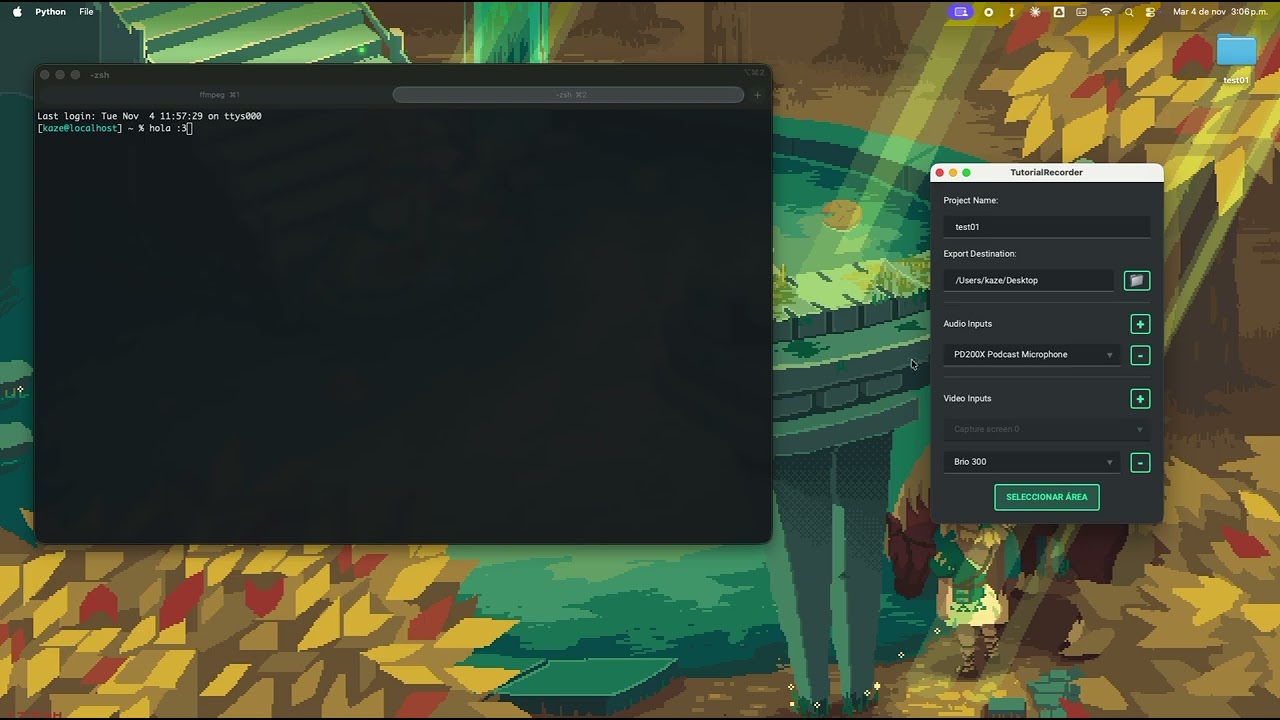
Click the image above to watch the demo on YouTube.
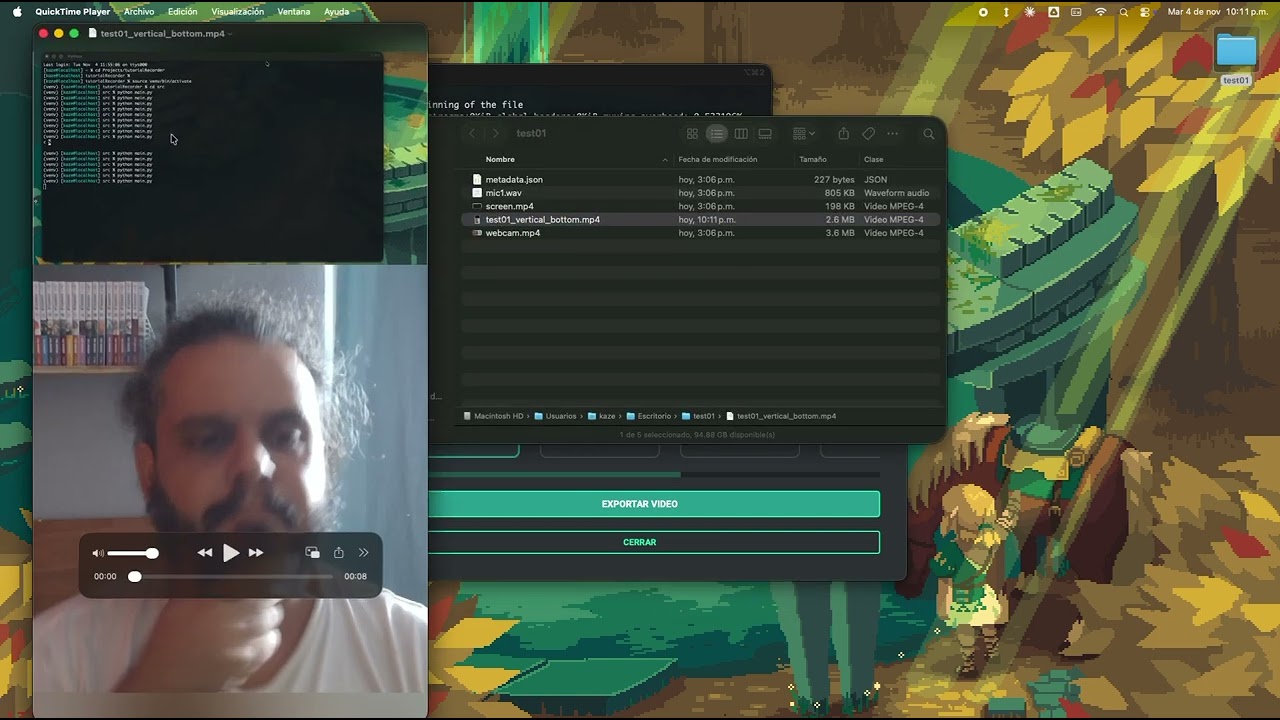
See how to export your recordings with different layouts for TikTok, Instagram, YouTube Shorts, and YouTube:
- 🎙️ Multi-channel audio recording - Record multiple microphones simultaneously
- 📹 Webcam recording - Capture video from your webcam
- 🖥️ Screen capture - Record specific areas of your screen with customizable resolution
- ⏯️ Pause/Resume - Control your recording with pause and resume functionality
- 💾 Separate tracks - Each input is saved as a separate file for easy editing
- 🕐 Perfect synchronization - All recordings are timestamped for frame-perfect sync
- 🎨 Interactive area selector - Visual overlay to select recording area
- 💾 User preferences - Remembers your export path and default resolution
Having issues? Check the Troubleshooting Guide for common problems and solutions.
macOS:
- Download from Releases
- Available files:
- TutorialRecorder-1.0.1.dmg - Installer (recommended)
- Or download .app directly from release assets
Requirements:
- macOS 10.13 (High Sierra) or later
- No additional installation needed (FFmpeg is bundled)
First run:
- System will ask for permissions (Camera, Microphone, Screen Recording)
- Go to System Preferences → Security & Privacy → Allow
Windows & Linux:
- Coming soon! For now, use the source installation method below.
- Python 3.10 or higher
- FFmpeg - Must be installed and available in PATH (not needed for pre-built binaries)
Note: If you downloaded the pre-built binary (DMG or .app from Releases), skip this step - FFmpeg is already bundled!
macOS:
brew install ffmpegLinux (X11 only, Wayland coming soon UwU):
# Ubuntu/Debian
sudo apt-get install ffmpeg alsa-utils v4l-utils

# Fedora
sudo dnf install ffmpeg alsa-utils v4l-utils

# Arch
sudo pacman -S ffmpeg alsa-utils v4l-utils
Note for Linux users: Currently only X11 is supported. If you're running Wayland, please switch to an X11 session for now.
Windows: Download from ffmpeg.org and add to PATH
# Clone the repository
git clone <repository-url>
cd tutorialRecorder

# Create virtual environment (recommended)
python -m venv venv
source venv/bin/activate  # On Windows: venv\Scripts\activate

# Install Python dependencies
pip install -r requirements.txt# Activate virtual environment if you created one
source venv/bin/activate # On Windows: venv\Scripts\activate
# Run the application
python src/main.py-
Configure your project:
- Enter a project name
- Select export destination folder
- Add audio inputs (microphones)
- Select video source (webcam or screen)
-
Select recording area (for screen recording):
- Click "Seleccionar Área"
- Drag the selection rectangle to position it
- Choose resolution from dropdown or use manual resize
- Click "Grabar" to start recording
-
During recording:
- Use the system tray icon to stop recording
- Or use the "Stop" button in the main window
-
After recording:
- All files are automatically saved to your chosen export folder
- Each source has its own file (mic1.wav, mic2.wav, webcam.mp4, screen.mp4)
- Metadata JSON file includes timestamps for synchronization
tutorialRecorder/
├── src/
│   ├── main.py                    # Application entry point
│   ├── models/                    # Data models
│   ├── services/                  # Business logic
│   │   ├── platform/              # Platform-specific implementations
│   │   │   ├── base.py           # Abstract interface
│   │   │   ├── macos.py          # macOS implementation
│   │   │   ├── windows.py        # Windows stub
│   │   │   └── linux.py          # Linux stub
│   │   ├── audio_service.py      # Audio device detection
│   │   ├── video_service.py      # Video device detection
│   │   ├── recording_service.py  # Recording control
│   │   └── config_service.py     # User configuration
│   ├── widgets/                   # UI components
│   └── windows/                   # Main windows
├── requirements.txt
└── README.md
- macOS record / finish at 2025/11/04
- macOS build (.app + .dmg) / finish at 2025/11/05
- Export with multiple layouts / finish at 2025/11/05
- Linux record / finish at 2025/11/05 (not tested)
- X11 OK (not tested)
- Wayland pending
- Windows record / finish at 2025/11/05 (not tested)
- Windows build (.exe)
- Linux build (.AppImage / .deb)
- Simple cut editor (cut all channels at same time)
User preferences are stored in ~/.tutorialRecording/config.json:
- Export path (last selected folder)
- Default resolution (last used resolution)
This project is licensed under the Beerware License (Revision 42).
You can do whatever you want with this code. If we meet some day, and you think this stuff is worth it, you can buy me a beer (or a coffee) in return.
☕ Support via Ko-fi: ko-fi.com/darkkaze
See LICENSE for the full license text.
Developed with assistance from Claude Code.
Contributions are welcome! Feel free to:
- Report bugs
- Suggest new features
- Submit pull requests
- Implement Windows/Linux support
If you find this tool useful, consider:
- ⭐ Starring the repository
- ☕ Buying me a
coffeebeer - 🐛 Reporting bugs and suggesting features