A simple chat server
In this example, we'll create a very simple chat room. Users will join the room by launching a swf file and then they can talk with all the other users in the room.
If you have not done so, you should install SwfConduit according to the instructions on the Install page. This example is located in the examples/chat directory of SwfConduit.
Start the chat server by invoking twistd from a terminal:
$ cd examples/chat
$ sudo twistd -ny chat.py
A bunch of text should scroll onto the screen, resembling the below block
2011-05-28 22:42:31-0500 [-] Log opened.
2011-05-28 22:42:31-0500 [-] twistd 11.0.0 (...) starting up.
2011-05-28 22:42:31-0500 [-] reactor class: twisted.internet.selectreactor.SelectReactor.
2011-05-28 22:42:31-0500 [-] swfconduit.socketpolicy.SocketPolicyFactory starting on 843
2011-05-28 22:42:31-0500 [-] Starting factory <swfconduit.socketpolicy.SocketPolicyFactory instance at 0x10196eb48>
2011-05-28 22:42:31-0500 [-] swfconduit.server.Server starting on 8000
2011-05-28 22:42:31-0500 [-] Starting factory <swfconduit.server.Server instance at 0x10196eab8>
If there are no error messages, the server is running. Leave the terminal open while you start the client.
First, we need to create a new Flex Project. We'll call our new project Chat. Give it an Application Type of "Web" and click Finish.

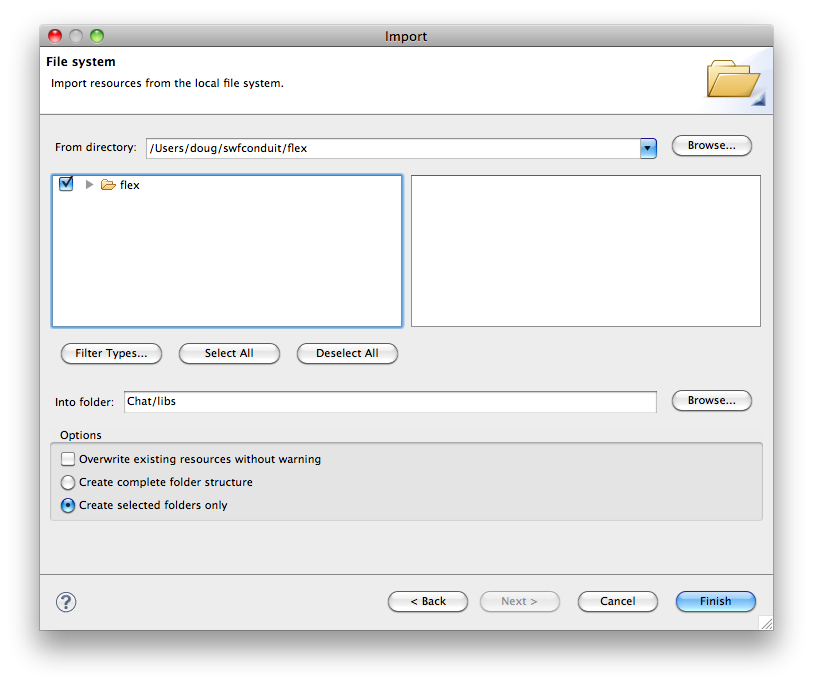
Next, we need to import the swfconduit libraries. Right-click on the "libs" folder in the Package Explorer and choose "Import…" from the pop-up menu.

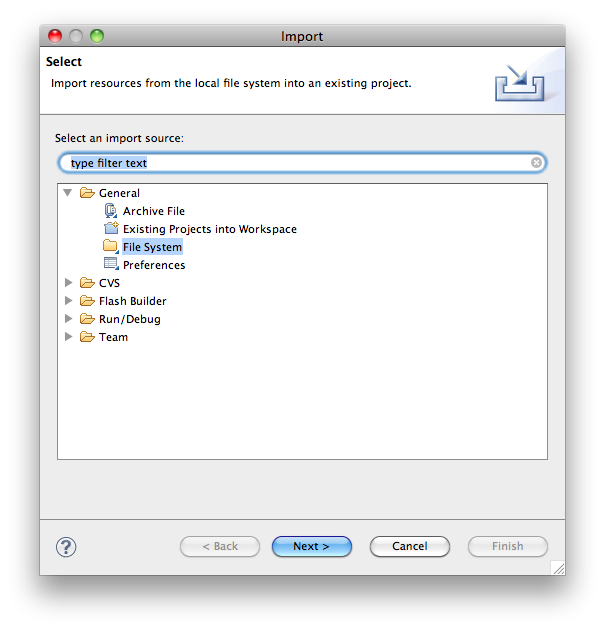
In the dialog box, open the General folder, choose "File System" and click Next.

Choose the swfconduit/flex folder and make sure it's checked in the box on the left. Then click Finish to import the files.
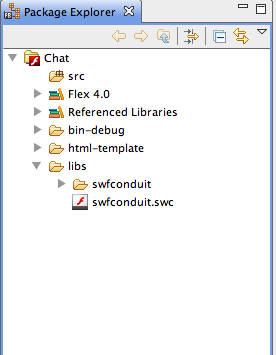
Finally, we need to import the files from the swfconduit/examples/chat folder. We follow the same procedure as we did when we imported the swfconduit libraries. Right-click on the "src" folder in the Package Explorer and choose Import… from the pop-up menu.

In the dialog box, open the General folder, choose "File System" and click Next.
Browse to the swfconduit/examples/chat folder, make sure it's checked in the box on the left, and click Finish to import the files.

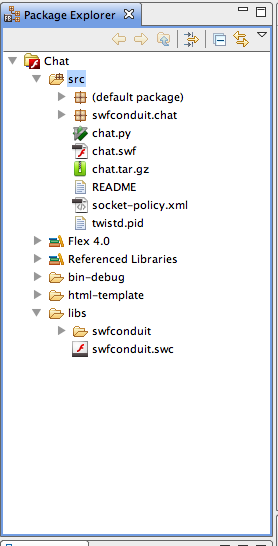
Now, we can open our chat.mxml file and Run it. Your browser will open and the chat window will appear. If the server is running (it should be), you'll be able to chat.

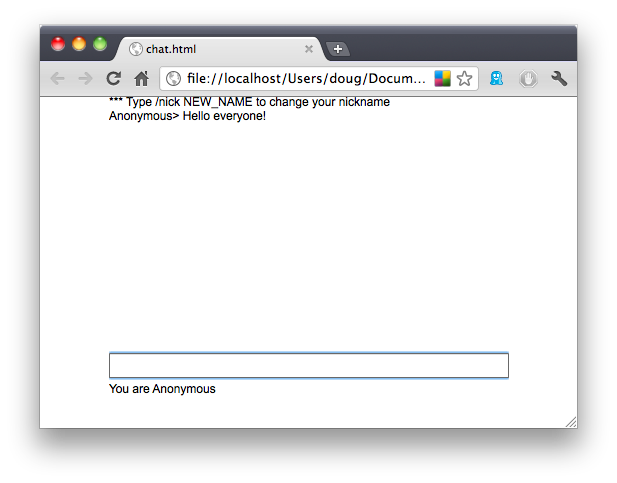
Compile the chat.swf by invoking mxmlc:
$ cd examples/chat
$ mxmlc -l+=../../flex chat.mxml
Then, open the chat.swf file and try it out.
You can use /nick NEW_NICK to change your nickname, and opening the chat.swf multiple times will allow you to talk to yourself without danger of people thinking you're weird or sending you to therapy.
The SwfConduit server handles messages using Event classes. The client sends events to the server, and the server sends events to the client. All the communication is asynchronous, so the server doesn't have to wait for the client to make a request.
So, the first thing we need to do to build a chat server is create the ChatEvent class. First we import the swfconduit Event base class and create our subclass.
# Create our event class
from swfconduit.event import Event
class ChatEvent( Event ):
Next, we add the properties of the event. ChatEvent needs a nickname of who sent the message, and the actual text of the message.
    # The nickname of the user sending the event
    nickname = ""
    # The message
    text = ""
Finally, we need to describe what to do when the server recieves a ChatEvent. SwfConduit events have a fire() function that gets called when the server recieves it. fire() recieves the swfconduit Server object for the current server, and the swfconduit Session object which is the session that sent the event.
In our fire() function, we're going to loop over all the other connections to the server and forward the event to them.
    def fire( self, server, session ):
        # We recieved a chat event, send it to every other person
        for session_id in server.sessions:
            s = server.sessions[session_id]
            if (s is not session):
                s.sendEvent( self )
Once we've built our event class, we need to register the class with PyAMF in order for it to be correctly serialized. We'll also need to register the ChatEvent class we create on the client, later. The server and client will both share the ID string "swfconduit.chat.ChatEvent" to know what they're serializing.
# Register our ChatEvent class. the first argument is the same as the
# registerClassAlias string in the client
import pyamf
pyamf.register_class( ChatEvent, "swfconduit.chat.ChatEvent" )
With the event class created and registered, we can create our server using the swfconduit Server class. Our server will use the TCP protocol on port 8000, so we'll pass that into the server's configuration dict.
# Create the SwfConduit server
from swfconduit.server import Server
server = Server({ "proto" : "tcp", "port" : 8000 })
Now, we'll load up the application that twistd will execute for us using the swfconduit Loader. The Loader will also handle the socket-policy.xml file for us, which is placed in the same directory as our server program.
# Load and run SwfConduit
from swfconduit.loader import Loader
loader = Loader()
loader.servers.append( server );
application = loader.get_application()
That's it! We can now run our server:
$ twistd -ny chat.py
Now that we have our server, we need something to connect to it. We'll create a simple MXML component that will take input from the user and display the incoming chat messages.
First, like our server, we need a ChatEvent. On the client, swfconduit events extend the swfconduit.Event class.
package swfconduit.chat {
    import swfconduit.Event;
    public class ChatEvent extends swfconduit.Event {
We make the same public attributes as the server's ChatEvent. If the two disagree, the flash client will warn you about the attributes it can't find.
        // The person who sent the event
        public var nickname:String;
        // The message being sent/recieved
        public var text:String;
Finally, we'll make a constructor that makes it easier to create ChatEvent objects. If we override the constructor for an Event, we must provide defaults. When the Event is sent by the server to the client, Flash will use the constructor, but will not pass any arguments to it.
        public function ChatEvent( nickname:String="", text:String="" ) {
            this.nickname = nickname;
            this.text = text;
        }
    }
}
And that's all our ChatEvent needs to do. Notice how the client doesn't do any handling of the Event. Unlike the server, the client's handling of the event is done using event listeners.
But before we can listen for ChatEvents, we have to build a form. We'll create a Spark Application that has an area for the chat, an input field to type into, and a label for the user's current nickname.
<?xml version="1.0" encoding="utf-8"?>
<s:Application width="400" height="300"
    xmlns:fx="http://ns.adobe.com/mxml/2009"
    xmlns:s="library://ns.adobe.com/flex/spark"
    xmlns:mx="library://ns.adobe.com/flex/mx"
>
    <s:layout><s:VerticalLayout /></s:layout>
    <s:RichEditableText editable="false" id="chatbox" width="100%" height="250">
        <s:text>*** Type /nick NEW_NAME to change your nickname</s:text>
    </s:RichEditableText>
    <s:TextInput id="input" width="100%" height="25" />
    <s:Label text="You are {nickname}" height="20" />
</s:Application>
We're using RichEditableText so that we get scrolling automatically, but we're setting editable to false because users should be typing into the TextInput below it. Finally, a Label with text bound to the "nickname" field (that we have yet to create).
So now that we have our form, we'll add our script. First we need to import the swfconduit libraries and our ChatEvent. Since we're also going to be working with keyboard events (pressing Enter to send text), we'll import the flash KeyboardEvent class.
    <fx:Script><![CDATA[
        import swfconduit.Socket;
        import swfconduit.chat.ChatEvent;
        import flash.events.KeyboardEvent;
Now, we'll need to keep some data around, like the hostname and port to connect to, the connected socket to the swfconduit server, and the user's nickname.
        public var hostname:String = "localhost";
        public var port:uint = 8000;
        public var socket:swfconduit.Socket;

        [Bindable]
        public var nickname:String;
Next, we'll need to connect to the server. We'll create an init function that will register our classes and connect to the server.
        public function init():void {
            // Register our event class
            registerClassAlias( "swfconduit.chat.ChatEvent", ChatEvent );

            // Connect to the server
            socket = new swfconduit.Socket( hostname, port );
        }
We'll need to call our init() function when our application is completed, so add 'applicationComplete="init()"' to our <s:Application> tag.
<s:Application width="400" height="300" applicationComplete="init()"
Next, we need to handle incoming ChatEvent messages. As they come in, we need to add the text to our chatbox text area.
        public function handleChat(event:ChatEvent):void {
            chatbox.appendText( "\n" + event.nickname + ": " + event.text );
        }
We add our event listener in our init() function, after we create our socket.
        public function init():void {
            // Register our event class
            registerClassAlias( "swfconduit.chat.ChatEvent", ChatEvent );

            // Connect to the server
            socket = new swfconduit.Socket( hostname, port );
            socket.addEventListener( "ChatEvent", handleChat );
        }
Now, as ChatEvents come in, they'll be added to the chatbox. Finally, we need to send out ChatEvents of our own. We'll add a handler for the Enter key so that it sends out the message.
        public function sendChat(event:KeyboardEvent):void {
            if ( event.keyCode == 13 ) {
We also want to allow users to change their nickname, so we'll do that first.
                // Let the user change their nickname using /nick NewName
                if ( input.text.match('^/nick') ) {
                    nickname = input.text.substr(6); // Everything after "/nick "
                }
If they're not changing their nickname, they're trying to talk, so we'll create a new ChatEvent object and send it out over the socket. We also add their text to the chatbox, because we won't get our ChatEvent back.
                else {
                    socket.writeEvent( new ChatEvent( nickname, input.text ) );
                    chatbox.appendText( "\n" + nickname + "> " + input.text );
                }
Last, we clear out the input so the user can chat more.
                input.text = "";
            }
        }
Again, we add the listener in our init() function.
        public function init():void {
            // Register our event class
            registerClassAlias( "swfconduit.chat.ChatEvent", ChatEvent );

            // Connect to the server
            socket = new swfconduit.Socket( hostname, port );
            socket.addEventListener( "ChatEvent", handleChat );

            // When enter is pressed, send the event
            input.addEventListener( KeyboardEvent.KEY_UP, sendChat );
        }
And that's all the script we need.
]]></fx:Script>
Now we can compile our swf file and try it out.
$ mxmlc -l+=../../flex chat.mxml
$ open chat.swf