-
Notifications
You must be signed in to change notification settings - Fork 6
AWS
egoing edited this page Oct 20, 2020
·
78 revisions
- aws에 회원가입합니다.
- git을 설치합니다. https://git-scm.com/
- vscode(https://code.visualstudio.com/)를 설치합니다. portable 버전은 설치하지 마세요.
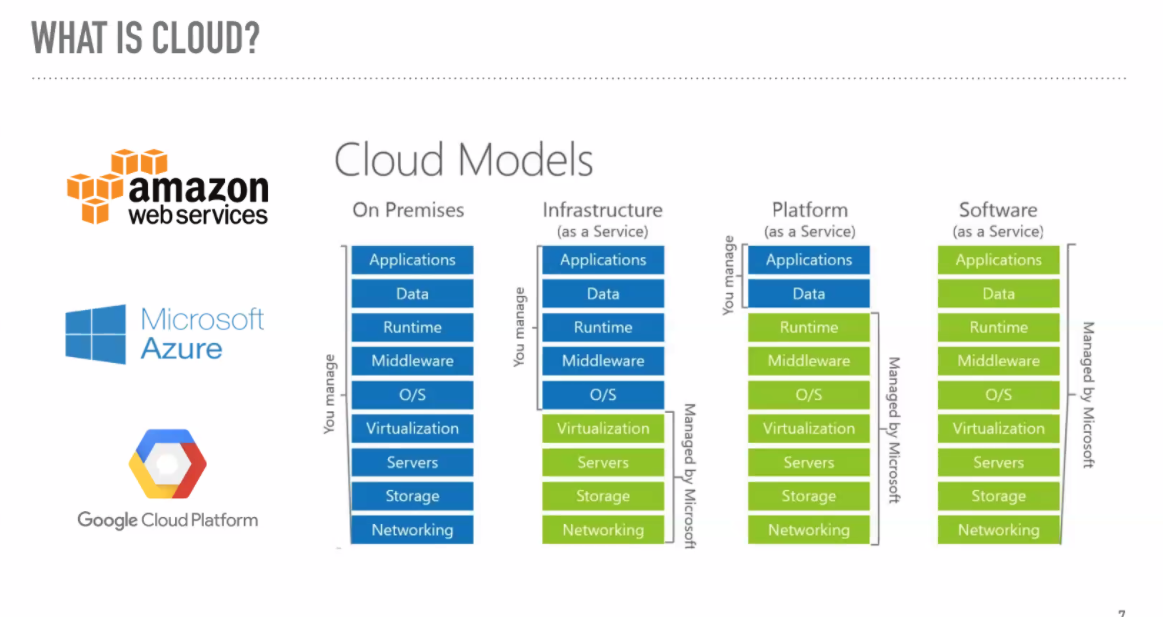
- https://4.bp.blogspot.com/-ZhQYKf2ZjRA/WOcKP0GEoAI/AAAAAAAABpI/wfTtsdubGlU-sXvezTAR-Fof0i7wXKI9gCLcB/s1600/20170406CloudModels.png
- https://qph.fs.quoracdn.net/main-qimg-f52c3833504e879de23bc9ebcc7344e5.webp

- 버킷을 생성한다.
- 버킷으로 파일을 업로드 한다.
- 파일을 다운로드 한다.
- 파일을 누구나 다운로드 할 수 있도록 한다. => 권한 : 모든 퍼블릭 엑세스 차단 해제 => 퍼블릭으로 지정
- 웹서버로서 s3를 사용한다.
- 요금체계 : https://aws.amazon.com/ko/s3/pricing/
- 클래스별 요금 체계 : https://docs.google.com/spreadsheets/d/114szGETmz8zKz0gPPaHBPmx5n0CO5fMzcNbmO0zOc4k/edit?usp=sharing
- 가용성과 내구성
- S3의 클래스 변경
- CLI 학습 - https://opentutorials.org/module/3747
- 인스턴스를 생성한다. (ubuntu 20 이상 버전을 사용해야 EC2 instant connect를 설정없이 사용할 수 있습니다)
- EC2 instance connect로 접속한다.
- SSH 로 접속 - 윈도우 유저의 경우 git(https://git-scm.com/)을 설치하고 git-bash를 이용한다. 접속명령 : ssh -i keypair ubuntu@ip
- 웹서버를 설치한다. - sudo apt install apache2
- 웹서버의 홈디렉토리를 확인한다. - cd /var/www/html
- 웹페이지에 접속해본다.
- index.html 파일을 삭제 후에 다시 접속해서 이 파일이 서비스 되고 있는 파일인지 확인한다.
- sudo rm index.html
- 홈디렉토리로 업로드 한다. nano, scp, vsc remote development와 같은 기술을 활용한다.
- Security Group을 설정한다. - http, https
- 웹서버에 접속한다.