This project was made by Khelifi Mouez (188409) - Chini Emanuale (202488) - Malagò Francesco (172080)
The project's scope is to create a virtual network to compare the performance of HTTP/3 with respect to HTTP/2 and TCP. To do this we used Vagrant and Virtualbox for managing the virtual machines, and Docker to run the web-server.
Suggested reference: https://blog.cloudflare.com/experiment-with-http-3-using-nginx-and-quiche/
Quic is beneficial in many cases:
- Faster handshake: In a TLS handshake the are 4 round-trip requests involved, plus those needed by TCP. Quic replaces all of this with a single handshake.
- No head-of-line blocking: In Http/2 a single lost packet can block an entire line of data. Quic solves this problem by allowing streams of data to reach their destination independently.
- Network switching will not affect connection: In the classic case where a mobile device switches from a WiFi connection to a mobile network, all TCP connections are lost. Quic prevents this by giving each connection to a web server a unique identifier.
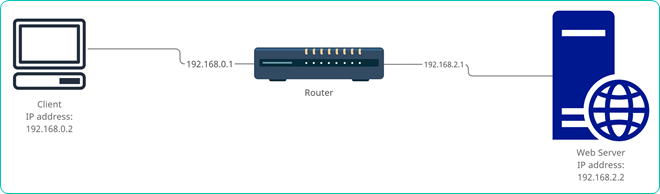
The network setup is the following:
- One host used as a client
- One host used as a web-server
- One host used as a router
The client will be connected to the router, and the router to the web-server which belongs to a different subnet, creating a realistic yet simple situation.
The web-server will run 3 Docker containers, one for each protocol to be tested. The client will run Google Chrome. The entire environment will be managed by Vagrant.
| Host | Interface | IP address | Subnet |
|---|---|---|---|
| Client | enp0s8 | 192.168.0.2 | 1 |
| Router | enp0s8 | 192.168.0.1 | 1 |
| Router | enp0s9 | 192.168.2.1 | 2 |
| Web-server | enp0s8 | 192.168.2.2 | 2 |
The 3 Docker containers are reachable through the following ports:
| Protocol | Ports |
|---|---|
| TCP | 100 , 743 |
| HTTP/2 | 90 , 643 |
| HTTP/3 + QUIC | 80 , 443 |
More on this will be discussed in the deployment part
In order to create such environment, we modified the vagrant file and created one start-up script for each host. Then we configured Docker, the details of this will be discussed below.
The important things to highlight in the vagrant file are the following:
- The OS chosen for the hosts is ubuntu/bionic64
- The client and the server have 1024 MB of RAM to be able to run the docker images
- To use the browser and the related dev tools it's necessary to add the following lines:
  config.ssh.forward_agent = true
  config.ssh.forward_x11 = true
It's also necesary, for the host machine, to run an X-server, like Xming.
The Docker image used is based on NGINX 1.16.1 over Ubuntu 18.04 in order to use the Quiche patch.
In order to function, Quic needs TLS certificates that can be issued with this command:
certbot certonly --standalone --non-interactive --agree-tos -d your.domain.com -m your@email.comThis command generates two file: fullchain.pem and privkey.pem that must be placed in docker/certs directory.
These files have been omitted for security reasons.
In the docker directory we can find a file named Dockerfile, this file contains all the commands needed to build the Docker image.
At this point the image is configured to use Http/3, but can be forced to use Http/2 and TCP as well editing the respective configuration file found in the confs directory.
We also have registered a DuckDns domain to which we have associated the 192.168.2.2 address and the TLS certificates issued earlier.
Client wise, this domain is echoed through the command echo '192.168.2.2 dncs-http3.duckdns.org' >> /etc/hosts
There are 3 Docker containers running on the web-server, in each container runs a Docker image where the following 3 websites can be found:
-
Game of Thrones

-
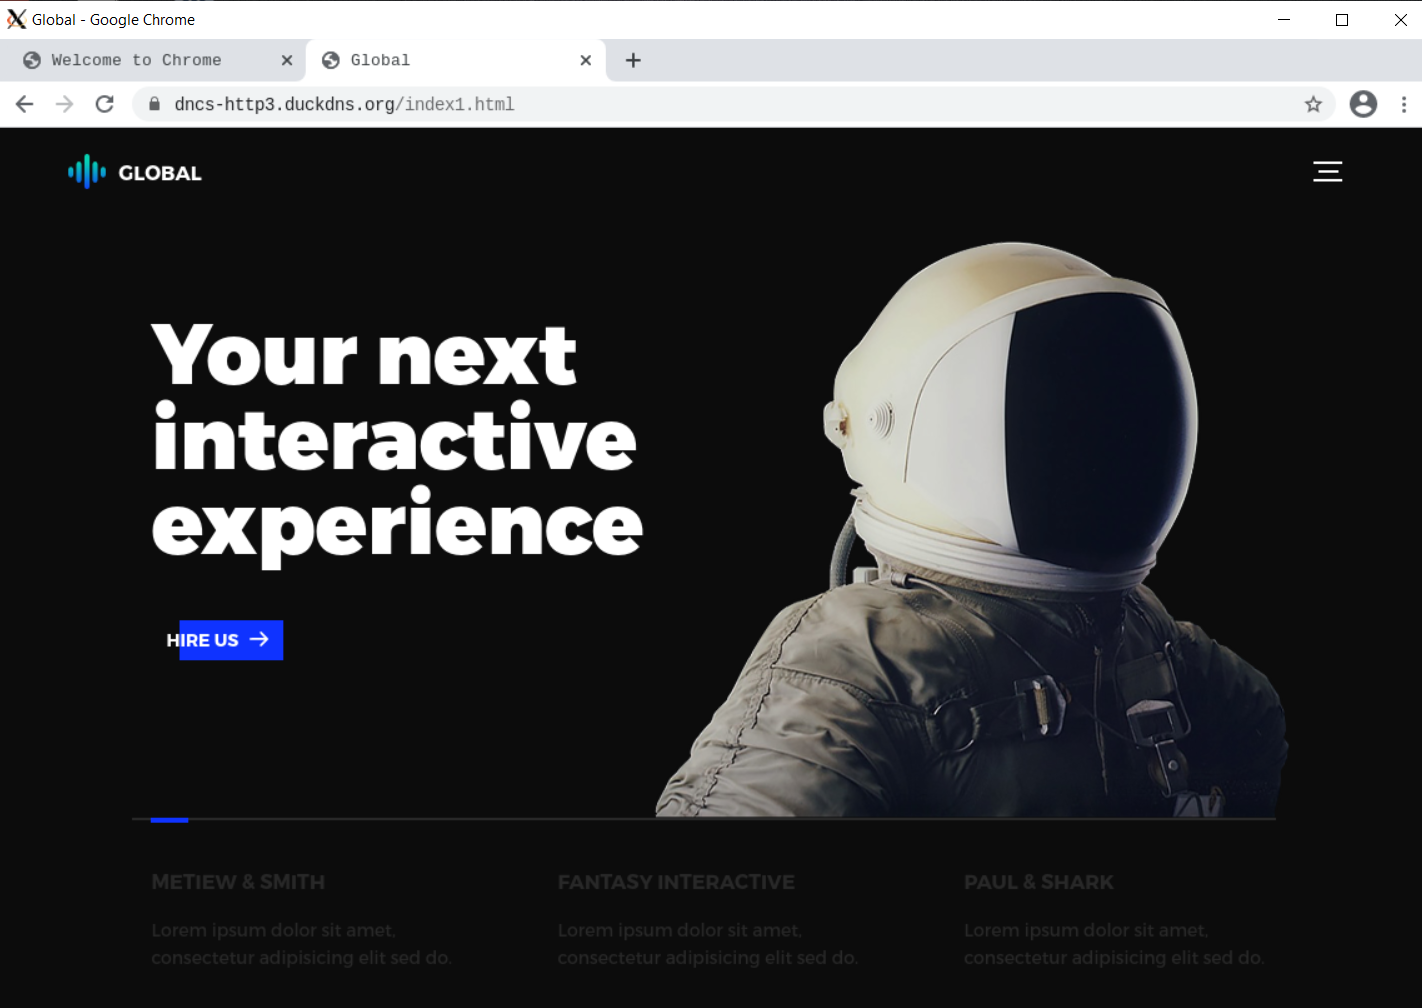
Global master
-
Eforlad travel

| Game of Thrones | Global master | Eforlad travel | |
|---|---|---|---|
| Weight | 3 MB | 1 MB | 2 MB |
| Number of requests | 39 | 19 | 56 |
After cloning the repository, the system can be run by using vagrant up
This will create the virtual machines and will run each start-up script.
In web-server.sh there are 3 similar lines that are:
sudo docker run --name nginx3 -d -p 80:80 -p 443:443/tcp -p 443:443/udp -v /vagrant/docker/confs/http3.nginx.conf:/etc/nginx/nginx.conf -v /vagrant/docker/certs/:/etc/nginx/certs/ -v /vagrant/docker/web/:/etc/nginx/html/ mouezkhelifi/nginx-quic

sudo docker run --name nginx2 -d -p 90:80 -p 643:443/tcp -p 643:443/udp -v /vagrant/docker/confs/http2.nginx.conf:/etc/nginx/nginx.conf -v /vagrant/docker/certs/:/etc/nginx/certs/ -v /vagrant/docker/web/:/etc/nginx/html/ mouezkhelifi/nginx-quic

sudo docker run --name nginx1 -d -p 100:80 -p 743:443/tcp -p 743:443/udp -v /vagrant/docker/confs/tcp.nginx.conf:/etc/nginx/nginx.conf -v /vagrant/docker/certs/:/etc/nginx/certs/ -v /vagrant/docker/web/:/etc/nginx/html/ mouezkhelifi/nginx-quic
These 3 lines will run the Docker image mouezkhelifi/nginx-quic hosted on the official Docker hub using the 3 .conf files discussed earlier in order to use all protocols.
As mentioned in the design part each protocol has its own ports defined by these 3 lines.
In order to run Google Chrome and evaluate the performance we have already enabled the X11 forwarding and run Xming.
We now need an SSH client, for example Putty.
Putty needs the Vagrant SSH key, using PuttyGen navigate to .vagrant\machines\default\virtualbox and generate a private key.
After loading the private key in Putty, make sure to enable X11 forwarding, this will be needed in the next part.
A more in depth guide can be found in the References.
As mentioned earlier, to compare the various protocols performance we used Google Chrome, its Dev Tools and Lighthouse.
After the system is running, Chrome must be run by the client using this command:
google-chrome --enable-quic --quic-version=h3-29This will launch Chrome and enable quic.
- Page weight: the total weight of the entire page
- Number of requests: how many requests were made by the browser in the process
- Load time: the total time needed to load the page
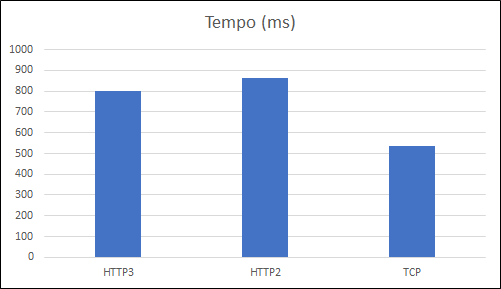
| Http3 + quic | Http2 | Tcp | |
|---|---|---|---|
| Load time | 803 ms | 862 ms | 537 ms |
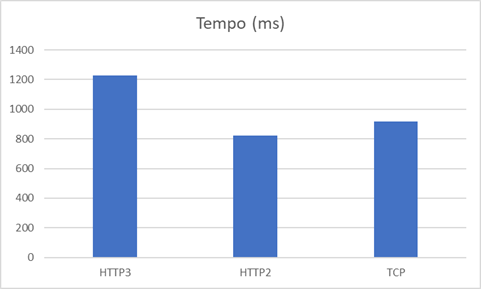
| Http3 + quic | Http2 | Tcp | |
|---|---|---|---|
| Load time | 1230 ms | 822 ms | 916 ms |
| Http3 + quic | Http2 | Tcp | |
|---|---|---|---|
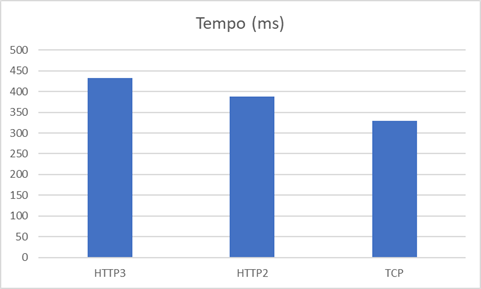
| Load time | 433ms | 388 ms | 330 ms |
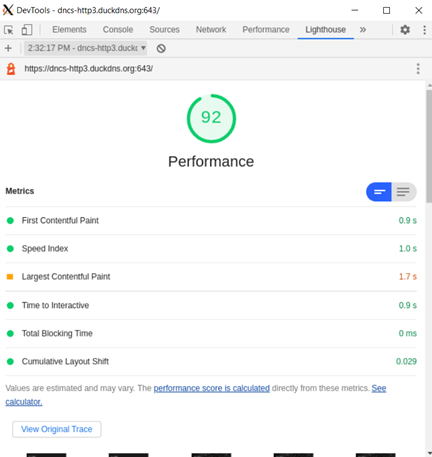
In addition to the Dev Tools we decided to use Lightouse to create reports which measure the performance of the protocols. The Lighthouse Performance score is a weighted average of 6 metric scores. These are:
| Audit | Weight |
|---|---|
| First Contentful Paint | 15% |
| Speed Index | 15% |
| Largest Contentful Paint | 25 |
| Time to Interactive | 15% |
| Total Blocking Time | 25% |
| Cumulative Layout Shift | 5% |
Report settings:
- Network: 10,240 kbps throughput
- CPU throttling: 1x slowdown
| Http3 + quic | Http2 | Tcp | |
|---|---|---|---|
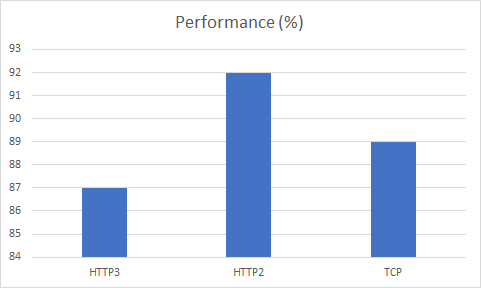
| Performance (%) | 87 | 92 | 89 |
| Http3 + quic | Http2 | Tcp | |
|---|---|---|---|
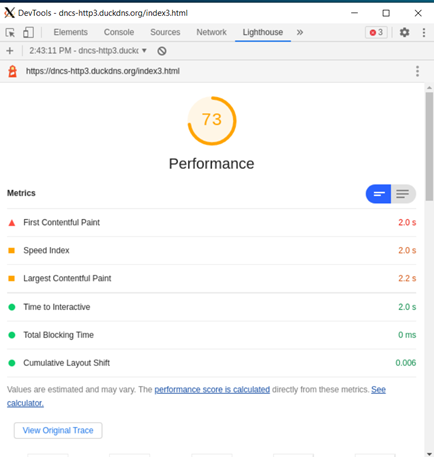
| Performance (%) | 73 | 75 | 71 |
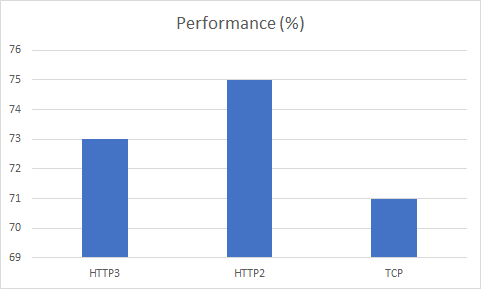
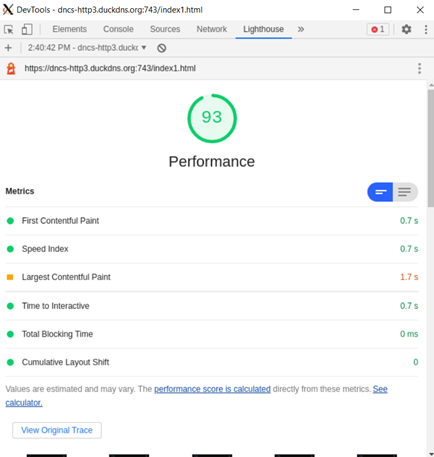
| Http3 + quic | Http2 | Tcp | |
|---|---|---|---|
| Performance (%) | 97 | 97 | 93 |
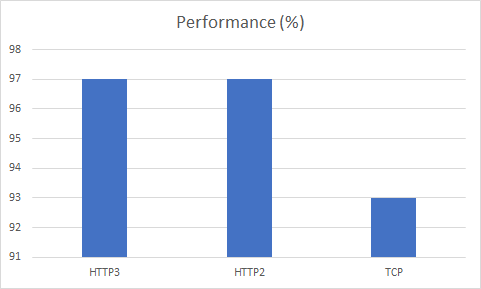
Although we thought the HTTP3+QUIC was the fastest protocol, during the experiments and as can be seen in the results, the TCP protocol was the swiftest. Another important statement is that the loading time is more influenced by the number of requst instead of the page weight. In fact, the page Game of Thrones has more requests, 39 vs 56 of Erforlad travel, and its time, using TCP as reference, is 537 ms vs 916 ms.
Http/3 is still in the development phase, in the future, we could expect increased performance in a real-world scenario where UDP connections, parallel loading of resources and better congestion control will play a significant role.
Ligthouse:
- https://developers.google.com/web/tools/lighthouse/?utm_source=devtools#extensibility
- https://geekflare.com/google-lighthouse/
Putty gen:
Http3 + ngnix:
Websites: