The task is to create a simulation environment for a Robot in the Gazebo platform, where the robot Navigates around the environment to learn about its environment and will generate a map of its environment
- First of all, Let's install the ROS noetic version in your Ubuntu machine. Then, check the version of ROS to check if it has been installed properly using the command 'rosversion -d'.

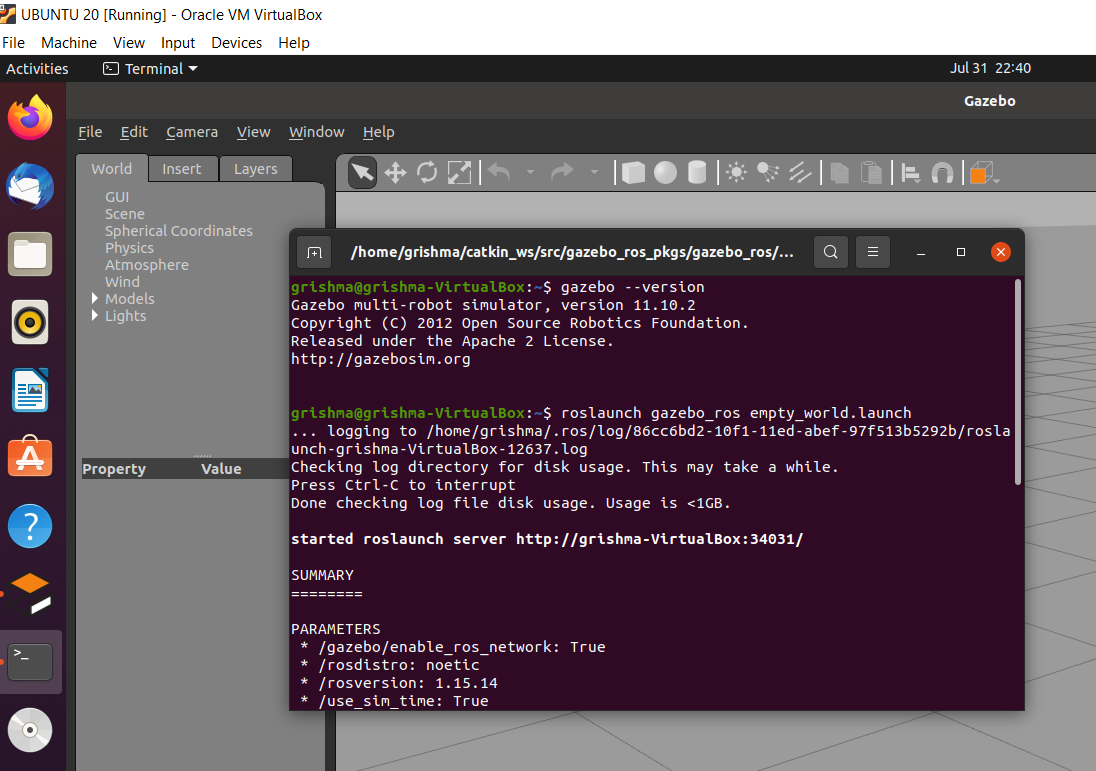
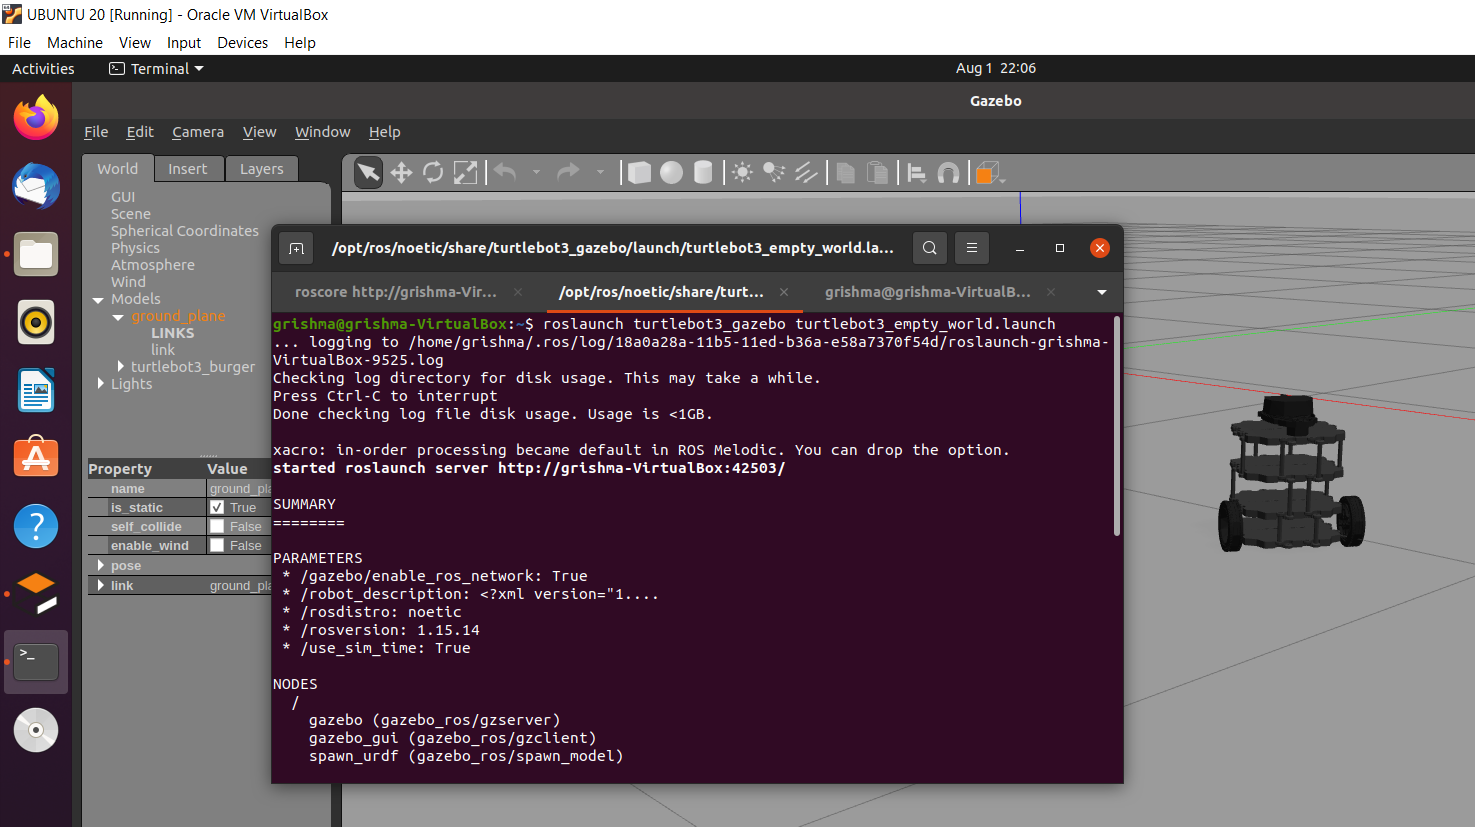
- After that, check if the standalone Gazebo is working properly and check the version of Gazebo using command 'gazebo --version'. Then, try to start gazebo using the roslaunch command 'roslaunch gazebo_ros empty_world.launch'. This is shown in the image below.
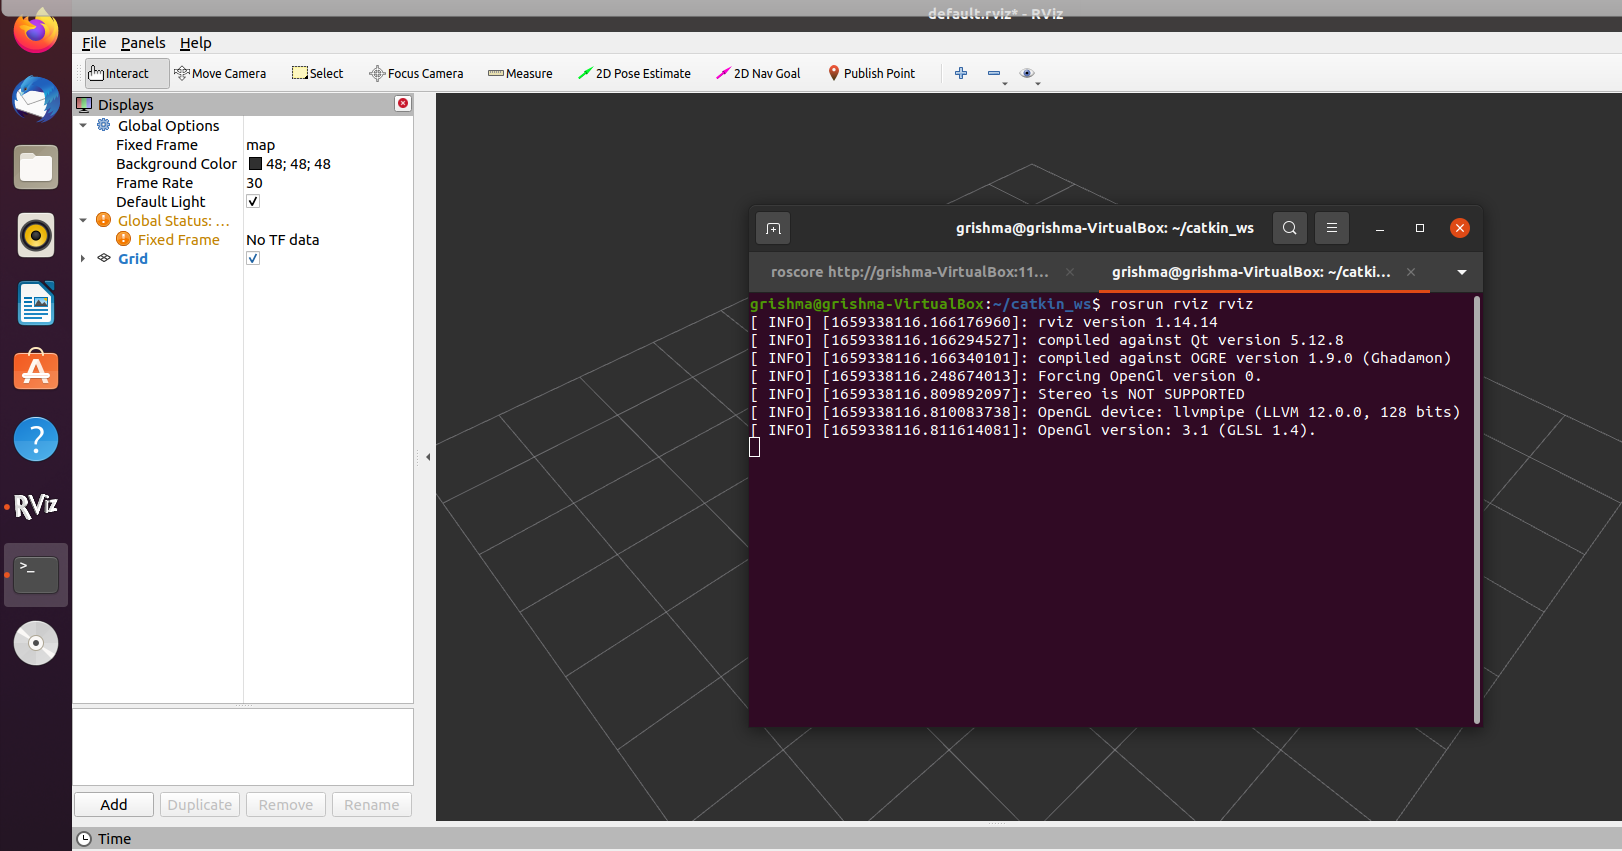
- Then, install rviz (ROS Visualization) using the command ‘sudo apt-get install ros-noetic-rviz’ (for noetic distro). To startup the visualizer run the command ‘rosrun rviz rviz’ as shown in the diagram below.
-
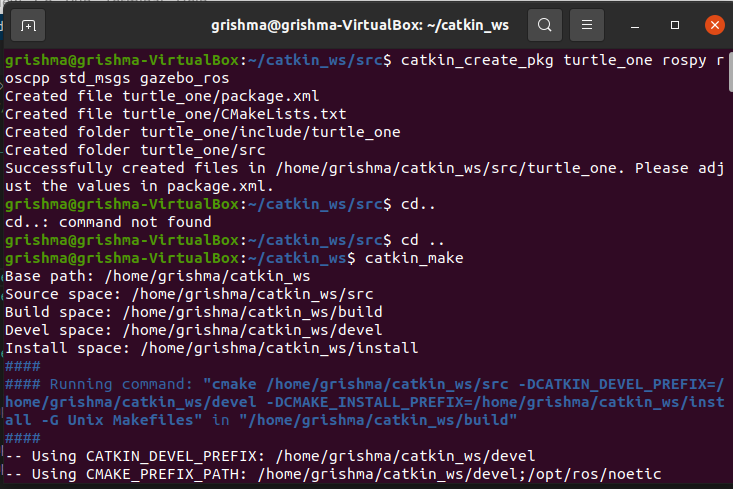
To create a custom ROS package in the catkin workspace, first go to catkin workspace folder using the command ‘cd catkin_ws/src/’ and to create a package, use command ‘catkin_create_pkg <package_name> rospy roscpp std_msgs gazebo_ros’. After that, come out of the src folder using ‘cd ..’ command and use command ‘catkin_make’. If the catkin_make is successful, the package is successfully created.
-
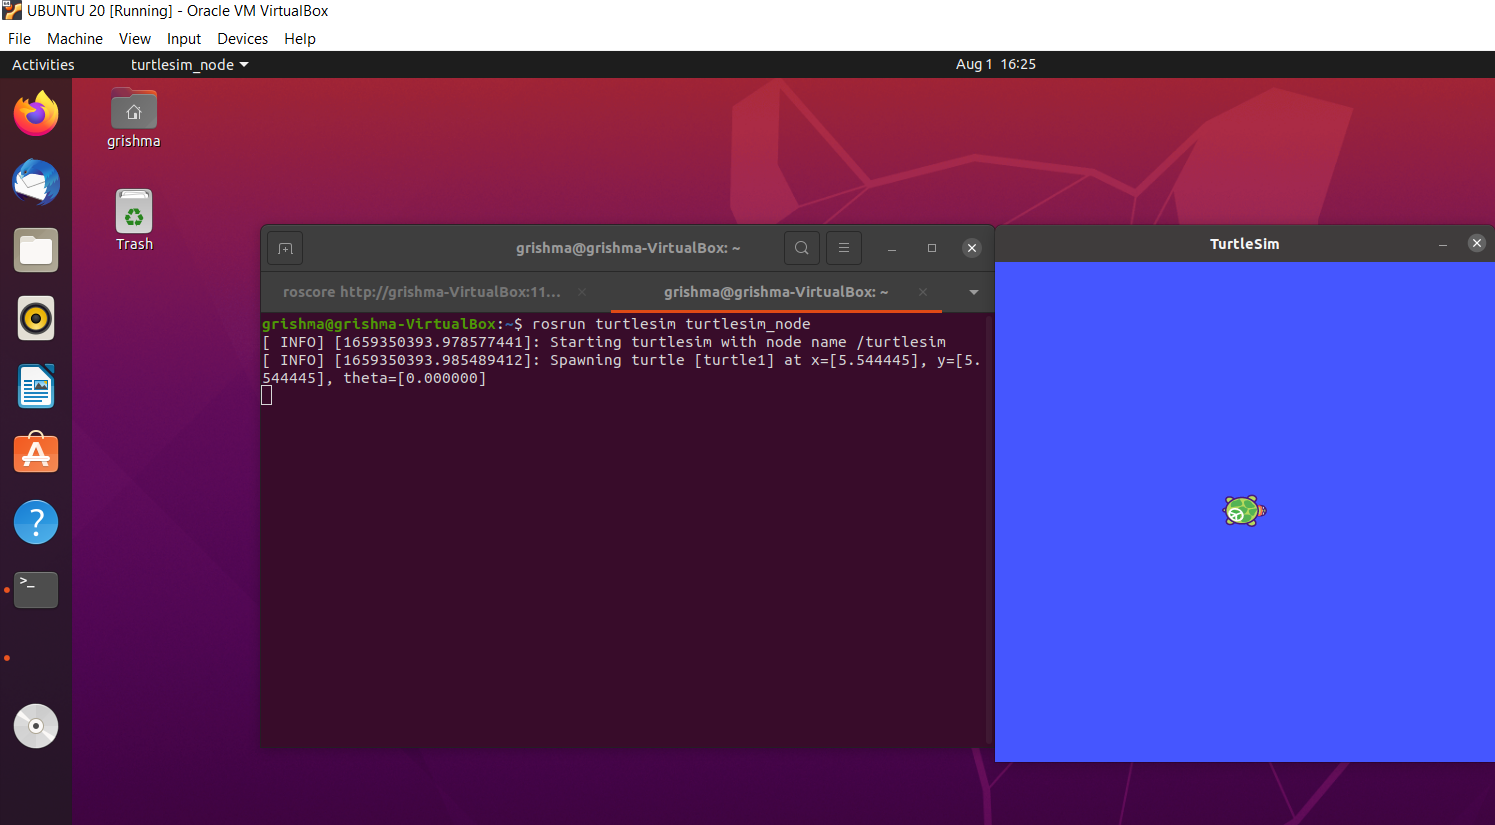
For this purpose, first run the roscore and then start the turtlesim using the command ‘rosrun turtlesim turtlesim_node’ as shown in the figure below.
-
After that, in a new terminal, let’s take a look at the ros topics using the command “rostopic list’ as shown below.
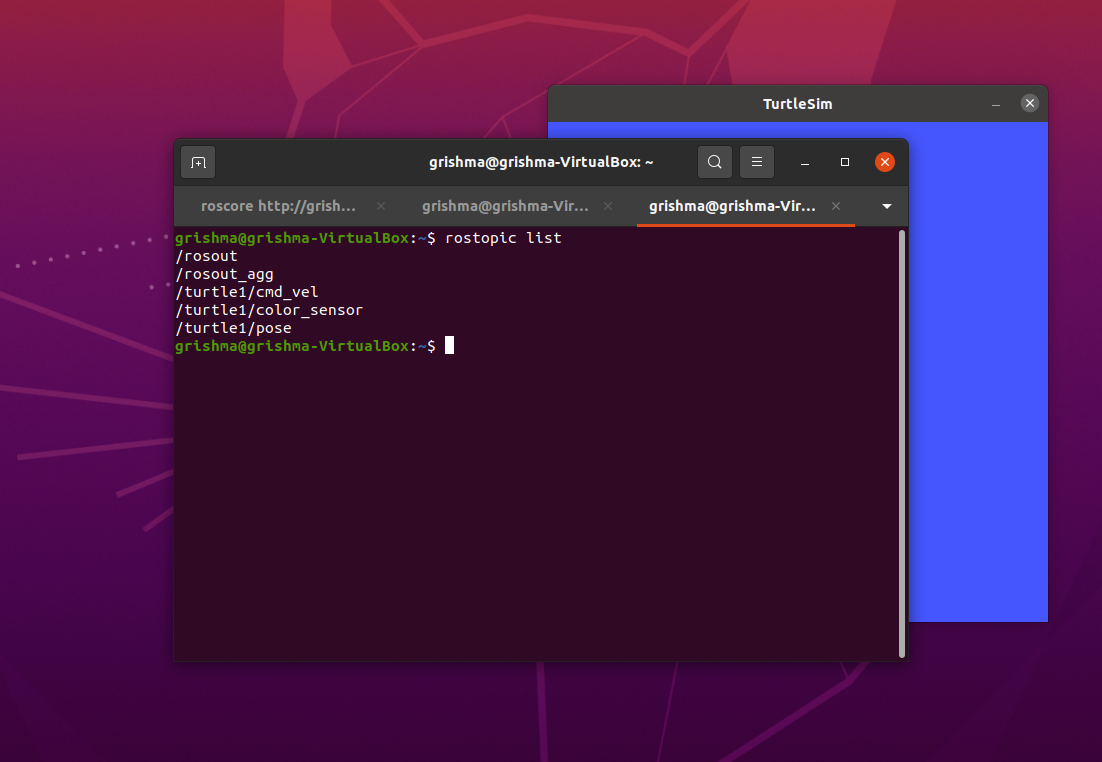 As we can see, there is a topic called ‘/turtle1/cmd_vel’ that we are going to use to publish the velocity commands to control the turtlebot using keyboard.
 -
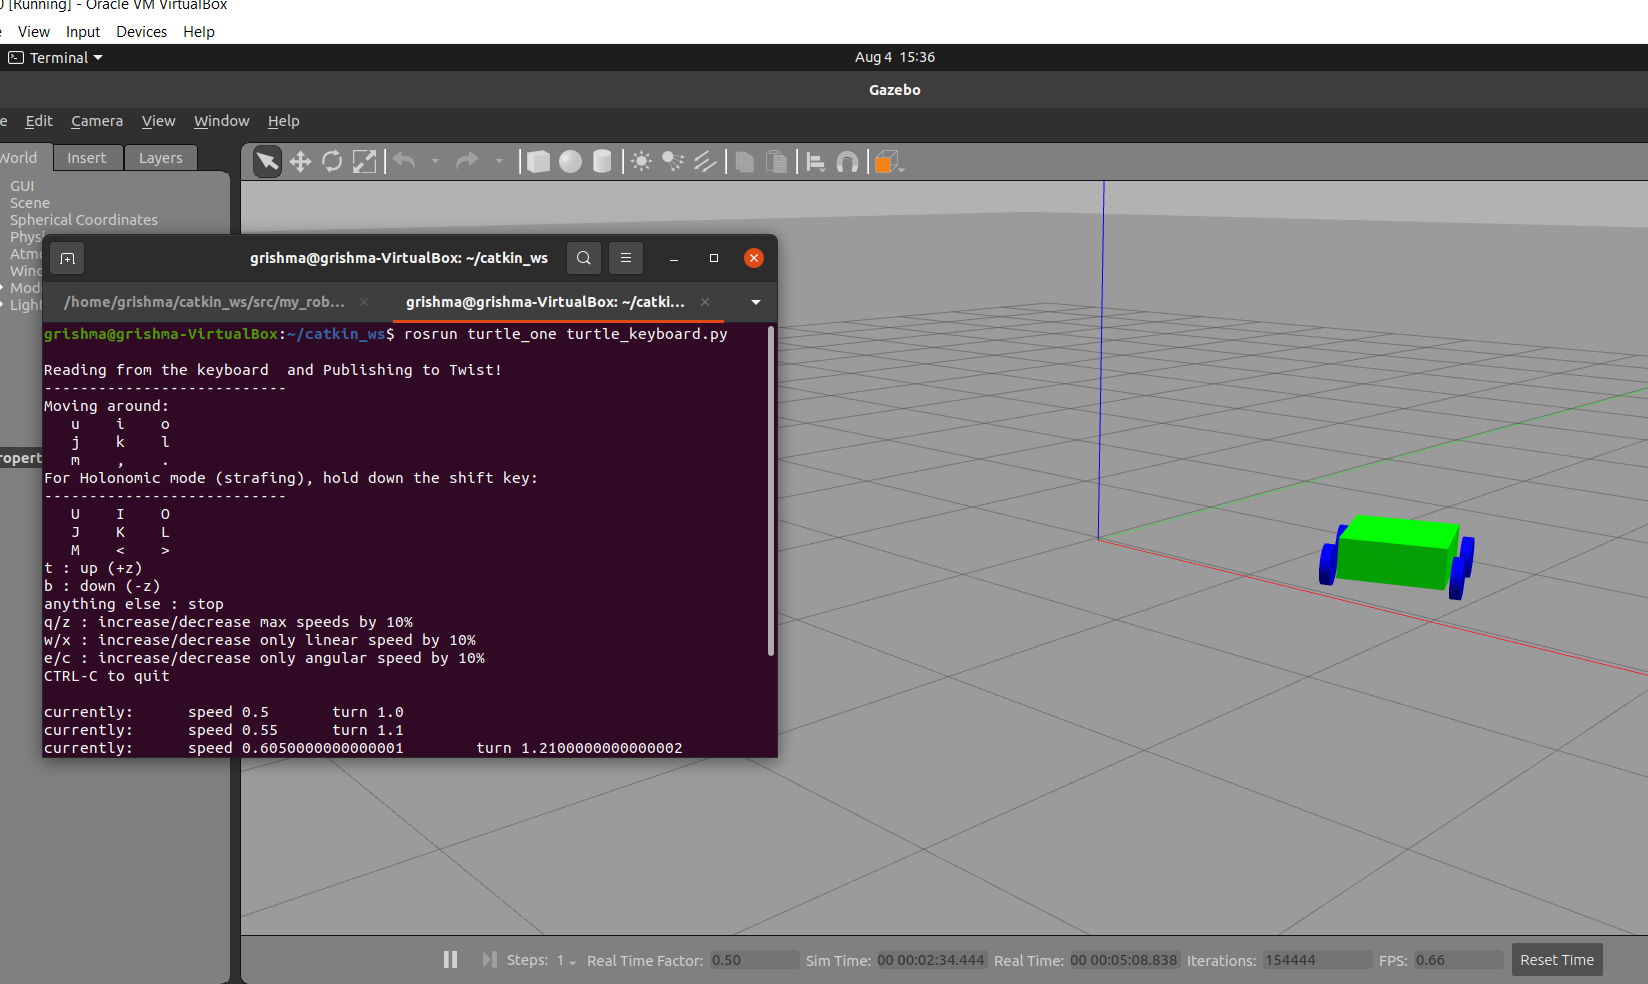
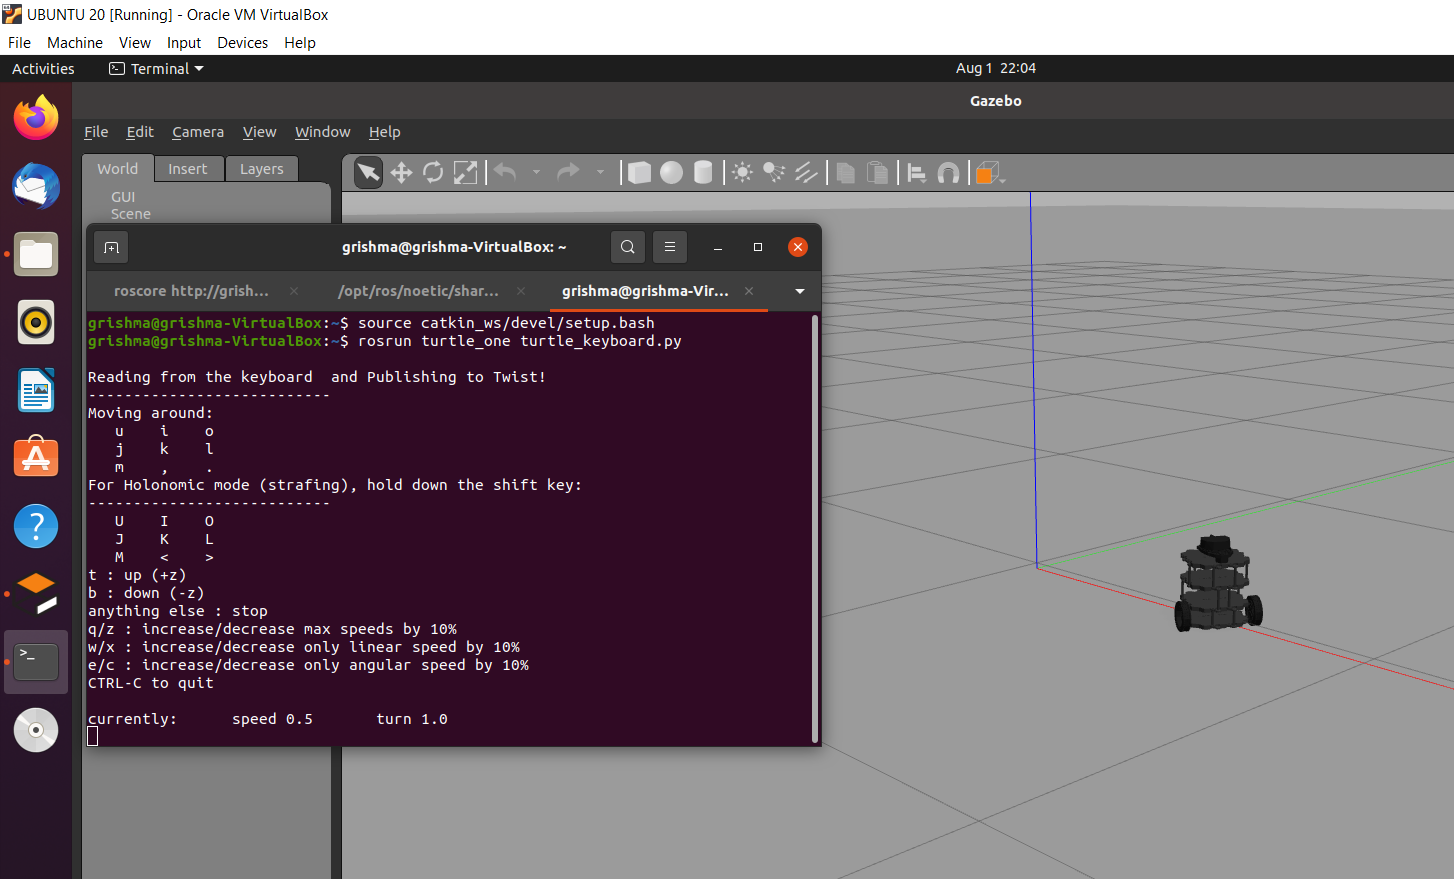
To control the turtle bot, the teleop_twist_keyboard package can be directly installed using the command ‘sudo apt-get install ros-noetic-teleop-twist-keyboard’ and use the command ‘rosrun teleop_twist_keyboard teleop_twist_keyboard.py’. However, in this case, the open source python code for keyboard control has been used with slight modification, creating our own package ‘turtle_one’. Now, Let’s modify the code accordingly and execute the node in a new terminal using the command ‘rosrun turtle_one turtle_keyboard.py’. The control instructions are shown in the picture below.

- Now, in the same way, Let’s use the same code for keyboard control on the TurtleBot3 as depicted in the figure. Here, the topic ‘/cmd_vel’ is used to publish the motion commands in the code.
-
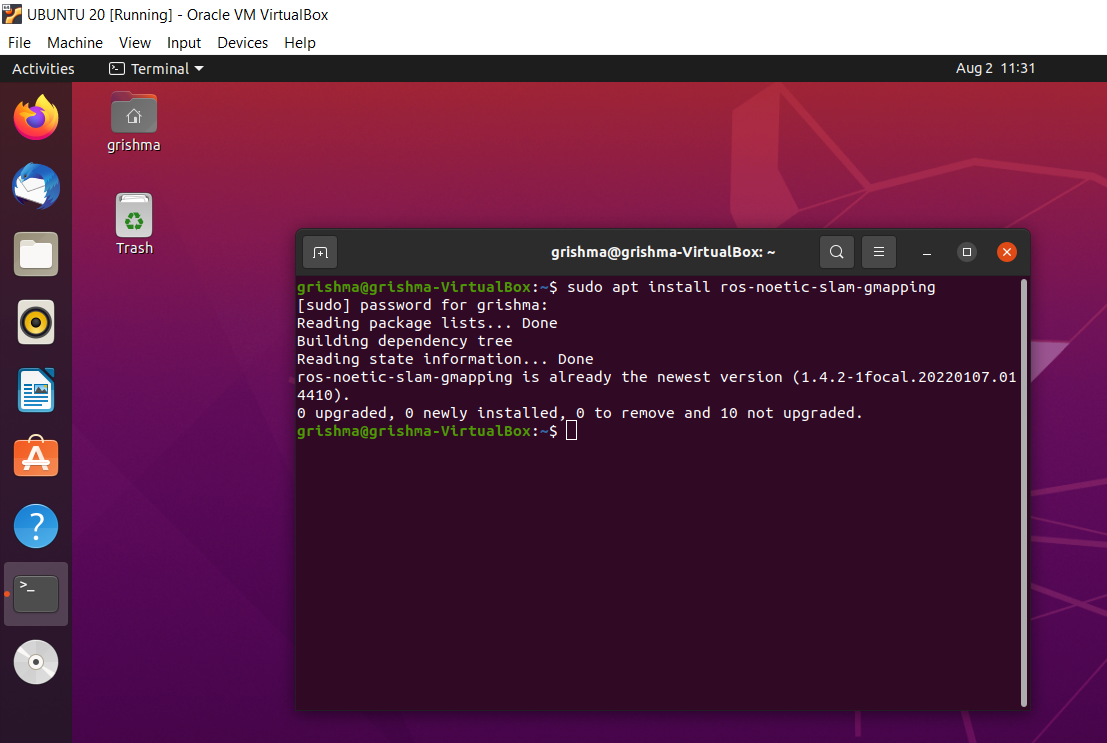
Let’s start with installation of the Simultaneous Localization and Mapping (SLAM) module. This module takes care of building robot and updating map in an unknown environment as well as keeps track of the location at the same time. Use installation command ‘sudo apt install ros-noetic-slam-gmapping). The gmapping package helps in creating a 2-D occupancy grid map. Here, all the packages needed for this purpose have been git cloned using the link ‘https://github.com/ROBOTIS-GIT/turtlebot3.git’.
-
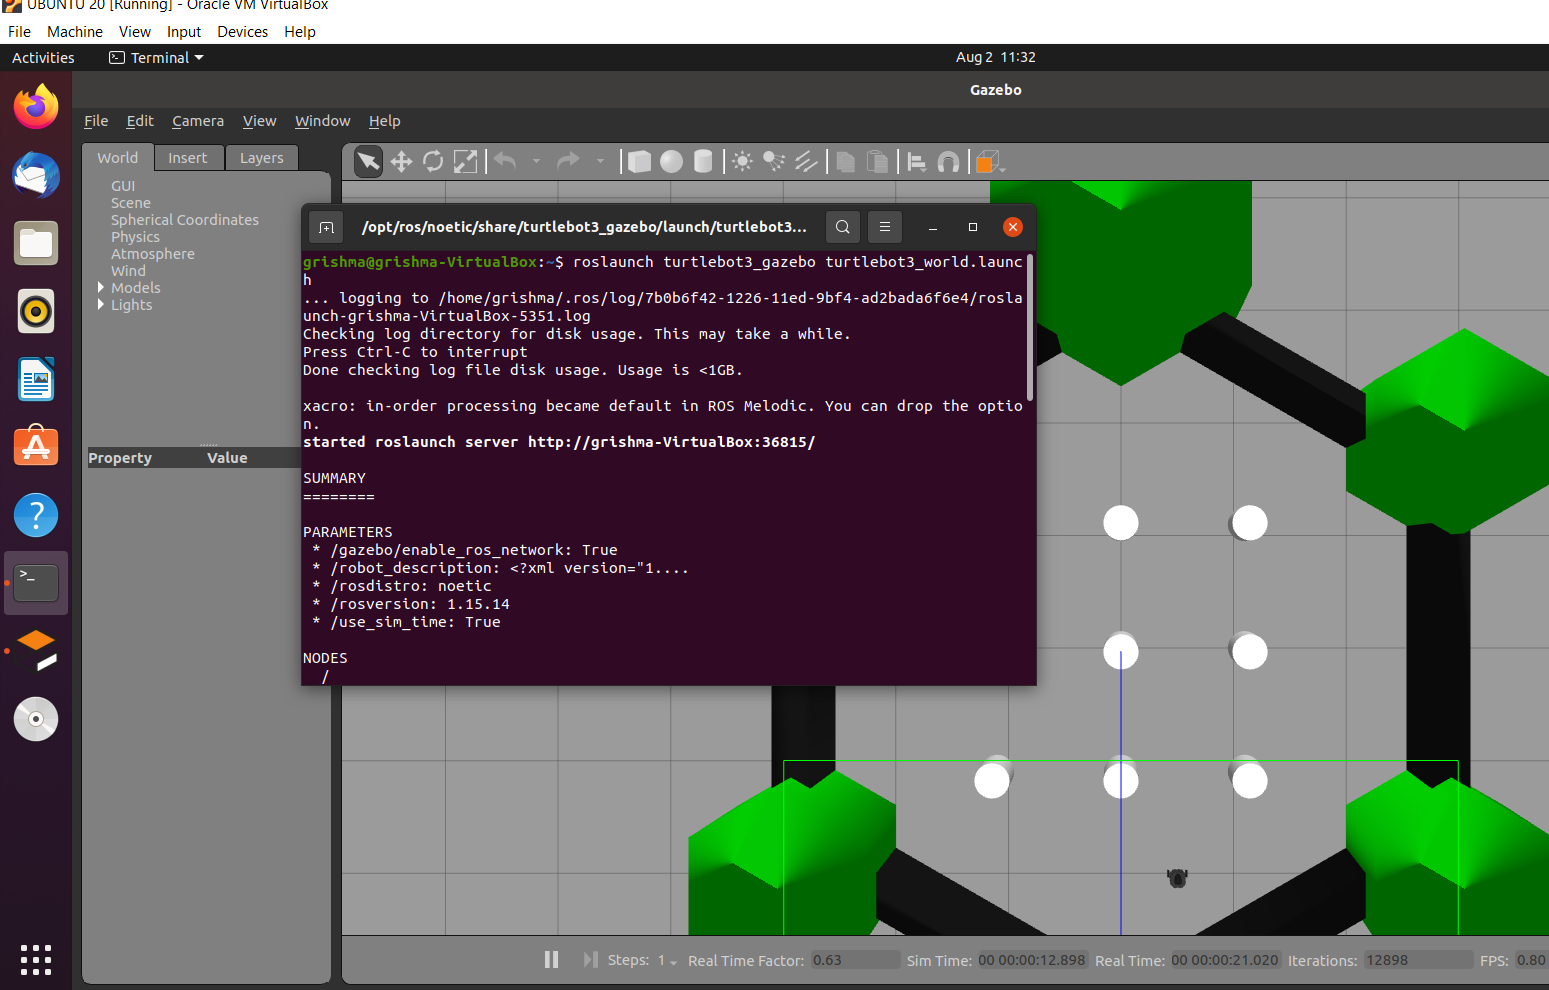
Now, in another terminal. Launch the gazebo world for our simulation using the command ‘roslaunch turtlebot3_gazebo turtlebot3_world.launch’
-
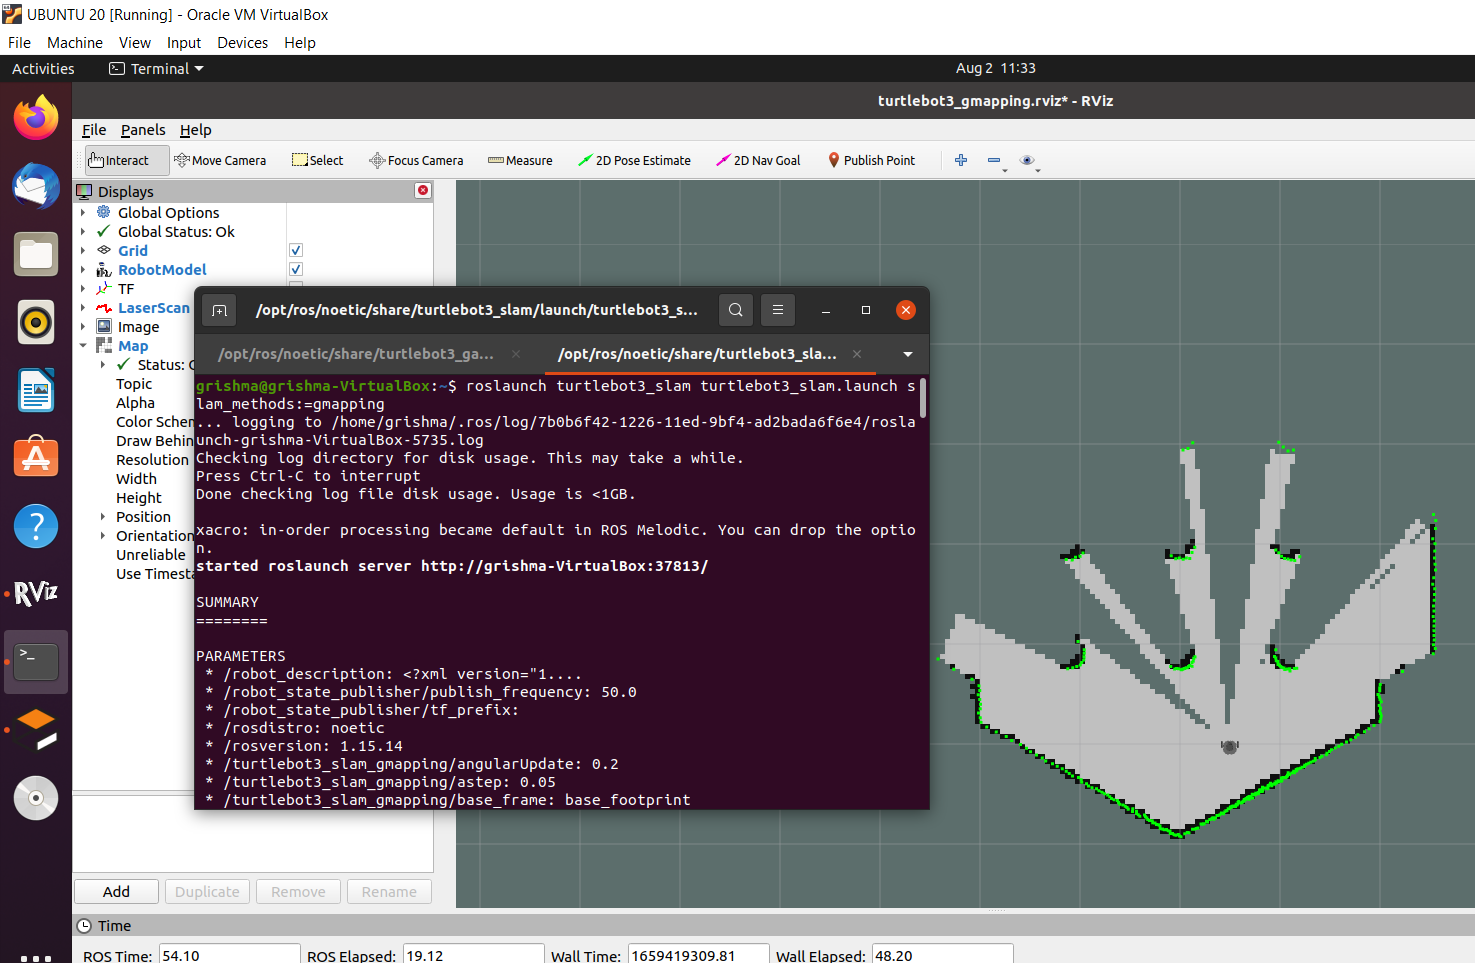
After that, for mapping purpose, launch another node in a new terminal using command as shown below.
-
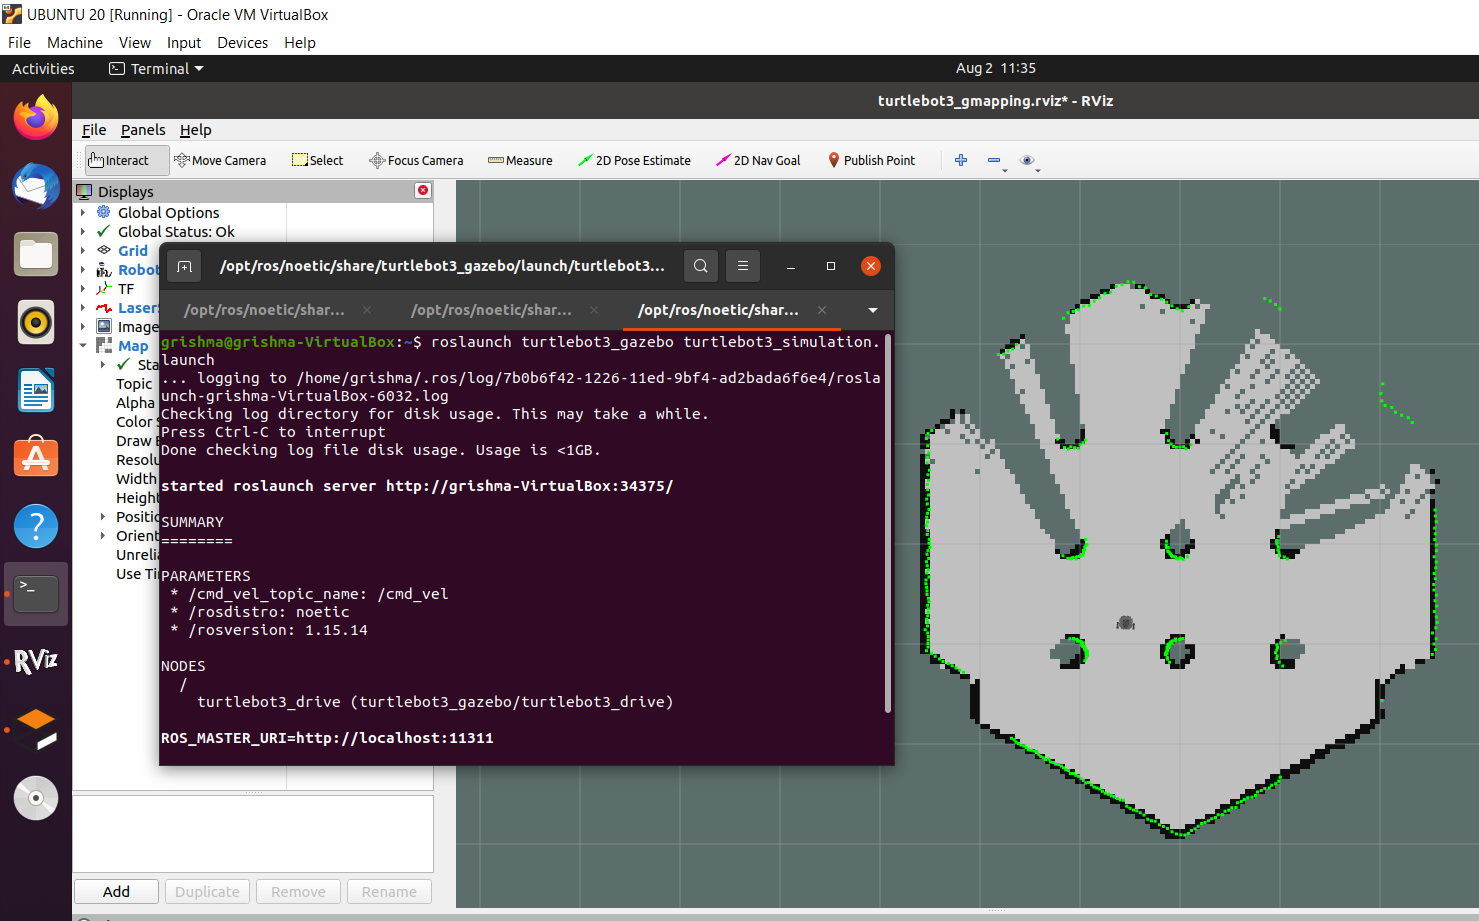
Again, in a new terminal, start Autonomous Navigation.
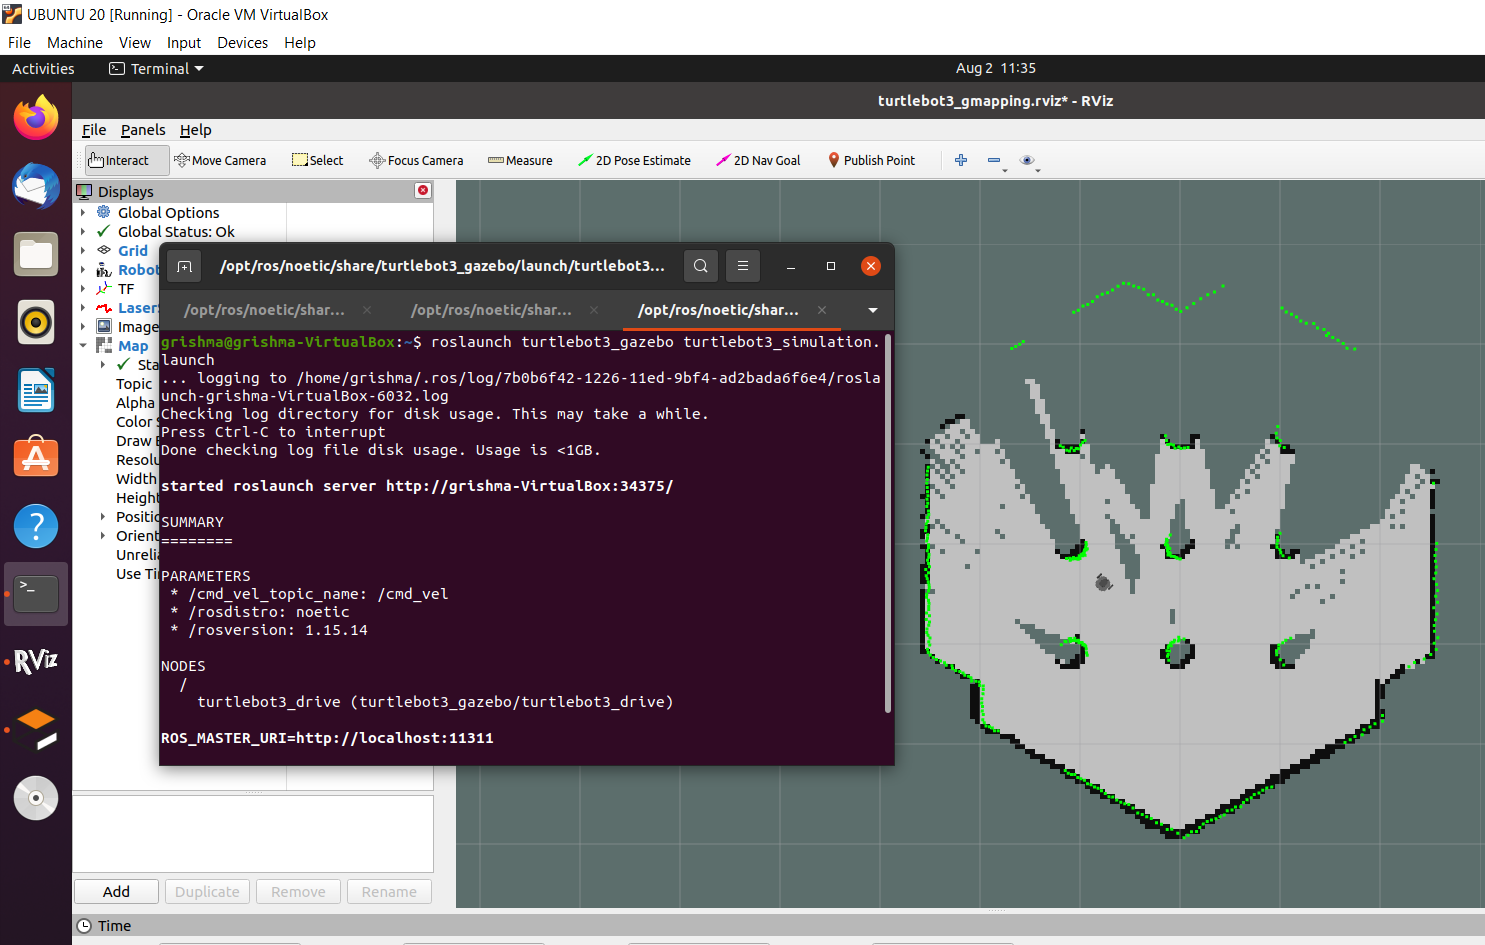 As we can see, the map of the gazebo environment is being created in the rviz environment as the turtlebot moves around autonomously.
-
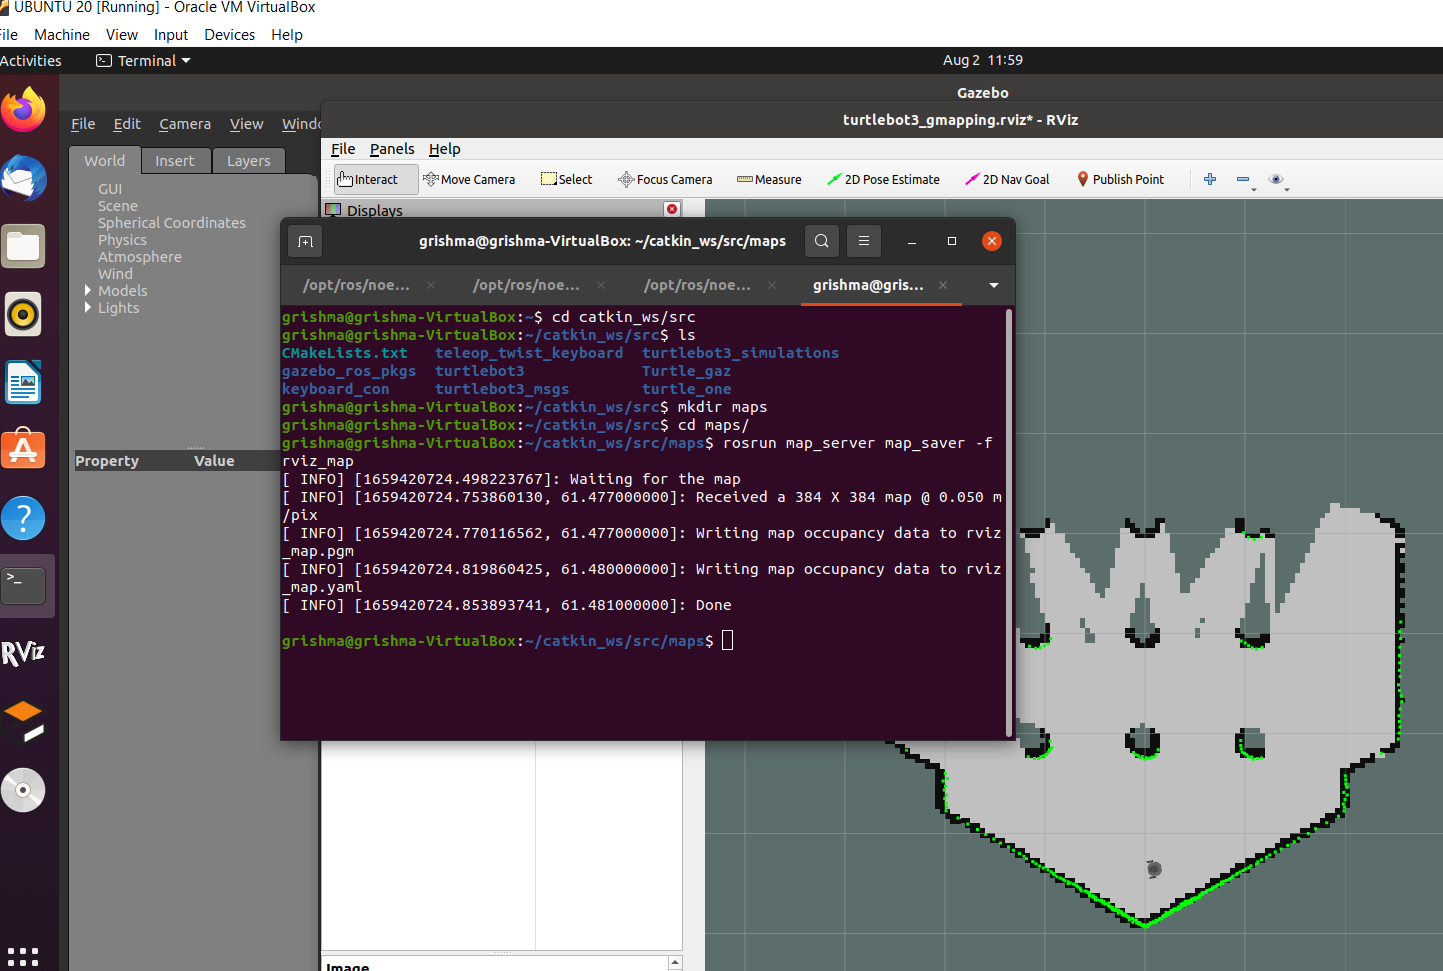
Once the desired map is created, the map can be saved. Let’s get inside the catkin workspace and then in src folder, where we are going to create a folder called maps to store the map. Then, go inside the maps directory and run the command ‘rosrun map_server map_saver –f rviz_map’ . This command creates two files in the maps directory called rviz_map.pgm and rviz_map.yaml and they contain information about the map.
 Now, we can close all the terminals that are running.
 -
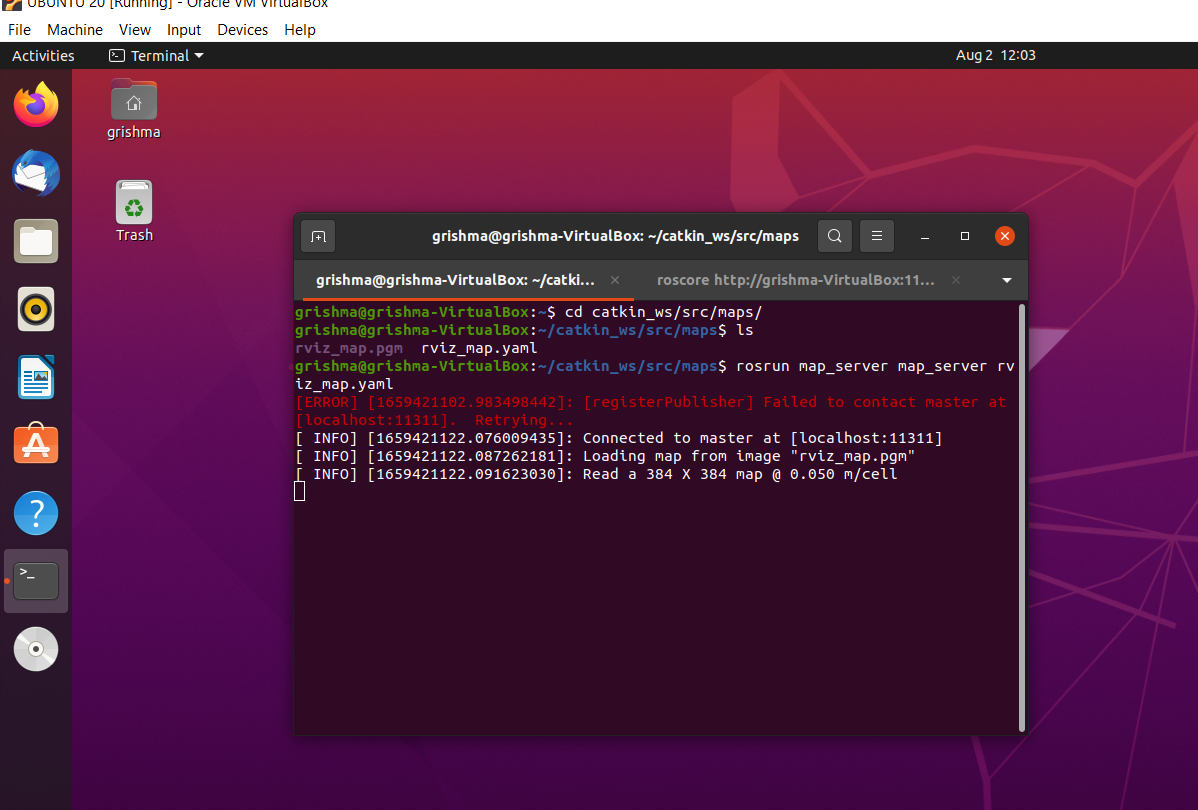
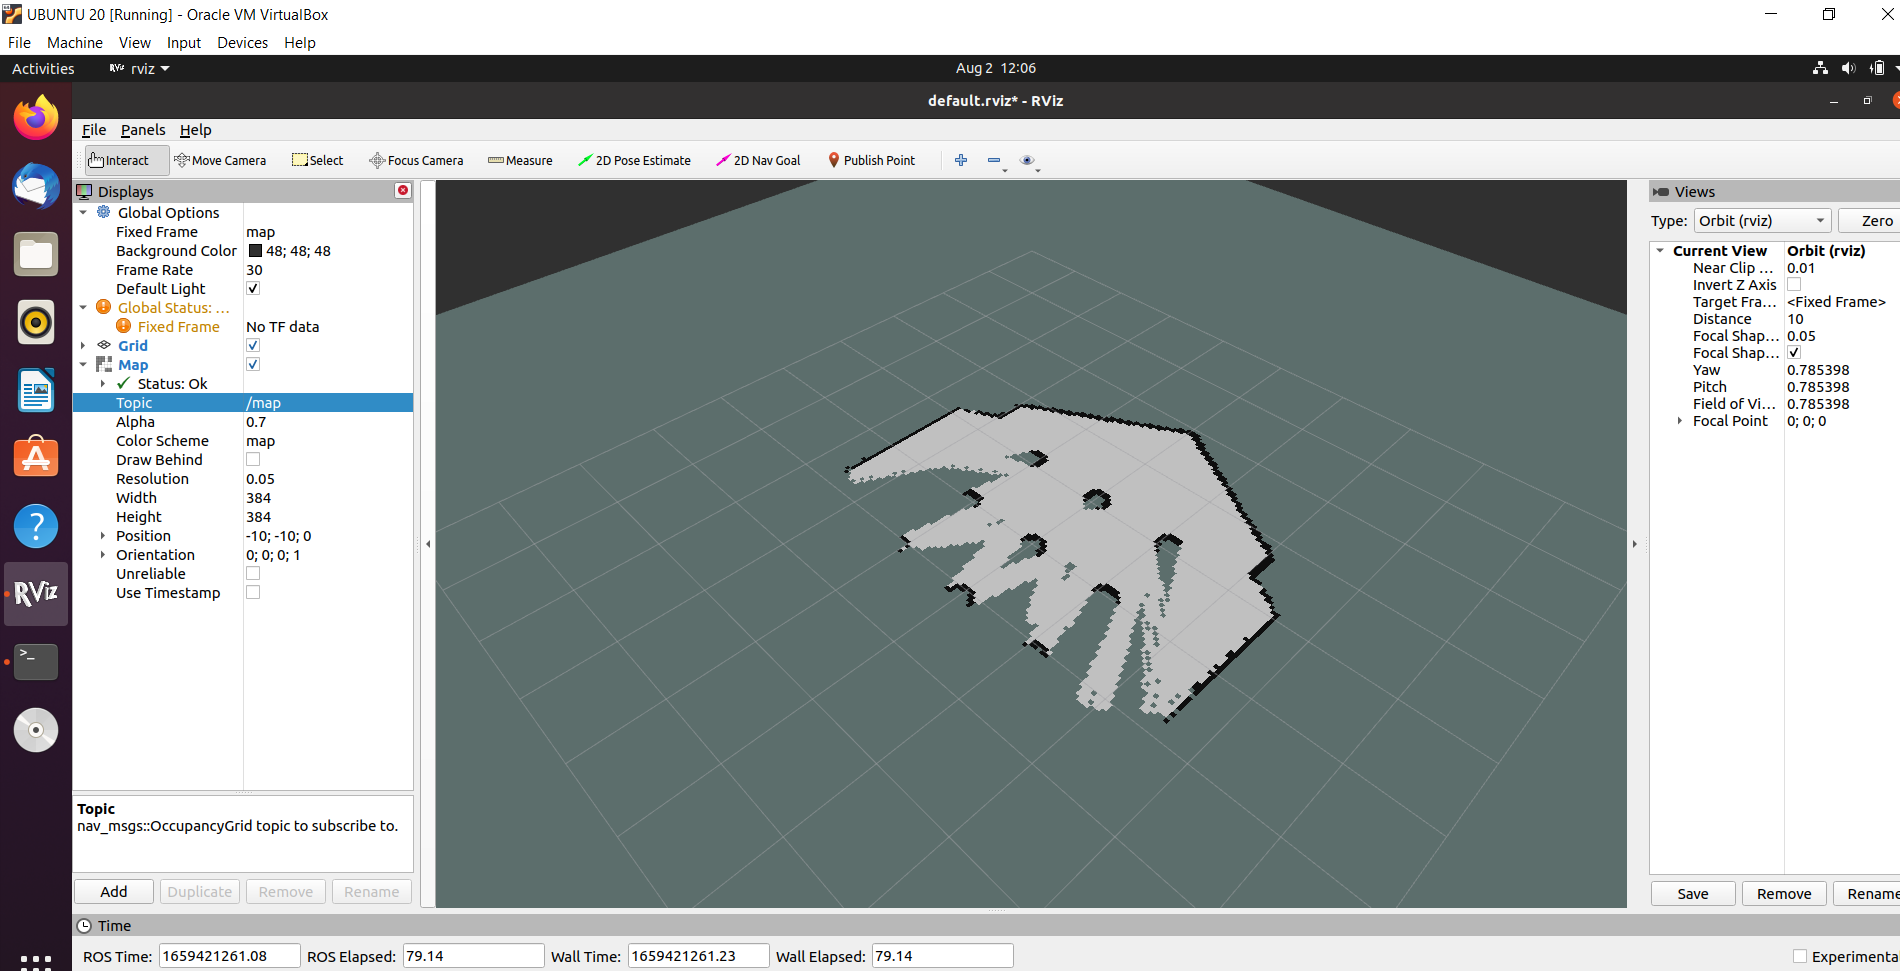
Now, to open the saved map, go to the catkin_ws/src/maps/ and execute the command ‘rosrun map_server map_server rviz_map.yaml’. and again launch rviz to view the map. Make sure you have the correct map topic as shown in the figure.
Let’s start by making a package named my_robot using the command ‘catkin_create_pkg my_robot rospy roscpp std_msgs’ and then add or make necessary folders inside the package using the command ‘mkdir’. Start with creating a folder called urdf, where we are going to add our urdf file. We can make any file inside a directory using the command ‘touch filename.extension’ and make it executable using ‘chmod +x filename.extention’ command. To edit any file, we can use the command ‘gedit filename.extention’. We also need other folders like launch and world, where we create our launch file and world file for successfully simulating our customized robot in gazebo world. All the files have been added to the git repository.
Different files needed for the creation of custom robot are described below.
- URDF file The term URDF stands for Universal Robotic Description Format and follows XML format for description of different components of any model. Different parts of any URDF file are:
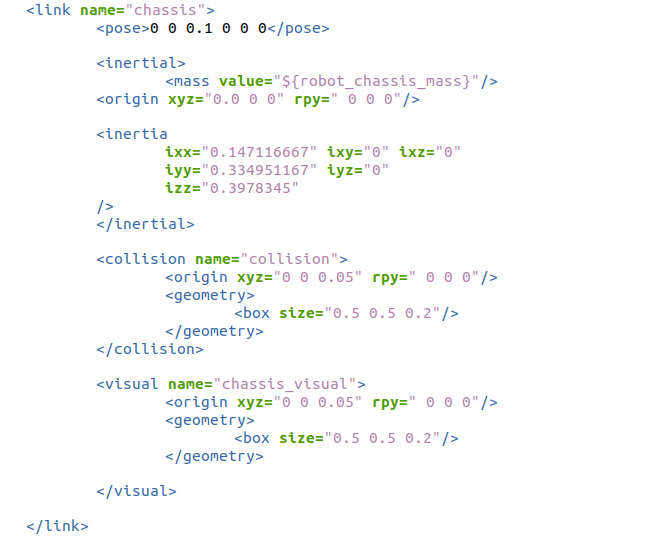
a. Links:
A link is a part of a robot and has multiple aspects like inertial, collision, and visual aspect. The inertial aspect contains the properties of any link such as link’s mass, position of its center of mass, and its central inertia. The collision aspect of any link specifies the geometrical properties of the link. The visual aspect of a link has the visual properties of link and makes the link visible.
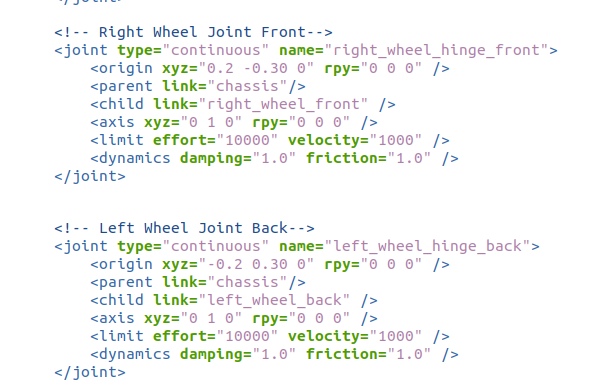
b. Joints:
Two links or parts of any model or robot are connected using joints. The joint element describes the kinematics and dynamics of the joint. The attribute name specifies the name of the joint and type specifies the type of joint.
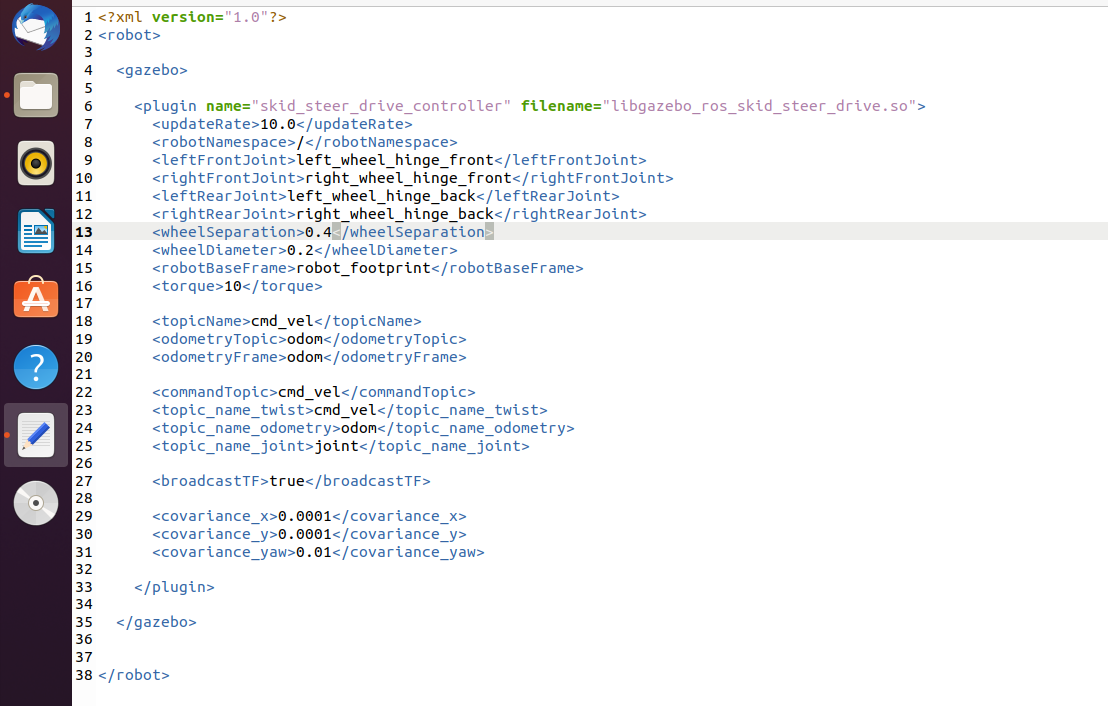
- Gazebo Plugin (filename.gazebo)
The gazebo plugin defines how does the controller actually get plugged in and how the control commands are published. It is wrapped in with pill to indicate the information passed to gazebo. Gazebo plugins give URDF models greater functionality and can tie in ROS messages and services for sensor output and motor input.
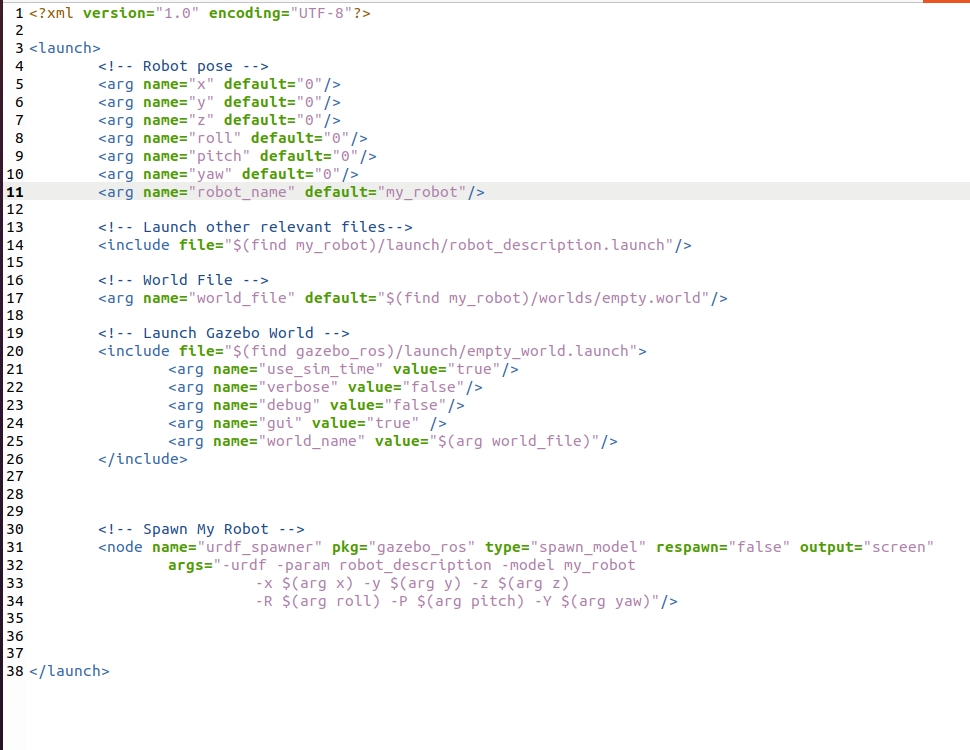
- Launch files:
Launch files are needed to launch the custom model or spawn the model. There are two launch files in for our model, world.launch and robot_description.launch.

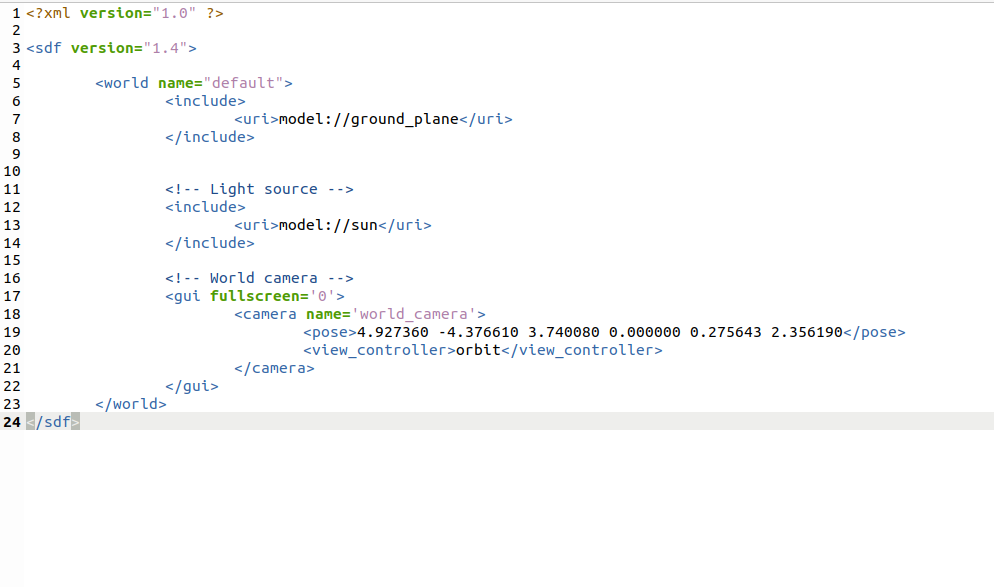
- World file
A world file is a file that contains the information or description of all the elements like robots, lights, sensor, etc. to be simulated in gazebo.
After creation of all the files, it is time to launch our custom robot in the gazebo world. It can be done in the following steps:
-
Go to catkin_ws and run ‘catkin_make’ command to build the packages in catkin_ws and source the setup.sh file for adding environment variable.

-
Launch the robot in gazebo world using command ‘roslaunch my_robot world.launch’.

-
We can see our robot in the empty gazebo world now. Using our code for keyboard control that we created earlier, we can control our robot.