01 Introduction
What you'll learn: What DRAW is, why it exists, how to install or build it on Windows / Linux / macOS, and how to find your way around the interface in five minutes.
🎯 Goal: Understand what DRAW is and why it exists.
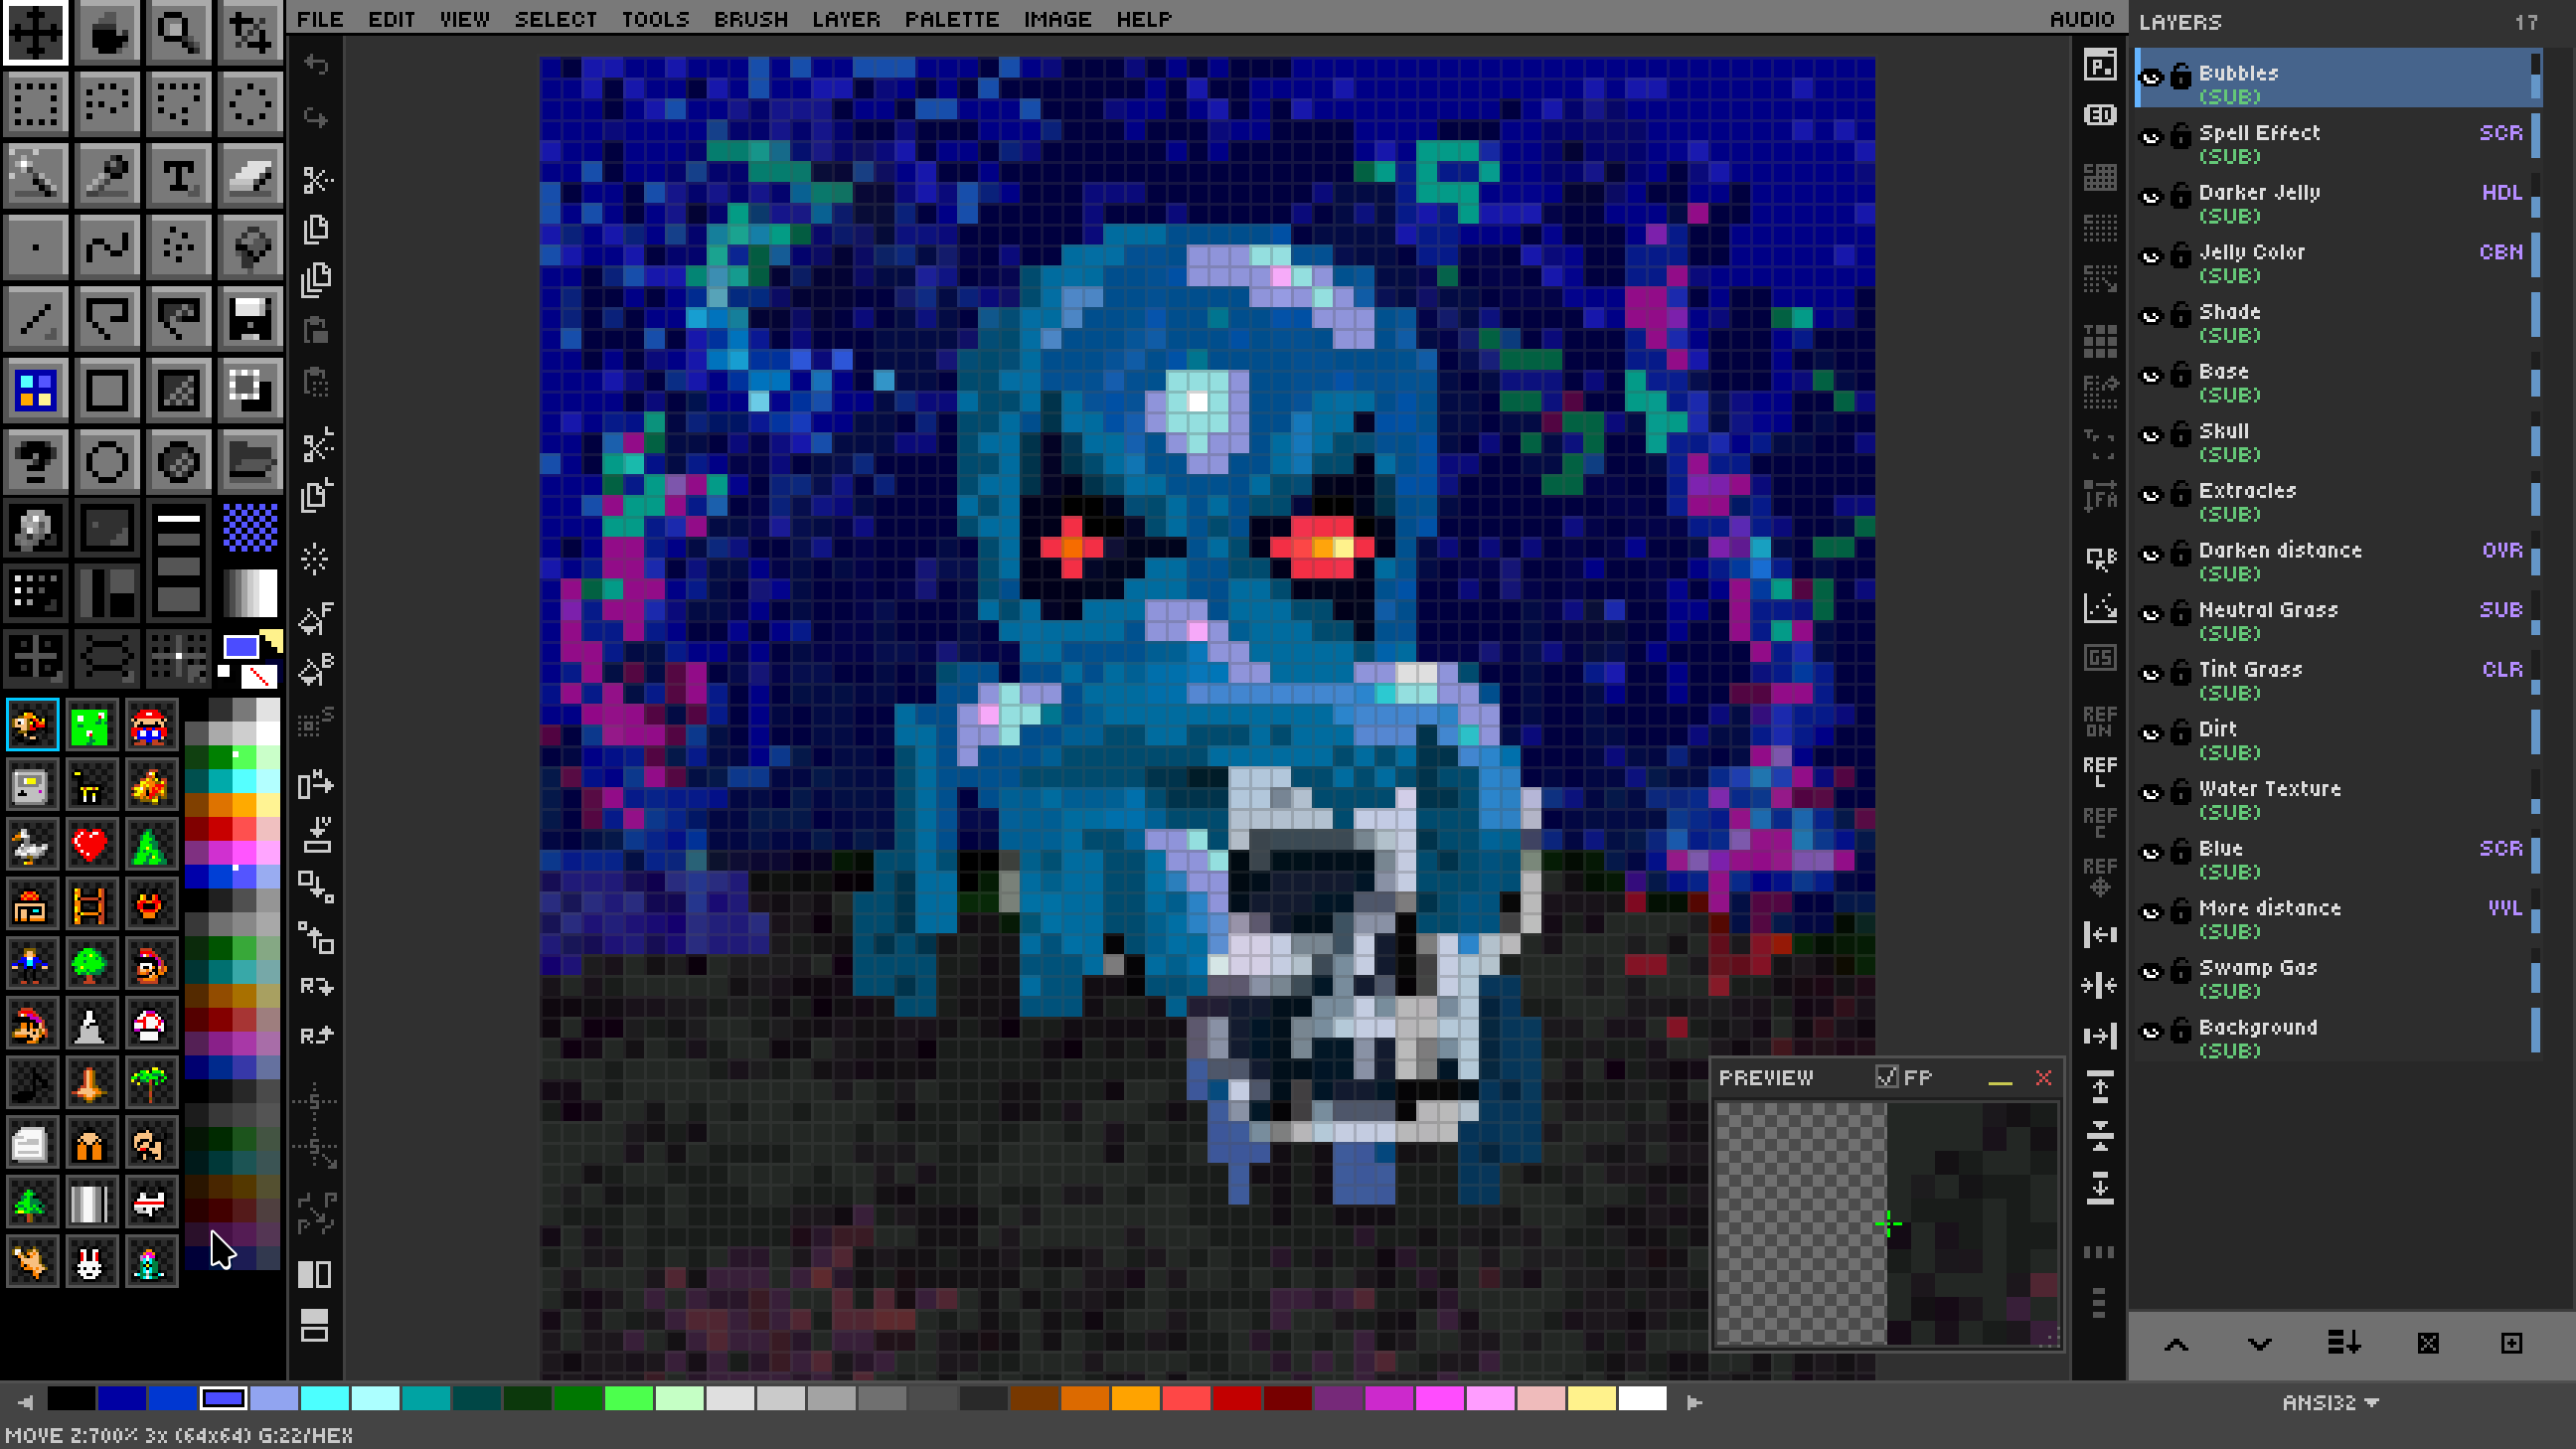
DRAW is a pixel art editor written entirely in QB64-PE — a modern reimagining of Microsoft's QuickBASIC compiler. That alone would make it a curiosity. What makes it genuinely different is its signature party trick: DRAW can export your pixel art as runnable QB64 source code. Open the resulting .bas file in any text editor, hit compile, and your sprite is reborn as a self-contained BASIC program that draws itself pixel by pixel.
The project takes its inspiration from the legends of the genre — BR0DERBUND's DazzleDraw (on the Apple ][), Electronic Arts' Deluxe Paint (DPaint DP2 enhanced for DOS), Grafx2 by Sunset Design, Cosmigo's ProMotion, a little Inkscape, a little GIMP, and of course Adobe Photoshop, as well as the other DP spiritual heirs that followed including DPaint.js, etc. If you grew up with Amiga art, DOS demoscene tools, or the modern Aseprite, or LibreSprite, DRAW will feel familiar within seconds.
DRAW is cross-platform (Windows, Linux, macOS), open source (MIT licensed), and dependency-free at runtime — once it's built, you have a single executable plus its ASSETS/ folder. It ships with 64 layers, 19 blend modes, a complete text system with rich formatting, theming, audio, custom brushes, and symmetry drawing. Its native .draw file format is a regular PNG file with a custom embedded chunk, so any image viewer can preview your art even though no other application can re-edit it. You don't need to save your file as .draw.png or .draw, as it recognizes draw files automatically.
🎯 Goal: Get DRAW running on your machine.
There are two paths to a working install: download a pre-built release (recommended for almost everyone) or build from source (recommended if you want to hack on DRAW itself).
Visit the DRAW Releases page and grab the archive that matches your platform. Each release ships as a self-contained zip containing the DRAW executable, the entire ASSETS/ tree, and a default DRAW.cfg. There are no separate library installs, no runtime dependencies, and no internet connection required for normal operation.
You will need the QB64-PE compiler (from github.com/QB64-Phoenix-Edition/QB64pe). You need v4.4+. Once it is installed and on your PATH:
git clone https://github.com/grymmjack/DRAW.git
cd DRAW
qb64pe -w -x -o DRAW.run DRAW.BAS
The repository also ships a Makefile with shortcuts (make, make clean, make run).
-
Linux — the
INSTALL/folder contains a.desktopfile and MIME-type registration for the.drawformat so you can double-click.drawfiles in your file manager and have them open in DRAW. -
Windows — an installer registers the application in the Start Menu and associates
.drawwith the executable in the Registry. -
macOS — run
INSTALL/install-mac.commandonce; it copies the app bundle into/Applicationsand sets up Launch Services associations.
On first run, DRAW probes your monitor with _DESKTOPWIDTH/_DESKTOPHEIGHT and chooses a sensible display scale (1× through 8×) and toolbar scale (1× through 4×). It writes a fresh DRAW.cfg next to the executable. That file is plain text — you can hand-edit it any time, and you can override the defaults entirely with --config /path/to/your.cfg.
🎯 Goal: Navigate the interface confidently.
When DRAW launches you'll see six regions. From top to bottom and outside in:
| Region | Purpose |
|---|---|
| Menu bar | 11 menus from File through Audio. |
| Toolbar | A 4×7 grid of 28 tool icons on the left. |
| Canvas | The drawing surface, centered. |
| Layer panel | Stack of layers on the right. |
| Palette strip | The current palette across the bottom. |
| Status bar | Coordinates, zoom, current tool, grid state. |
A second tier of hidden panels can be summoned on demand:
- Organizer Widget — brush presets and toggles.
- Drawer Panel — 30 reusable brush / pattern / gradient slots.
-
Edit Bar (
F5) — quick edit actions. -
Advanced Bar (
Shift+F5) — 26+ toggles. -
Preview Window (
F4) — magnifier or floating image. -
Character Map (
Ctrl+M) — 16×16 glyph grid for text-mode work.
Every dockable panel can be flipped to the opposite side with Ctrl+Shift+Click on its title or icon area. F11 toggles all UI for distraction-free drawing; Ctrl+F11 keeps only the menu bar; Tab toggles the toolbar alone.
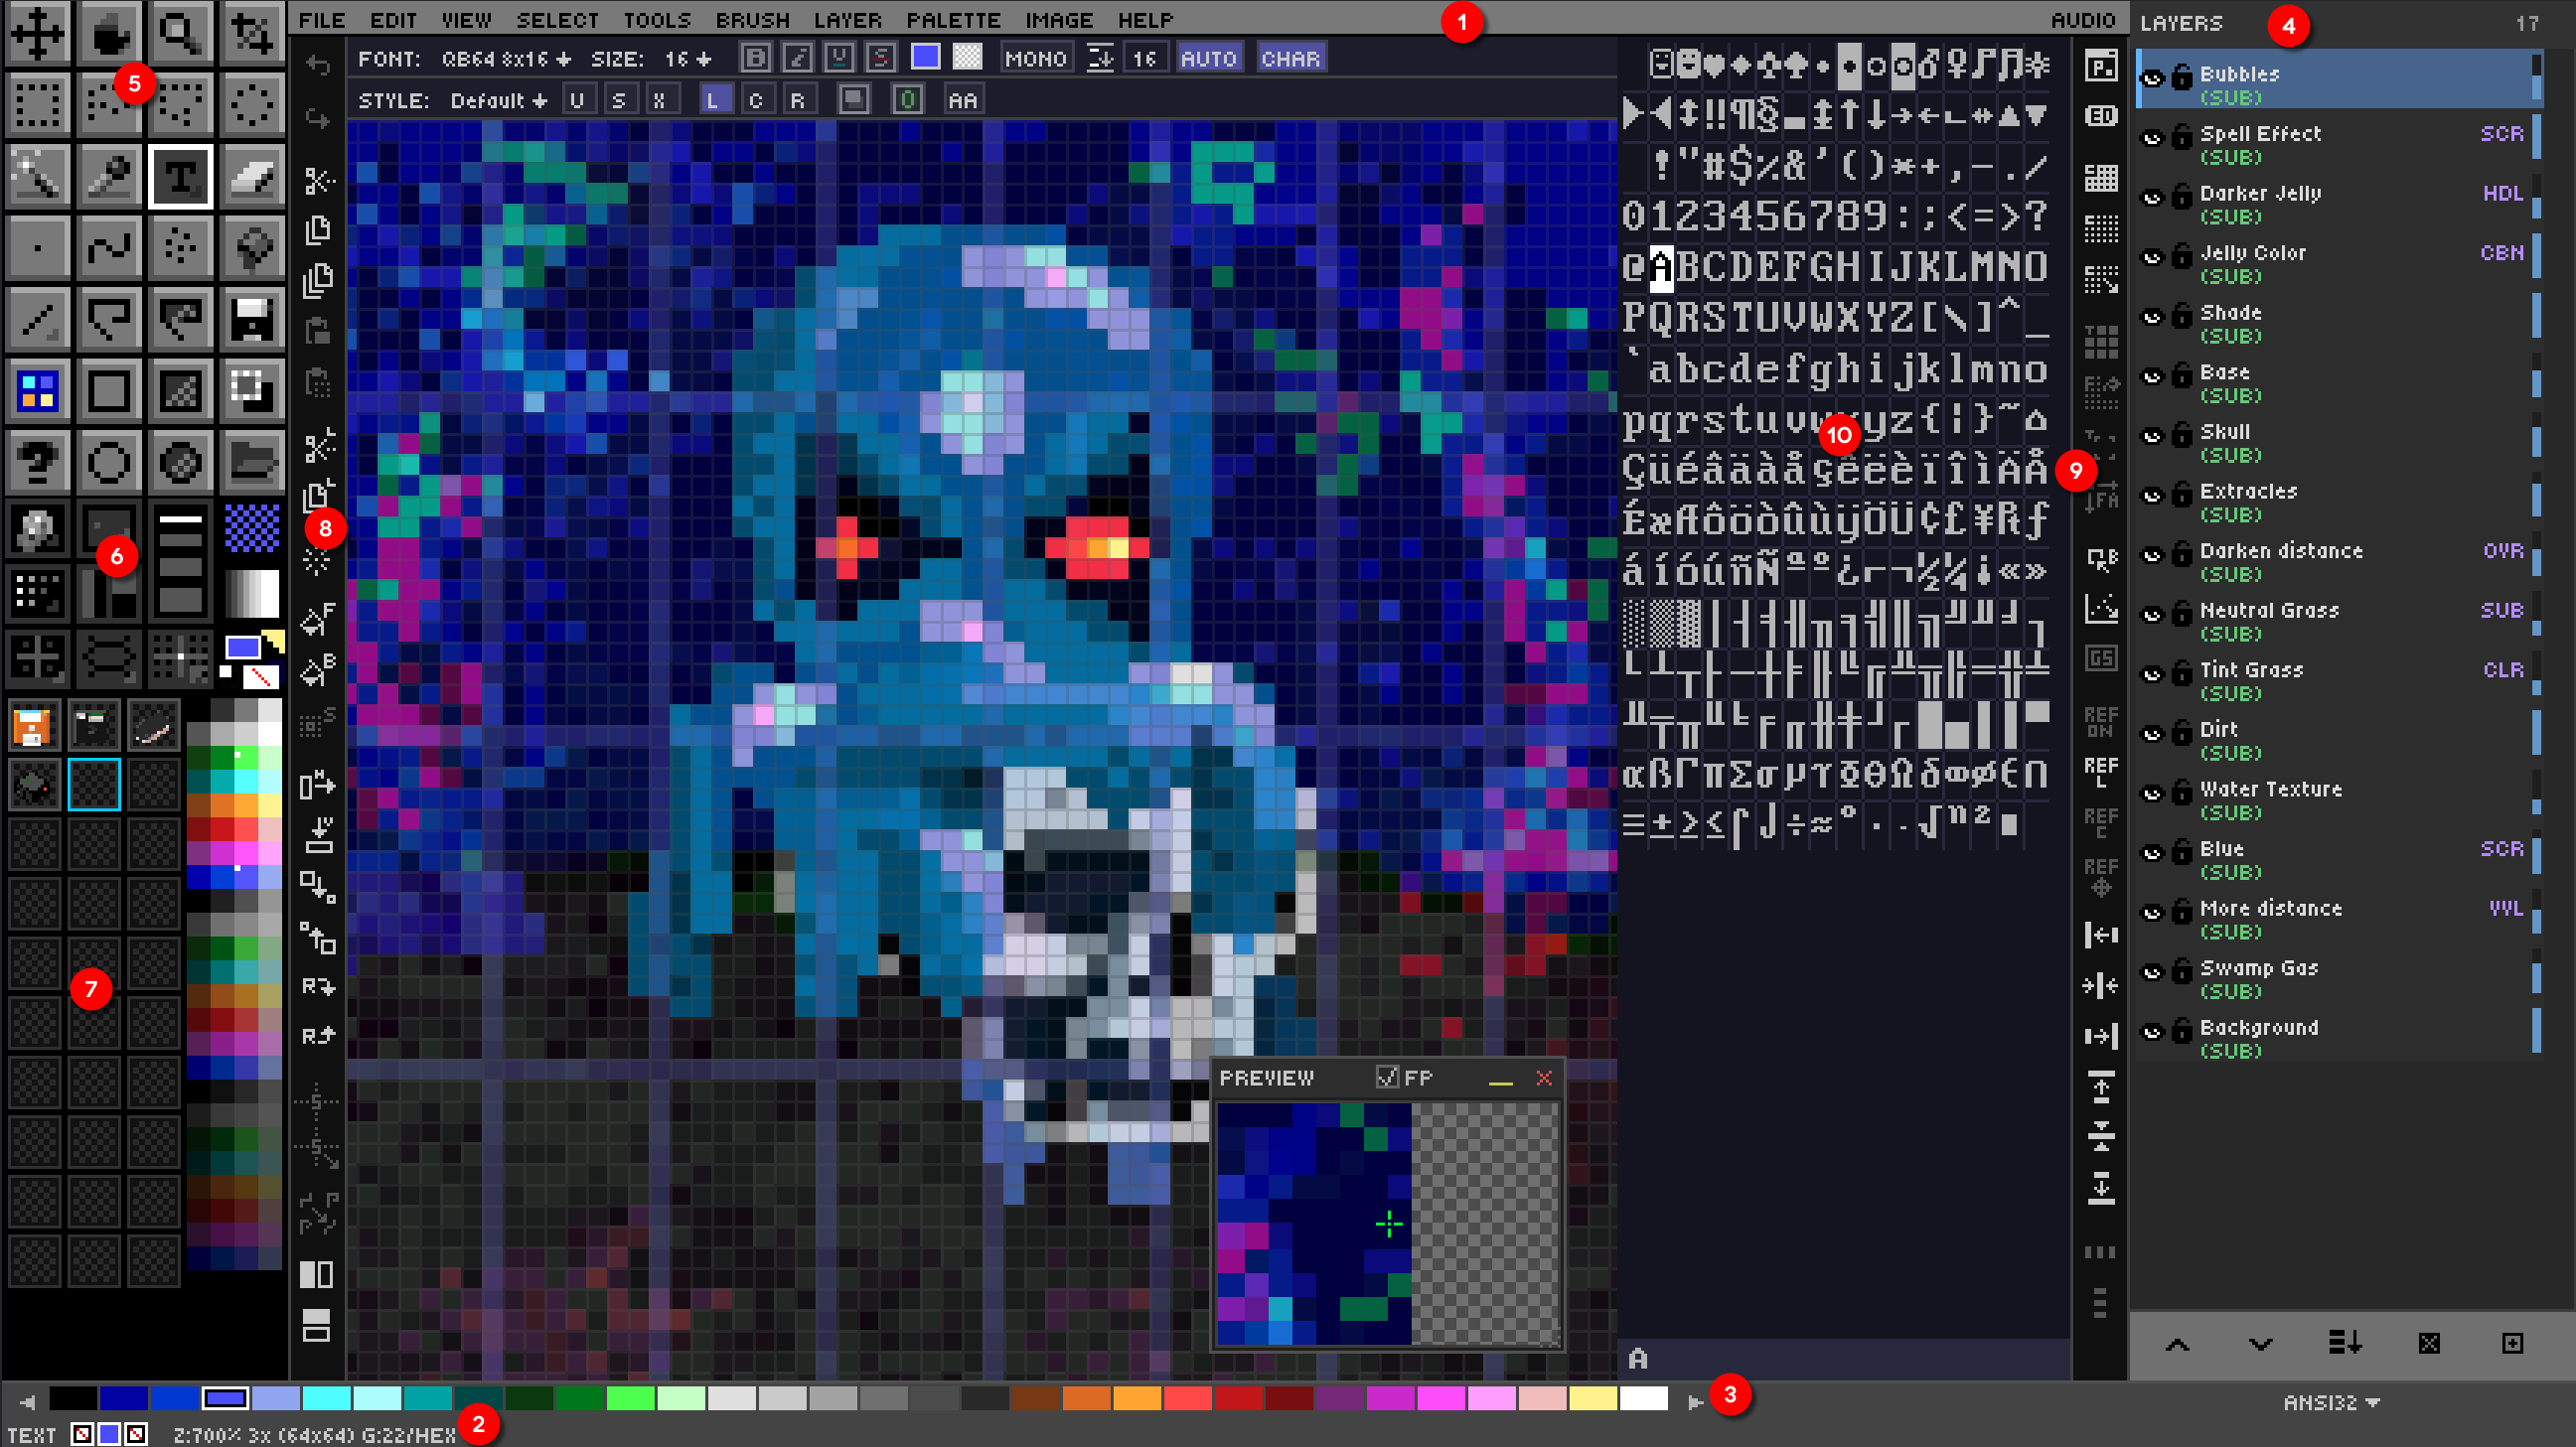
- Menu Bar
- Status Bar
- Palette Strip
- Layer Panel
- Tool Box
- Organizer
- Drawer Bins
- Edit Bar
- Advanced Bar
- Character Map
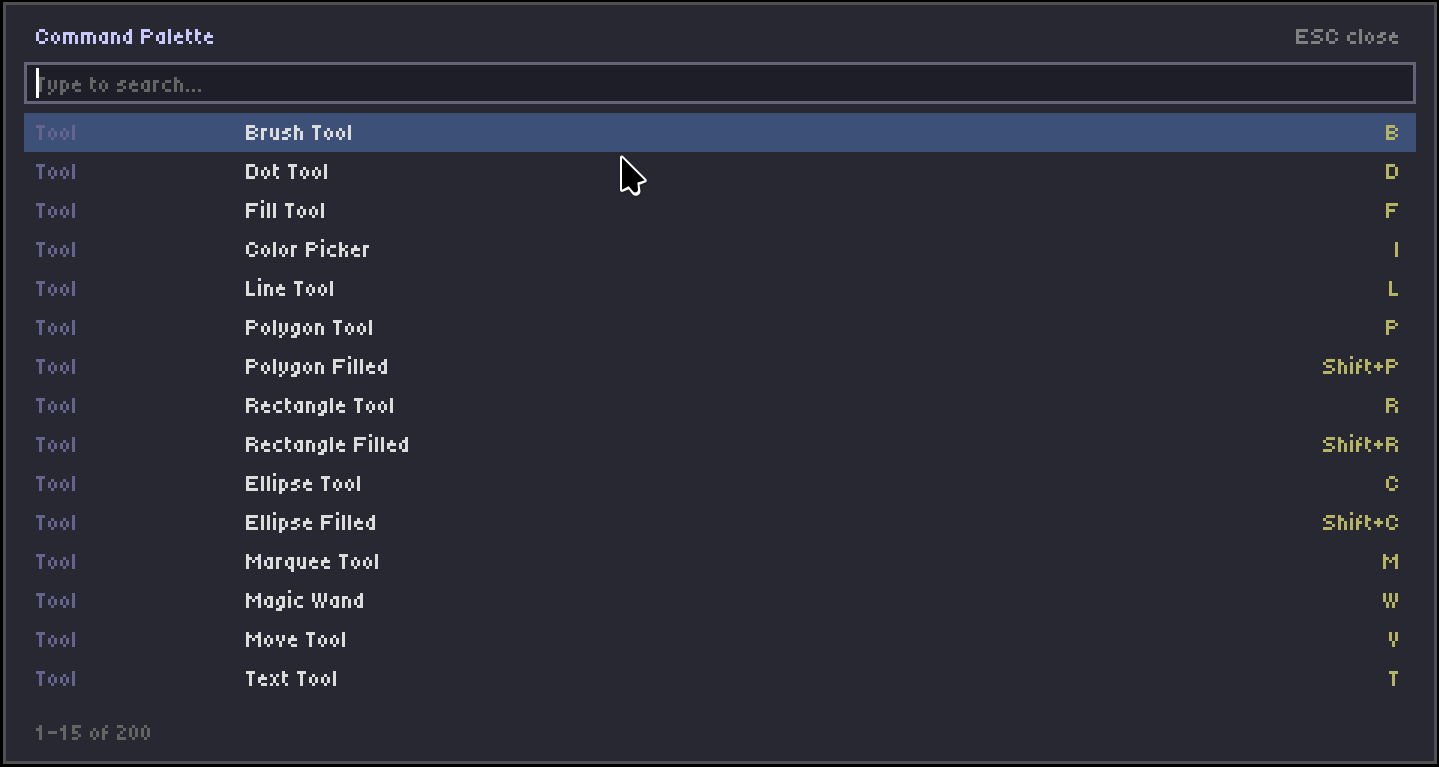
The single most important keystroke to remember on day one is ? — that opens the Command Palette, a fuzzy-searchable list of every command in the app. If you can't remember a shortcut, type a few letters and hit Enter.
➡️ Next: [Chapter 2 — Core Drawing Fundamentals](02 - Drawing Fundamentals)