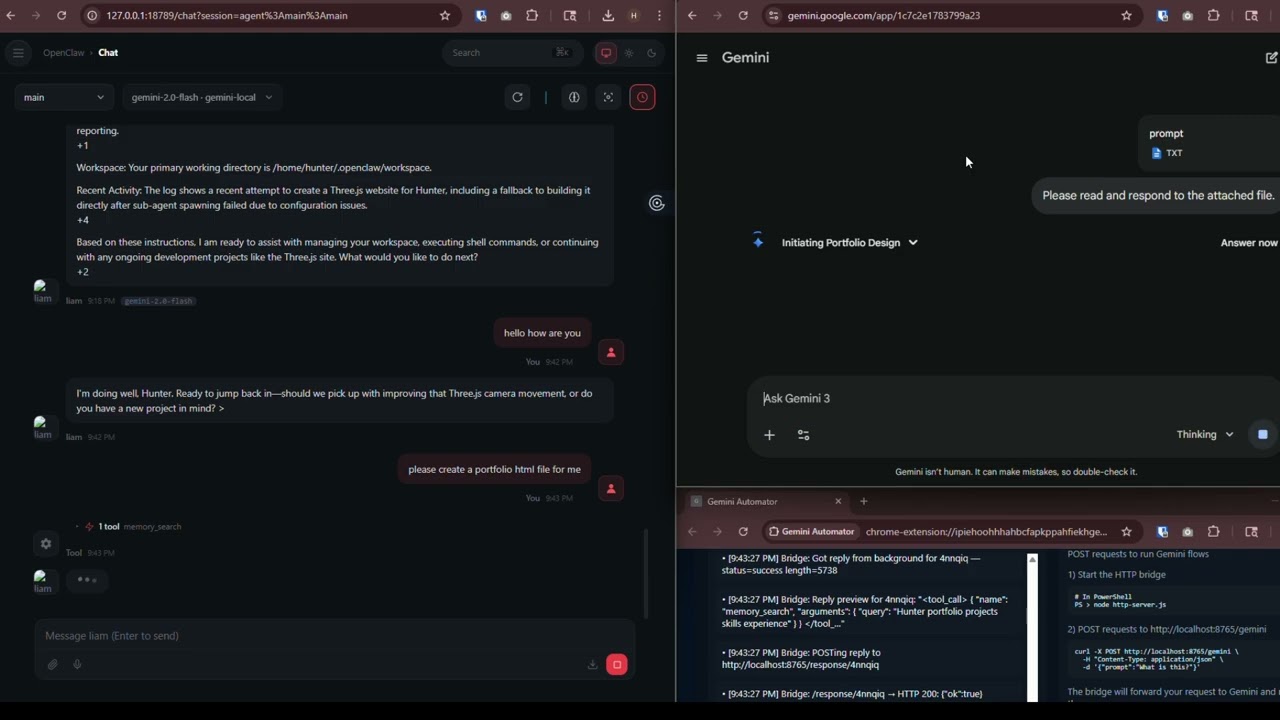
A Chrome extension + Node.js bridge that lets you send prompts to Gemini over a local HTTP API — no Gemini API key required. It drives your already-logged-in Chrome browser automatically.
Watch the video ⬇️⬇️
Node.js is a program that lets you run the local server that connects everything together. You only need to install it once.
-
Open the downloaded installer and click through it — all the defaults are fine
-
When it's done, open a terminal to confirm it worked:
Windows — press
Win + R, typecmd, press Enter, then run:node --versionMac — open the Terminal app (search for it in Spotlight), then run:
node --versionYou should see something like
v20.11.0. Any number above 16 is fine.
❓ What's a terminal? It's a text-based window where you type commands. On Windows it's called Command Prompt or PowerShell. On Mac it's called Terminal. Think of it like texting your computer instead of clicking.
If you haven't already, download this project folder to your computer. Put it somewhere easy to find, like your Desktop or Documents folder. Remember where you put it — you'll need it in the next step.
This installs Gemini Automator into Chrome.
- Open Chrome and type
chrome://extensions/in the address bar, press Enter - In the top-right corner, turn on the Developer mode toggle
- Click Load unpacked (a button that appears after enabling Developer mode)
- A file picker opens — navigate to and select the project folder you downloaded in Step 2
- Gemini Automator now appears in the list, and its icon shows up in the Chrome toolbar
This is the server that sits between your app and the Chrome extension.
-
Open a terminal (see Step 1 if you're not sure how)
-
Navigate to the project folder. Type the following and press Enter — replace the path with wherever you actually put the folder:
Windows:
cd C:\Users\YourName\Desktop\gemini-automatorMac / Linux:
cd ~/Desktop/gemini-automator❓ What is
cd? It stands for "change directory" — it moves you into a folder, like double-clicking it. -
Now start the server:
node http-server.js -
You should see this printed out:
🚀 Gemini Automator Bridge active on port 8765Leave this terminal window open. The server stops if you close it.
-
Click the Gemini Automator icon in the Chrome extensions list
-
A new tab opens showing the shell UI
-
Wait a few seconds — the status badge should change to connected
⚠️ Keep this tab open the entire time you're using Gemini Automator. It's the relay between the server and Gemini. If you close it, nothing will work.
Open a new terminal window (keep the server one open) and use the command for your OS:
Windows — Command Prompt:
curl -X POST http://localhost:8765/gemini -H "Content-Type: application/json" -d "{\"prompt\": \"Say hello!\"}"Windows — PowerShell:
Invoke-WebRequest -Uri http://localhost:8765/gemini -Method Post -ContentType "application/json" -Body '{"prompt": "Say hello!"}'Mac / Linux:
curl -X POST http://localhost:8765/gemini \
  -H "Content-Type: application/json" \
  -d '{"prompt": "Say hello!"}'
You should get back a JSON response in the server terminal containing Gemini's reply. That's it for the standard setup! ✅
⚠️ Only follow this part if:
- You are using OpenClaw inside WSL2 (Windows Subsystem for Linux), AND
- Chrome and the Node server are running on the same Windows machine as WSL2
If OpenClaw is on a completely separate computer, or you're not using WSL at all — skip this entire section.
WSL2 runs Linux inside a hidden virtual machine on your Windows PC. That virtual machine has its own network, separate from Windows. So when Linux says "localhost", it means the Linux VM — not your Windows machine where Chrome is running.
To fix this, we need to find the Windows host IP (the address Linux uses to talk to Windows) and use that instead of localhost.
Make sure the standard setup is fully working on the Windows side before continuing here.
Windows Firewall will block WSL from reaching the Node server by default. You need to add a rule to allow it.
- On Windows, click the Start menu, search for PowerShell, right-click it, and choose Run as administrator
- Copy and paste this entire block, then press Enter:
New-NetFirewallRule `
  -DisplayName "Gemini Automator WSL" `
  -Direction Inbound `
  -Protocol TCP `
  -LocalPort 8765 `
-Action Allow-
You should see a confirmation that the rule was created. You only ever need to do this once.
-
Now open your WSL terminal and test that it can reach the server:
WIN_HOST=$(ip route show | grep -i default | awk '{ print $3 }')
echo "Your Windows host IP is: $WIN_HOST"
curl http://$WIN_HOST:8765/
You should see something like:
{"object":"list","data":[{"id":"gemini-2.0-flash",...}]}If you see that, the firewall is open and everything is connected. ✅
The Windows host IP is the address WSL uses to reach your Windows machine. Run this in your WSL terminal:
ip route show | grep -i default | awk '{ print $3 }'It will print something like 172.22.16.1 or 192.168.x.x. Write this number down — you'll need it in the next step.
⚠️ This IP can change after a reboot. If things stop working after restarting your PC, re-run this command and update thebaseUrlin your OpenClaw config to match the new IP.
4a — Run the onboarding command
In your WSL terminal:
curl -fsSL https://openclaw.ai/install.sh | bashFollow any prompts it gives you: Yes -> Quickstart -> Use Existing Values -> Skip for now(press up arrow, its at the bottom) -> enter -> enter -> skip for now -> skip for now -> No, don't configure skills. -> skip for now -> restart. Now, open the Web UI! It should look like http://127.0.0.1:18789/#token=xyz (it's printed in the console)
4b — Find your Linux username
whoamiIt prints something like john or alice. Write it down — you'll need it in the next step.
4c — Open the config editor
- In the web UI, click Config in the sidebar (or top navigation)
- Look for a Raw button and click it — this switches from the visual editor to a plain text view where you can paste directly
4d — Paste the config
Select and delete everything currently in the raw config editor, then paste in the following.
You need to make two replacements before saving:
- Replace
YOUR_WINDOWS_IPwith the IP you found in Step 3 (e.g.172.22.16.1) - Replace every
YOUR_USERNAMEwith whatwhoamiprinted (e.g.john)
Leave __OPENCLAW_REDACTED__ as-is — OpenClaw fills those in automatically.
{
  models: {
    mode: 'merge',
    providers: {
      'gemini-local': {
        baseUrl: 'http://YOUR_WINDOWS_IP:8765',
        apiKey: 'none',
        api: 'openai-completions',
        authHeader: false,
        models: [
          {
            id: 'gemini-2.0-flash',
            name: 'Gemini 2.0 Flash (via Browser)',
            api: 'openai-completions',
            reasoning: true,
            input: [
              'text',
            ],
            cost: {
              input: 0,
              output: 0,
              cacheRead: 0,
              cacheWrite: 0,
            },
            contextWindow: 128000,
            maxTokens: 4096,
            compat: {
              supportsStore: false,
            },
          },
        ],
      },
    },
  },
  agents: {
    defaults: {
      model: {
        primary: 'gemini-local/gemini-2.0-flash',
      },
      models: {
        'gemini-local/gemini-2.0-flash': {},
      },
      workspace: '/home/YOUR_USERNAME/.openclaw/workspace',
    },
    list: [
      {
        id: 'main',
        name: 'main',
        workspace: '/home/YOUR_USERNAME/.openclaw/workspace',
        agentDir: '/home/YOUR_USERNAME/.openclaw/agents/main/agent',
        model: 'gemini-local/gemini-2.0-flash',
      },
      {
        id: 'gemini-local',
        name: 'gemini-local',
        workspace: '/home/YOUR_USERNAME/.openclaw/workspace-gemini-local',
        agentDir: '/home/YOUR_USERNAME/.openclaw/agents/gemini-local/agent',
      },
    ],
  },
  tools: {
    profile: 'coding',
  },
  commands: {
    native: 'auto',
    nativeSkills: 'auto',
    restart: true,
    ownerDisplay: 'raw',
  },
  session: {
    dmScope: 'per-channel-peer',
  },
  gateway: {
    port: 18789,
    mode: 'local',
    bind: 'loopback',
    auth: {
      mode: 'token',
      token: '__OPENCLAW_REDACTED__',
    },
    tailscale: {
      mode: 'off',
      resetOnExit: false,
    },
    nodes: {
      denyCommands: [
        'camera.snap',
        'camera.clip',
        'screen.record',
        'calendar.add',
        'contacts.add',
        'reminders.add',
      ],
    },
  },
  plugins: {
    entries: {},
  },
}
Click Save when done.
mkdir -p "$HOME/.openclaw/workspace-gemini-local"

cat > "$HOME/.openclaw/workspace-gemini-local/AGENTS.md" << 'EOF'
# AGENTS.md

## Every Session
Read SOUL.md, USER.md, memory/YYYY-MM-DD.md before anything. Main session: also read MEMORY.md. No need to ask.

## Memory
- Daily logs → memory/YYYY-MM-DD.md
- Long-term insights → MEMORY.md (main session only, never in group contexts)
- "Remember this" = write it down. No mental notes.

## Safety
- Never exfiltrate private data
- Prefer trash over rm, ask before destructive commands
- Ask before: emails, tweets, anything leaving the machine
- Safe without asking: read, organize, search, check calendar

## When to Respond
Respond: directly asked, you add real value, correcting misinformation.
Stay quiet: casual banter, already answered, low-value addition.

## Group Chats
You have access to your human's info — don't share it. You're a participant, not a spokesperson.

## Reactions
One emoji reaction per message when it fits. No over-reacting.

## Heartbeats
Read HEARTBEAT.md and follow it. Nothing to do → reply HEARTBEAT_OK.
Check 2-4x daily: urgent email, upcoming calendar events, mentions.
Reach out for: important email, event <2h away, something useful found, >8h since contact.
Stay quiet: 23:00–08:00, human seems busy, nothing new.

## Proactive (no asking needed)
Organize memory, check project status, update docs, commit/push, review MEMORY.md.

## Platforms
Discord/WhatsApp: no markdown tables, use bullets. Wrap Discord links in < >.

## Tools
Check SKILL.md when needed. Store local notes in TOOLS.md.
EOF
Follow this exact order every time you sit down to use it:
── On Windows first ─────────────────────────────────────────
  1. Open a terminal in the project folder and run:
         node http-server.js
     → Wait until you see: 🚀 Gemini Automator Bridge active on port 8765

  2. Click the Gemini Automator icon in Chrome
     → A shell tab opens. Wait for the status badge to show "connected"
     → Keep this tab open the entire session — do not close it

── Then in WSL ──────────────────────────────────────────────
  3. Run:
         openclaw
     → If the daemon is running (installed in Step 4), it starts automatically
Run these from your WSL terminal in order:
# Step 1 — confirm your Windows IP is visible from WSL
WIN_HOST=$(ip route show | grep -i default | awk '{ print $3 }')
echo $WIN_HOST
# Should print something like: 172.22.16.1

# Step 2 — confirm the bridge is reachable
curl http://$WIN_HOST:8765/
# Should print: {"object":"list","data":[{"id":"gemini-2.0-flash",...}]}

# Step 3 — send a full test prompt end-to-end
curl -X POST http://$WIN_HOST:8765/gemini \
  -H "Content-Type: application/json" \
  -d '{"prompt":"Reply with just the word READY."}'
# Should print: {"choices":[{"message":{"content":"READY"}}],...}
Something not working?
| What went wrong | Most likely cause | How to fix |
|---|---|---|
echo $WIN_HOST prints nothing |
WSL networking issue | Run wsl --shutdown in PowerShell, then reopen WSL |
curl says "connection refused" |
Node server isn't running | Go to Windows and run node http-server.js |
curl says "connection timed out" |
Firewall rule missing | Redo Step 2 (the PowerShell firewall command) |
| Gets no reply or times out | Shell tab is closed | Click the extension icon in Chrome, wait for "connected" |
"Port already in use" error when starting the server
Something else is already using port 8765. You can use a different port:
PORT=9000 node http-server.jsIf you do this, also open http-bridge.js in a text editor and change http://localhost:8765 to http://localhost:9000.
Shell tab shows "disconnected"
The extension can't reach the Node server. Make sure node http-server.js is still running in your terminal — it stops if you close that window.
Gemini tab never appears, or response is empty
- Make sure you're signed into a Google account in Chrome that has access to Gemini
- Open Chrome DevTools on the shell tab (
F12→ Console tab) and look for red error messages - If Gemini's website updated recently, its page layout may have changed and the selectors in
background.jsmay need updating
Requests always time out
For very long prompts, the default 3-minute timeout may not be enough. Open http-server.js in a text editor and find the line TIMEOUT_MS — increase the number (it's in milliseconds, so 300000 = 5 minutes).
- No true streaming — the full response is read from the page after Gemini finishes typing. SSE returns it as one chunk.
- Token counts are always 0 — there's no way to get them through the browser.
- One request at a time — if multiple requests come in at once, they wait in a queue.
- Breaks if Gemini's website updates — if Google changes the Gemini page layout, the selectors in
background.jsmay need to be updated to match. - Requires Chrome to stay open — the extension uses your existing Google login and can't run without a real browser session.
- File attachments may not always work — attachment injection uses browser drag-and-drop simulation, which can break if Gemini's UI changes.
Your App  (curl, Python, OpenAI SDK, OpenClaw…)
        │  POST /gemini  or  /v1/chat/completions
        ▼
http-server.js  ── Node.js server running on your machine
  • Receives your request and holds the connection open
  • Queues it with a unique ID, waits for a reply (up to 3 min)
        │  GET /queue every 500ms  /  POST /response/:id
        ▼
http-bridge.js  ── runs inside the Chrome extension shell tab
  • Polls the server every 500ms for new requests
  • Forwards them to the background service worker
  • Sends the reply back to the server when done
        │  chrome.runtime.sendMessage
        ▼
background.js  ── Chrome extension service worker
  • Opens (or reuses) a gemini.google.com tab
  • Types your prompt into the Gemini input box via code
  • Watches the page for Gemini's response using a MutationObserver
  • Returns the response text once Gemini stops typing
In short: your request travels from your app → Node server → Chrome extension → Gemini tab → back the same way. The whole thing typically takes a few seconds depending on how long Gemini takes to respond. In short: your request travels from your app → Node server → Chrome extension → Gemini tab → back the same way. The whole thing typically takes a few seconds depending on how long Gemini takes to respond.