3.3 Using IntelliJ
IntelliJ includes a Gradle plugin, which can be used to run the jazz development environment tasks. As we use IntelliJ for plugin development, this enables us to run the gradle tasks from within the same IDE that we use to develop plugins.
- Creating a plugin project and using jazz development environment with it
- Adding to an existing plugin project
- Using IntelliJ for just running the jazz development environment
This guide assumes that you have not yet set up your plugin project with IntelliJ. If you already have a plugin project, and just want to use the gradle tasks, skip ahead to adding the environment to a project, and maybe read the section on using the jazz development environment run task as your default run task
We will import the project that is created during the plugins tutorial. If you haven't followed that tutorial but wish to develop plugins using IntelliJ, we highly recommend completing that first, and then returning to this section.
First, we will create a new IntelliJ project, using the service plugin that is created when following the steps from the plugins tutorial. All java plugins can be used with IntelliJ in this way.
- Import a project from existing sources:
File -> New -> Project from Existing Sources - Select the base directory of the service project we created:
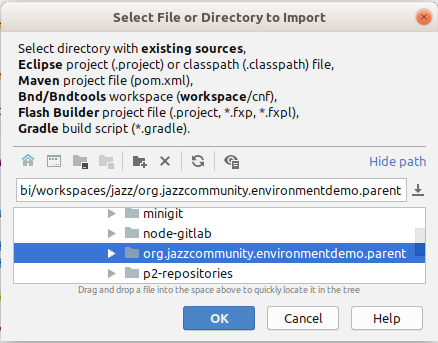
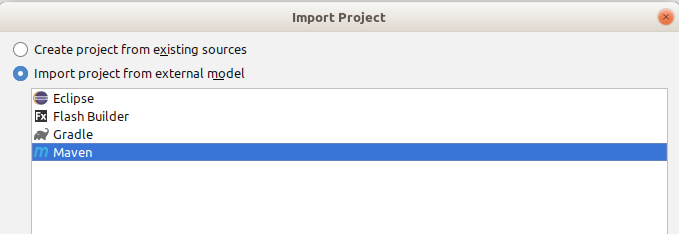
- Choose import project form external model, and select maven as the external model:
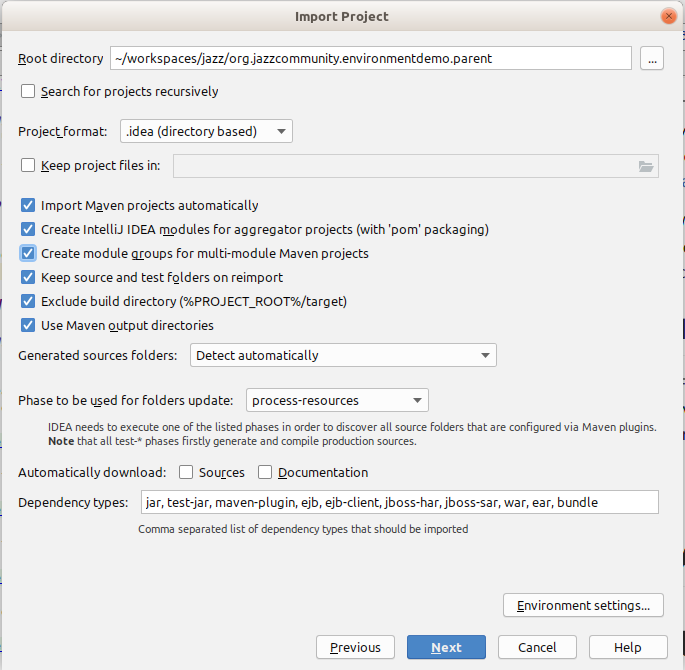
- On the settings screen, make sure to select Import maven projects automatically and Create module groups for multi-module maven projects. These two settings are important.
- On the next two screens, you can just continue by clicking next.
- In the SDK selection screen, make sure that you select a version of the JDK that is at least Java 7 for 6.0.3 and at least Java 8 for all RTC versions after and including 6.0.6
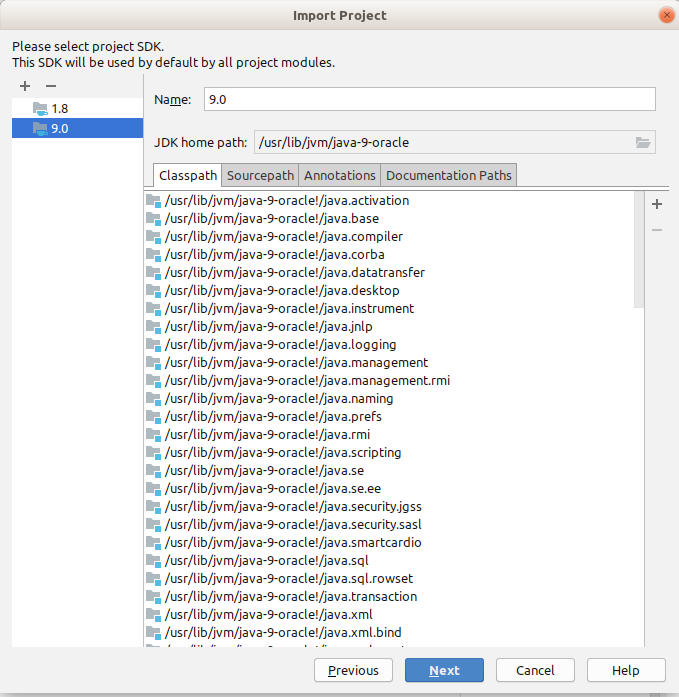
You have now successfully imported the plugin example project. For example, you can now navigate to the HelloWorldService class by pressing Ctrl + N and starting to type HelloWorldService. This is the file we previously edited.
Once you have a plugin project open, you can add the jazz development environment to your project. This will enable you to run the jazz development environment tasks from within your plugin project.
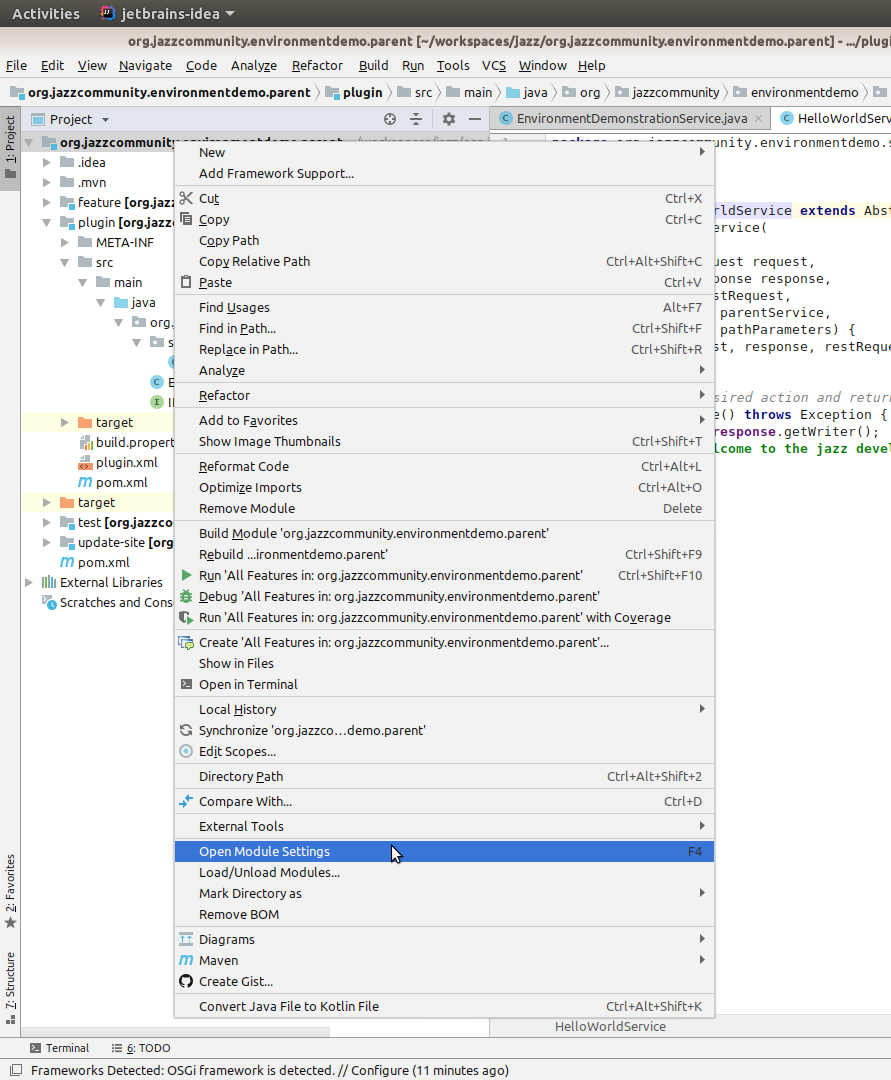
- Right click your project in the project window (
Alt + F1if not visible)
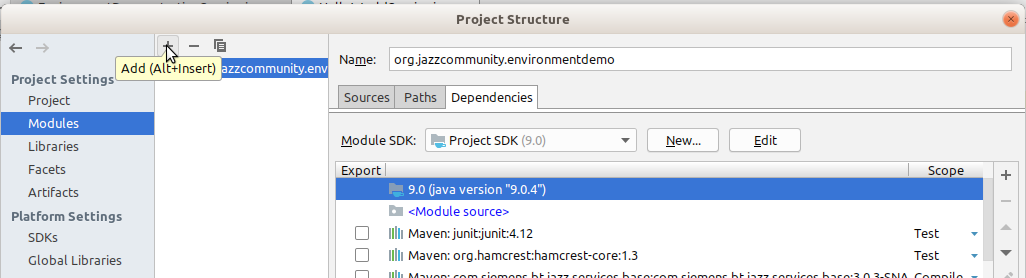
- Select Modules in the left menu, and then click the Plus to add a new module entry.
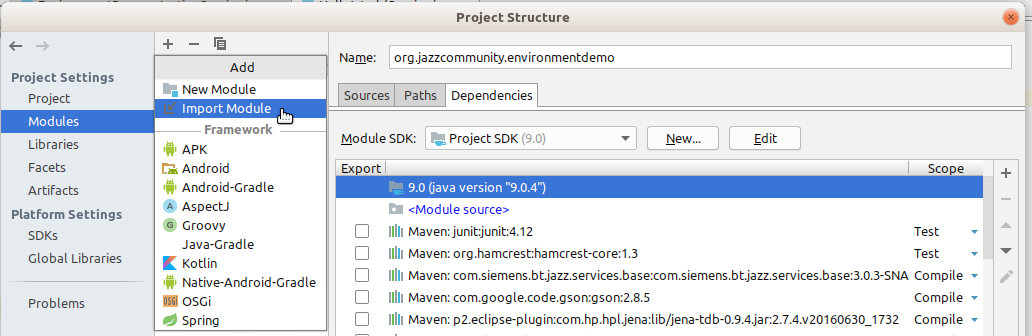
- Select Import Module to add an existing module
- Select the root directory of the jazz development environment and then continue with step 3 from the next section.
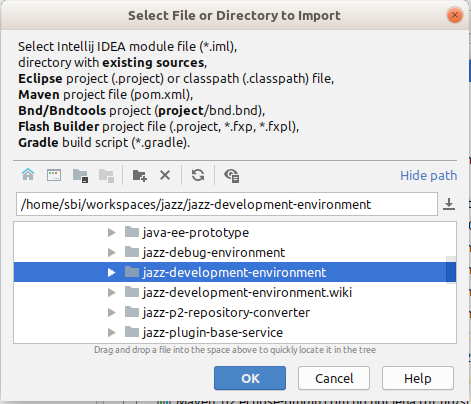
You can now continue from step three in the standalone section.
If you are just interested in using IntelliJ to run the jazz development environment tasks without working on a plugin project, you can just import the jazz development environment project.
- Create a new project from the jazz development environment sources by navigating to
File -> New -> Project from Existing Sources - Select the base folder of the jazz development environment:
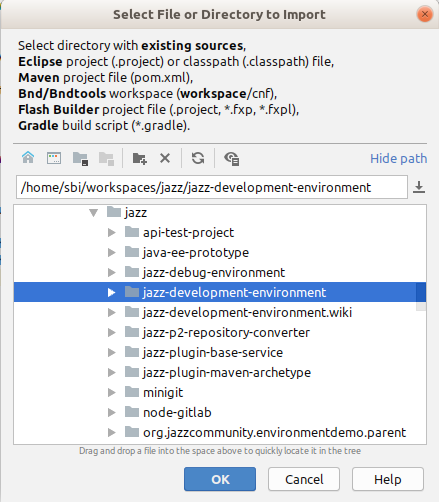
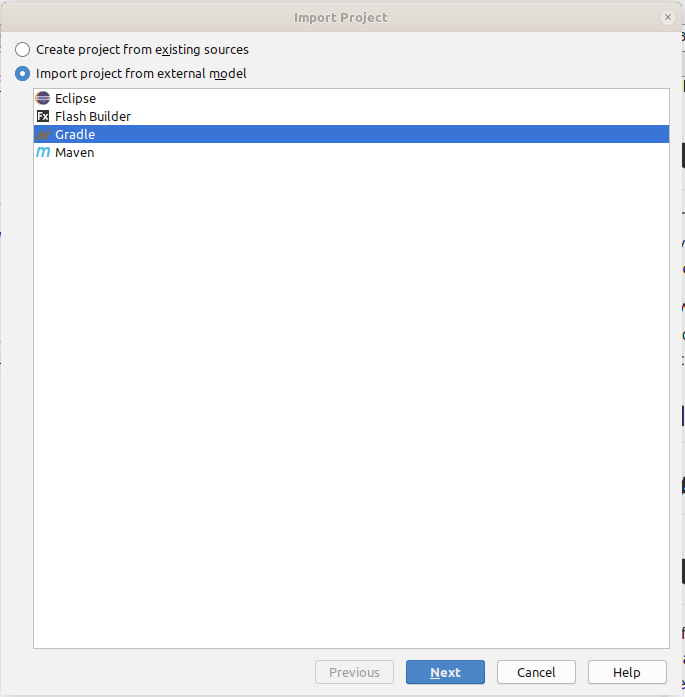
- On the next screen, choose "Import project from external model" and make sure that gradle is selected.
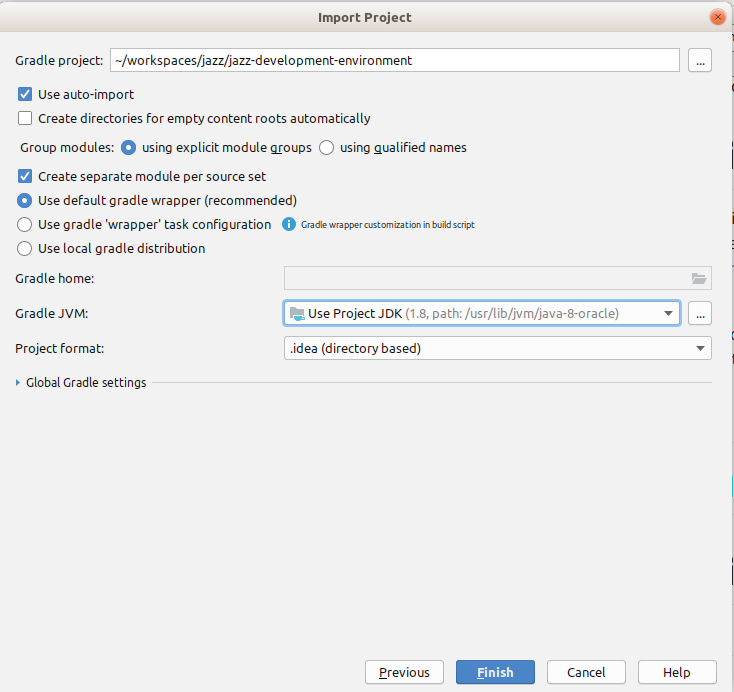
- On the Import Project settings screen, select "Use auto-import" to always have the newest changes, and make sure that you select "Use default gradle wrapper (recommended)", to make sure that jazz development environment is always run using the provided gradle wrapper scripts.
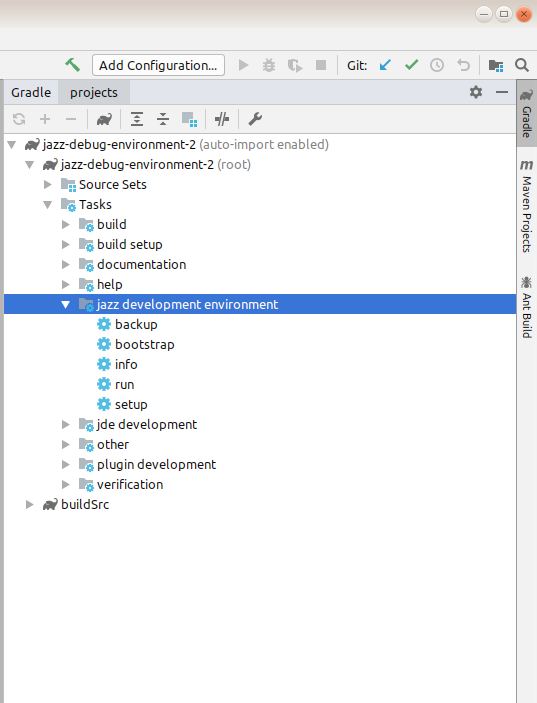
- Once the project is imported, you should see a "Gradle" tab on the far right side of your screen. Open it to expand the gradle tasks view, and look for the jazz development environment tasks (navigate the tree structure like in the screen shot). You can now run all of the tasks from inside IntelliJ. To run a task, simply double click it.
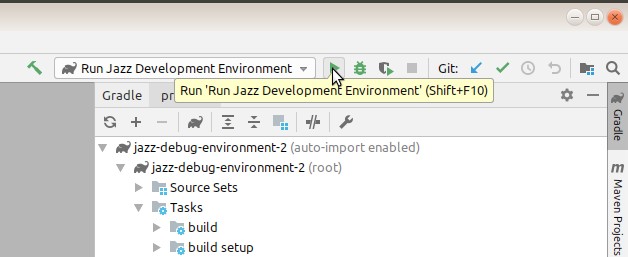
You can configure IntelliJ to use the jazz development environment run task as the default run task. Pressing the green button inside IntelliJ will then run your development environment.
- To create this run configuration, go to
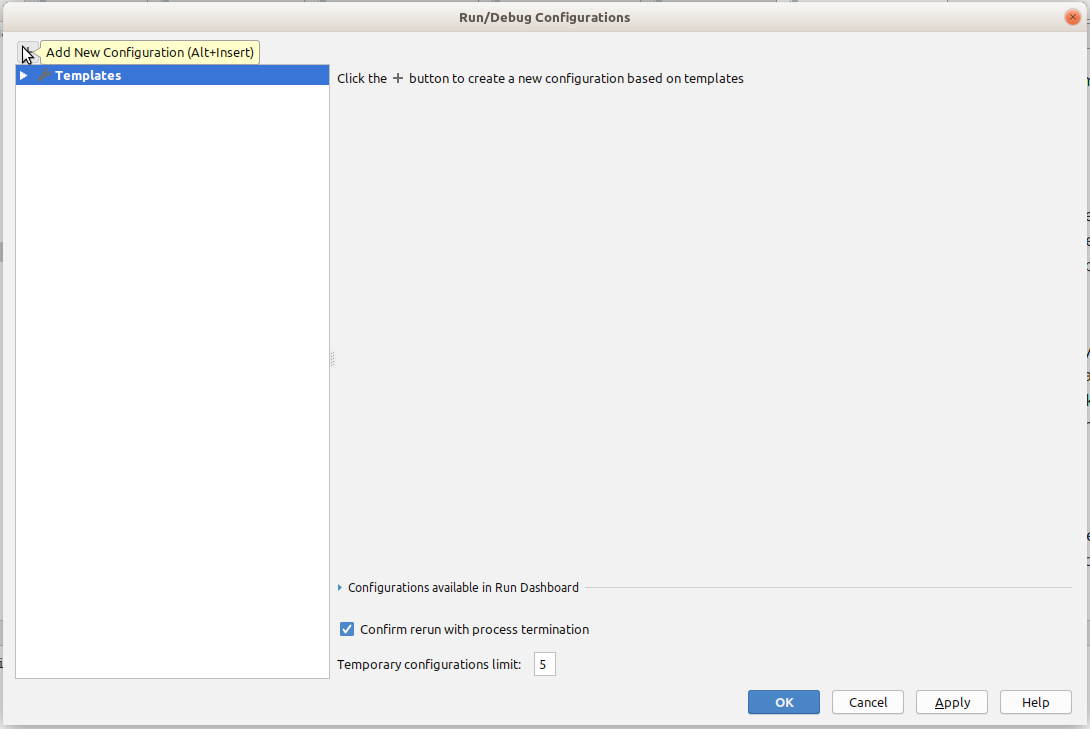
Run -> Edit Configurations. In the Run/Debug Configurations window, add a new run configuration by clicking on the plus in the upper left corner.
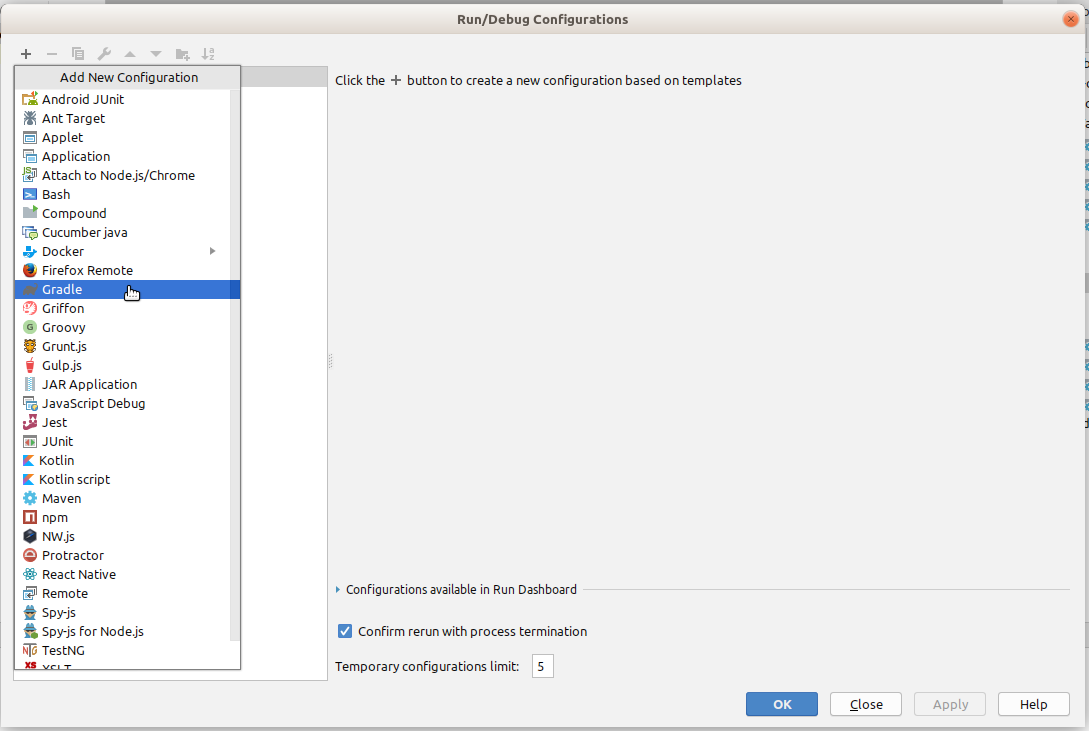
- From the drop down, choose the gradle run template.
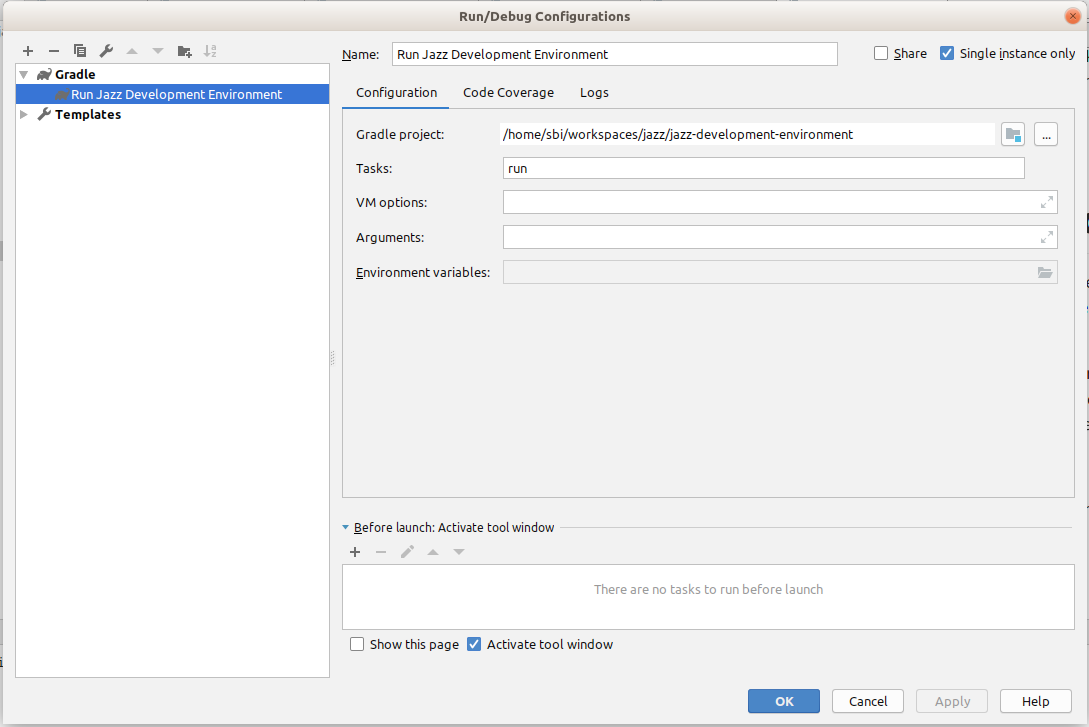
- In the gradle template, choose a sensible name for your run time configuration, also, check the Single instance only checkbox. Make sure that the run task is defined in the tasks text box.
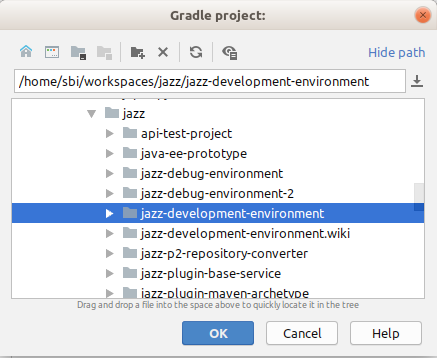
Also, set the correct path to the gradle project (the root folder of the jazz development environment):
Press apply to save your new run task.
- If saved successfully, your new run task should be available from the tasks drop down in the top bar of IntelliJ, and you can run the jazz development environment by pressing the button with the green arrow.
Some jazz development environment gradle tasks take optional run time parameters. These can be passed using the gradle plugin for IntelliJ. For details on which tasks take parameters and how to pass them, please refer to the tasks section. This section just features and example of how to pass run time parameters using IntelliJ.
Please note that passing run time parameters for the run task is different from all other tasks. Keep this in mind when configuring your environment! This is a limitation of gradle and the IntelliJ gradle plugin
This example shows how to run a different run time than the default run time.
- Open the gradle tab and navigate to the jazz development environment tasks. Right click the
runtask and selectCreate...
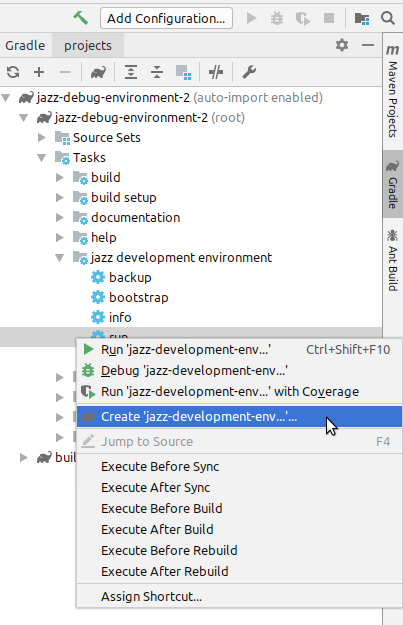
- In the configuration menu, choose a sensible name for your run configuration, check the
single instance onlycheckbox and in the arguments text box, use the-Pruntime=argument to set the name of the run time you wish to run.
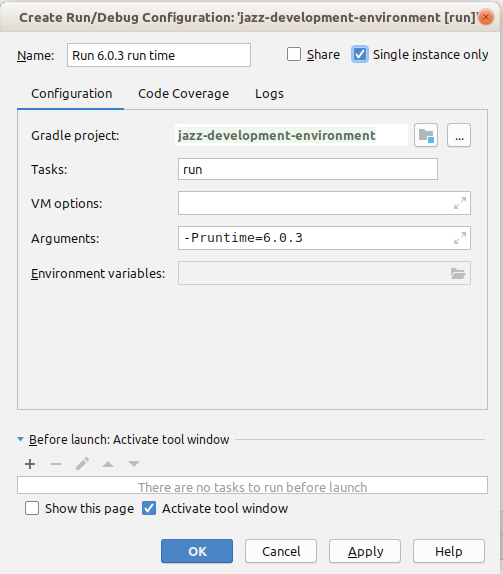
- Your custom task configuration will show in a new folder at the bottom of your gradle tasks called
Run Configurations.
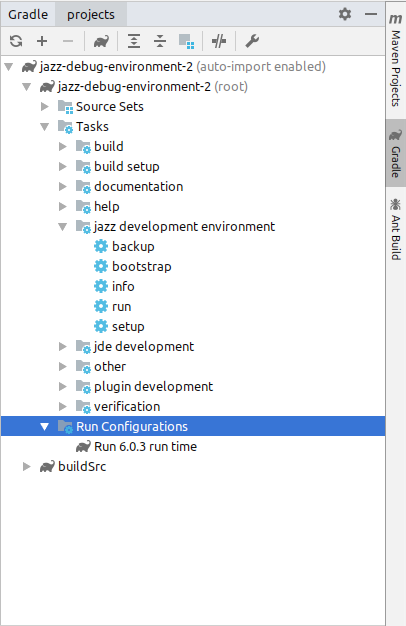
- To run the task, double click the custom run task
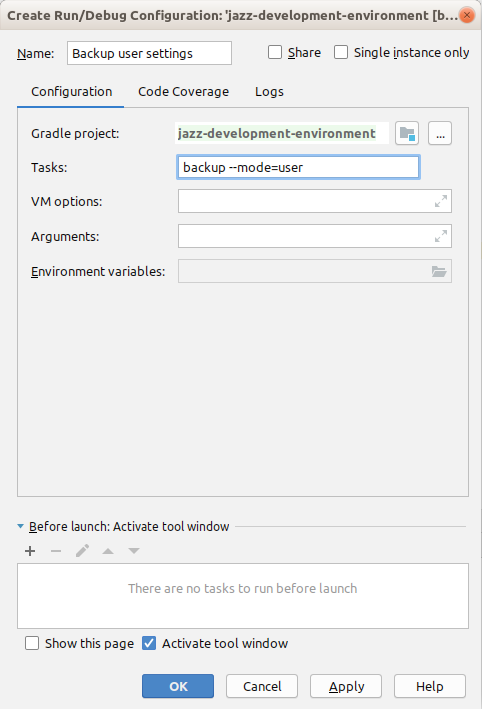
This example shows how to create a user-only backup by passing the --mode parameter with a value of user to the backup task. All other tasks that take parameters can be configured in the same way.
- Open the gradle tab and navigate to the jazz development environment tasks. Right click the
backuptask and selectCreate...
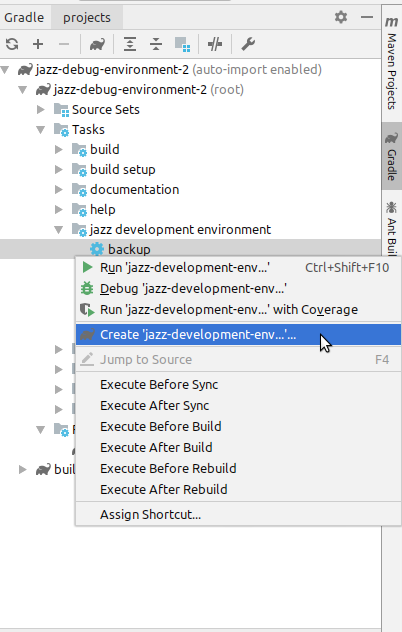
- In the configuration menu, choose a sensible name and in the tasks text box add the runtime parameter and value,
--mode=user. ClickOKto save your task.
- Your new task will now show up together with the other customized tasks. To create the user backup, double click the task.
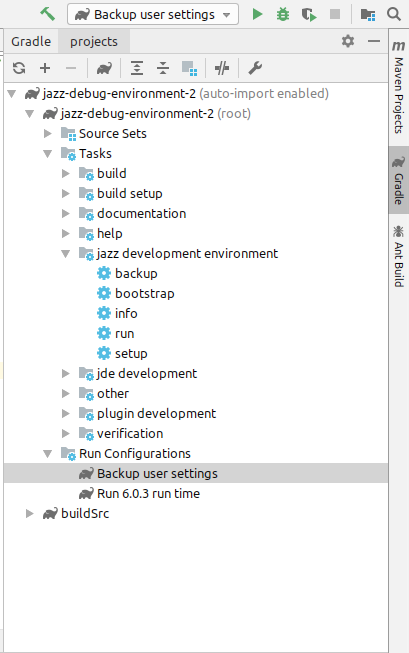
Customized tasks can be edited after they are created by right-clicking them to open the Edit run configuration window.