6.1 prepare
When a new release of the RTC SDK is made available on the download page (for old versions, please refer to the old rtc downloads section), new configuration files (in tool/sdk_files) and database files (in tool/db_presets) have to be created. This is necessary for enabling the creation of run times that use newer versions of the SDK. This page is a detailed explanation of the steps necessary for creating these files, and how to make them available to other users.
- Make sure that you have a jazz development environment with at least the bootstrap task already executed.
- Download
JTS-CCM-KeysandRTC-SDK-Serverzip files with matching versions, of the version that you want to create a new release for. Place these in thejde/serversandjde/sdksfolders accordingly. This requires an IBM login. - Download the Feature Based Launches eclipse dropin from the IBM wiki or using this direct link. This requires an IBM login.
- Extract the content of the
launcher442.zipinto thejde/dev/dropinsfolder. Make sure to only copy the jar file from inside the zip archive:/launcher442/plugins/com.ibm.team.dev.launch_0.3.13.201605301342.jar - Run the
./gradlew ideCleantask to make sure no previously initialized eclipse environments still exist.
This and the following examples will create files for the 6.0.6.1 release, but other versions will work in the same way.
- Run the Info task and check that both SDK and Server versions are available for the new release.
$ ./gradlew info

> Task :info
Available SDK versions:
        RTC-SDK-Server-6.0.6.1.zip
Available Servers / JRE versions:
        JTS-CCM-keys-Linux64_6.0.6.1.zip
Note that there are no available databases and configurations for this release. This makes it clear that it is necessary to follow these instructions for creating a new release. Make sure that you are using the newest version of the jazz development environment from GitHub before proceeding.
- Attempt to run a setup task for the new version. This should fail, as the files do not exist yet.
$ ./gradlew setup --sdk=6.0.6.1

> Task :setup
SDK Version 6.0.6.1 selected for runtime setup
Missing file for version 6.0.6.1 in directory jde/dbs
- Make sure that the dropin jar file has been copied correctly. The folder structure of the
jde/devfolder should look like this:
jde/dev
├── dropins
│   └── com.ibm.team.dev.launch_0.3.13.201605301342.jar
├── projects
│   ├── configs
│   │   └── teamserver.properties
│   ├── launches
│   │   ├── Create Development Environment Database.launch
│   │   └── Launch Development Environment.launch
│   └── tests
│       └── build.properties
└── release
    ├── config
    └── db
and the Info task should list the dropin accordingly:
 ➜  ./gradlew info

Available drop-ins:
        com.ibm.team.dev.launch_0.3.13.201605301342.jar
Creating a new release requires the usage of the following tasks in the correct order. This process has been streamlined so that minimal user interaction is necessary, however, the process is still fairly intricate. Make sure to properly follow these instructions so that a working environment can be created using the files that are generated.
This task will create an Eclipse Plugin Environment, preconfigured to use the newest available sdk as the target platform. Depending on your machine and operating system, the initialize task will take a considerable amount of time to finish. It is not unsual for directory and file exceptions to occur, but generally, these can be ignored. Once the task has completed, continue with the next task.
The ide task will run the previously initialized eclipse environment. After a configuration phase, a jazz-community branded eclipse should start.
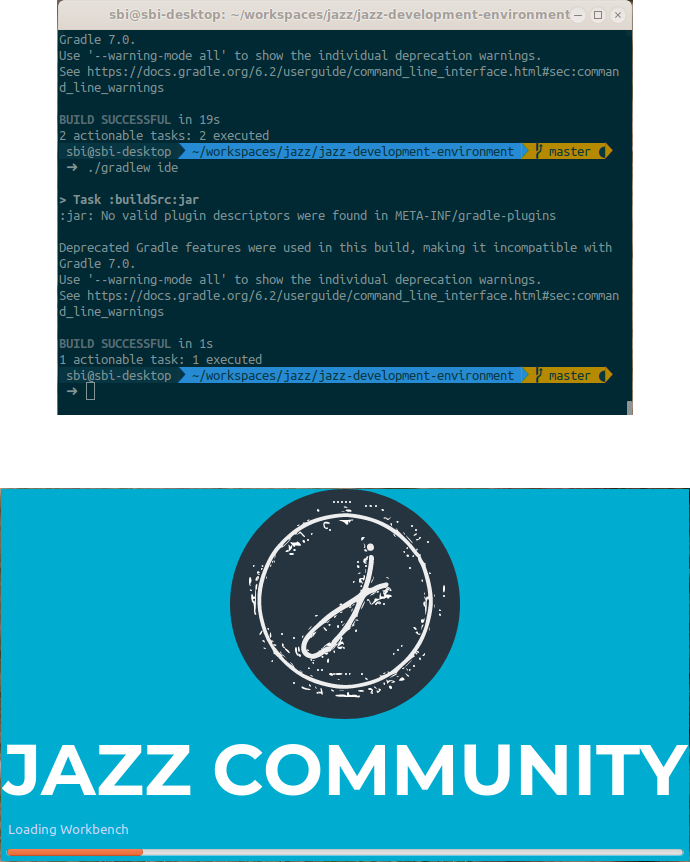
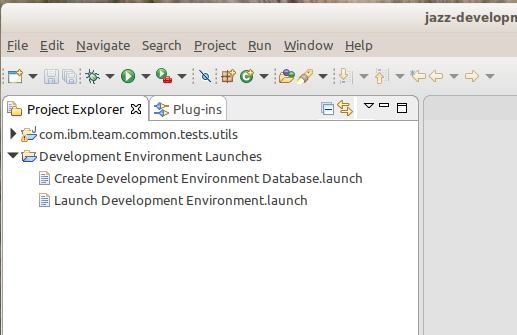
This is where most issues will occur with the rather fickle process of creating a new sdk configuration. If everything went well, you should see a Project Explorer with 2 Projects. Sadly, the configuration of the target platform can fail, resulting in no projects being shown. Should this be the case, you will have to manually set up the target platform. If you can see the projects as in the following screenshot, continue with Running the necessary Launches, otherwise try Setting up the target platform first.
- Open
Window -> Preferences - Filter for
target platform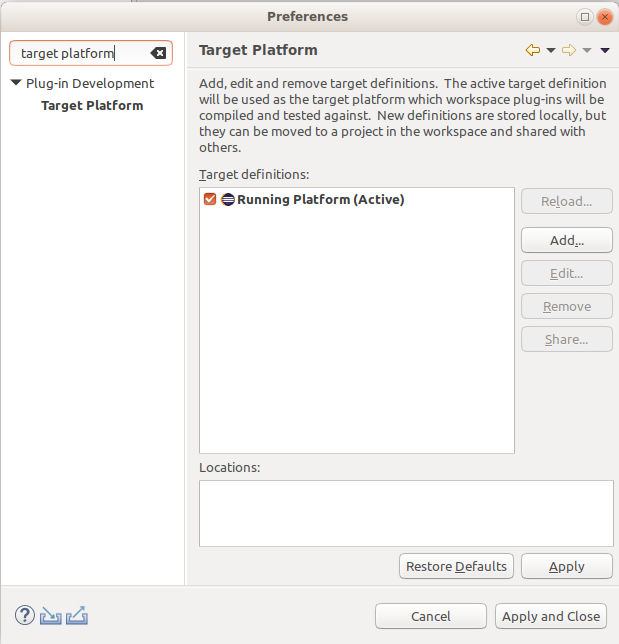
- Select "Nothing: Start with an empty target definition"
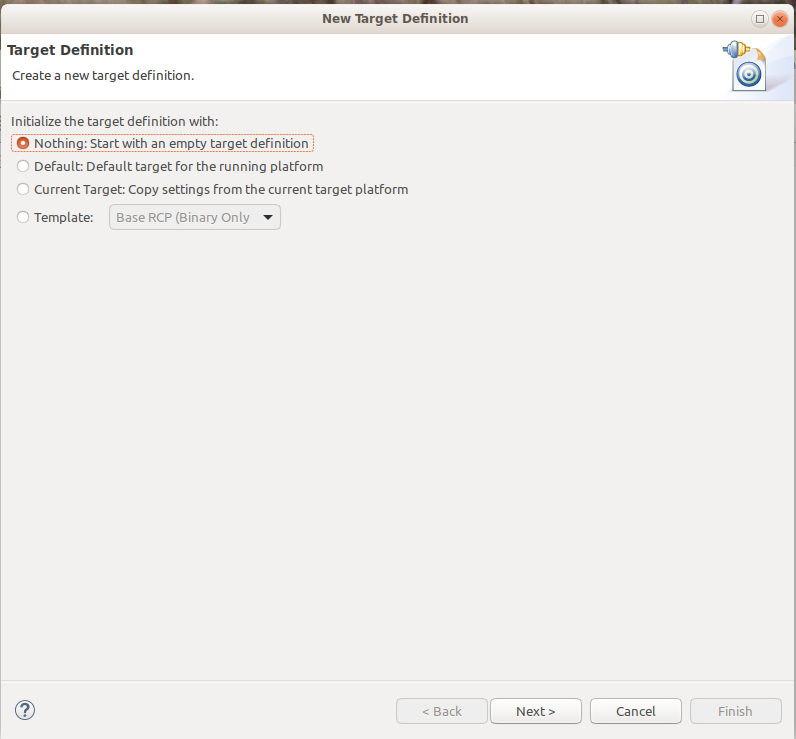
- Choose a name, preferably
rtc-sdk, and clickAdd...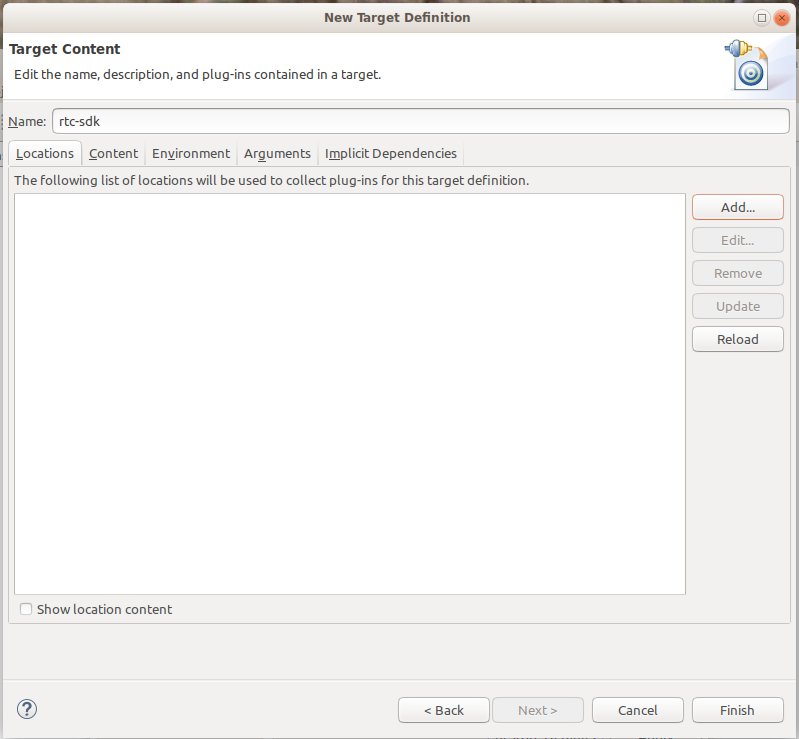
- Select
Directoryand click next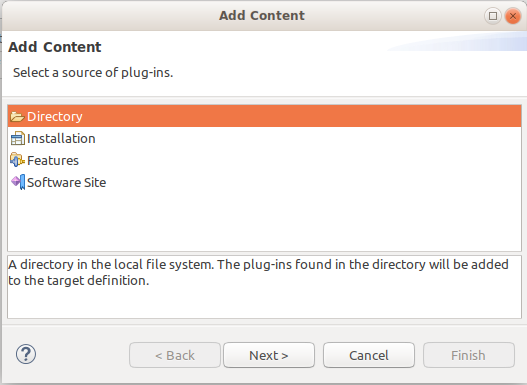
- Browse to the correct directory inside the
dev/initializefolder and click next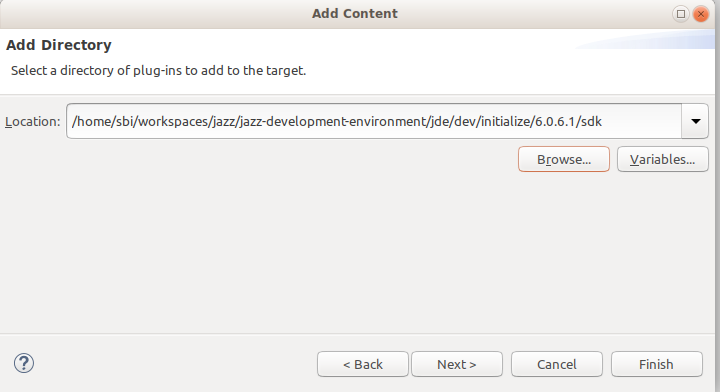
- Activate the new target platform and confirm by clicking
Apply and Close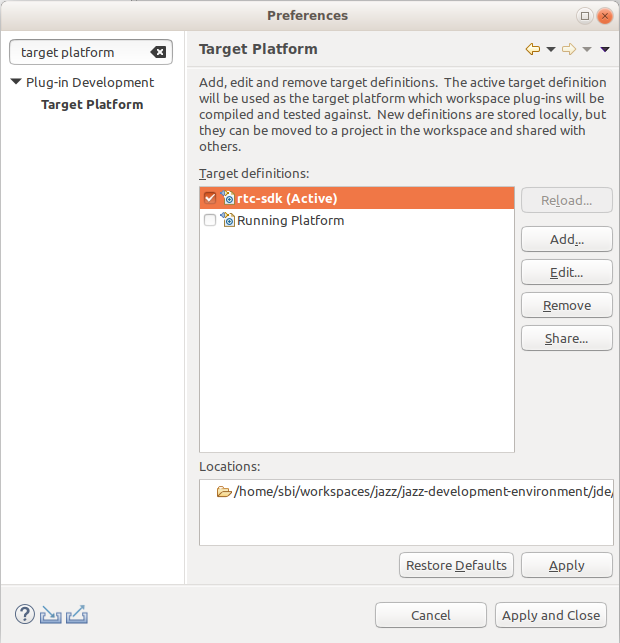
- Finally, add all the plugins of the target platform to the java search by clicking the appropriate button in the plug-in view.
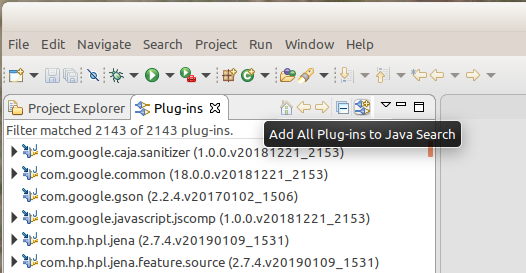
If none of this helped, it's a case of eclipse not having a good day. Run ./gradlew ideClean and then run ./gradlew ide again. Sometimes, a few tries of this are required to get eclipse in the mood of correctly configuring everything. I assume this has to do with the osgi-loader and the non-deterministic nature of the order in which plugins are loaded.