Appendix T Generac Power Zone 200 Information
Genmon support for the Generac Power Zone 200 controller.
Most features listed in the genmon wiki are supported with the Power Zone 200 controller.
The controller type must be set to "generac_evo_nexus". This is the default settings so for a new install you should not have to change anything for this settings.
The Power Zone 200 communicates at a different rate over the serial connection than most other Generac controller types. In order for Genmon to communicate with the Power Zone 200 you must set the serial data rate to 115200. The rest of the communication defaults work. The serail data rate can be set to 115200 in the "Serial Data Rate" setting in the Advanced Settings.
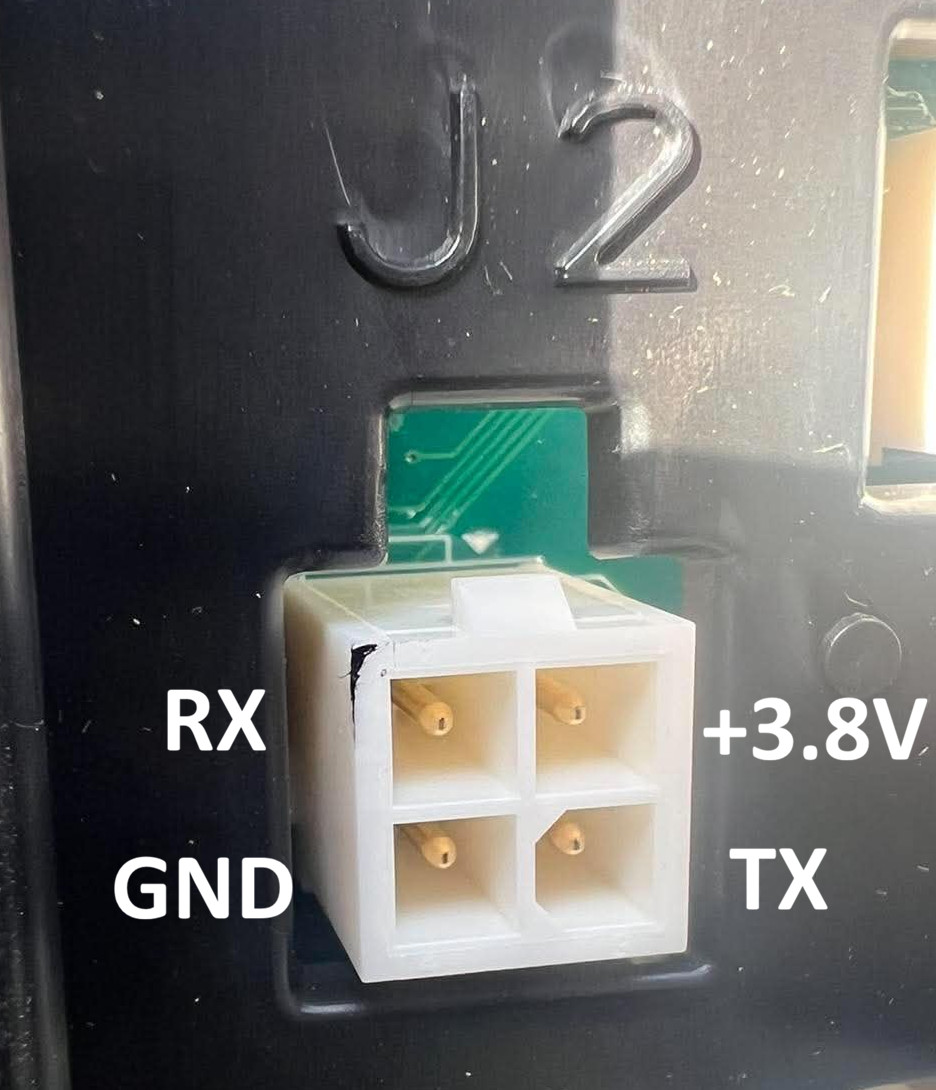
The Power Zone 200 controller uses a propritary connector that does not appear to be available for general use. The accessory port has RS-232 pins, ground, and a very low power pin. The power pin is 3.8V, a common voltage for cellular connections, and likely very low potential power output. I strongly recommend against trying to use this as a power source.
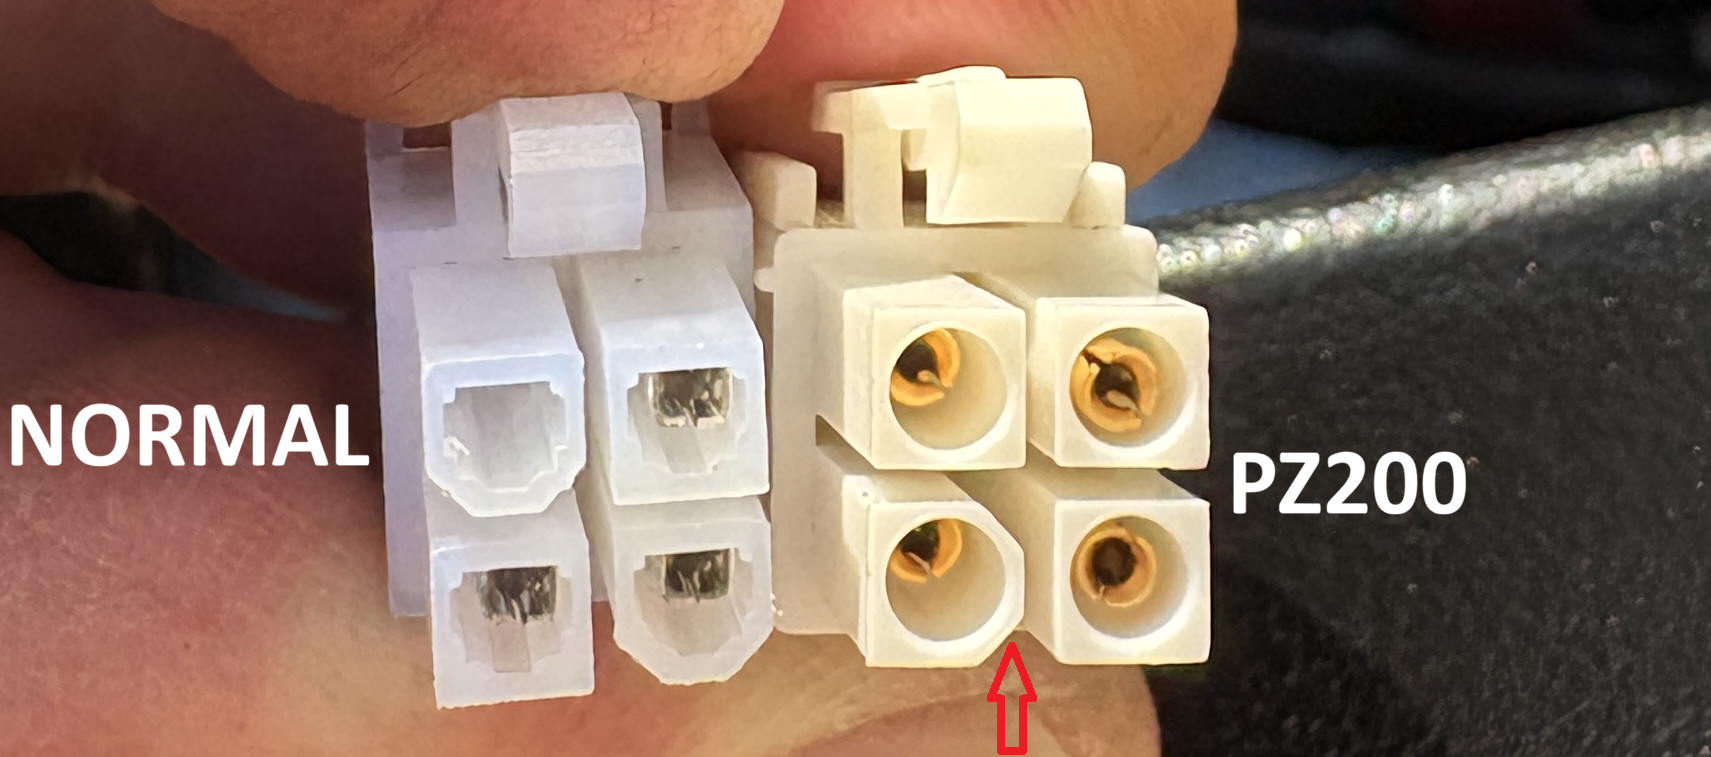
Compared to other Generac residential generators, the Power Zone 200 connector has a different pinout and requires modifying one pin to allow the use of a over the counter connector, but otherwise is very similar to making the 2x4 cable used on the Generac Evolotion and Nexus controllers. To make the cable, find a 2x2 Molex Mini-Fit Jr cable such as https://www.amazon.com/dp/B0FWR5X3WG. Then on the bottom left pin, remove some of the body from the top right and bottom right corners. Generac is using a custom Molex that has the chamfered pin in the "wrong" spot and in the wrong orientation. The image of the 2 plugs below shows the difference between the standard 2x2 and the Generac 2x2. The normally chamfered pins on a standard 2x2 will fit just fine into the square pins, leaving just the one pin that requires modification. You could do this with a very sharp blade or with a fine sandpaper. Take your time doing this, but if you cut too much away and cut all the way through the plastic you are probably still fine as long as the pin is still secure and does not slide out the back. The top right corner is much harder since it is nested in the middle of the 4 pins and sanding with some creative routing of the sandpaper between pins, and maybe a small jig to hold the sand paper, and you can probably get it.