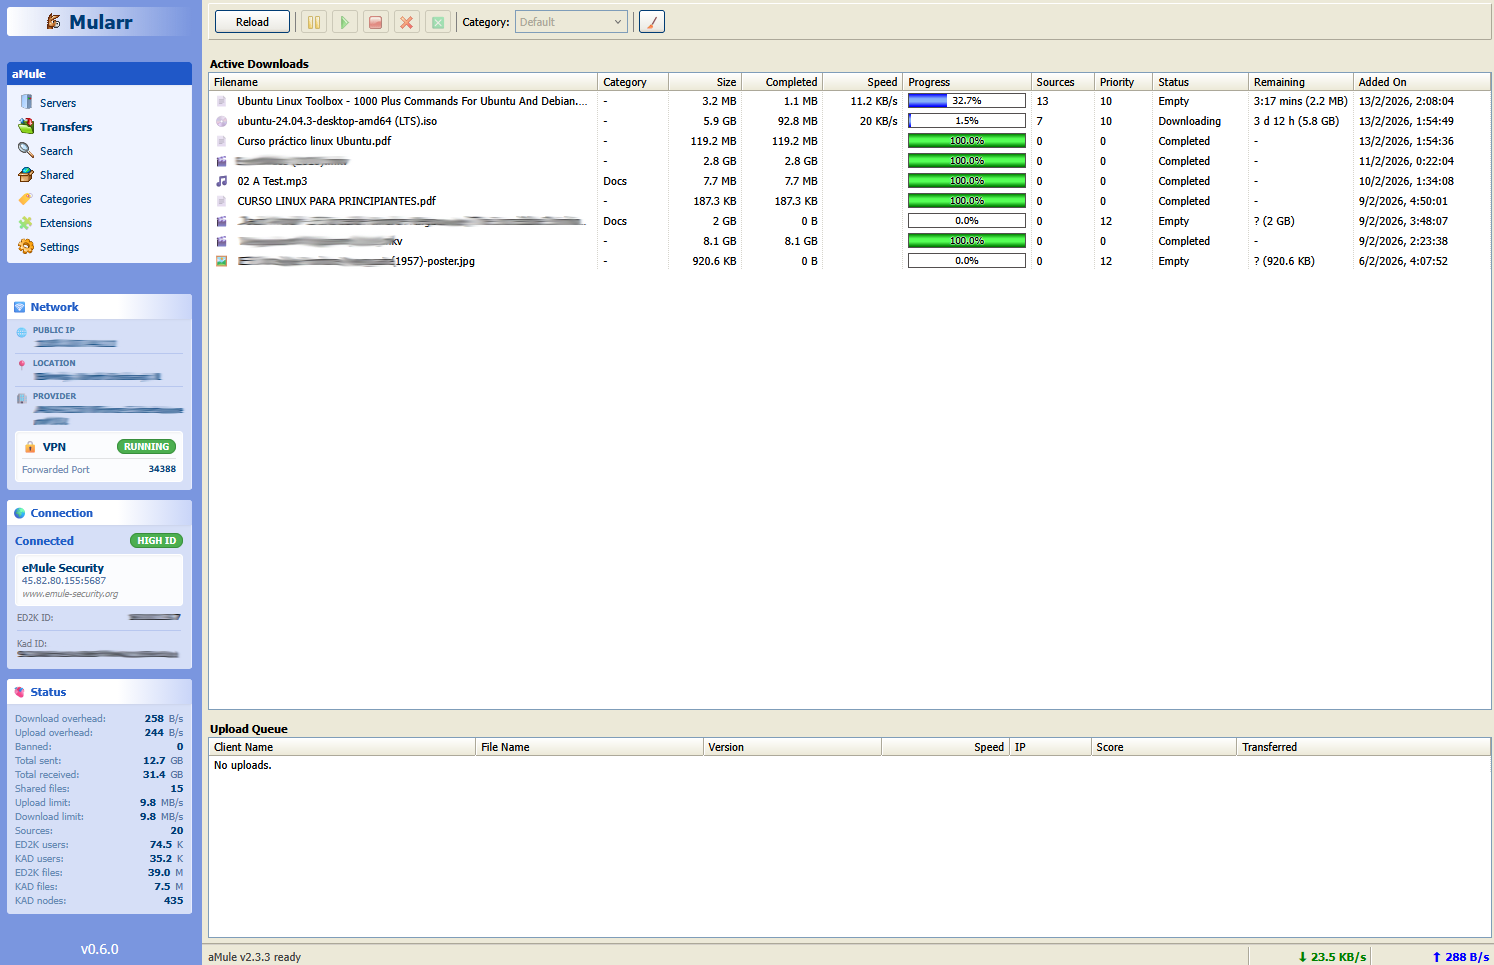
Mularr is a powerful integration for aMule that provides a functional web interface with a nostalgia-infused retro touch. It bridges the gap between classic P2P and modern automation tools by offering qBittorrent-compatible APIs and Torznab indexers, making it seamless to use aMule with modern apps like Sonarr and Radarr.
It also includes an extension to use the Telegram Network as a download provider. This requires a real account (not a bot) to access groups/channels with media files.
- *Arr Integration: Native support for Sonarr/Radarr via qBittorrent & Torznab API compatibility.
- Docker Ready: Easy deployment using Docker and Docker Compose.
- Telegram Integration:
- Notifications: Get notified of your downloads via a Telegram bot.
- Provider: Use the Telegram network for searching and downloading files.
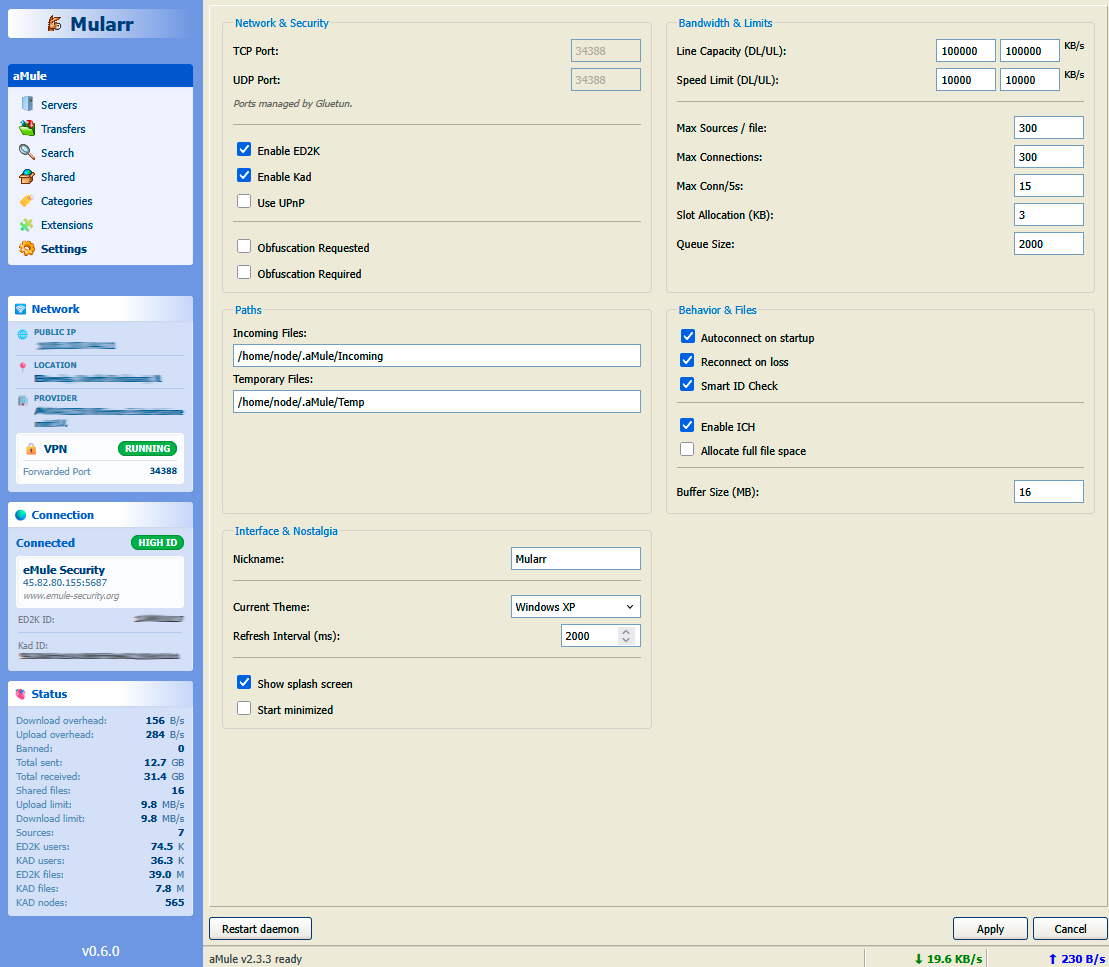
- 🛡️ VPN Ready: Built-in support for Gluetun health checks and automatic port updates.
- Retro-Style Web Interface: A fully responsive UI with a nostalgic Windows XP feel. Includes multiple themes like Classic and Windows 11 (Experimental). Built with Chispa.
The easiest way to get Mularr running is using Docker Compose:
services:
    mularr:
        image: ghcr.io/joecarl/mularr
        container_name: mularr
        restart: unless-stopped
        ports:
            - '8940:8940'
        volumes:
            - ./data:/app/data

    # Check docker-compose.example.yml for a full configuration guide
Run it with:
docker-compose up -dAccess the web UI at http://localhost:8940.
You can configure Mularr as both an indexer and a download client.
To configure as indexer use the following settings:
- Type: Torznab
- API Path:
/api/as-torznab-indexer
To configure as download client use the following settings:
- Type: qBittorrent
- URL Base:
/api/as-qbittorrent
Mularr is built primarily with TypeScript.
| Component | Technology |
|---|---|
| Frontend | Chispa + Vite |
| Backend | Node.js + Express |
| Database | SQLite (better-sqlite3) |
If you want to contribute or run Mularr you need docker & VS Code devcontainers. Open the project in the devcontainer and it automatically installs the needed dependencies.
Then you can start the application in dev mode:
cd backend
npm run devcd frontend
npm run devWarning
Do not run npm install in the root folder. Install dependencies separately in backend/ and frontend/.
The included Dockerfile handles everything for you. It builds the frontend and bundles it with the backend for a single-image deployment.
docker build -t mularr .To contribute, follow the standard process:
- Fork the Project
- Create your feature branch & Commit your changes
- Open a Pull Request
Any contributions you make are greatly appreciated.
MIT
Made with ❤️ for the P2P Community