Created by Cornelis Weemstra
- Date: 29 March 2019
- Time: 09:00hr
This will be an active learning assignment, which will make use of the Python programming language in combination with Jupyter Notebooks, which you should install (or already have) on the laptop that you bring to the course.
I have prepared some instructions for setting up your environment so that you come prepared and so that we don’t spend precious time on these preparations during the assignment. Please follow the instructions. These instructions should work on Linux, macOS, and Windows.
Step 1:
If you do not already have Anaconda or Miniconda installed on your machine (Hint: If you are unsure, go ahead and install a fresh copy), follow this link to download Miniconda and install the right package for your OS (Windows, Linux, or MacOS):
https://conda.io/en/latest/miniconda.html
Irrespective of your OS, I recommend the 64-bit Python 3.7 version. Installation should be straightforward (choose default install location), but inludes agreeing to the license terms (mark/type 'yes').
Step 2:
Regardless whether you just installed Miniconda or are using an already existing conda environment, create a new environment by typing the following command in your terminal ('Anaconda Prompt' on Windows):
conda create -n teach -c conda-forge -y python=3.7And activate this new environment with:
conda activate teachStep 3:
Now install the packages needed to be able to run the notebook. In case your running MacOS or linux, use the following command:
conda config --add channels conda-forge && conda install -y ipython \
    tornado=5.1.1 jupyter notebook ipywidgets numpy scipy numba pandas \
    gdal netcdf4 matplotlib basemap basemap-data-hires pillow obspy
In case your running Windows, use the following command in your Anaconda Prompt (without the back slashes):
conda config --add channels conda-forge && conda install -y ipython tornado=5.1.1 jupyter notebook ipywidgets numpy scipy numba pandas gdal netcdf4 matplotlib basemap basemap-data-hires pillow obspyInstallation may take a couple of minutes and will result in many other packages being installed as conda takes care of the dependencies for you.
Step 4:
Test your environment:
You should now be good-to-go. To verify this, please type jupyter-notebook in the Terminal (or 'Anaconda Prompt'). A browser window should open and you should be able to start a new Python 3 Notebook:
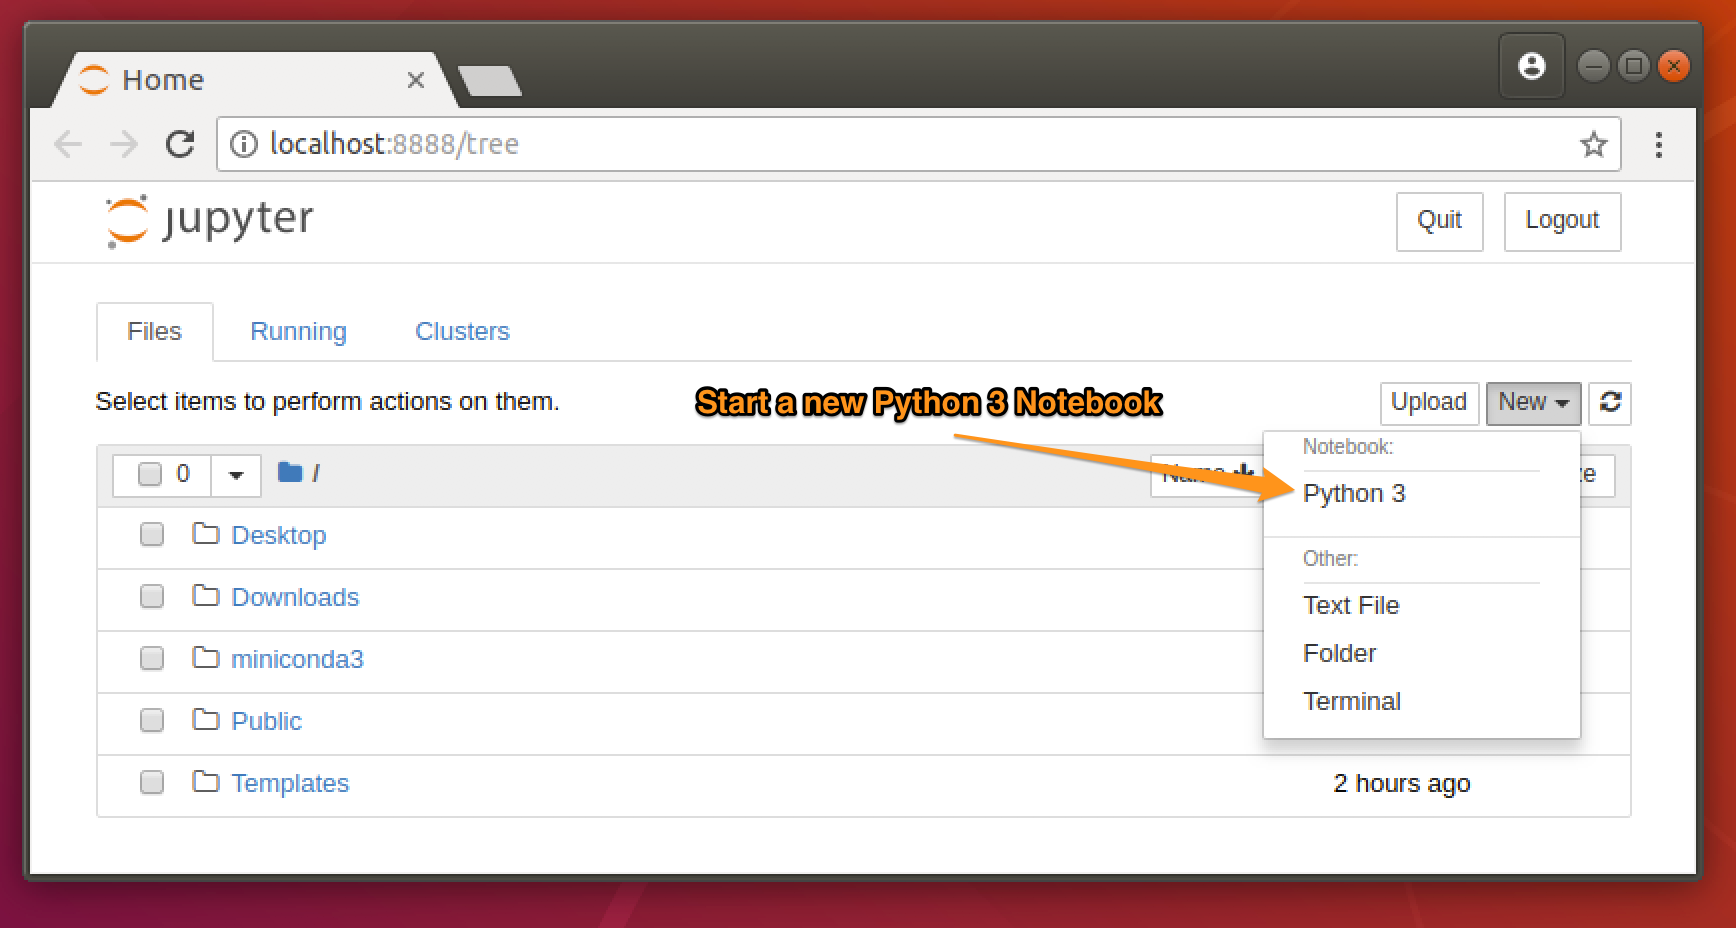
If you were able to start a new Python 3 Notebook, you are indeed good-to-go for this Thursday. In case you got stuck somewhere in the process above, I will either let you look over the shoulder of a colleague tomorrow or we will do some quick troubleshooting. We will start our session this Thursday with "the real deal", below.
At the top of this page (i.e., in the project), you can find a zip file dubbed "JUPYTER_NOTEBOOK.zip". Please download the zip file, unzip it, and store the content in a separate directory on you machine. In your terminal ('Anaconda Prompt' on Windows), go to this directory and type
jupyter notebook Teach.ipynbSee you this Thursday,
Kees