Project V is a set of tools to help you build your own privacy network over internet. The core of Project V, named V2Ray, is responsible for network protocols and communications. It can work alone, as well as combine with other tools.
- Multiple inbound/outbound proxies: one V2Ray instance supports in parallel multiple inbound and outbound protocols. Each protocol works independently.
- Customizable routing: incoming traffic can be sent to different outbounds based on routing configuration. It is easy to route traffic by target region or domain.
- Multiple protocols: V2Ray supports multiple protocols, including Socks, HTTP, Shadowsocks, VMess etc. Each protocol may have its own transport, such as TCP, mKCP, WebSocket etc.
- Obfuscation: V2Ray has built in obfuscation to hide traffic in TLS, and can run in parallel with web servers.
- Reverse proxy: General support of reverse proxy. Can be used to build tunnels to localhost.
- Multiple platforms: V2Ray runs natively on Windows, Mac OS, Linux, etc. There is also third party support on mobile.
#how it works?
(Client) <-> [ Bridge Server ] <-> [ Upstream Server ] <-> (Internet)
Bridge Server ~ a server in iran Upstream Server ~ a server in foreign country which has access to free internet
This repository contains sample Docker Compose files to run V2Ray upstream and bridge servers.
- Upstream Server: A server that has free access to the Internet.
- Bridge Server: A server that is available to clients and has access to the upstream server.
- Client: A user-side application with access to the bridge server.
(Client) <-> [ Bridge Server ] <-> [ Upstream Server ] <-> (Internet)
- Install Docker and Docker-compose.
- Copy the
v2ray-upstream-serverdirectory into the upstream server. - Run
cat /proc/sys/kernel/random/uuidcommand to generate a UUID. - Replace
<UPSTREAM-UUID>in theconfig.jsonfile with the generated UUID. - Run
docker-compose up -d.
- Install Docker and Docker-compose.
- Copy the
v2ray-bridge-serverdirectory into the bridge server. - Replace the following variables in the
config.jsonfile with appropriate values.<BRIDGE-UUID>: A new UUID for bridge server (Runcat /proc/sys/kernel/random/uuid).
"inbounds": [ { "listen": "0.0.0.0", "port": 1310, "protocol": "vmess", "settings": { "clients": [ { "id": "", "alterId": 0, "security": "aes-128-gcm" } ] } } ],
    * `<UPSTREAM-IP>`: The upstream server IP address like `13.13.13.13`.
    * `<UPSTREAM-UUID>`: The generated UUID for the upstream server.
        ```javascript
"outbounds": [
    {
      "tag": "proxy",
      "protocol": "vmess",
      "settings": {
        "vnext": [
          {
            "address": "<UPSTREAM-IP>",
            "port": 1310,
            "users": [
              {
                "id": "<UPSTREAM-UUID>",
                "alterId": 0,
                "security": "none"
              }
            ]
          }
        ]
      },
    ```

1. Run `docker-compose up -d`.
1. You can run `./clients.py` to generate client configurations and links.


#at the end
1.run in both servers wget -N --no-check-certificate https://github.com/teddysun/across/raw/master/bbr.sh && chmod +x bbr.sh && bash bbr.sh


#### Clients

##### VMESS Protocol

The VMESS proxy protocol is the primary protocol that V2Ray servers provide.
We recommend these client applications:
* [V2RayX for macOS](https://github.com/Cenmrev/V2RayX/releases)
* [v2ray-core for Linux](https://github.com/v2ray/v2ray-core)
* [Qv2ray for Windows](https://qv2ray.net)
* [ShadowLink for iOS](https://apps.apple.com/us/app/shadowlink-shadowsocks-vpn/id1439686518)
* [v2rayNG for Android](https://github.com/2dust/v2rayNG)


### method 2 (using docker compose + x-ui):
#how it works?

(Client) <-> [ Bridge Server(x-ui) ] <-> [ Upstream Server(docker compose) ] <-> (Internet)

### Setup

#### Upstream Server

1. Install Docker and Docker-compose.
1. Copy the `v2ray-upstream-server` directory into the upstream server.
1. Run ```cat /proc/sys/kernel/random/uuid``` command to generate a UUID.
1. Replace `<UPSTREAM-UUID>` in the `config.json` file with the generated UUID.
1. Run `docker-compose up -d`.

#### Bridge Server
it supports vmess、vless、trojan、shadowsocks、dokodemo-door、socks、http

-intsalling x-ui:
1. bash <(curl -Ls https://raw.githubusercontent.com/vaxilu/x-ui/master/install.sh)
1. press n and enter in question(in chinese)
1. open ur webbrowser go to <bridge server>:54321
1. user & pass = admin
1. DO NOT forget to change user&pass
1. now config x-ui outbounds manuaaly (only <UPSTREAM-IP>,<UPSTREAM-PORT>,<UPSTREAM-UUID> in outbounds part)


```javascript

{
   "api":{
      "services":[
         "HandlerService",
         "LoggerService",
         "StatsService"
      ],
      "tag":"api"
   },
   "inbounds":[
      {
         "listen":"127.0.0.1",
         "port":62789,
         "protocol":"dokodemo-door",
         "settings":{
            "address":"127.0.0.1"
         },
         "tag":"api"
      }
   ],
   "outbounds":[
      {
         "protocol":"freedom",
         "settings":{

         }
      },
      {
         "protocol":"blackhole",
         "settings":{

         },
         "tag":"blocked"
      }
   ],
   "outbounds":[
      {
         "tag":"proxy",
         "protocol":"vmess",
         "settings":{
            "vnext":[
               {
                  "address":"<UPSTREAM-IP>",
                  "port":"<UPSTREAM-PORT>",
                  "users":[
                     {
                        "id":"<UPSTREAM-UUID>",
                        "alterId":0,
                        "security":"none"
                     }
                  ]
               }
            ]
         },
         "streamSettings":{
            "network":"ws"
         },
         "mux":{
            "enabled":true
         }
      },
      {
         "protocol":"freedom",
         "tag":"freedom"
      },
      {
         "protocol":"blackhole",
         "tag":"blackhole"
      }
   ],
   "dns":{
      "servers":[
         "8.8.8.8",
         "8.8.4.4",
         "localhost"
      ]
   },
   "policy":{
      "system":{
         "statsInboundDownlink":true,
         "statsInboundUplink":true
      }
   },
   "routing":{
      "rules":[
         {
            "inboundTag":[
               "api"
            ],
            "outboundTag":"api",
            "type":"field"
         },
         {
            "ip":[
               "geoip:private"
            ],
            "outboundTag":"blocked",
            "type":"field"
         },
         {
            "outboundTag":"blocked",
            "protocol":[
               "bittorrent"
            ],
            "type":"field"
         }
      ]
   },
   "stats":{

   }
}
past below json to x-ui
1.in the bridge server run# x-ui restart
#at the end 1.run in both servers wget -N --no-check-certificate https://github.com/teddysun/across/raw/master/bbr.sh && chmod +x bbr.sh && bash bbr.sh
Get your server up to date:
apt update && apt upgrade -y
Also install curl and socat:
apt install curl socat -y
Install Acme Script
Download and install the Acme script for getting a free SSL certificate:
curl https://get.acme.sh | sh
Get Free SSL Certificate
Set the default provider to Let’s Encrypt:
~/.acme.sh/acme.sh --set-default-ca --server letsencrypt
Register your account for a free SSL certificate. In the next command, replace xxxx@xxxx.com by your actual email address:
~/.acme.sh/acme.sh --register-account -m xxxx@xxxx.com
Obtain an SSL certificate. In the next command, replace host.mydomain.com by your actual host name:
~/.acme.sh/acme.sh --issue -d host.mydomain.com --standalone
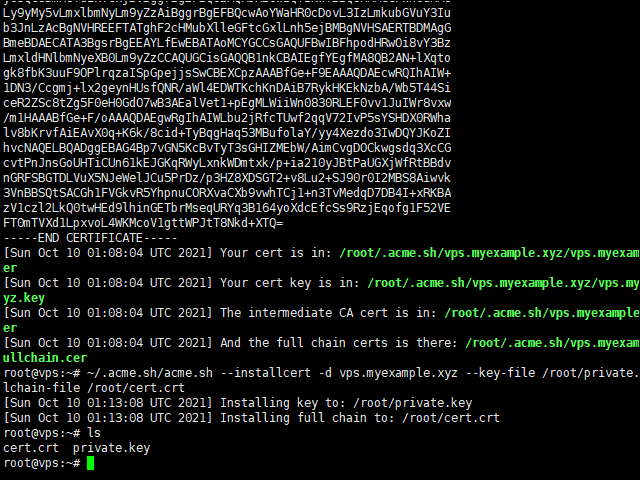
After a minute or so, the script terminates. On success, you will receive feedback as to the location of the certificate and key:
You cannot use the certificate and key in their current locations, as these may be temporary. Therefore install the certificate and key to a permanent location. In the next command, replace host.mydomain.com by your actual host name:
~/.acme.sh/acme.sh --installcert -d host.mydomain.com --key-file /root/private.key --fullchain-file /root/cert.crt
Install certificate and key issued by Acme script
Run the X-UI Install Script
Download and run the one-click install script provided by the developer:
bash <(curl -Ls https://raw.githubusercontent.com/vaxilu/x-ui/master/install.sh)
enter y enter a user name enter pass reenter pass
First Time Login
You can get to the X-UI panel on your PC by opening a browser and typing your server IP address and port 54321. For example:
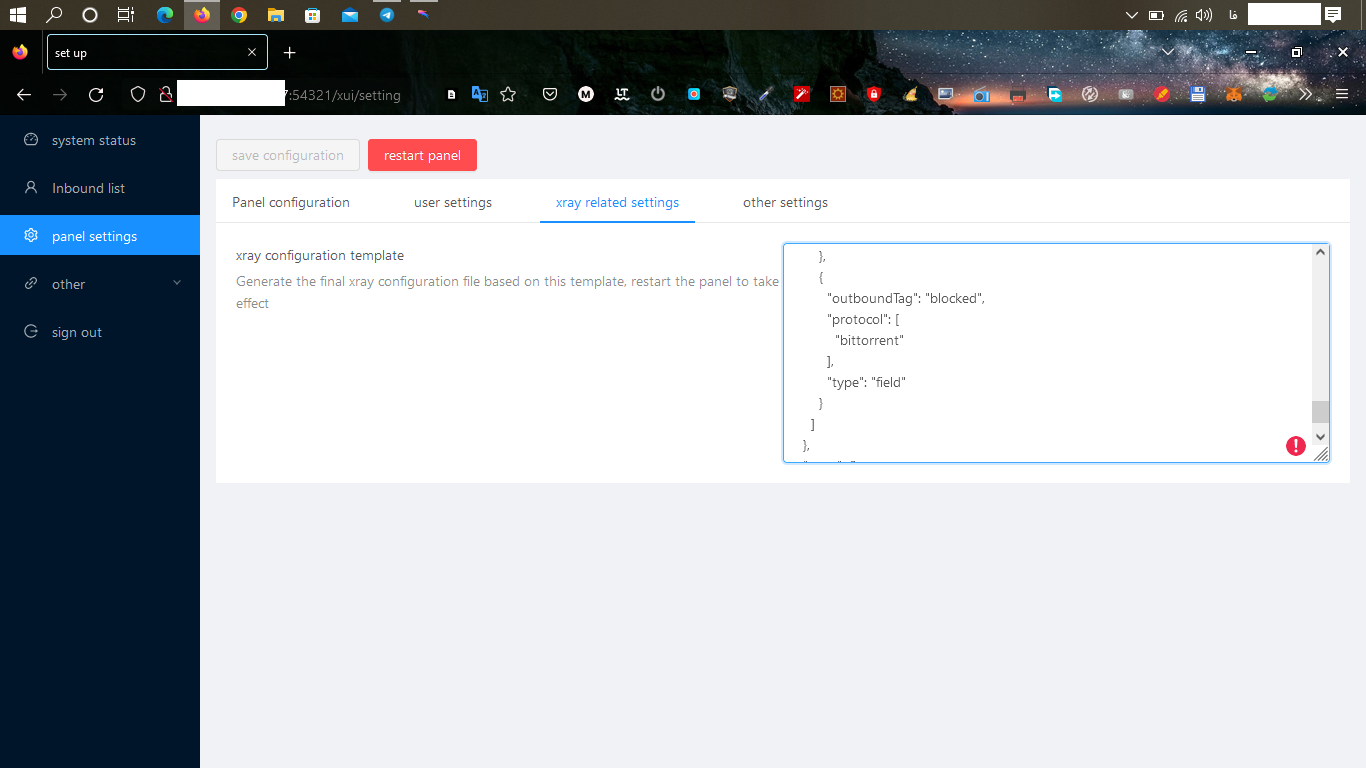
Enable HTTPS on Panel
You will notice that, at first, you used plain text HTTP to reach the panel. This is not secure.
To enable HTTPS, choose 面板设置 (Panel settings).
You will need to specify your certificate and key.
Fill in /root/cert.crt
Fill in /root/private.key
Save these options.
Now in your SSH session issue the command:
x-ui restart
Now you can reach the panel using HTTPS. For example:
https://host.mydomain.com:54321
Add VLESS+XTLS Xray User
We are going to add an inbound user account using VLESS and Xray. VLESS is an an updated version of the older Vmess protocol. After several developers found flaws in Vmess protocol and showed that the Vmess protocol can be detected by deep packet inspection or DPI, VLESS was developed. (Note that it is plain Vmess that can be detected; Vmess+WS+TLS is still secure and supports the use of a CDN.) Xray core was developed as an alternative to the older V2Ray core. According to the Xray developers, Xray is more stable, better for UDP gaming, and 30% faster than V2Ray. XTLS speeds up TLS by reducing double-encryption.
On the side menu, select 入站列表 (Inbound list).
Click the plus sign to add a new inbound user.
The 添加入站 (Add inbound) box appears.
Enter fields as follows.
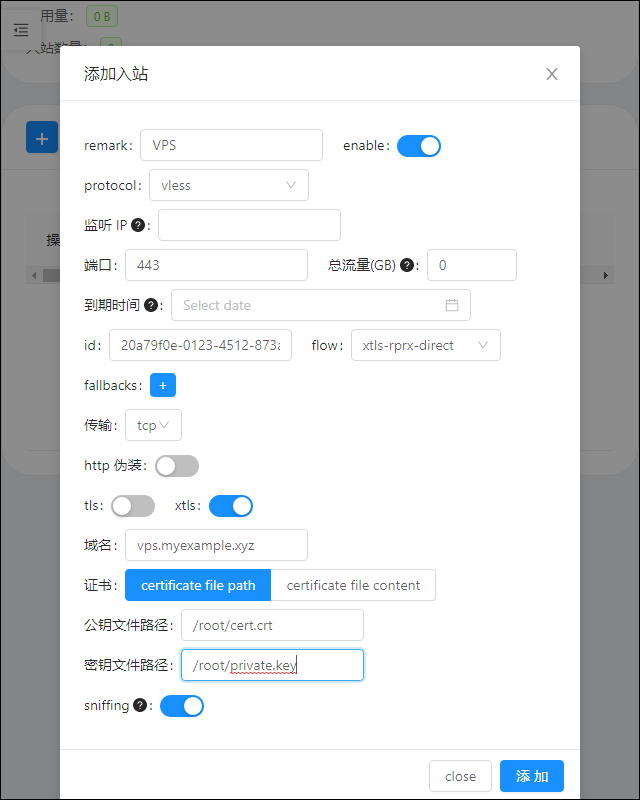
Save the new user.
Click the 操作 (operating) button at the start of its row to display the QR code for the new user.
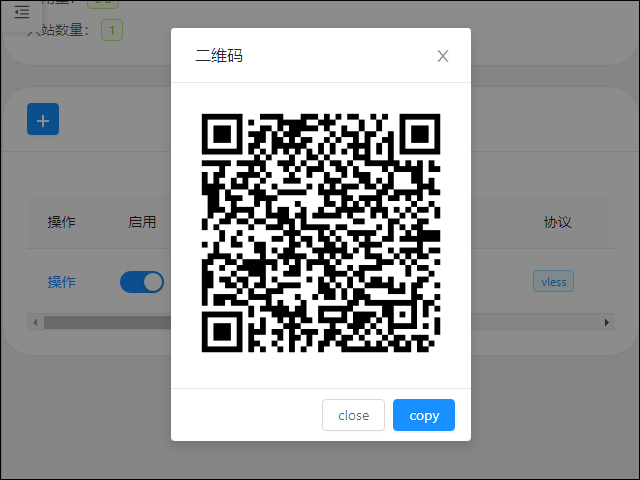
Client
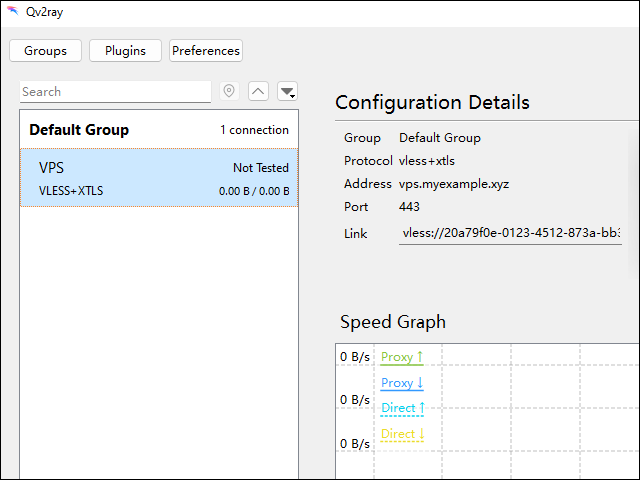
Clients are available for Android, iOS, Windows, macOS, and Linux. Examples are v2rayNG, Shadowrocket, and Qv2ray.
Add the profile in the QR code to your client.
now do the same at the bridge server but the x-ui config must be :
{
  "api": {
    "services": [
      "HandlerService",
      "LoggerService",
      "StatsService"
    ],
    "tag": "api"
  },
  "inbounds": [
    {
      "listen": "127.0.0.1",
      "port": 62789,
      "protocol": "dokodemo-door",
      "settings": {
        "address": "127.0.0.1"
      },
      "tag": "api"
    }
  ],


  "outbounds": [
    {
        "protocol": "vless",
        "settings": {
            "vnext": [
                {
                    "address": "<serverdomain>",
                    "port": serverport,
                    "users": [
                        {
                            "encryption": "none",
                            "flow": "xtls-rprx-direct",
                            "id": "server uuid"
                        }
                    ]
                }
            ]
        },
        "streamSettings": {
            "security": "xtls",
            "tlsSettings": {
                "disableSystemRoot": false
            },
            "xtlsSettings": {
                "disableSystemRoot": false
            }
        }
    }
],


  "policy": {
    "system": {
      "statsInboundDownlink": true,
      "statsInboundUplink": true
    }
  },
  "routing": {
    "rules": [
      {
        "inboundTag": [
          "api"
        ],
        "outboundTag": "api",
        "type": "field"
      },
      {
        "ip": [
          "geoip:private"
        ],
        "outboundTag": "blocked",
        "type": "field"
      },
      {
        "outboundTag": "blocked",
        "protocol": [
          "bittorrent"
        ],
        "type": "field"
      }
    ]
  },
  "stats": {}
}
restart xui -> x-ui restart
Add VLESS+XTLS Xray User
We are going to add an inbound user account using VLESS and Xray. VLESS is an an updated version of the older Vmess protocol. After several developers found flaws in Vmess protocol and showed that the Vmess protocol can be detected by deep packet inspection or DPI, VLESS was developed. (Note that it is plain Vmess that can be detected; Vmess+WS+TLS is still secure and supports the use of a CDN.) Xray core was developed as an alternative to the older V2Ray core. According to the Xray developers, Xray is more stable, better for UDP gaming, and 30% faster than V2Ray. XTLS speeds up TLS by reducing double-encryption.
On the side menu, select 入站列表 (Inbound list).
Click the plus sign to add a new inbound user.
The 添加入站 (Add inbound) box appears.
Enter fields as follows.
Save the new user.
Click the 操作 (operating) button at the start of its row to display the QR code for the new user.
Client
Clients are available for Android, iOS, Windows, macOS, and Linux. Examples are v2rayNG, Shadowrocket, and Qv2ray.
Add the profile in the QR code to your client.
🎉🎉🎉YOU ARE FREE🎉🎉🎉🎉