This project was bootstrapped with Create React Native App.
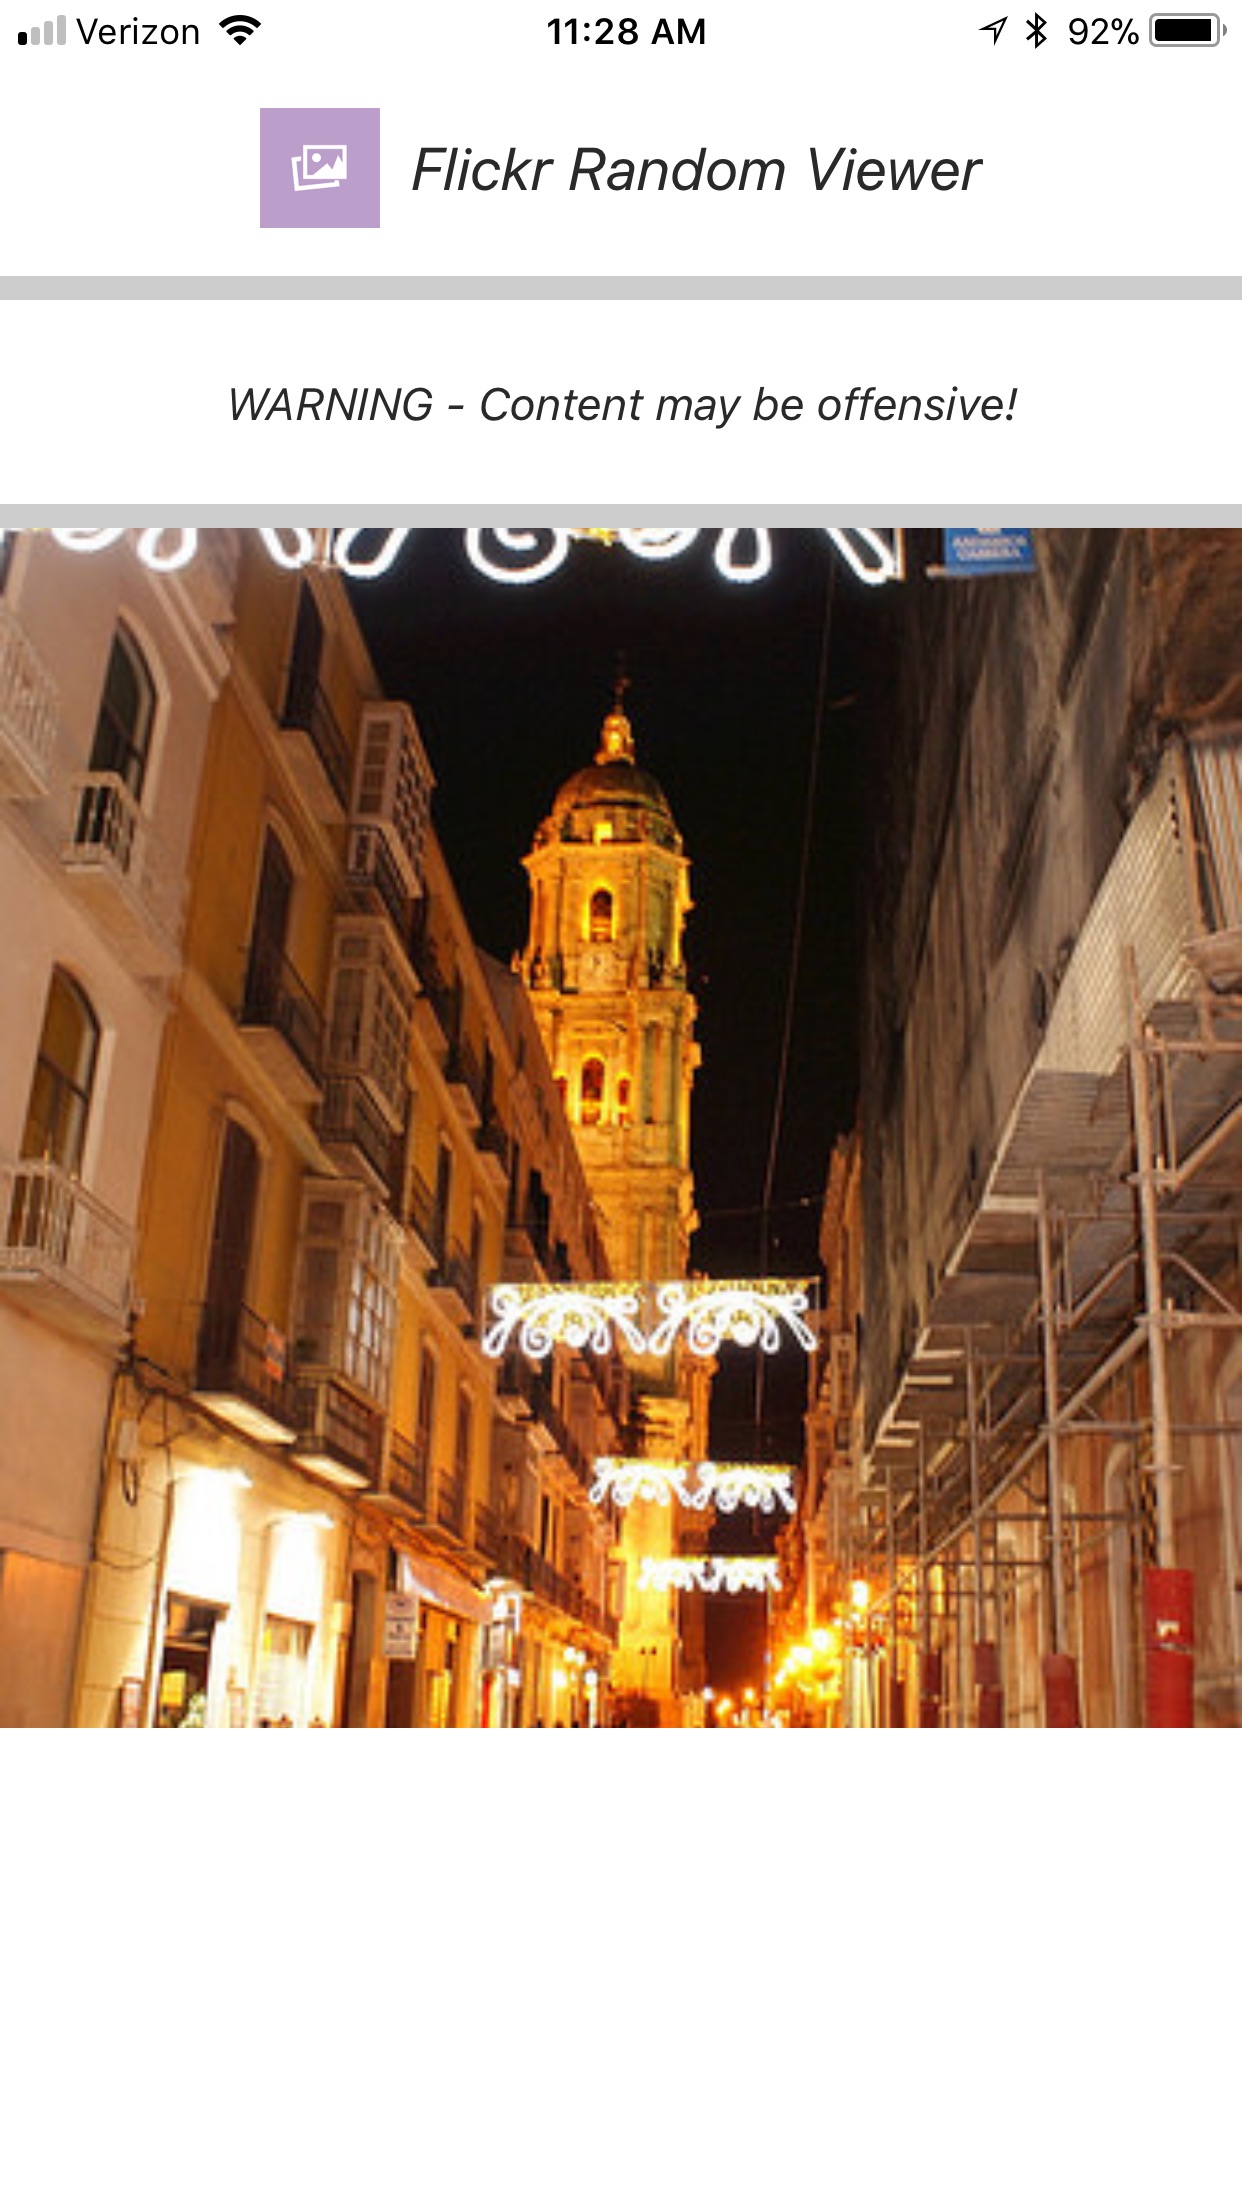
This component and included sample application were created using React Native and Expo.
The flickrviewer.js component file located in the ./src/component/ directory is the where the code for the component is located.
The app.js in the FlickrViewer or project root directory is the sample application that implements the flickrviewer component.
The sample application requires all the directories and files under the ./src directory
The flickrviewer requires 2 attributes.
- DisplayInterval : determines how frequently the image is refreshed.

- ApiKey : your access key to the Flickr api – you can request a key here:
https://www.flickr.com/services/apps/create/apply/
In the sample application app.js you first need to import the flickrviewer component as shown below:
import FlickrViewer from './src/components/flickrviewer'
and when you call the component pass the attributes via props as shown below:
<FlickrViewer displayInterval={this.state.displayInterval} apiKey={apiKey} />
This will be clear when you look at the code of the app.js file.
In the sample application both of these attributes are managed via the config.json file that is located in the FlickrViewer or project root directory.
Below is the config.json file for my implementation.
{
apiKey :"b8456b957137d462e7c8088dad495c9b", //Enter the Flickr apiKey for accessing your registered Flickr App
timeInterval : "3000" //Enter the displayInterval in milliseconds
}
Assuming that you have Node installed, you can use npm to install the create-react-native-app command line utility:
npm install -g create-react-native-app
Then run the following commands to create a new React Native project called "FlickrViewer":
create-react-native-app FlickrViewer

cd FlickrViewer

npm start
This will start a development server for you, and print a QR code in your terminal.
Download the files & directories from this github repository.
From your local project file:
- Replace the app.js file with the one provide in this repository.

- Copy everything in this repositories ./src directory and recreate the same directories in your project folder.

- Copy the config.json file and place it in your projects main directory.

- Update the local config.json file to include Your apiKey for accessing the Flickr API.

- Change the timeInterval value in config.json if you like, by default it is 3 seconds or 3000 milliseconds
Install the Expo client app on your iOS or Android phone and connect to the same wireless network as your computer. Using the Expo app, scan the QR code from your terminal to open your project.
I utilized jest for my unit testing.
Install Jest using npm:
npm install --save-dev jest
In the package.json file make sure the "sripts" entry is followed by "test" : "jest" similar to below:
{ "scripts": { "test": "jest" } }
In the ./src/components/tests/ directory you will find unit tests for each of the components. The results of the tests are published in the ./src/components/tests/snapshots/ directory
Since the flickrviewer component uses async promises, I created a manual mock that simulates the promise. The mock can be found in the ./src/components/mocks/flickrviewer.js file.
Inorder for the test scripts to function properly, the flickrviewer.test.js will have to include:
jest.mock('../flickrviewer');
If you examine the ./src/components/mocks/flickrviewer.js file you will see that I assigned the variable d to a json object that represents the object the Flickr Rest API returns.
Inorder to run the test you will need to copy the ./src/components/tests/ directory and the ./src/components/mocks directory to your local repository.
Do no copy the .../tests/snapshots directory as you will generate your own snapshots.
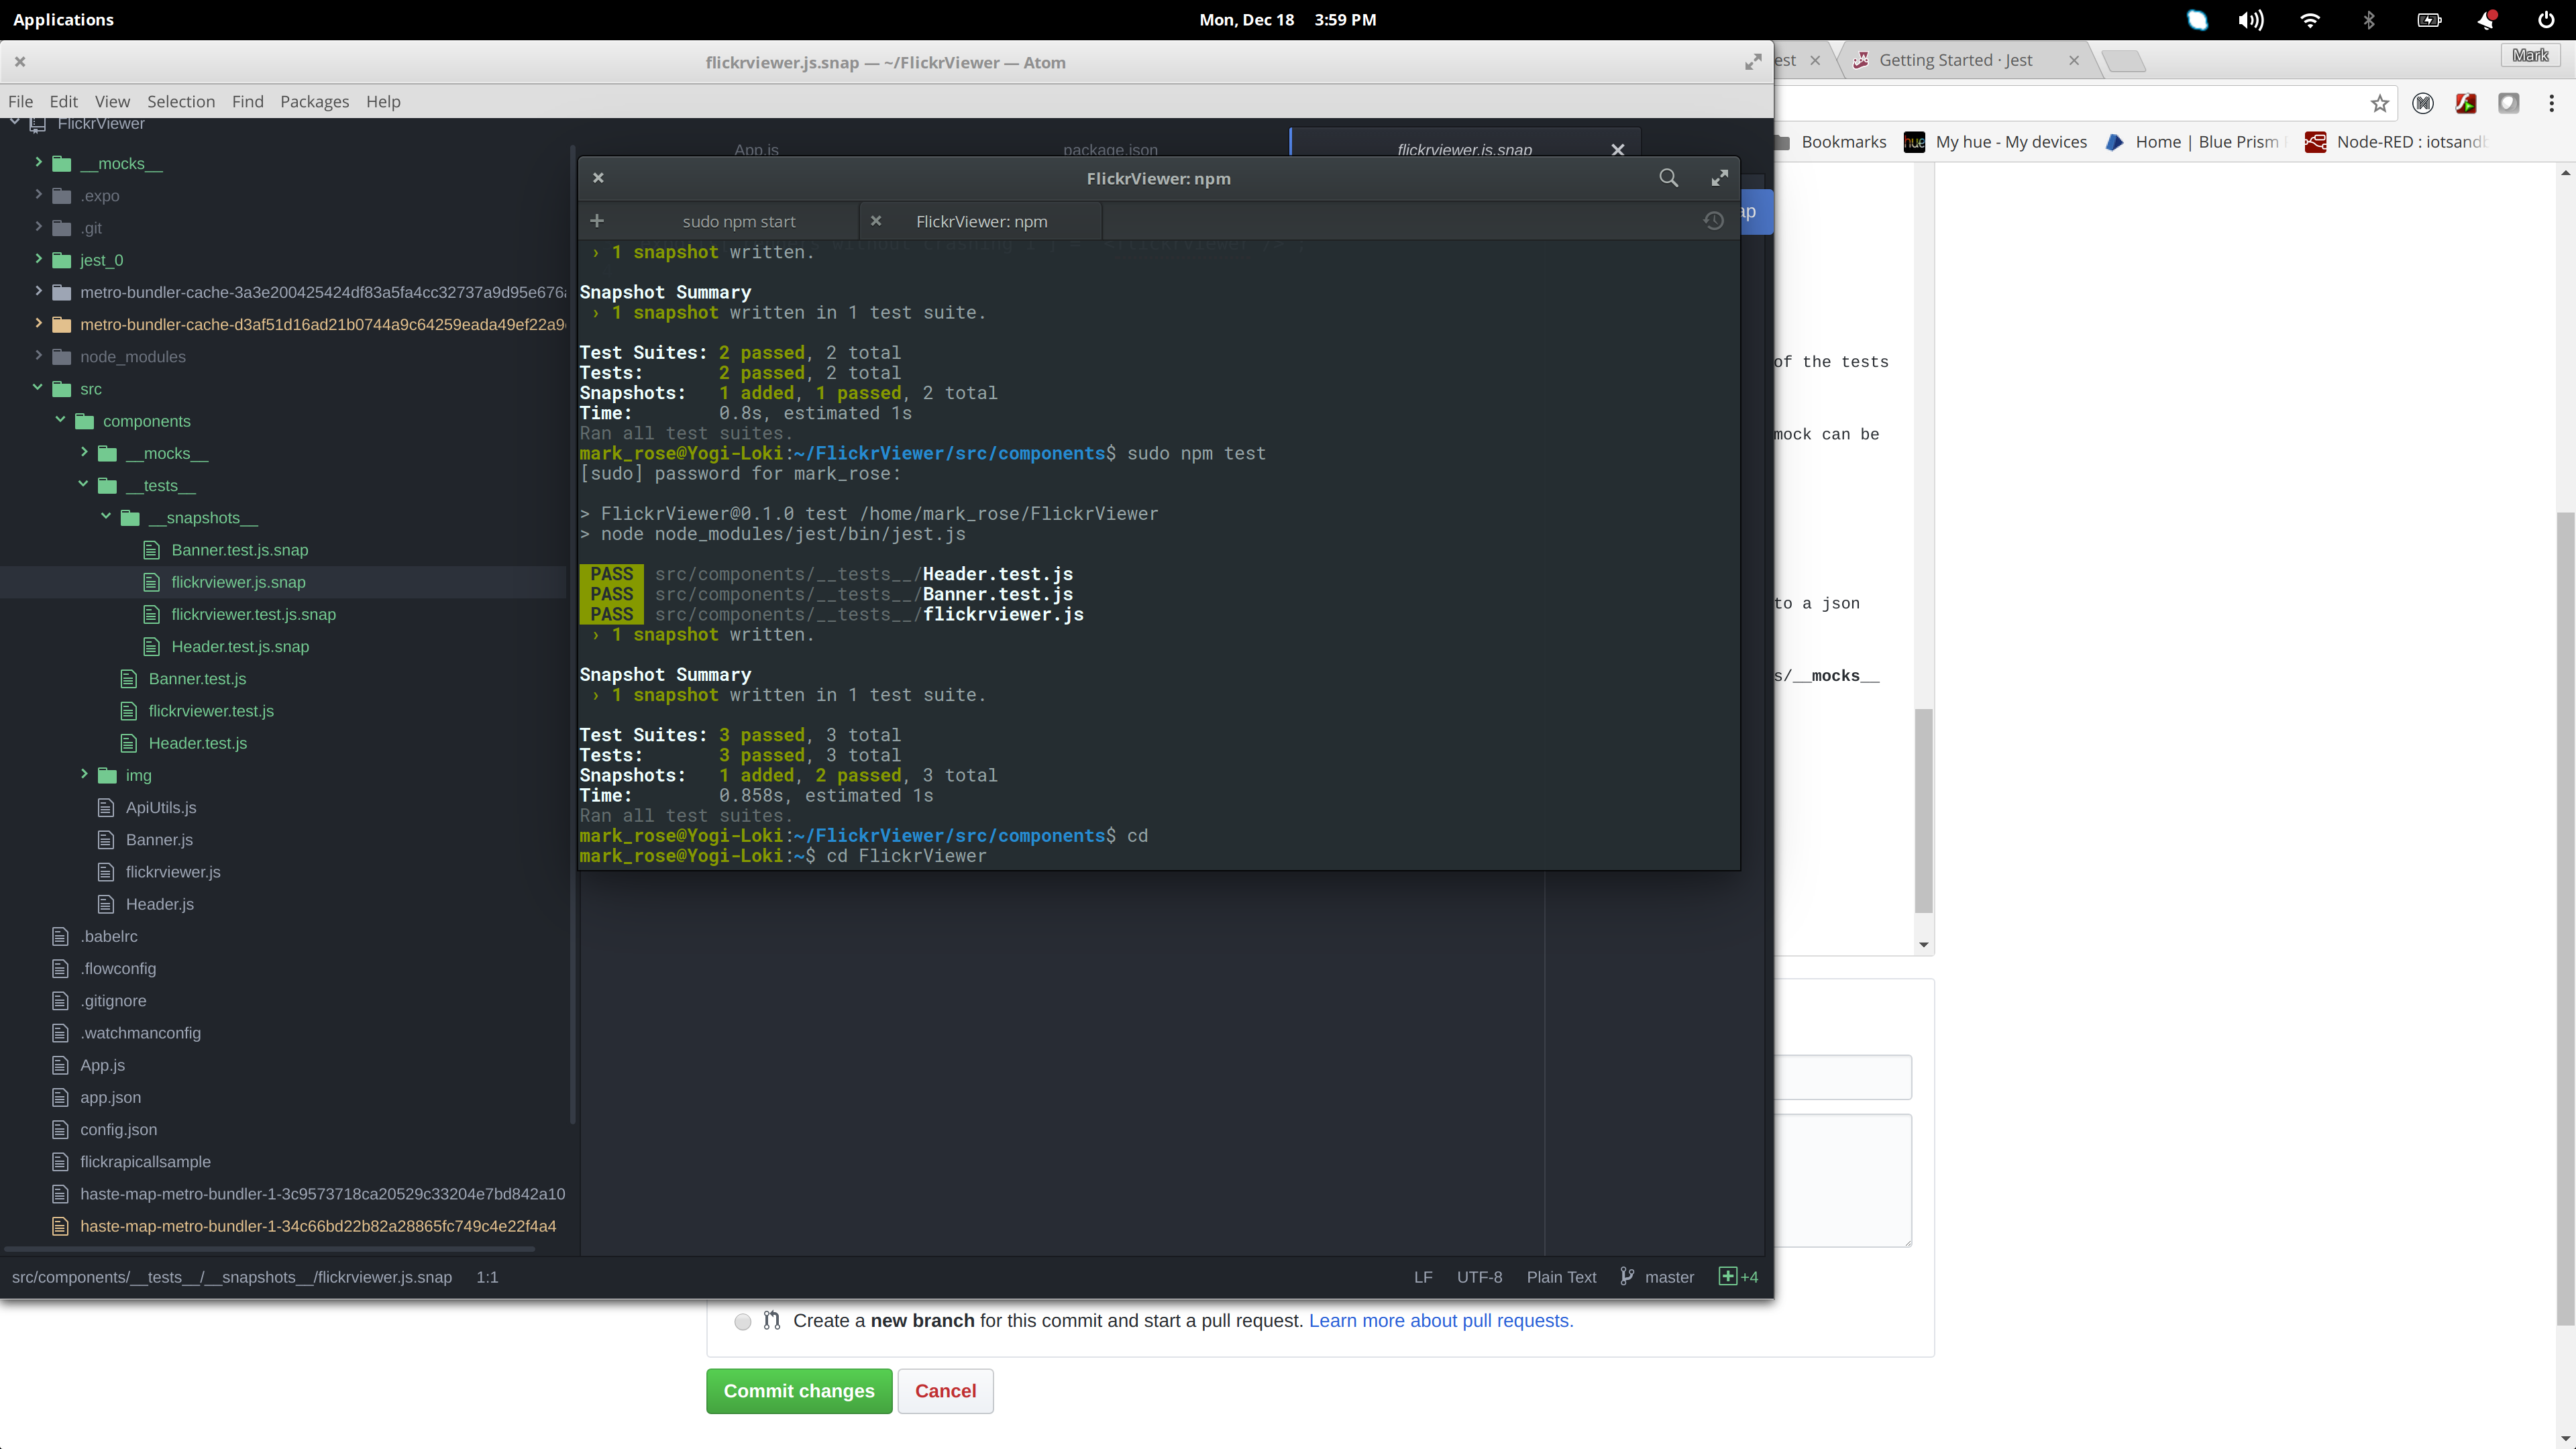
To execute the tests from npm:
sudo npm test
You should see results similar to the below: