Welcome to kineCAM!
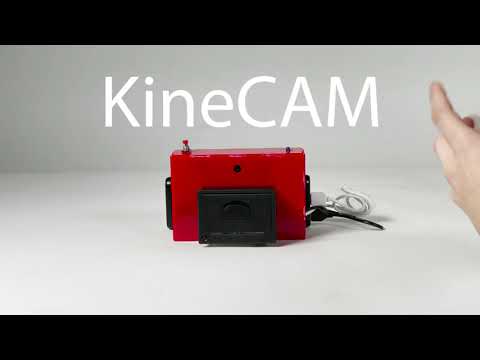
This code works with a Raspberry Pi to take photos of a camera, produce kinegrams out of photos taken 1 second apart from eachother, and print the resulting kinegram in a receipt printer.
image.py file has a OurImageClass, which we built and use to manipulate our images. This class has different functionalities that allow us to:
- Initialize an image into a class from another format like nparray, PIL and jpg.
- Set and get pixel values
- Save image as PNG, BMP or PIL
- Manipulate the image changing its brightness and contrast
At the end of the file we included some functions to test our Class locally, in lines 204-206 you can uncomment to run the different functions and their output will be saved to the 'Output/image_manipulation/' folder.
creating_kinegram.py file has all of the functions needed to create the clearest kinegram. Different functions have different functionalities
- grayscale: returns a grayscale image of OurImageClass when given the same image in RGB.
- ditheredRGBtoBW: given an RGB image in OurImageClass, it dithers it and returns the resulted dither.
- ims_from_frames: given a folder name with images, this function returns a list of OurImageClass images of the images in the folder. This function takes additional parameter dithered = False, and when set to True in returns a list of the dithered images instead. It also takes frame_num = 3, which indicates the maximum number of images that the list should have.
- detect_difference: given a list of three images, this function returns an OurImageClass grayscale image representing a map of difference between the same pixel number in the three images. If the three images have pixels that are totally different in the three images, the map value at that pixel is higher and no more than 512. If the images have a very similar value in all the images, then the map at that point is lower and no less than 0.
- generate_kinegram: This function generates a kinegram from the images in img_list, with each frame having hole_width pixels between eachother. if different_detection = True, the kinegram will not alternate images where the difference between images (according to detect_difference map) is less than threshold = 30 and uses the value of the pixel in the second image of the list, otherwise it creates a kinegram in every pixel. If dithered = True, this function returns a grayscale image, otherwise an RGB.
At the end of the file we included some functions to test the functions in the files locally. In lines 142 to 145, you can uncomment the function calls to test the different functionalities. Which will be saved to "Output/dithered_images/" folder for the function that tests dithering and to "Output/kinegrams/" folder for the function testing kinegrams.
Input folder, provides the user photo files to test different functionalities of our code in image.py and creating_kinegram.py. These can be used to run the code locally and see test results. We used some of these for our test functions in both files, and users are encouraged to change them.
video.py file handles taking images of the frames that will be used in our kinegram and sending the print command to the receipt printer. The file has a Video class with a capture_kinegram function that takes num_frames = 3 images in an interval of 1 second using picamera. It stores these images in an nparray and uses our OurImageClass to make turn this nparrays into images of our class. It then uses our generate_kinegram function to create a kinegram of the frames. It is preset to not use dithering and to not account for pixel difference in the different frames. It then sends a command to our receipt printer to print the kinegram image. Note that running the code with dithering and/or difference detection takes significantly more time.
gpio_button.py this function is what is called upon starting the Raspberry Pi. It controls the button that allows our capture_kinegram function in video.py to run. It is an infinite loop that looks for a press in our button. Once it is pressed it calls the capture_kinegram function and allows for all of that process to run and so print a kinegram from our live images. The kinegrams created will also be available in the "Ourput/live/" folder.
The code is currently automated to run upon startup of the raspberry pi (plugging into the power bank). To turn off automation, ssh into the pi and run the command line "sudo crontab -e," and comment out the last line of this file. Then run "sudo reboot.
To test the kinegrams online, we have included the Testing_Kinegrams folder with Testing_Kinegrams.pde Processing file. Running the file in Processing 5 will allow the user to see if the kinegram works. The input image needs to be added to the data folder and the filename changed in line 8. The size of the image should also be changed correspondly in line 7 and the hole_w to whatever parameter was used for hole_width when calling the generate_kinegram function, and the slit_w to (frame_num - 1)*hole_w. Where frame_num is the number of frames used in the kinegram.
Enjoy using kineCAM!