Tag 11: Dependency Injection & Mocking
Problem description: Why are we getting an empty list instead of the response (a T-shirt JSON) from the query on the server ?
What went wrong?
- Class diagram:

The class diagram shows the classes we've built, indicating which methods are included in each class. ShopController defines the endpoints, Get/Product, which returns a list of products, and Post/Products, which adds a product. Then there are two services, one to read from it and the other to add products to it. The CustomerService is used to read the products while the VendorService is used to add the products. Both services use the same repository. If we don't have dependency injection, we need to create instances of objects ourselves.
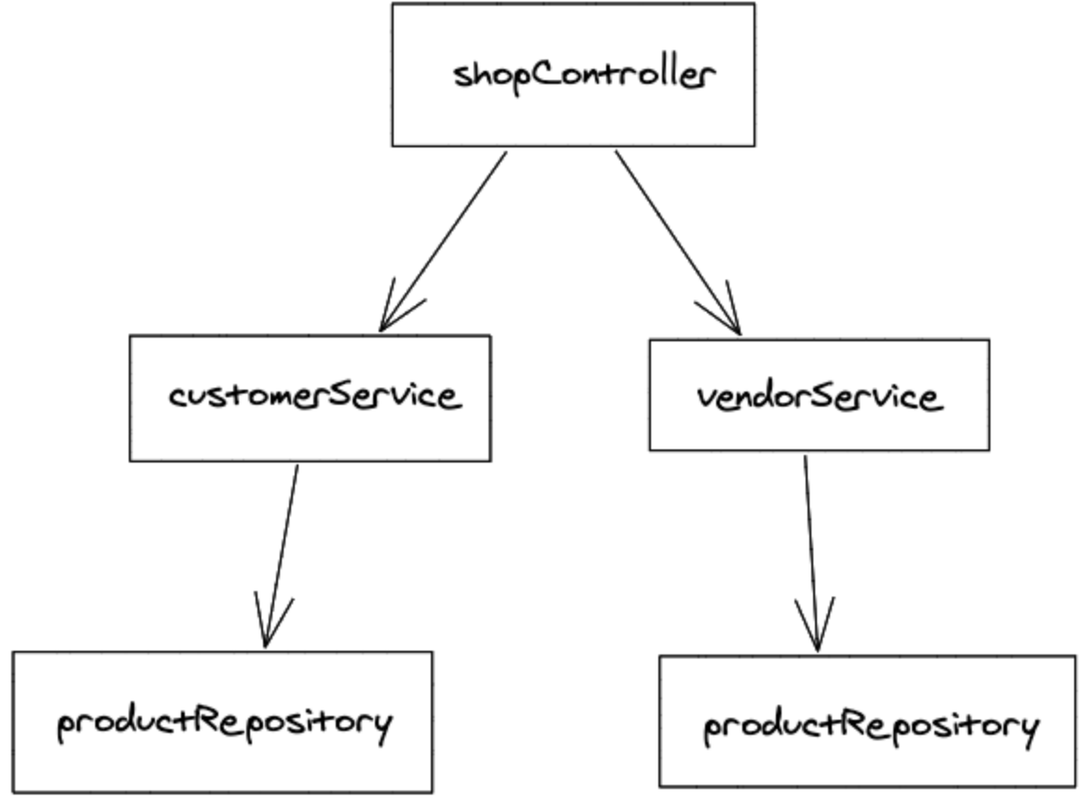
- Object diagram: If we take a closer look at this program, we see that in the two services it says "new ProductRepository" and again "new ProductRepository". What is actually causing this? There is another diagram, namely an object diagram, which shows which objects are initialized when the app is started. When the app is launched, all these classes need to be instantiated into objects so they can be used. First we need a ShopController object, then we need a CustomerService object and a VendorService object. Each Service creates a ProductRepository object for itself. If we add a product via the VendorService, it will be added to the products on the right. However, if we want to read the products via the ShopController, what happens? On the left side, we have a ProductRepository where nothing has been written yet and it is still empty. Therefore, it returns an empty list and we get an empty list. This is the problem we have here. Such a problem is not solved only by dependency injection. However, this is the main use point in Spring Boot that we are going to use. And the problem here is how to solve it. You solve it by using Dependency Injection. To use Dependency Injection, we just need to know a few things about what it looks like and what it is. If we write "@Service" in the Services or "@RestController" in the ShopController, then we are already using Dependency Injection.
This will also occur in larger projects where many services use other services, or one service has multiple dependencies, or different controllers use multiple services, etc. To solve this problem, we need to create an instance of the object and then make it available to all controllers by passing it in the constructor when we create the controller. For this, Spring Boot provides us with Dependency Injection.
- The first step in getting Spring Boot to create this repository for us is to remove the "new" keyword. If we do this, IntelliJ will tell us that we need to instantiate it elsewhere since it is a private final. This must be done in the constructor.
- 2nd problem (Dependency Injection): Could not autowire. No beans of “ProductRepository” type found (as reported by IntelliJ) → Spring Boot should instantiate "ProductRepository". To achieve this, we simply add a @Component annotation to the class we want Spring Boot to instantiate for us. This way, we have applied Dependency Injection.
- When starting the app with Spring Boot, all classes with @Component, @Service, @Restcontroller, etc. are getting read. And when they are read, an object of that class is instantiated. To create a VendorService, it needs to say "new VendorService" with a ProductRepository. (See a branch "Dependency-Injection-Repository").
- We look at the object diagram. Spring Boot will create a ShopController. To create a ShopController, it needs a VendorService and CustomerService. And to create CustomerService and VendorService, it needs a ProductRepository. Spring Boot will look at all the classes and parameters in the constructors that it needs to provide. Then it will figure out on its own in which order the objects need to be created so that other objects can be created. Then it will create the ProductRepository object first, and then make new VendorService with ProductRepository, then make new CustomerService with ProductRepository, and then make new ShopController with those two classes as parameters in the constructor (CustomerService and VendorService). Spring Boot will do all this automatically for us, we don't need to create all of this ourselves. We just need to tell it to create the object for us.
- So let's restart the app and then repeat the test. Go to Postman, because my list is in memory and we restarted the server, so everything has been cleared from the list, thus we have an empty list. If we now make a Post with the T-shirt again, then send another Get, we will get the T-shirt. What is the difference from before? The difference is that only one object has been created by the ProductRepository and it has been given to both classes. And if we write something in there, what happens? The ShopController goes through the VendorService and writes to the ProductRepository. When we query that, ShopController goes through the CustomerService, which once again has the same object and the same list underneath, reads out the objects and returns them. We get that in our Postman through the controller.
- We need @Component so that we can tell Spring Boot to create an instance of this object. Once you have created this instance, pass it on wherever an object of this type is expected in the constructor. We can use @Component instead of @Service.
Spring Boot offers other annotations as well, such as the **@Component ** (The simplest way) notation, which is a generic notation that can be applied to any class that is instantiated. However, it should not be used in every class. In our course, we will use annotations such as: @Component: to tell Spring Boot to create an instance of a class when we have not created a specific service. @Service: for classes that are services. In a service, we should always keep our logic. @Configuration: used when we are doing configuration. @Repository: a class that goes to the database, retrieves data, saves data, filters data, queries data in different formats, etc. @RestController: used for creating RESTful web services..
**@Bean **(an instance in Spring Boot). Create a bean: @Bean (See Dependency Injection Bean). @bean is an annotation in Spring Boot that is used to mark a method that creates an object that is managed by Spring Boot. We can also use to specify configurations and settings for the object. Under Config class with @Configuration, @Bean is annotated
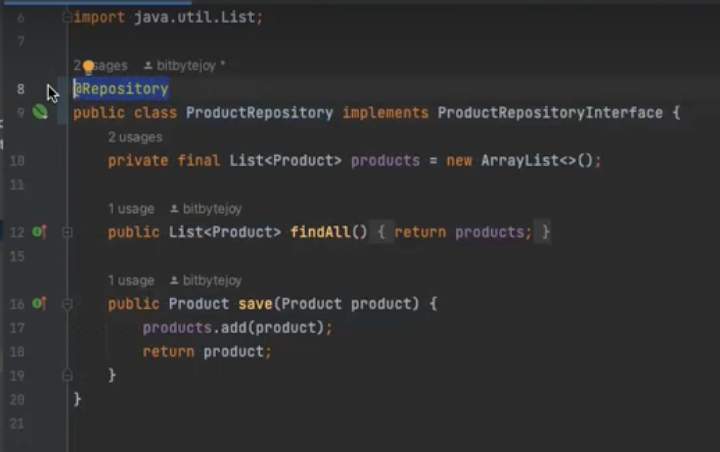
If we write @Repository in ProductRepositroy, it means: "Make me an instance of this object or of this class and use this object in all other constructors that would use it". Instead, if we write it in Config class with a bean, we say: "Here is an instance of the object of type ProductRepository, use this instance everywhere in the constructors where ProductRepository is expected."
ProductRepository
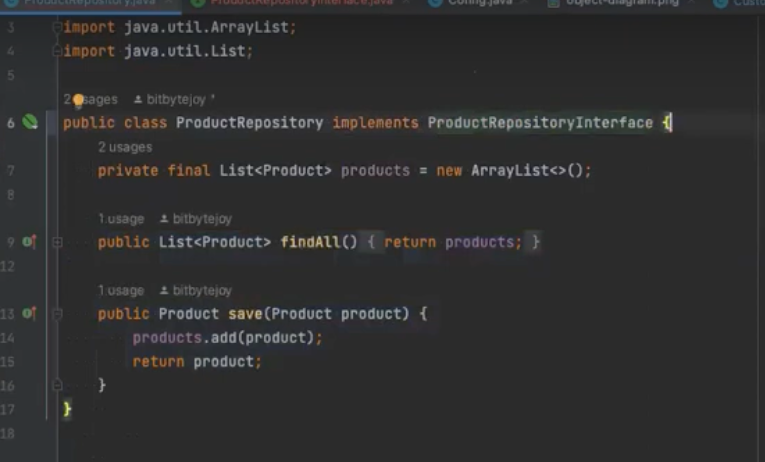
ProductRepository Interface
- 2nd side of Dependency Injection
- Inversion of Control
- Architecture page
-
Advantage of Depndency Injection: Code can be tested better because we push things into the classes from the outside and don't create them ourselves in the classes. Testing has a big advantage when we use Dependency Injection.
-
Task:
- Implement dependency injection in your projects
- Find out what inversion of control is
- What is the difference between dependency injection and inversion of control?
- What other tools use dependency injection?
Dependency Injection: Mechanism where dependencies are automatically injected into a constructor or method. I.e.: Creation of objects no longer by "new", but by the dependency injection of the framework. DI is a mechanism used in the context of Inversion of Control. DI means: Throw in a dependency , via the setter, via the constructor, create object, we take the objects, they are automatically created in our constructor with private final in the constructor is thrown in, setter, Ceculator (what we want to create)
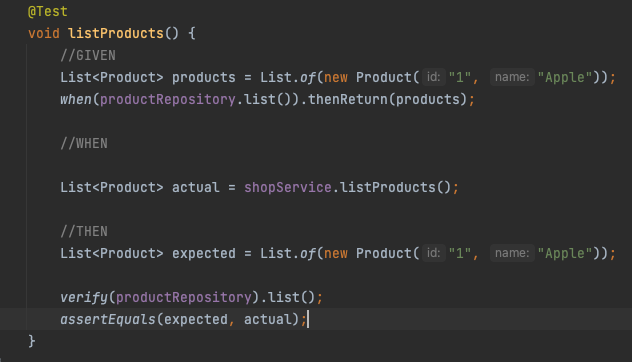
Wenn im 3-Schichten Modell (Controller, Service, Repository) Abhängigkeiten bestehen und wir eine Methode testen wollen, erstellen wir ein Mock. Ein Mock ist eine Fake-Klasse/gefaketes Objekt, zum Beispiel
mock(Repository.class)
(würden wir ein new erstellen, würden wir Fehler riskieren. Mit dem Mocken umgehen wir sie.)
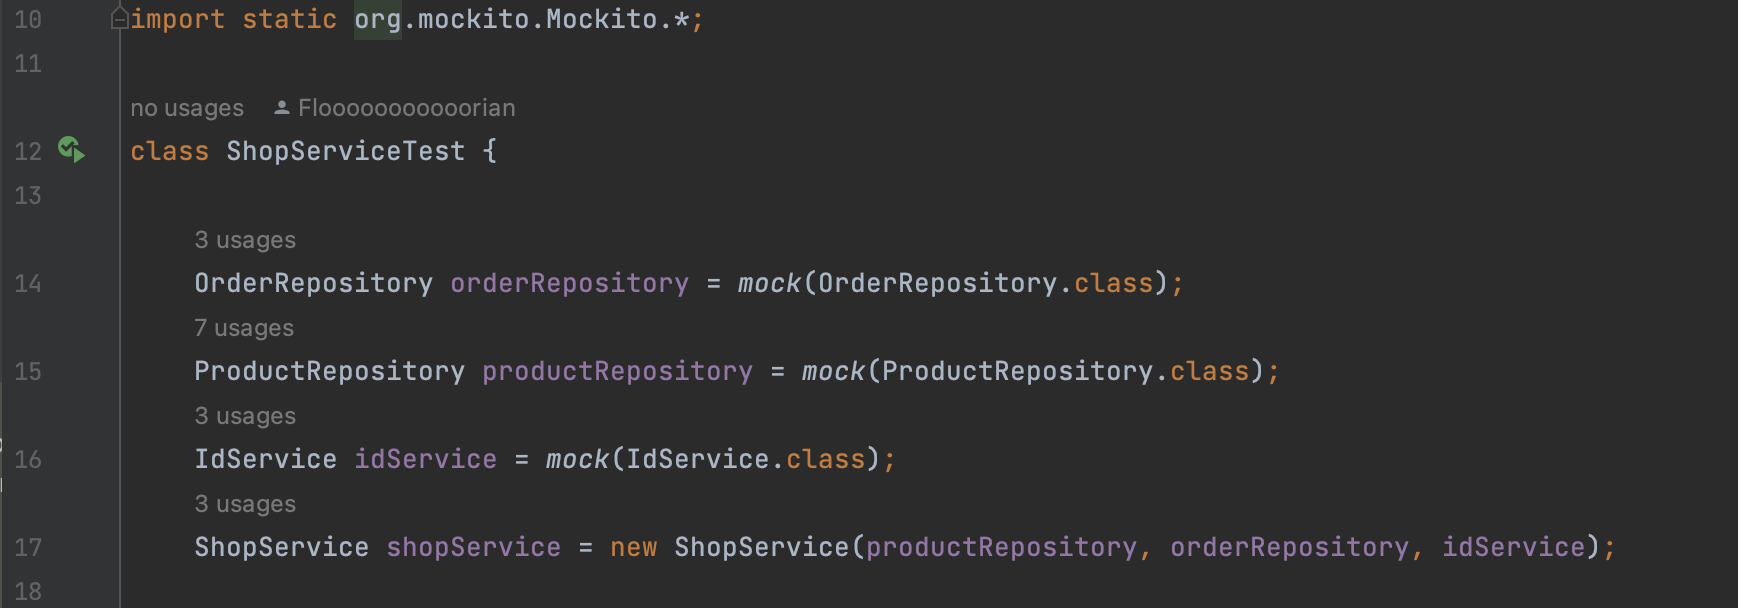
Dieses Mock gibt es nur für 1 Testfall. Dabei nutzen wir Moskito als Library.
Im Mock muss danach immer ein when, then und verify geben.
when (repository.get()). then return (new product())
Wenn der Mock fehl schlägt, wissen wir, dass es an get lag.
Zum Testen wollen wir keine neuen Repositories, denn diese könnten Fehler enthalten.
Verify ist dabei eine Extra-Überprüfung als Zwischenschritt wie assert.
Beispiel aus dem RealLife: Wir wollen die Flugbahn testen und bauen kein neues Flugzeug, sondern ein Papierflugzeug.