Datasets
Once you have created a project, you can begin adding datasets to the project. A project can have many datasets or only one.
Each dataset should have the same data model. Each dataset has its own form; in order to use a different form you must create an additional dataset. Information is exported from DataScribe by dataset.
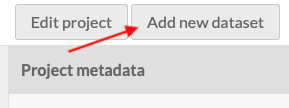
To add a dataset, go to the Project view for your project, then select “Add new dataset” from the dropdown in the upper right corner of the browser window.
This will take you to the form to build a new dataset. There are fields for:
- Name (required): a name for the dataset
- Description: A description of the dataset. This will display in the dataset metadata when viewing the project.
- Guidelines: Instructions and useful information for transcribers of this dataset.
- Item Set (required): Select from a dropdown of item sets in the Omeka S install.
- Revert review status: checkbox. Check this to automatically revert an approved item's review status to "not reviewed" when a record belonging to the item is added or modified. The default behavior is to retain the approved review status.
- This matters when exporting data - only approved data is exported. So if the box is unchecked, changes to items which are approved will be automatically added to the export.
- Import form: import a DataScribe dataset form (json). This option is only available when adding a new dataset.
Using the eye icon in the upper right corner, you can set the dataset as private or public. Private datasets are only visible to Global Admins of the Omeka S install and those users who have been added to the project. A public dataset can be viewed by anyone who is logged in to the Omeka S installation.

Once you have created the dataset, you will be taken to the dataset browse page. A message should appear in the main work area “No items found. Sync this dataset. If you have recently synced, the sync job likely has not finished.”
To sync the dataset, either click the phrase “sync this dataset” or use the Actions menu in the upper right corner of the window and select the “Sync dataset” option. Syncing updates the dataset with the information from the items in the item set. For more on syncing once a dataset is populated, see below.
Once you have synced the dataset, you may need to reload the page in order to see the items.
To view a dataset, go to the project of which it is a part. The project has a table of all datasets, the dataset’s title, creator, and date created. Clicking on the ellipses (three dots) in a dataset’s row will show you the metadata for that dataset. Clicking its title takes you to the items in the dataset.
Dataset actions are available from the dataset page (the same page where you see the items in the dataset). The Browse and Edit buttons are always visible; other options are available from the "more actions" dropdown.
Depending on what your current browse view is, this will either display as “Browse records” or “Browse items”. Use this to toggle between the two views.
Editing the dataset presents you with a page two tabs: General and Form Builder.
The General options are almost the same as when you created the dataset. You can to edit the name, description, and guidelines of a dataset. Note that changing the associated item set will result in a loss of data. You can choose whether or not to revert the review status. Note that you cannot import a form into an existing dataset.
The Form Builder tab allows you to add or edit the form for your dataset
Syncing updates the dataset with the information from the items in the item set. You should synchronize periodically, any time items are added or removed from the item set. Be aware that any items which have been removed from the Omeka S item set will be deleted from the DataScribe dataset, along with any records which have been created for those items.
Syncing does not send any information from DataScribe to Omeka S.
Running the validation checks input in the records against settings you have in the form builder. For example, checking whether required fields are filled, whether numbers match the required format, and against any regular expressions you may have implemented.
Once you have run the validation, records with invalid values will be marked with a red alert, or exclamation point, on their browse rows. You will be able to filter by items and records “with values marked as invalid” in order to find them more quickly.
You should validate periodically, after fields are added to the form, after field validation rules change, and before exporting the dataset.
Export this dataset to a CSV file. Note that the file will only include records from approved items. Any invalid values will be given as “null” in the CSV. Running an export will overwrite any previous export file.
Exported files are stored in the Omeka install. They are made available in the Dataset metadata drawer, at the bottom of the page, under the heading “Export file.”
You will need to download the file in order to open it or save it locally; the link functions as a direct link to the file, and will either download or open when you click on it depending on your browser settings.
An exported csv will have three columns in addition to the data created in the dataset form:
- DataScribe item number: item number in the DataScribe dataset. Does not correspond to Omeka S item number.
- DataScribe Record number: record number for that record in DataScribe. Record numbers are assigned across DataScribe as a whole, so an item may not have sequential record numbers.
- DataScribe Record Position: order of records within an item. If the insert before/after option has been used when editing or creating a record, the position number sequence may not match the record number sequence. For example, the records with positions 1, 2, 3, 4 could have record numbers 1, 3, 2, 4.
In order to transcribe items in a dataset, you must build a form for the dataset.
You may find it useful to have a reference image or outline of the data you're collecting when you build the form.
To create a form, use the action menu in the upper right corner to select “edit dataset,” which will take you to the Edit page. The edit page has two tabs, a general tab where you can edit the information you entered when adding the dataset. The second tab is where you build the form for the dataset.
On the Form Builder tab, you will see a drawer on the right with options for building the form. At the top of the drawer is a “Save Progress” button. Use this at any time to save your progress without reloading the page. If you click the Save button in the upper right corner of the window (not in the drawer) your progress will be saved but you will be directed back to the dataset.
DataScribe has the following options on the form builder: Checkbox, Date, DateTime, Number, Radio, Select, Text, Textarea, and Time. Use the plus button to add a field of the desired kind to the form.
Every field type in the form has the same four initial options:
- Field name (required): will display for transcribers
- Field description: will display for transcribers
- Field is primary: checkbox to set whether this is the primary field, ie the field by which the record is identified.
- A form can only have one primary field.
- Field is required: checkbox.
- Note that if a field is marked as required and is left blank by a transcriber, it will be marked as invalid.
Some fields allow you to use regular expressions (RegEx) to validate field entry. To learn how RegEx works, see this Programming Historian tutorial and RegEx 101. The module uses the RegEx library associated with Laminas.
In addition to these standard options, each field type has its own options.
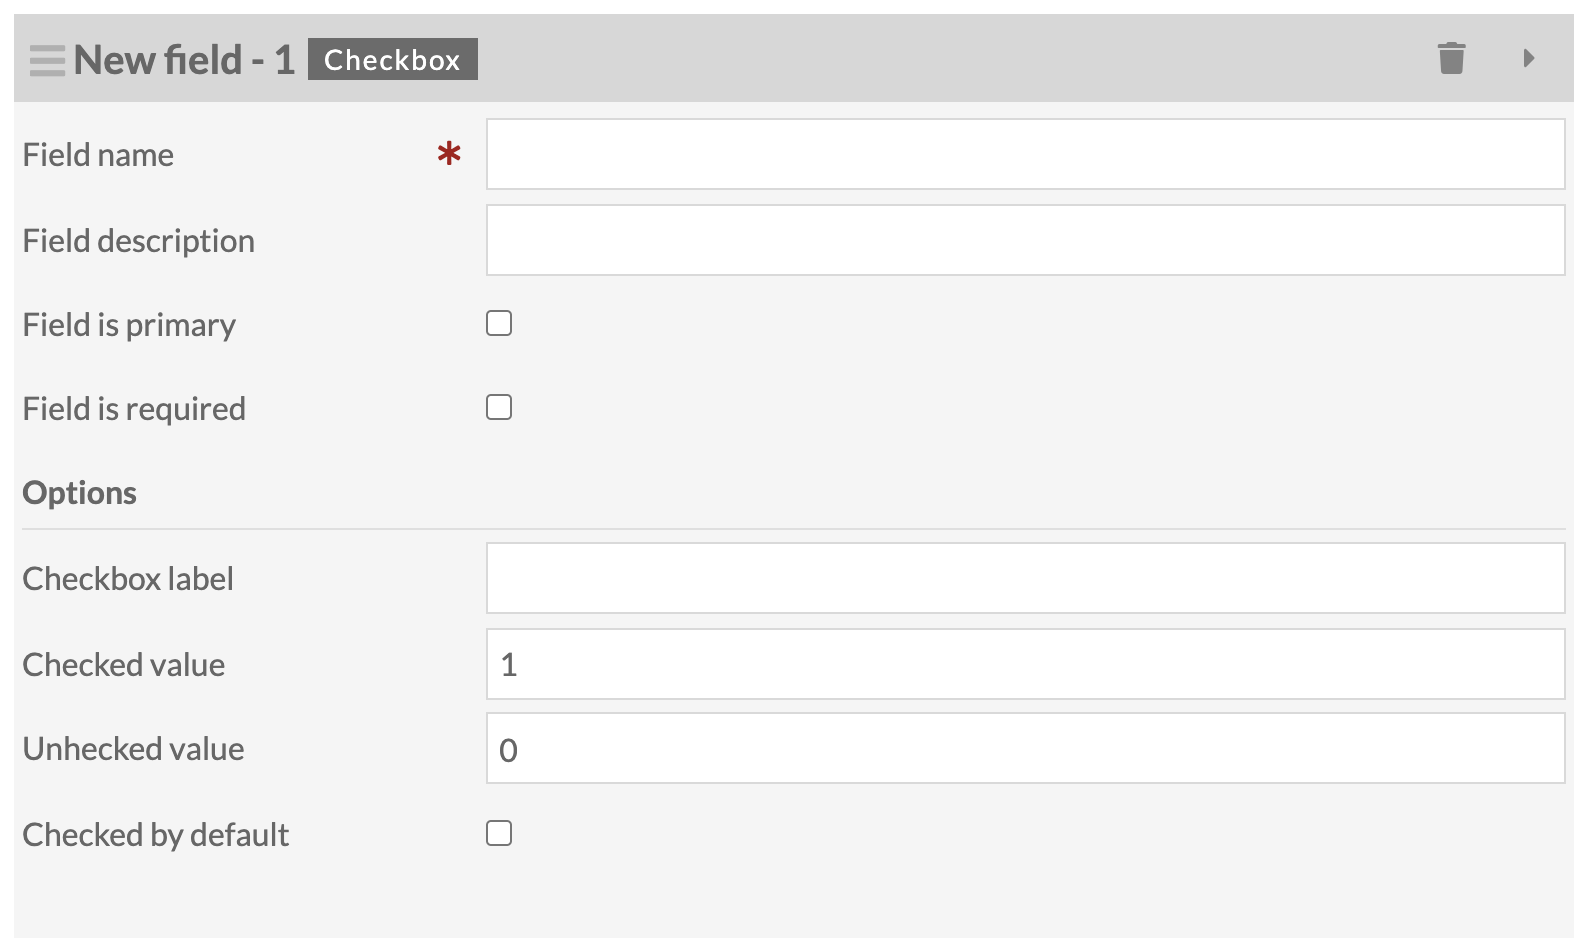
This creates a checkbox for the form
Options are:
- Field name (required): the name of the field will display in the transcription form.
- Field description: will display for transcribers
- Field is primary: checkbox to set whether this is the primary field, ie the field by which the record is identified.
- Field is required: checkbox.
- Note that if a field is marked as required and is left blank by a transcriber, it will be marked as invalid.
- Checked value: use this to set how this information exports. Defaults to 1.
- Unchecked value: set how this information exports. Defaults to 0.
- Checked by default: checkbox
- Checkbox label: set the label for the checkbox (separate from the field name)
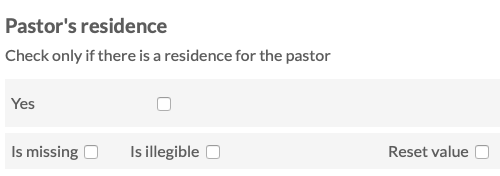
The image below shows a checkbox in action from the transcriber's perspective. The field name is "Pastor's Residence" and the description is "check only if there is a residence...". The label for the checkbox is "Yes." The checked and unchecked values are not visible to the transcriber.
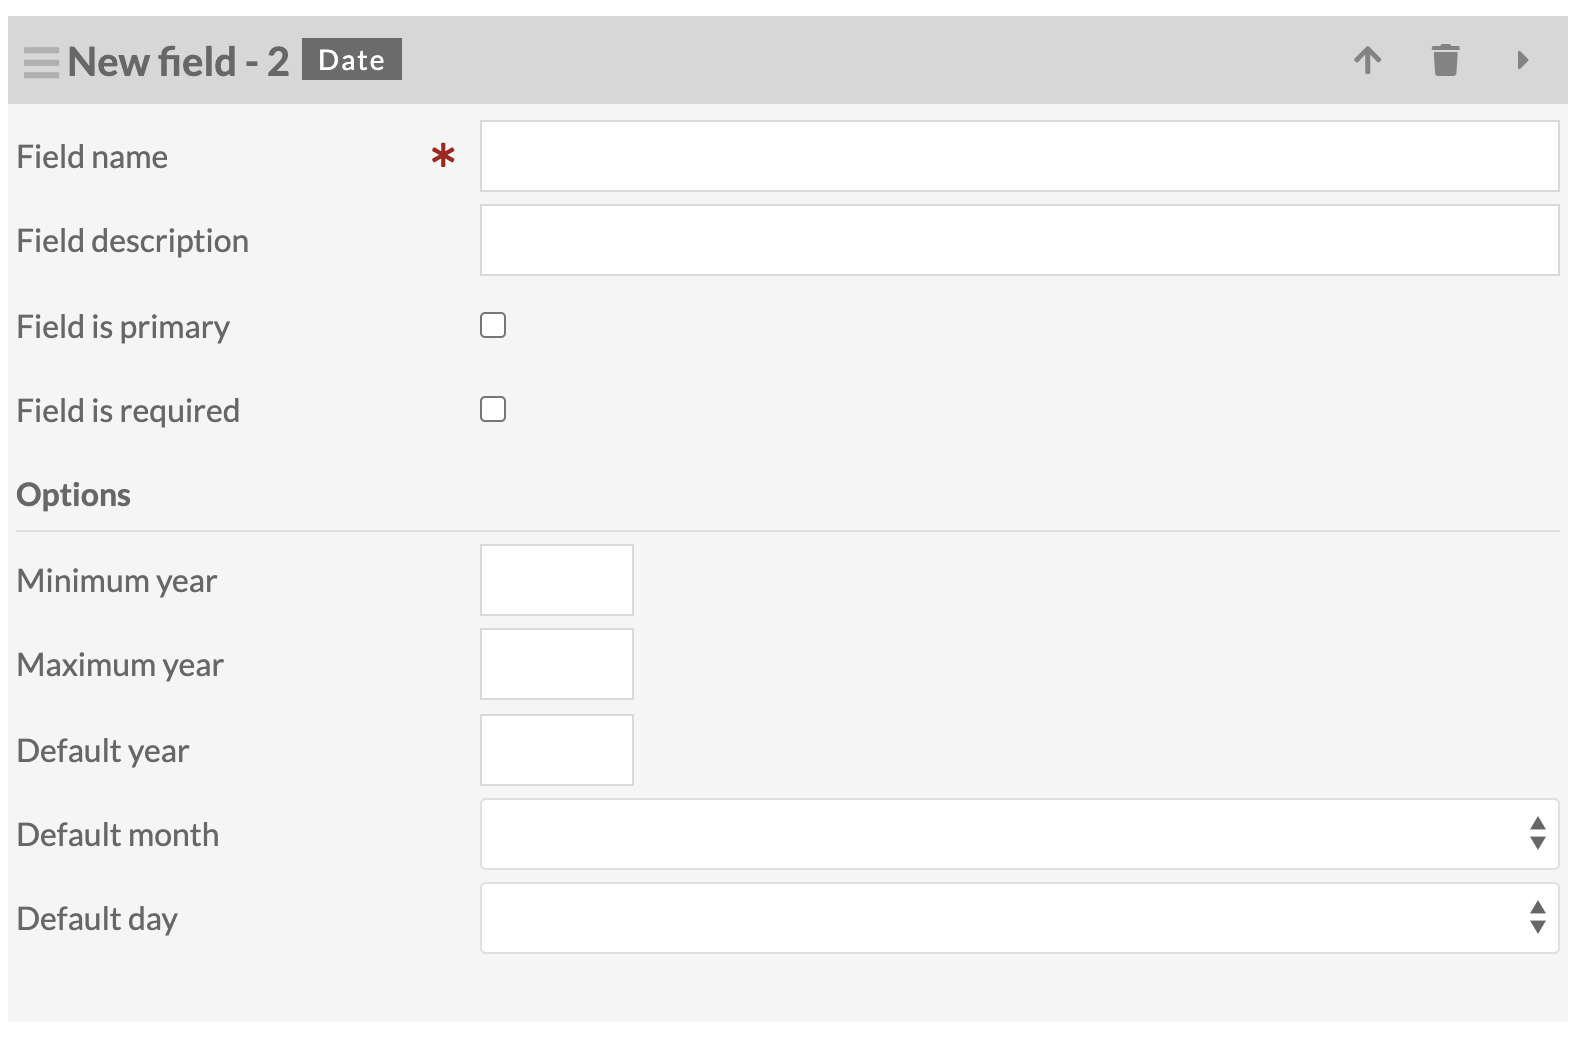
Create a date field (using the Gregorian calendar) which will be exported in ISO 8601 date format.
Options are:
- Field name (required): will display for transcribers
- Field description: will display for transcribers when they are doing data entry.
- Field is primary: checkbox to set whether this is the primary field, ie the field by which the record is identified.
- Field is required: checkbox.
- Note that if a field is marked as required and is left blank by a transcriber, it will be marked as invalid.
- Minimum year: Set the earliest year which a transcriber can select from the dropdown. Enter a four digit year (YYYY)
- If left blank, this will default in the transcription view to 100 years before the present year. If you want to set a range longer than that, you must enter a minimum year.
- Maximum year: Set the latest year which a transcriber can select. Enter a four digit year (YYYY).
- If left blank, this will default to the present year, regardless of the minimum year.
- Default year: set a default year for entry.
- The year selection is a dropdown, so if you have a very
- Default month (optional): select from a dropdown of months.
- Default day (optional): select from a dropdown of days.
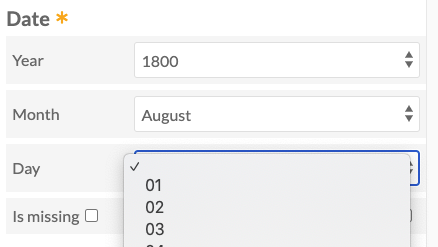
In the example below, the field name is simply "Date". The yellow asterisk next to the field name indicates that this is the primary field for this form. The year and month dropdowns have already been selected to 1800 and August. Note that the month dropdown uses the full written name of the month - "August" - rather than a short form like "08" or "Aug". The number selection option is open, showing the dates in order starting with 01.
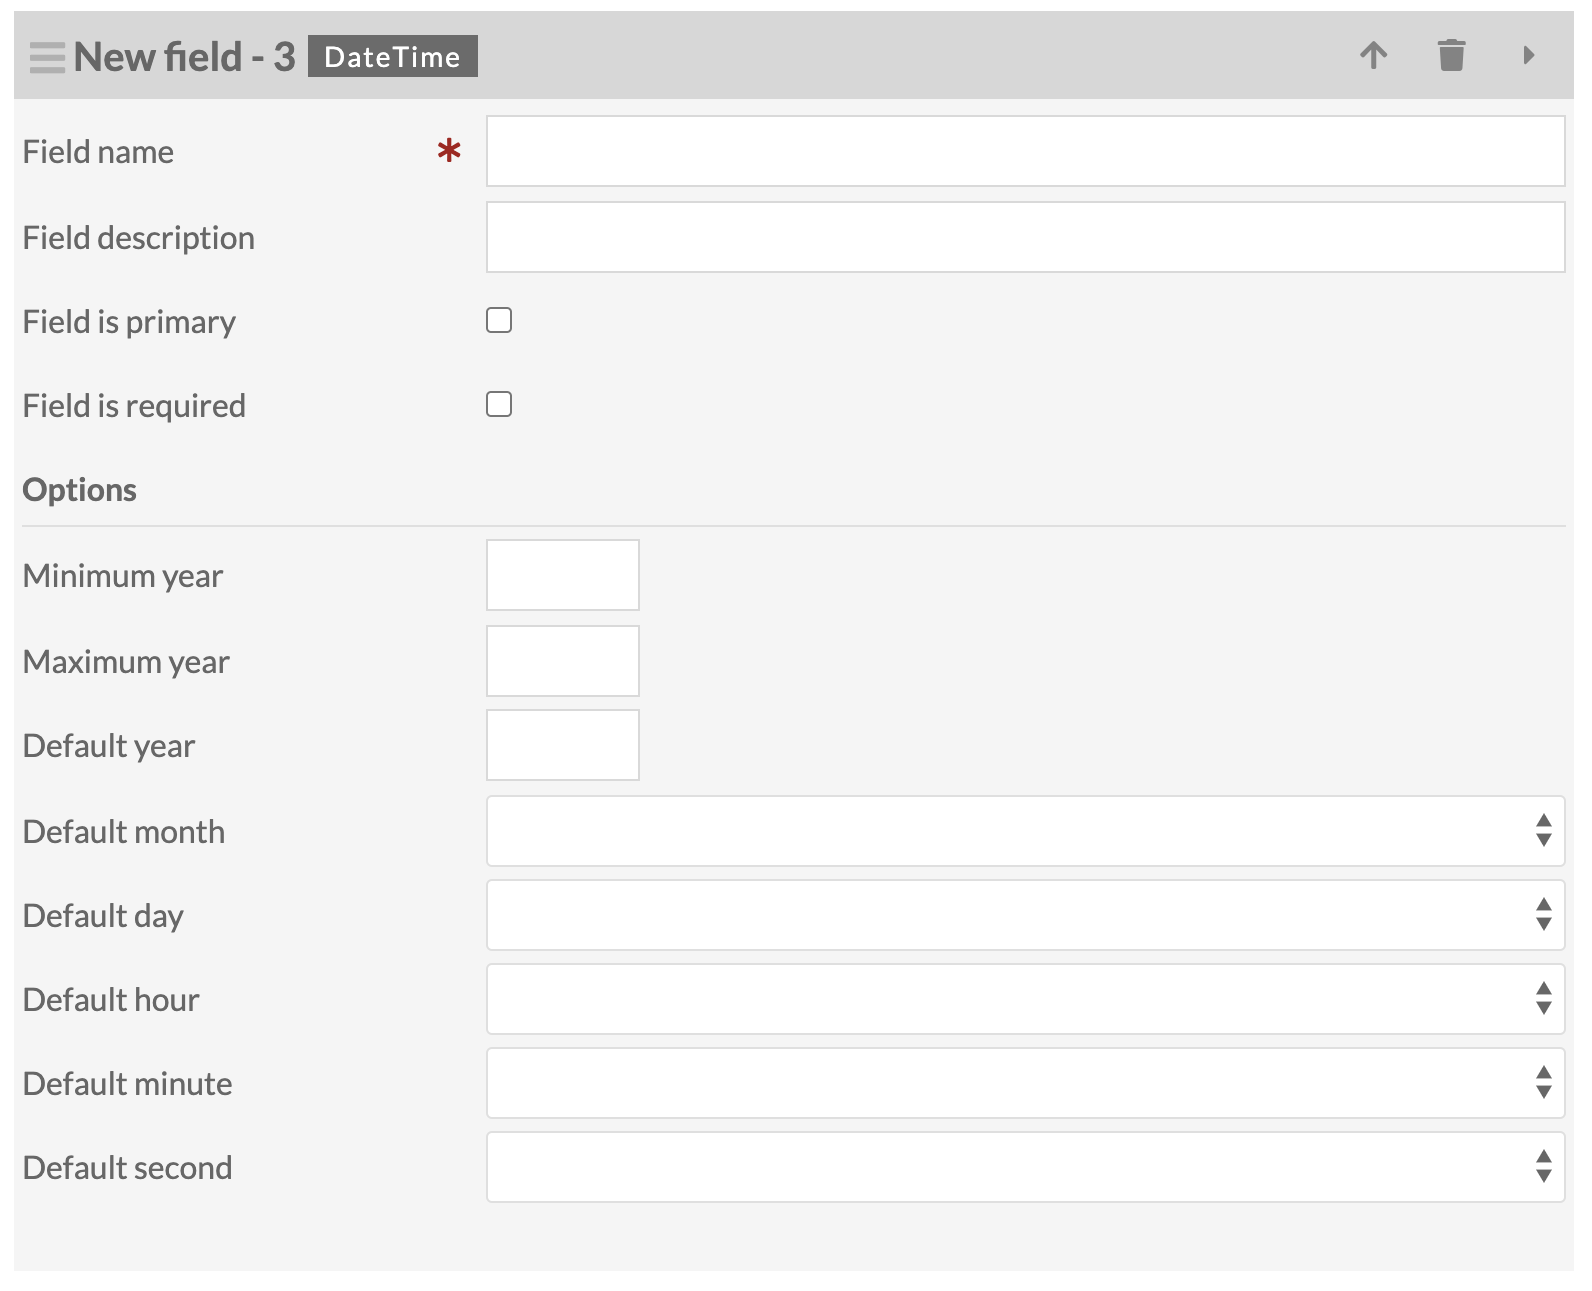
Create a field with both date and time entry options. As with the Date option, all dates are will be exported in ISO 8601 format using the Gregorian calendar. Transcribers select from a dropdown for the year, month, day, and hour, minute, and second.
Options are:
- Field name (required): will display for transcribers
- Field description: will display for transcribers when they are doing data entry.
- Field is primary: checkbox to set whether this is the primary field, ie the field by which the record is identified.
- Field is required: checkbox.
- Note that if a field is marked as required and is left blank by a transcriber, it will be marked as invalid.
- Minimum year: enter the minimum year in four digit format (YYYY).
- If left blank, this will default in the transcription view to 100 years before the present year. If you want to set a range longer than that, you must enter a minimum year.
- Maximum year: set the latest year a transcriber can select. If left blank, this will default to the present year.
- Default year: set a default year for entry.
- Years appear as dropdowns; you can place this at the start or in the middle of your time span. Not required.
- Default month (optional): select from a dropdown of months.
- Default day (optional): select from a dropdown of days.
- Default hour: select from a dropdown, 1-23
- Default minute: select from a dropdown (00-59)
- Default second: select from a dropdown (00-59)
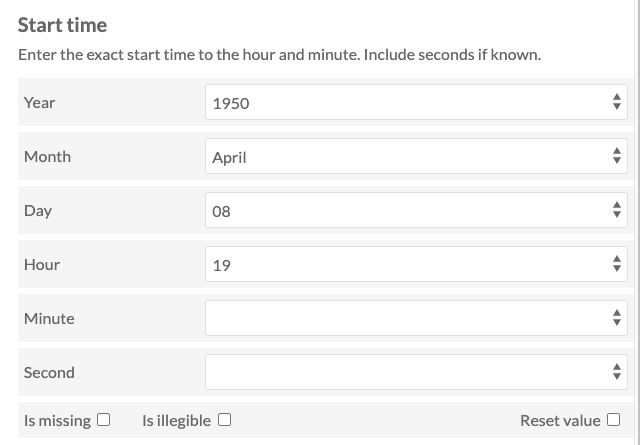
In the example below, the field name is "Start time" and the description explains that time should be entered to the hour and minute, with the second included only if known. The year, month, day, and hour inputs have been selected to display 1950 April 08, hour 19. Note that the hour dropdown is in 24-hour time, not an am/pm display.
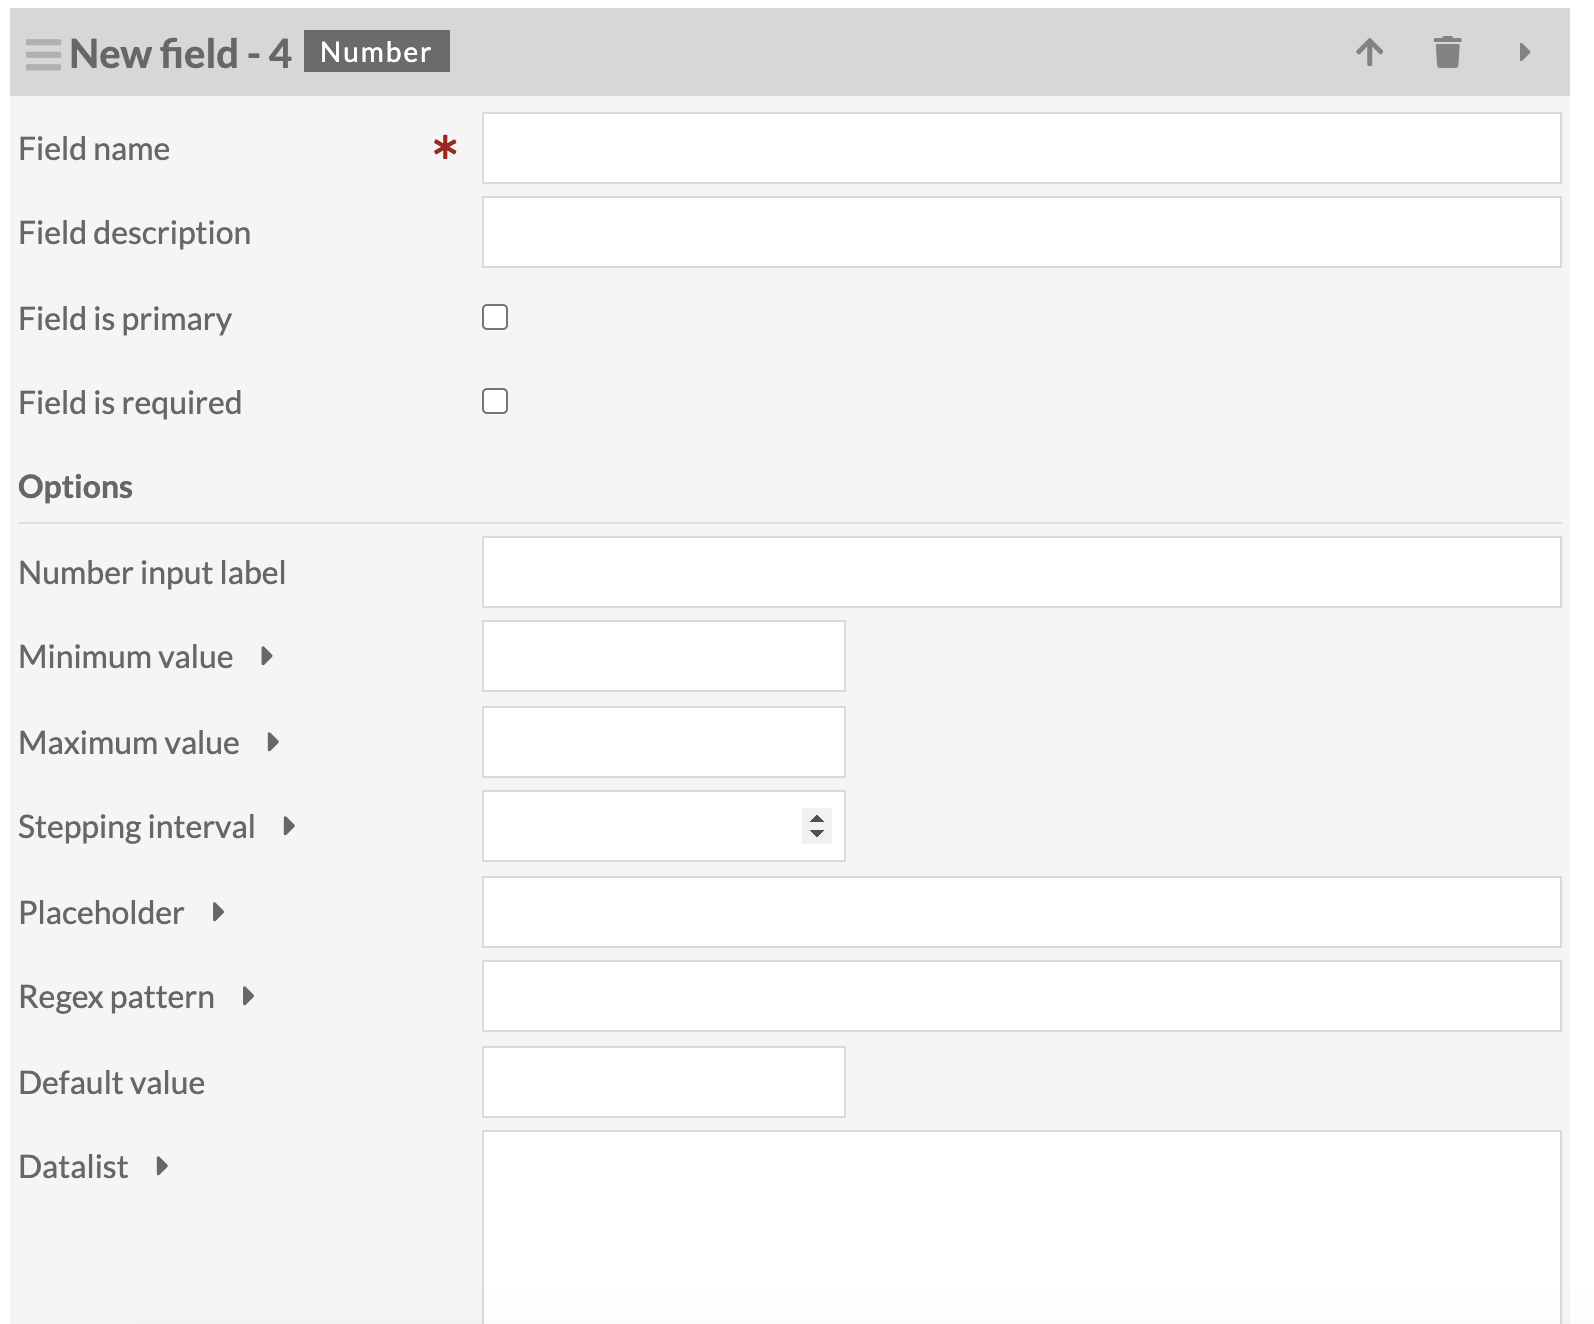
This field only allows numeric data - users must enter numerals (1,2,3) not typed descriptions of numbers.
Options are:
- Field name (required): will display for transcribers
- Field description: will display for transcribers when they are doing data entry.
- Field is primary: checkbox to set whether this is the primary field, ie the field by which the record is identified.
- Field is required: checkbox.
- Note that if a field is marked as required and is left blank by a transcriber, it will be marked as invalid.
- Minimum value: sets the minimum allowed value for this field.
- Maximum value: sets the maximum allowed value for this field.
- Stepping interval: sets the interval to which any entered data must adhere.
- Placeholder: example value to display when the field is empty.
- Regex pattern: set a regular expression pattern which the field input must match.
- Default value: set a default value for the field
- Number input label: changes the label of the field.
- Datalist: displays recommended options.
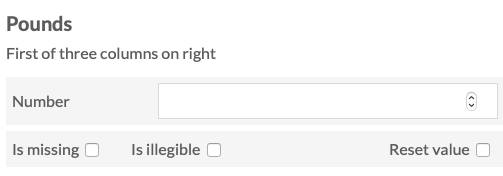
The image below shows a number input on the transcription form. The field name is "Pounds" and the description is "first of three columns on right". The number field will only allow entry of numerals ("1") not numbers written as words ("one"). Clicking on the up or down arrows on the right of the number field will step up or down in the interval defined in the settings for this block.
Create a set of radio buttons with options from which transcribers can select a single response.
Options are:
- Field name (required): will display for transcribers
- Field description: will display for transcribers when they are doing data entry.
- Field is primary: checkbox to set whether this is the primary field, ie the field by which the record is identified.
- Field is required: checkbox.
- Note that if a field is marked as required and is left blank by a transcriber, it will be marked as invalid.
- Selection label: add a label for the radio button array.
- Options: enter the label text for the radio buttons.
- Each option must be on a new line in the text area.
- Default value: must match one of the options entered in the options field.
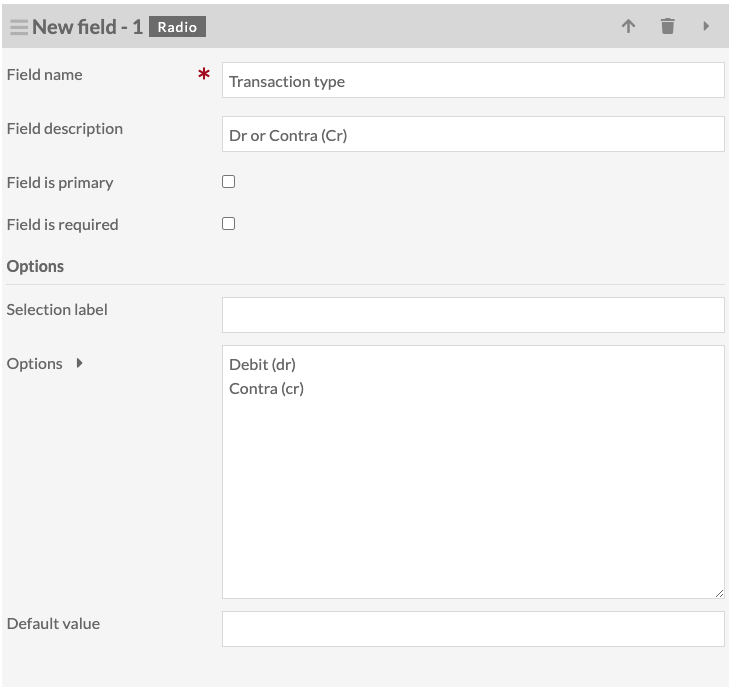
This image shows a radio block with entries in the options field to show that each option must be on a new line.
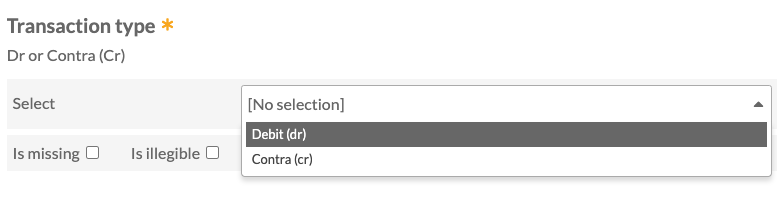
This image shows the transcriber's view of the above radio field. The field name is Transaction type, with a description of "Dr or Contra (Cr)". Each line in the options table appears as a separate radio button: "Debit (dr)" or "Contra (cr)" with the additional option of "No selection" set as active.
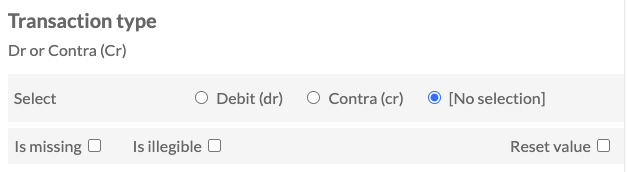
When there are more options than can fit on one line for the transcription view, the radio block will wrap buttons (see the Select example for more information).
Create a dropdown with options for transcribers to choose from, created by the form builder.
Options are:
- Field name (required): will display for transcribers
- Field description: will display for transcribers
- Field is primary: checkbox to set whether this is the primary field, ie the field by which the record is identified.
- Field is required: checkbox.
- Note that if a field is marked as required and is left blank by a transcriber, it will be marked as invalid.
- Selection label: Changes the label for the dropdown menu. If nothing is entered, the dropdown is labeled with "Select."
- Options: enter the text for each choice to appear in the dropdown.
- Each option must be on a new line in the text area.
- Default value: must match one of the above options.
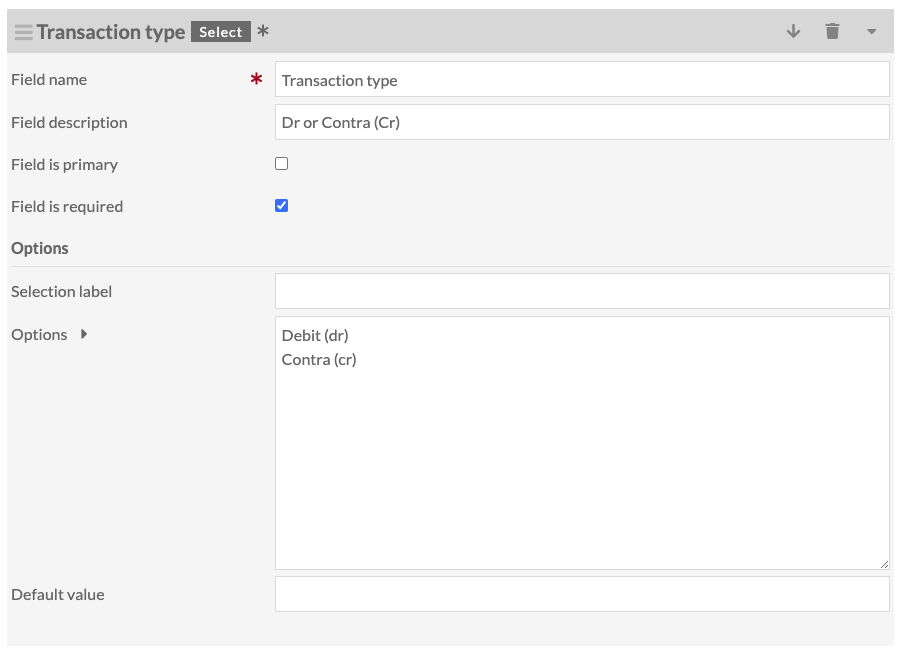
In this example, the field name is Transaction type and the yellow asterisk next to the name indicates that it is a required field. The description is "Debit (dr) or Credit." The select label has not been changed, so the menu is just called "select". The dropdown menu is open and shows the default option "No selection" along with options to select Debit or Credit.
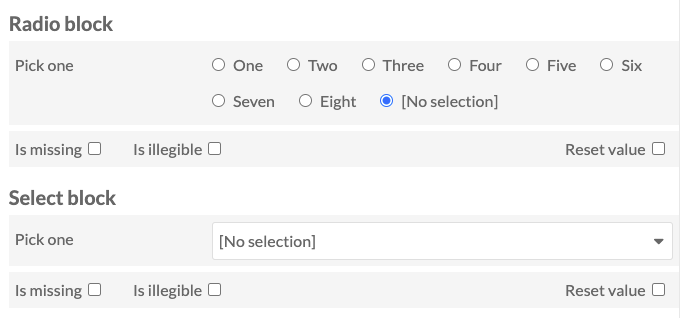
Select and Radio have similar functions; the select dropdown will not allow transcribers to set more than one option using keyboard commands. The Select block may be preferable when there are a large number of options to list. In this example, the Radio and Select blocks have the same options. The Radio block has wrapped to show all eight radio buttons, while the Select block remains a basic dropdown regardless of the number of options.
If you are using Custom Vocab for you Omeka items, you can manually duplicate the options into a select dropdown for DataScribe. Copy and paste the the list from the Custom Vocab configuration into the options textarea for the select field.
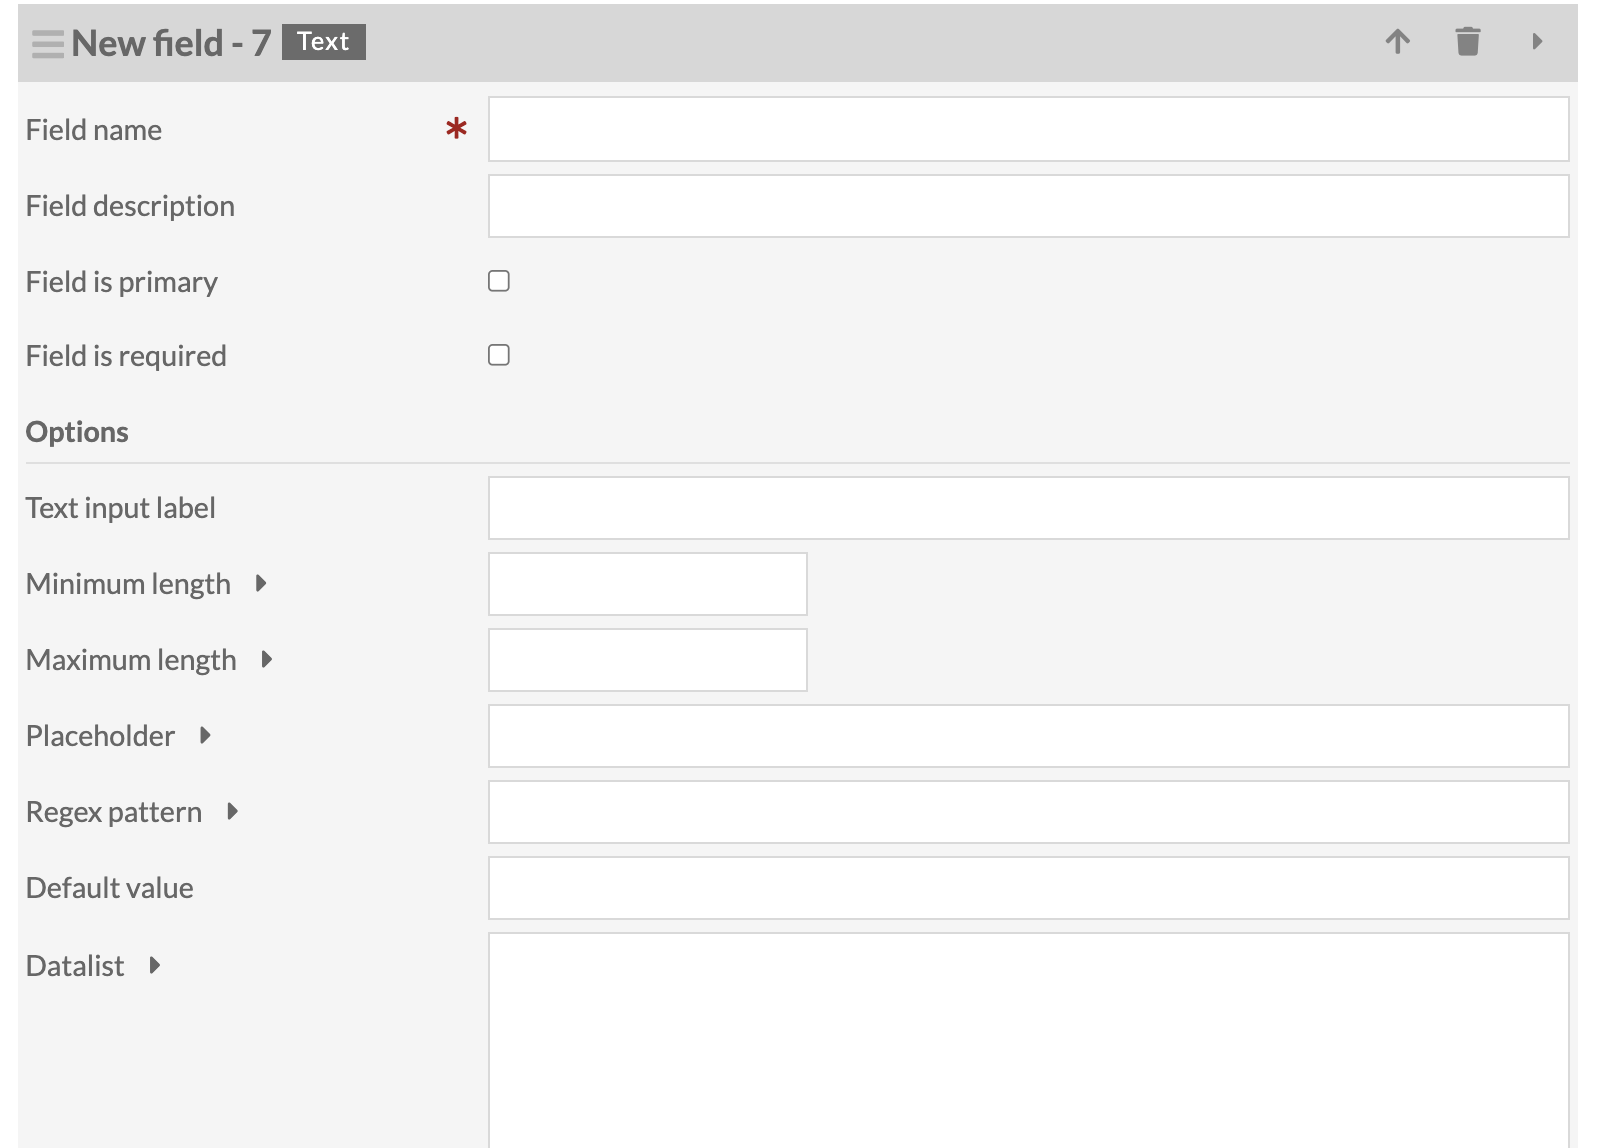
Create a field for a single line of text.
Options are:
- Field name (required): will display for transcribers
- Field description: will display for transcribers
- Field is primary: checkbox to set whether this is the primary field, ie the field by which the record is identified.
- A form can only have one primary field.
- Field is required: checkbox.
- Note that if a field is marked as required and is left blank by a transcriber, it will be marked as invalid.
- Text input label: adds the display label for the text entry area.
- Minimum length: sets the minimum number of characters which a transcriber can enter.
- Maximum length: sets the maximum number of characters which a transcriber can enter.
- Placeholder: example value to display when the field is empty.
- Regex pattern: set a regular expression pattern which the field input must match.
- Default value: set a default value for the field
- Datalist: displays recommended options for entry. Each option must be on a new line.
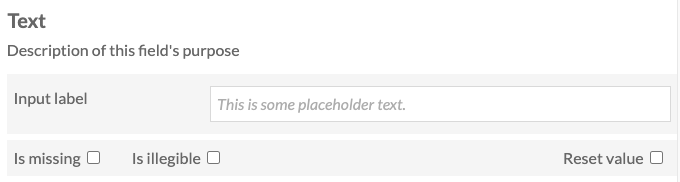
This image shows that the text field has a single-line entry area. The description, input label, and placeholder have all been populated with text reflecting their purposes.
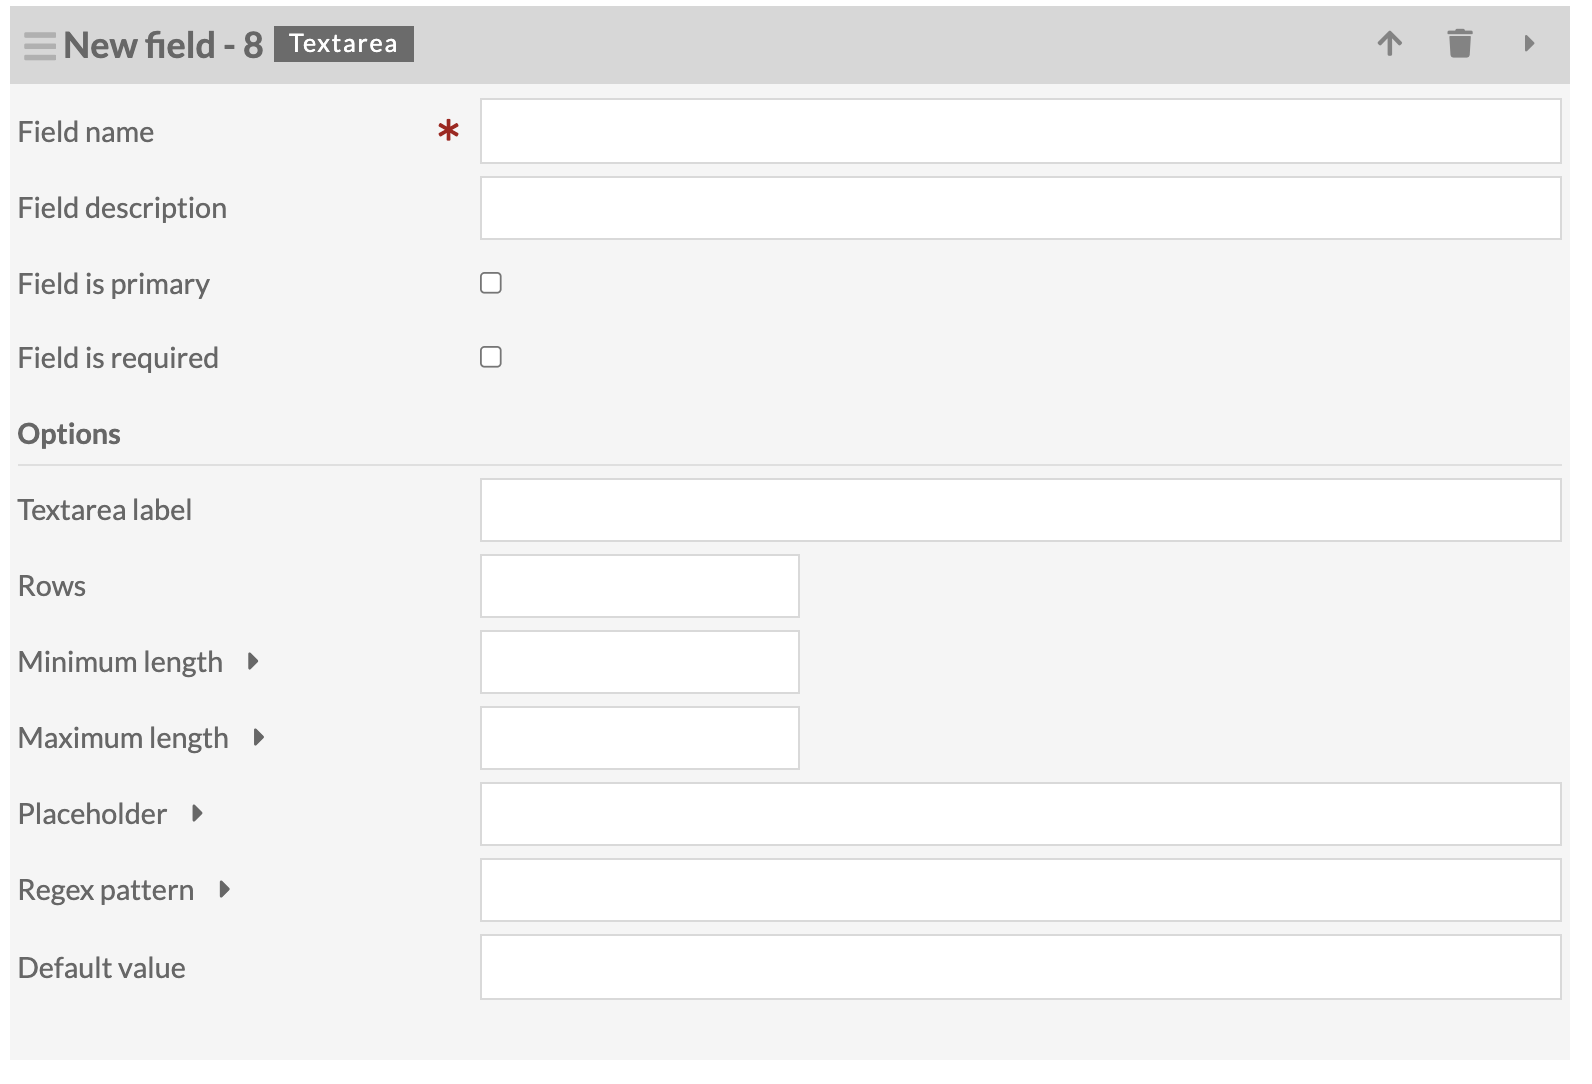
Create a field with s pace for multiple lines of text.
Options are:
- Field name (required): will display for transcribers
- Field description: will display for transcribers
- Field is primary: checkbox to set whether this is the primary field, ie the field by which the record is identified.
- Field is required: checkbox.
- Note that if a field is marked as required and is left blank by a transcriber, it will be marked as invalid.
- Textarea label: changes the display label for the field.
- Rows: set the number of visible rows for text. If left blank, this defaults to three rows.
- Minimum length: sets the minimum number of characters which a transcriber can enter.
- Maximum length: sets the maximum number of characters which a transcriber can enter.
- Placeholder: example value to display when the field is empty.
- Regex pattern: set a regular expression pattern which the field input must match.
- Default value: set a default value for the field.
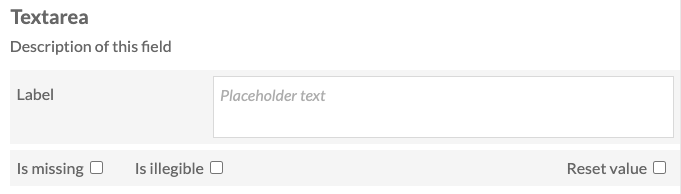
This image shows a textarea field with the default height of three rows. The placeholder, label, and descriptions have been populated with text which reflects their purpose.
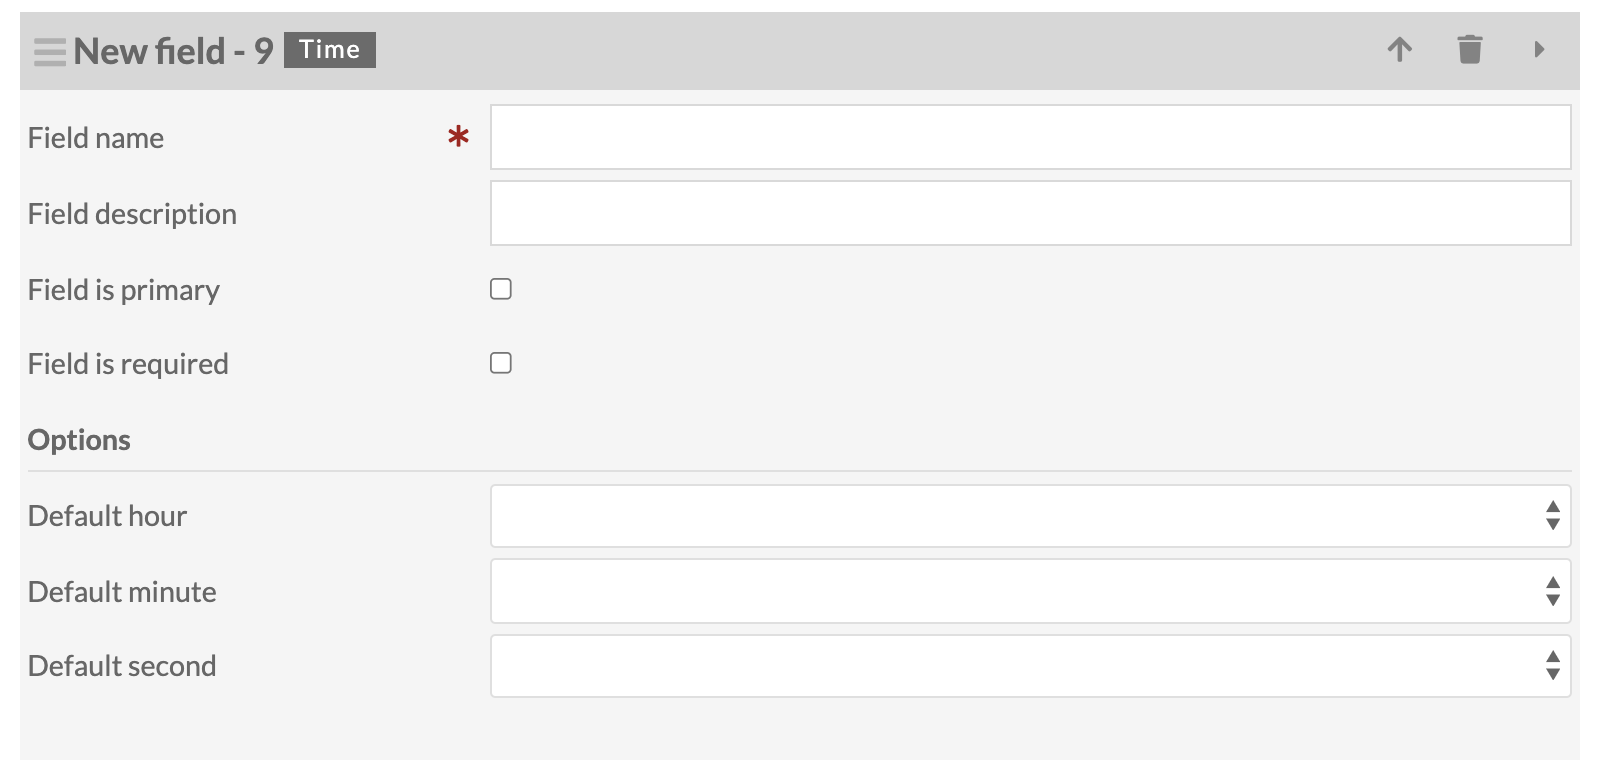
Create a field which allows entry of time data (no date)
Options are:
- Field name (required): will display for transcribers
- Field description: will display for transcribers
- Field is primary: checkbox to set whether this is the primary field, ie the field by which the record is identified.
- Field is required: checkbox.
- Note that if a field is marked as required and is left blank by a transcriber, it will be marked as invalid.
- Default hour: select from a dropdown (1-23)
- Default minute: select from a dropdown (00-59)
- Default second: select from a dropdown (00-59)
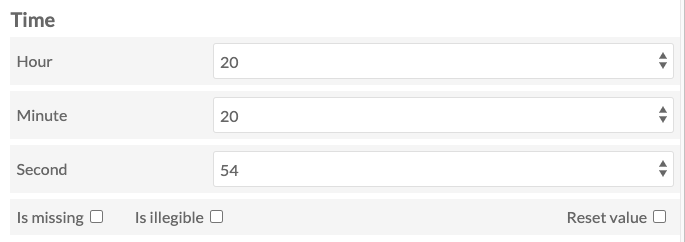
This image shows a time block in the transcription view with the dropdowns set to 20:20:54, or 54 seconds past 8:20 pm.
At any time when you are building or editing a form, you can save your progress.
The "Save and..." button in the upper-left corner of the browser window opens to reveal two options:
- Save and Return to dataset items will save your changes and return you to the browse view of the items in your dataset.
- Save and Continue editing dataset will save your changes and reload the page, keeping you on the Form Builder tab. A green banner should appear near the top of the page with the message that the dataset has been edited.
As you are building your form, you can save and continue to edit.
Once you have saved your form, you can return to edit it at any time by going to the dataset page and clicking "edit dataset". From there you can select the Form Builder tab.
When you edit each field, you have access to all of the same options as when you added it. If a field is collapsed - showing up only as a gray bar - click the arrow on the right end of the bar to expand the field and edit it.

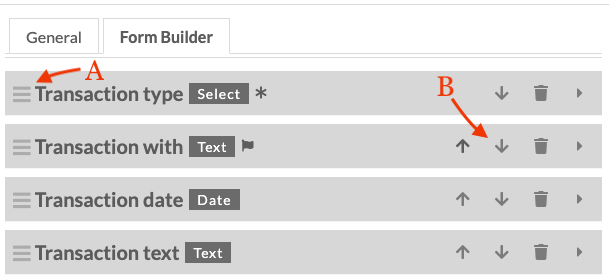
Once you have multiple field blocks in a form, you can change the order of the fields in two ways:
Drag and drop the fields by clicking on the triple-bar icon on the far left of the field block, then dragging the block to the location you want it to appear.
Click the up and down arrows on each field in order to move it exactly one spot higher or lower in the field order. It will move above or below the field immediately adjacent.
In the image below, the A arrow points to the drag and drop icon and the B arrow points to the up and down arrows.
If your form will have more than 75 fields, you will need to increase the default setting for max_input_vars of the PHP on your server. You may need to ask a systems administrator to do this for you. If you are using Reclaim or other hosting companies which use CPanel, you may be able to do this yourself by following these instructions.