Datasets
Once you have created a project, you can begin adding datasets to the project. A project can have many datasets or only one.
Each dataset should have the same data model. Each dataset has its own form; in order to use a different form you must create an additional dataset. Information is exported from DataScribe by dataset.
To add a dataset, go to the Project view for your project, then select “Add new dataset” from the dropdown in the upper right corner of the browser window.
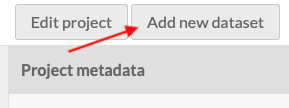
This will take you to the form to build a new dataset. There are fields for:
- Name (required): a name for the dataset
- Description: A description of the dataset. This will display in the dataset metadata when viewing the project.
- Guidelines: Instructions and useful information for transcribers of this dataset.
- Item Set (required): Select from a dropdown of item sets in the Omeka S install.
- Revert review status: checkbox. Check this to automatically revert an approved item's review status to "not reviewed" when a record belonging to the item is added or modified. The default behavior is to retain the approved review status.
- This matters when exporting data - only approved data is exported. So if the box is unchecked, changes to items which are approved will be automatically added to the export.
- Import form: import a DataScribe dataset form (json). This option is only available when adding a new dataset.
Using the eye icon in the upper right corner, you can set the dataset as private or public. Private datasets are only visible to Global Admins of the Omeka S install and those users who have been added to the project. A public dataset can be viewed by anyone who is logged in to the Omeka S installation.

Once you have created the dataset, you will be taken to the dataset browse page. A message should appear in the main work area “No items found. Sync this dataset. If you have recently synced, the sync job likely has not finished.”
To sync the dataset, either click the phrase “sync this dataset” or use the Actions menu in the upper right corner of the window and select the “Sync dataset” option. Syncing updates the dataset with the information from the items in the item set. For more on syncing once a dataset is populated, see below.
Once you have synced the dataset, you may need to reload the page in order to see the items.
To view a dataset, go to the project of which it is a part. The project has a table of all datasets, the dataset’s title, creator, and date created. Clicking on the ellipses (three dots) in a dataset’s row will show you the metadata for that dataset. Clicking its title takes you to the items in the dataset.
Dataset actions are available from the dataset page (the same page where you see the items in the dataset). The Browse and Edit buttons are always visible; other options are available from the "more actions" dropdown.

Depending on what your current browse view is, this will either display as “Browse records” or “Browse items”. Use this to toggle between the two views.
Editing the dataset presents you with a page two tabs: General and Form Builder.
The General options are almost the same as when you created the dataset. You can to edit the name, description, and guidelines of a dataset. Note that changing the associated item set will result in a loss of data. You can choose whether or not to revert the review status. Note that you cannot import a form into an existing dataset.
The Form Builder tab allows you to add or edit the form for your dataset
Syncing updates the dataset with the information from the items in the item set. You should synchronize periodically, any time items are added or removed from the item set. Be aware that any items which have been removed from the Omeka S item set will be deleted from the DataScribe dataset, along with any records which have been created for those items.
Syncing does not send any information from DataScribe to Omeka S.
Running the validation checks input in the records against settings you have in the form builder. For example, checking whether required fields are filled, whether numbers match the required format, and against any regular expressions you may have implemented.
Once you have run the validation, records with invalid values will be marked with a red alert, or exclamation point, on their browse rows. You will be able to filter by items and records “with values marked as invalid” in order to find them more quickly.
You should validate periodically, after fields are added to the form, after field validation rules change, and before exporting the dataset.
Export this dataset to a CSV file. Note that the file will only include records from approved items. Any invalid values will be given as “null” in the CSV. Running an export will overwrite any previous export file.
Exported files are stored in the Omeka install. They are made available in the Dataset metadata drawer on the right hand side of the window. Once you have completed a successful export, the bottom option of the drawer with have the heading "Download dataset."
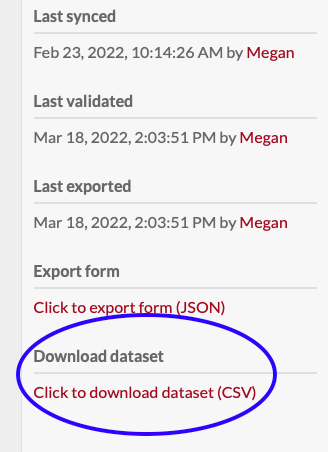
You will need to download the file in order to open it or save it locally; the link functions as a direct link to the file, and will either download or open when you click on it depending on your browser settings.
An exported csv will have three columns in addition to the data created in the dataset form:
- DataScribe item number: item number in the DataScribe dataset. Does not correspond to Omeka S item number.
- DataScribe Record number: record number for that record in DataScribe. Record numbers are assigned across DataScribe as a whole, so an item may not have sequential record numbers.
- DataScribe Record Position: order of records within an item. If the insert before/after option has been used when editing or creating a record, the position number sequence may not match the record number sequence. For example, the records with positions 1, 2, 3, 4 could have record numbers 1, 3, 2, 4.
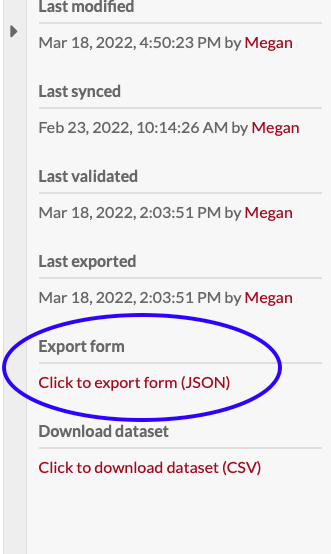
This action is available from the drawer in the Dataset view, near the download dataset option. You can export the form from the dataset to import when creating new datasets. Note that you cannot import a form to an existing dataset - only new datasets.
When you click on the link, your browser will prompt you to select where to save the form. The form will be called "form_export" by default - you can change this in the download and save dialog. Forms are exported in json format.