

A lightweight, cloud-native GIS platform for visualizing, exploring, and analyzing geospatial data across desktop and web environments, with a responsive layout for mobile screens.
GeoLibre is built with Tauri v2, React, TypeScript, MapLibre GL JS, DuckDB-WASM Spatial, and deck.gl. The same workspace runs as a native desktop app, in any modern web browser, and adapts responsively to mobile and small screens.
Video tutorial: GeoLibre 1.0: A Free, Open-Source Cloud-Native GIS That Runs Anywhere (Browser, Desktop & Jupyter)
- Runs across desktop (Tauri), web (browser), and mobile or small screens, with a responsive layout that adapts menus, dialogs, and panels, plus per-panel visibility through Layout settings
- MapLibre map workspace with OpenFreeMap basemaps, blank background support, and toggleable navigation, fullscreen, geolocation, globe, terrain, scale, attribution, and logo controls
- Load local vector layers supported by DuckDB-WASM Spatial, including common formats such as GeoJSON, GeoParquet, GeoPackage, Shapefile, FlatGeobuf, KML/KMZ, GML, delimited text, and GPX
- Reproject vector layers to EPSG:4326 on load and split dragged GPX files into named waypoint, track, and route layers
- Add Data menu for XYZ tiles, WMS, WFS, GeoJSON URLs, vector tiles, COG and GeoTIFF rasters, MBTiles, ArcGIS FeatureServer and VectorTileServer layers, PMTiles, Zarr, LiDAR, 3D Tiles, and Gaussian splats
- Cloud data integrations through the Planetary Computer and Earth Engine panels, the Overture Maps plugin, and federal Web Services plugins
- Manual and automatic refresh for WFS, GeoJSON URL, and Add Vector Layer URL layers
- Layer panel for visibility, opacity, reordering, rename, zoom-to-layer, identify, labels, open attribute table, export, and remove actions
- Live style panel with single, categorized, graduated, and expression symbology (fill, stroke, opacity, circle radius), including for Add Vector Layer layers
- Attribute table with filtering, sorting, resize controls, feature highlighting, optional zoom to selected features, column management (rename, delete, hide/show, reorder), and export to GeoJSON/GeoParquet/CSV
- SQL Workspace for running DuckDB Spatial SQL against loaded layers, local files, and remote URLs, with sample queries, query history, and adding results to the map or exporting them
- Multiple DuckDB SQL query-result layers with identify, selection, and attribute table support
- Controls menu with Measure, Bookmark, Minimap, and View State tools, plus a Print menu and a Search panel
- Conversion menu for Vector to GeoParquet/FlatGeobuf/PMTiles, CSV to GeoParquet, and Raster to COG; GeoParquet and CSV conversions run in the browser with DuckDB-WASM, while FlatGeobuf, PMTiles, and COG require the optional Python sidecar
- Whitebox toolbox with batch tools run against a selected input directory
- Vector menu with common geometry tools (buffer, centroids, convex hull, dissolve, bounding box, simplify, clip, intersection, difference, union) that run in the browser with Turf.js, an optional GeoPandas sidecar engine for every tool, and an in-browser GeoPandas engine via Pyodide (no server, same results as the sidecar)
- Raster menu with common raster tools (hillshade, slope, aspect, reproject, resample, clip by extent, clip by mask layer, polygonize, contour) backed by a rasterio Python sidecar, with a file path in and a file path out
- Drag and drop vector and GeoTIFF/COG raster files onto the map to add them as layers
- Project menu to create, open, save, and Save As
.geolibre.jsonprojects - Desktop diagnostics panel, update check, and MSIX packaging support
- Plugin system with basemap, layer control, MapLibre components, swipe, street view, Overture Maps, LiDAR, GeoAgent, and GeoEditor integrations, including configurable control positions and external plugin manifests; external plugins can render on the host's shared deck.gl instance via
app.getDeckGL() - Time Slider plugin for animating time series raster and vector data
- Atmosphere Effects plugin that renders a deep-space backdrop, parallax starfield, comets, and an atmospheric halo around the globe at low zoom (technique adapted from Leonel Dias)
- External plugin zip loading from the app data plugins directory and local development plugin directories
- Bundled drop-in plugins under
public/plugins/<id>/that bake into both the web and desktop builds and load automatically with no manifest URL - Browser deployment with Docker, embed-friendly URL parameters, and a
maponlychrome-free mode - Python package (
geolibre) that embeds the full app in Jupyter notebooks as an anywidget, with a leafmap-style API and two-way project sync - Optional Python FastAPI sidecar for heavier processing workflows
- Node.js 22+
- Rust toolchain (rustup) for Tauri desktop builds
- Linux:
webkit2gtk,libayatana-appindicator(see Tauri prerequisites)
git clone https://github.com/opengeos/GeoLibre.git
cd GeoLibre
npm install
Bun users can run bun install. The root trustedDependencies list allows the known install scripts for core-js, @google/genai, and protobufjs.
To update an existing source checkout to the latest version, pull the changes, reinstall dependencies (in case package.json changed), and rebuild:
cd /path/to/GeoLibre   # your GeoLibre checkout
git pull origin main
npm install            # or: bun install
If you run a production build, rebuild afterwards with npm run build (web) or npm run tauri:build (desktop). If you work from the dev servers (npm run dev or npm run tauri:dev), the git pull and npm install above are enough — just restart the dev server to pick up the changes.
npm run devOpen http://localhost:5173. The map and browser vector import support local vector files that DuckDB-WASM Spatial can read, including common formats such as GeoJSON, GeoParquet, GeoPackage, Shapefile, FlatGeobuf, KML/KMZ, and GML, with direct handling for GeoJSON, zipped Shapefiles, and KMZ archives. You can choose files from Add Vector Layer or drag them onto the app. GeoTIFF/COG rasters can also be dragged onto the map to add them as raster layers. Desktop filesystem dialogs, local MBTiles, and local raster file reads require Tauri.
Build and run the browser version of GeoLibre:
docker build -t geolibre .
docker run --rm -p 8080:80 geolibre
Open http://localhost:8080. The Docker image serves the production Vite build with nginx. Desktop-only features such as Tauri filesystem dialogs, local MBTiles, local raster file reads, and project save/open require the desktop app.
The image also bundles the Python conversion/Whitebox sidecar (uvicorn) and
reverse-proxies it at /sidecar, so the browser reaches it same-origin with no
CORS or separate process to manage. /conversion/status is reachable at
http://localhost:8080/sidecar/conversion/status.
- Vector → GeoParquet and CSV → GeoParquet run in the browser with DuckDB-WASM and need no sidecar.
- Vector → FlatGeobuf, Vector → PMTiles, and Raster → COG use the sidecar. These read a file path on the sidecar's filesystem, so from a pure browser they currently work for files mounted into the container (a browser cannot hand the container an absolute path); upload-based input is a planned follow-up. The desktop app passes real local paths, so all conversions work there.
- PMTiles and Whitebox are amd64-only in the container —
freestilerandwhitebox-workflowspublish no linux/arm64 wheels. On arm64 the other conversions still work; those two report unavailable.
Because the sidecar is reachable same-origin, conversion reads/writes are
confined to GEOLIBRE_CONVERSION_ROOTS (default /data in the image). Mount
your files there:
docker run --rm -p 8080:80 -v "$PWD/data:/data" geolibreSet GEOLIBRE_DISABLE_SIDECAR=1 to run nginx only (the original web-only
behavior):
docker run --rm -p 8080:80 -e GEOLIBRE_DISABLE_SIDECAR=1 geolibreThe published image is available from GitHub Container Registry:
docker pull ghcr.io/opengeos/geolibre:latest
docker run --rm -p 8080:80 ghcr.io/opengeos/geolibre:latest
For deployments under a URL subpath, pass GEOLIBRE_APP_BASE at build time:
docker build --build-arg GEOLIBRE_APP_BASE=/geolibre/ -t geolibre .The container always serves the app from its root path. The build argument only sets the URL prefix that the app expects, so subpath deployments also require a reverse proxy in front of the container that strips the prefix before forwarding requests (for example, nginx proxy_pass http://geolibre/; with a trailing slash).
The SQL Workspace runs DuckDB SQL (with the Spatial extension loaded, so ST_* functions are available) directly in the browser against your loaded layers and remote data. Open it from the Processing menu.
- Query loaded layers. Every vector layer with in-memory features is exposed as a table; the queryable table names are listed at the top of the dialog.
- Read files and URLs. Use
read_parquet(),read_csv_auto(),read_json_auto(), orST_Read(). A bare URL or path afterFROM/JOIN(for exampleSELECT * FROM https://host/data.parquet) is auto-wrapped in the matching reader. Remote files are streamed over HTTP range requests, so large datasets are not downloaded in full. - Sample queries. A dropdown of ready-to-run examples (attribute-only, aggregate, and spatial queries) against a public sample dataset, plus a per-layer "sample query for layer" dropdown.
- Query history. Recently run queries are saved (in
localStorage) and can be reloaded from the History dropdown. - Results and export. Results show in a grid (capped for display; the full result is kept for export). When a query returns a geometry column, you can add the result to the map as a new layer (with an optional custom layer name) or export it as CSV or GeoParquet.
SELECT NAME, CONTINENT, POP_EST, geom
FROM https://data.source.coop/giswqs/opengeos/countries.parquet
WHERE POP_EST > 50000000
ORDER BY POP_EST DESC;
Only a single statement is supported per run; remote s3:// URLs are not read directly, so use the HTTPS form instead.
The Processing → Vector menu opens a single Vector tools dialog with common geometry operations that run against your loaded GeoJSON layers. Pick a tool, choose the input layer (and an overlay layer for the two-layer tools), set the parameters, and the result is added to the map as a new layer.
- Geometry tools. Buffer (by a distance in kilometers, meters, or miles), Centroids (one centroid point per feature), Convex hull (a single polygon enclosing all features), Dissolve (merge polygons, optionally grouped by an attribute field), Bounding box (the rectangular envelope of all features), and Simplify (Douglas-Peucker vertex reduction).
- Overlay tools. Clip (clip the input to an overlay layer, keeping input attributes), Intersection, Difference, and Union between two polygon layers.
- Three engines. Every tool runs fully in the browser with Turf.js, so no sidecar is required. Every tool can also run on the optional GeoPandas sidecar for projection-aware results; when the sidecar is unavailable the dialog falls back to the client engine. A third Python (Pyodide) engine runs the same GeoPandas/Shapely code as the sidecar but entirely in the browser via Pyodide — no server, so it works on the web build too. The first run lazily downloads the Python runtime from a CDN (override with
VITE_PYODIDE_INDEX_URLto self-host for offline use); results match the sidecar because both share onevector_ops.py.
To enable the sidecar engine, install the optional vector extra (it is not bundled by default to keep the sidecar small):
# install the vector extras (GeoPandas, Shapely)
pip install -e "backend/geolibre_server[vector]"
# run it
geolibre-server # or: uvicorn geolibre_server.app.main:app --host 127.0.0.1 --port 8765The Processing → Raster menu opens a single Raster tools dialog with common raster operations. Because raster processing cannot run in the browser, these tools run on the Python sidecar (rasterio) with a file path in and a file path out: pick a tool, choose an input raster and an output file, set the parameters, and run the job.
- Terrain. Hillshade, Slope (degrees or percent), and Aspect from an elevation model.
- Reproject. Reproject to a target CRS and Resample to a new pixel size, with selectable resampling (nearest, bilinear, cubic).
- Clip. Clip by extent (a bounding box in the raster's CRS) and Clip by mask layer (a GeoJSON mask, reprojected to the raster automatically).
- Raster to vector. Polygonize (vector polygons grouped by pixel value) and Contour (contour lines from an elevation model), written as GeoJSON.
The tools share the conversion sidecar job runner. Install the optional raster extra (rasterio is also pulled in by the conversion extra):
# install the raster extras (rasterio, numpy, contourpy)
pip install -e "backend/geolibre_server[raster]"
# run it
geolibre-server # or: uvicorn geolibre_server.app.main:app --host 127.0.0.1 --port 8765The browser demo supports URL parameters for iframe-friendly layouts.
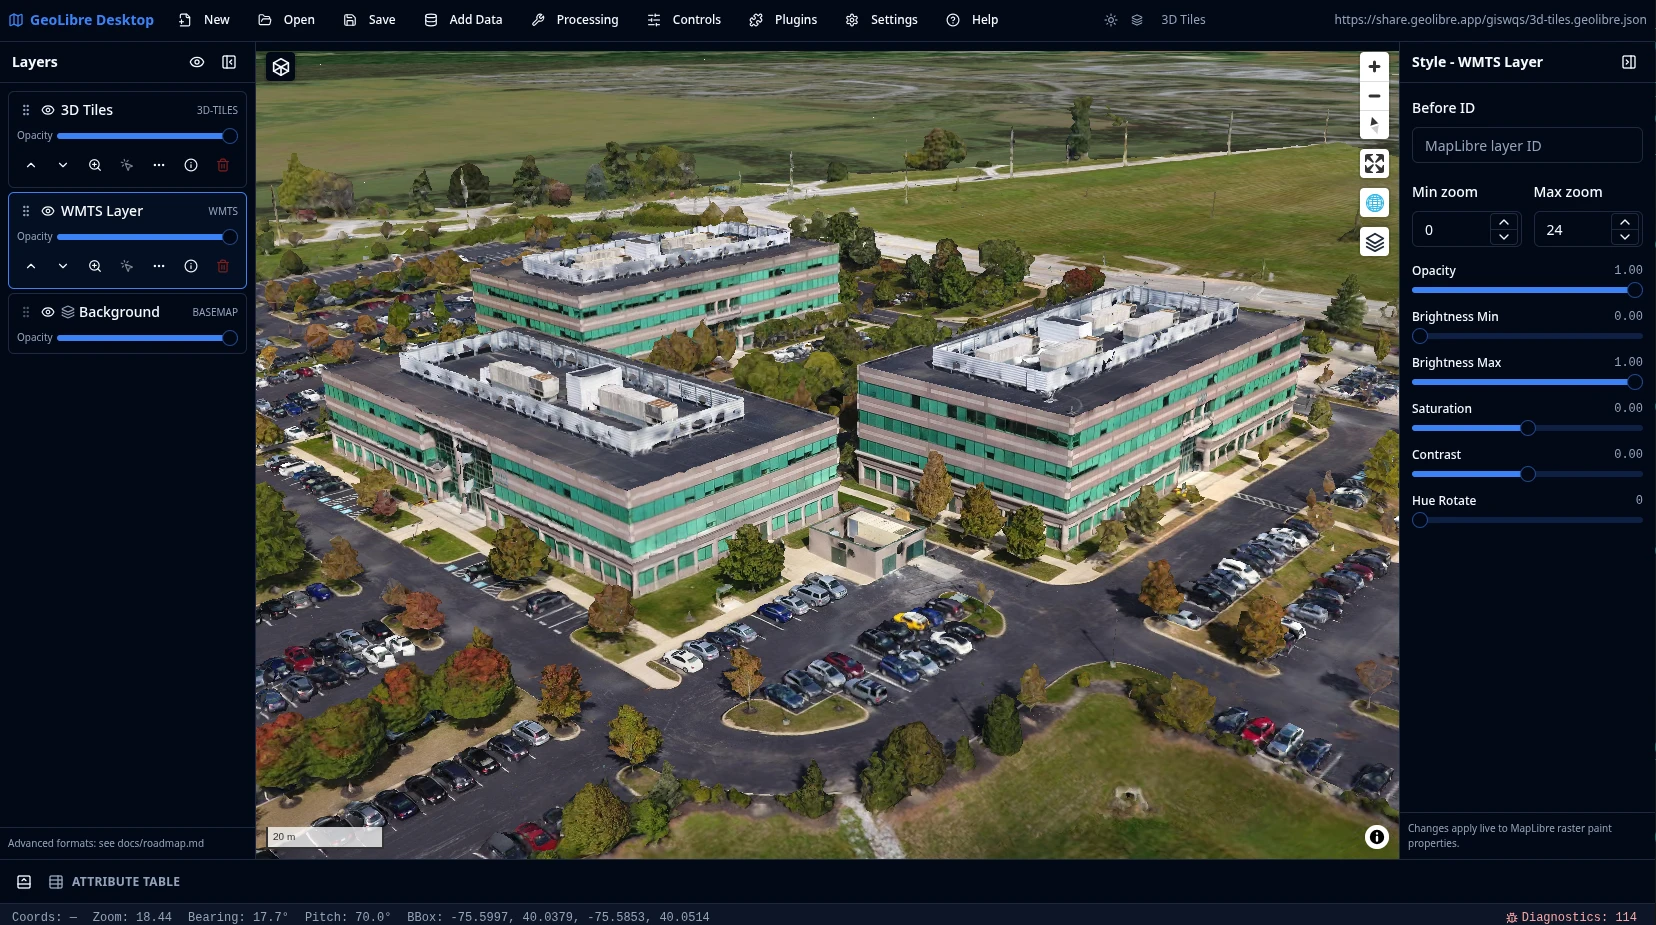
Open a project by URL:
https://viewer.geolibre.app/?url=https://share.geolibre.app/giswqs/3d-tiles.geolibre.json
Supported query parameters:
| Parameter | Example | Description |
|---|---|---|
url |
url=https://share.geolibre.app/giswqs/3d-tiles.geolibre.json |
Loads a .geolibre.json project from a public URL. |
layout |
layout=compact |
Uses the compact embed layout with icon-only toolbar buttons and hidden project metadata. embed and iframe are aliases. |
toolbar |
toolbar=icons |
Shows icon-only toolbar buttons without enabling the full compact layout. |
panels |
panels=none |
Hides the Layers, Style, and Attribute table panels. hidden, hide, and off are aliases. |
hidePanels |
hidePanels=true |
Alternative way to hide the Layers, Style, and Attribute table panels. |
maponly |
maponly |
Hides all chrome (toolbar menu, Layers/Style/Attribute panels, and status bar), leaving only the map. The bare flag or any of true, 1, yes, on enable it. |
theme |
theme=dark |
Sets the initial color theme on load, overriding the OS preference. Accepts dark or light; the in-app toggle still works afterwards. |
Use compact mode for narrow embeds. This shows icon-only toolbar buttons and hides project metadata:
https://viewer.geolibre.app/?url=https://share.geolibre.app/giswqs/3d-tiles.geolibre.json&layout=compact
Hide the Layers, Style, and Attribute table panels for map-focused embeds:
https://viewer.geolibre.app/?url=https://share.geolibre.app/giswqs/3d-tiles.geolibre.json&layout=compact&panels=none
Use toolbar=icons when you only want icon-only toolbar buttons. panels=hidden, panels=hide, panels=off, and hidePanels=true are accepted aliases for hiding panels.
For a fully chrome-free, map-only embed, use maponly. It hides the toolbar menu, all panels, and the status bar:
https://viewer.geolibre.app/?url=https://share.geolibre.app/giswqs/3d-tiles.geolibre.json&maponly
GeoLibre ships a Python package that embeds the full GeoLibre app (menus,
panels, processing tools) in a Jupyter notebook cell as an
anywidget, with a leafmap-style API. State syncs both
ways through a single .geolibre.json project, so data you add from Python
appears in the UI, and edits you make in the UI are readable back from Python.
pip install geolibreOr with conda:
conda install -c conda-forge geolibrefrom geolibre import Map
m = Map(center=(-100, 40), zoom=4)
m.add_geojson("https://example.com/data.geojson", name="Data")
m.add_tile_layer("https://tile.openstreetmap.org/{z}/{x}/{y}.png", name="OpenStreetMap")
m.add_cog("https://example.com/dem.tif", name="DEM")
m # the full GeoLibre UI renders in the cellRead state edited in the UI, and round-trip projects:
m.to_project()["mapView"]["center"]   # reflects the live UI view after panning
m.save_project("my-map.geolibre.json")
Map().load_project("my-map.geolibre.json")
The package source lives in python/, and the bundled web app is
built into the wheel by npm run build:embed. The interactive widget works in
local Jupyter, VS Code, Google Colab (its built-in port proxy is used
automatically), and JupyterHub / remote servers (through jupyter-server-proxy;
install with pip install "geolibre[hub]", and pass Map(server_proxy=True) on
non-Hub remote setups). See the Python package guide for the
full API.
The Street View plugin can use Google Street View and Mapillary imagery. Create apps/geolibre-desktop/.env.local and set one or both provider credentials:
VITE_GOOGLE_MAPS_API_KEY=your_google_maps_api_key
VITE_MAPILLARY_ACCESS_TOKEN=your_mapillary_access_token
For Google Street View, enable the Maps Embed API for the key in Google Cloud. For Mapillary, create an app in the Mapillary developer dashboard and use its client access token.
The optional Python (Pyodide) vector engine loads its runtime from the public jsDelivr CDN by default. To self-host it for offline or production use, point it at a mirrored copy of the Pyodide distribution:
VITE_PYODIDE_INDEX_URL=https://your-host/pyodide/v0.27.7/full/Restart npm run dev or npm run tauri:dev after changing these values. Vite only exposes variables with the VITE_ prefix to the frontend.
npm run tauri:devnpm run build
npm run tauri:buildWhere to find the output:
- Web build — static files in
apps/geolibre-desktop/dist/. Serve this directory with any static web server (or the Docker image above). - Desktop installers —
apps/geolibre-desktop/src-tauri/target/release/bundle/, with per-platform subfolders:deb/,rpm/, andappimage/on Linux;msi/andnsis/on Windows;dmg/andmacos/on macOS. The unbundled executable is inapps/geolibre-desktop/src-tauri/target/release/. On Linux,npm run tauri:buildbuildsdebandrpmby default; passing--bundlesreplaces that default selection rather than adding to it, so list every format you want, for examplenpm run tauri:build -- --bundles deb,rpm,appimagefor all three.
Run the fast TypeScript unit tests:
npm run test:frontendRun the full local quality gate:
npm run cicd backend/geolibre_server
python -m venv .venv && source .venv/bin/activate
pip install -e .
uvicorn geolibre_server.app.main:app --host 127.0.0.1 --port 8765The Processing → Conversion menu (Vector → GeoParquet / FlatGeobuf,
CSV → GeoParquet, Vector → PMTiles, Raster → COG) talks to this sidecar at
http://127.0.0.1:8765. Vector → GeoParquet and CSV → GeoParquet also
run fully in the browser with DuckDB-WASM and need no sidecar; the others
require it.
To use them from the web build, start the sidecar and serve the app from
localhost:5173 (CORS is restricted to that origin and the Tauri origins):
# install the conversion extras (DuckDB, rio-cogeo, freestiler)
pip install -e "backend/geolibre_server[conversion]"
# run it
geolibre-server   # or: uvicorn geolibre_server.app.main:app --host 127.0.0.1 --port 8765
The sidecar self-bootstraps a managed runtime on first use; set
GEOLIBRE_CONVERSION_PYTHON=$(which python) to reuse the current environment
instead. See backend/geolibre_server/README.md
for details.
apps/geolibre-desktop   # Tauri + React app
packages/core           # Types, store, project format
packages/map            # MapLibre integration
packages/ui             # Tailwind + shadcn/ui
packages/plugins        # Plugin API
packages/processing     # Algorithm registry
backend/geolibre_server # FastAPI sidecar
python/                 # geolibre Python package (Jupyter anywidget)
sample-data/            # Sample GeoJSON & project
docs/                   # Architecture & API docs
Built-in plugins live in packages/plugins/src/plugins/ and are registered by the desktop app in apps/geolibre-desktop/src/hooks/usePlugins.ts. Map control plugins can expose a control position through getMapControlPosition() and setMapControlPosition() so the Plugins menu can move them between map corners.
For external plugin development, start from the GeoLibre plugin template. It includes a plugin.json manifest, a GeoLibre plugin wrapper entry point, and a package:geolibre script that creates a zip file for the desktop app data plugins/ directory. During development, Settings → Manage Plugins can scan an additional local plugin directory, including an unpacked bundle folder such as the template's geolibre-plugin/ directory, or a hosted plugin.json manifest URL. See the Plugin API for the external plugin contract.
To bake an external plugin into the build so it loads automatically — with no Settings entry and no manifest URL — drop its built folder into apps/geolibre-desktop/public/plugins/<plugin-id>/ (the same plugin.json + dist/ a manifest URL would serve). The bundledPlugins() Vite plugin discovers it at build time and the app loads it through the normal external-plugin path. The same folder serves both the web build and the desktop build (which ships the same frontend), so one drop-in covers both. Private plugin bundles are git-ignored under that folder and copied in at build/deploy time. See the Plugin API for details and the security model.
- Create a plugin file in
packages/plugins/src/plugins/.
import type { GeoLibreAppAPI, GeoLibrePlugin } from "../types";

export const myPlugin: GeoLibrePlugin = {
  id: "my-plugin",
  name: "My Plugin",
  version: "0.1.0",
  activate: (app: GeoLibreAppAPI) => {
    app.setBasemap("https://example.com/style.json");
  },
  deactivate: () => {},
};- Export it from
packages/plugins/src/index.ts.
export { myPlugin } from "./plugins/my-plugin";- Register it in
apps/geolibre-desktop/src/hooks/usePlugins.ts.
import { myPlugin } from "@geolibre/plugins";

manager.registerAll([
  maplibreLayerControlPlugin,
  maplibreGeoAgentPlugin,
  maplibreGeoEditorPlugin,
  myPlugin,
]);
Plugins can use the app API to change basemaps, add GeoJSON layers, or attach MapLibre controls. For a MapLibre control plugin, add the package dependency, import its CSS in apps/geolibre-desktop/src/main.tsx, then call app.addMapControl(control, "top-left") in activate() and app.removeMapControl(control) in deactivate().
Built-in MapLibre controls such as Navigation, Fullscreen, Geolocate, Globe, Terrain, Scale, Attribution, and Logo are toggled from the desktop app's Controls menu. The same menu also opens Search, a standalone place search panel backed by the Components plugin. Keep project-specific controls such as Layer Control and Components in the plugin menu when they use the plugin API or need plugin lifecycle behavior.
The Components plugin wraps maplibre-gl-components controls and wires their layer events into the GeoLibre store. It provides Add Data shortcuts for FlatGeobuf, PMTiles, Zarr, LiDAR, and Gaussian splats, while raster COG and GeoTIFF layers can also be added through the standard Add Raster Layer dialog.
If a third-party MapLibre control needs app-specific styling fixes, add scoped overrides in apps/geolibre-desktop/src/index.css instead of editing files in node_modules. Keep selectors limited to the plugin control class. For example, GeoEditor toolbar buttons need a local override because MapLibre's default control button CSS can override their flex centering:
.geo-editor-control .geo-editor-tool-button {
  align-items: center;
  display: flex !important;
  justify-content: center;
  line-height: 0;
  padding: 0;
}

.geo-editor-control .geo-editor-tool-button svg {
  display: block;
  flex: 0 0 auto;
  margin: 0;
}
Run checks before submitting changes:
npm run build
pre-commit run --all-filesFull documentation, including the User Guide and Tutorials, is published at geolibre.app.
- User Guide - a feature-by-feature reference for the interface, adding data, layers, styling, the attribute table, map controls, processing, the SQL Workspace, data integrations, plugins, settings, and embedding.
- Tutorials - hands-on, end-to-end workflows: your first map, cloud-native data, vector analysis, terrain analysis, spatial SQL, and sharing and embedding.
- Reference
- The Atmosphere Effects plugin (deep-space backdrop, parallax starfield, comets, and the globe atmosphere halo) adapts the technique and visual design from Leonel Dias's article Globe atmosphere, halo, and comets — the layered Canvas 2D approach, the halo gradient and "screen" blend, the limb-sampling that keeps the halo aligned under pitch, and the starfield/comet parameters.
MIT