GradBot Student Assignments
In this assignment, you will construct a function that will allow you to easily set your robot’s translational and rotational speeds. This function will be a handy function, and we will make use of it throughout future lab assignments.
Recall that the kinematic model of our robot consists of the following equations:
- x translational speed in m/s
$$V_{x}= \frac{r}{2}(S_{left}+S_{right})$$
- yaw rotational speed in radians/s
$$V_{yaw}= \frac{r}{L}(S_{left}-S_{right})$$
- motor speed in radians per second
$$S_{m}= \frac{(Power⋅6.80)}{100}$$
- r=0.065 m, L=0.238 m
-
Working as a class, solve the equations so that given a desired Vx and Vyaw, we can compute a corresponding power setting for the motors.
-
Type in the following skeleton of a function:
function setSpeed(vx, vyaw) {
    const r = 0.065;    //wheel radius
    const l = 0.238;    //axel length
    var sleft;          //left speed
    var sright;         //right speed
    var lpower;         //left power
    var rpower;         //right power

    // Compute lpower and rpower
    // YOUR CODE HERE

    left.setPower(lpower);
    right.setPower(rpower);
}
-
Complete the function by implementing the math that you developed in step 1 in the part that says “YOUR CODE HERE”.
-
Use your function to perform the following actions:
a. Have your robot roll forward 1 meter.
b. Have your robot roll in a circle that is 2 meters in diameter.
c. Have your robot stop after completing the circle.
-
Open notepad and create a file on your flash drive called “functions.txt”, copy the setSpeed function into this file so we can use it again later.
-
Download your robot.txt file from the robot simulator and submit your file on https://tinyurl.com/robotics-turnin. For “assignment” put “Lab 1”. You may also want to save your robot on your flash drive for later.
In this lab, we will be implementing turtle graphics. Turtle graphics is a classic way to introduce programming and robotics. The idea is that your robot will use a marker to draw on the floor as it moves, and you will write programs to draw creative images.
- Add a marker to your robot. The best place for the marker to be is in the center of your robot, so don’t move it once you add it. The final robot should look something like this:
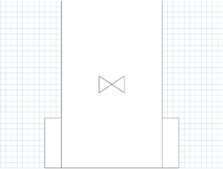
- Rename the marker part to “marker” as shown above.
- Enter the functions as shown in the section titled "Turtle Functions" in Lab 2.
- Copy all your new functions into the “functions.txt” file on your flash drive. These may prove useful!
- Take a look at the function “toRadians”
Note: Turtle graphics uses degrees, not radians in their commands as this is easier to think of while drawing shapes.
- Take a look at the four basic turtle commands:
a. forward(d)
b. back(d)
c. turnLeft(d)
d. turnRight(d)
- Take a look at the reference for the marker. You can raise and lower the pen, and you can change its color.
- Enter the following code below the line of slashes:
marker.penUp();
await forward(5);
await turnRight(90);
await forward(5);
await turnLeft(90);
marker.penDown();

for(var i=1; i <= 4; i = i+1) {
  await forward(2);
  await turnRight(90);
}
Write a program to draw your own interesting figures. This could be a scene of some kind, or a geometric shape. The key thing is that you experiment with what your robot can do! The best pictures will be awarded a certificate at the end of the summer institute.
To submit your assignment, email a screenshot of your picture and your robot.txt file to relowe@pstcc.edu. Make the message’s subject: “ Lab 2”
-
Look at the “for” loop and note how it repeats its contents a fixed number of times.
-
Alter the code so that your turtle makes left-hand turns instead of right-hand turns.
-
Alter the code so that your turtle moves backward instead of forward.