Kali RPI4B
- Download and copy this latest kali rpi image to the VM and cd into the directory with it
- Confirm the file is in your current directory
$ ls kali-linux-2020.1-rpi3-nexmon-64.img.xz - (Optional step, as you can dd the compressed image later) Extract the image
$ unxz kali-linux-2020.1-rpi3-nexmon-64.img.xz - Verify it extracted
$ ls kali-linux-2020.1-rpi3-nexmon-64.img - Plug in your sd-card into the USB reader and attach it to the VM
- Identify the block device for your sd-card (SIZE should be close to your SD card size, my sd-card is 64GB and was /dev/sdc)
$ lsblk -p NAME MAJ:MIN RM SIZE RO TYPE MOUNTPOINT /dev/sda 8:0 0 50G 0 disk ├─/dev/sda1 8:1 0 42G 0 part / ├─/dev/sda2 8:2 0 1K 0 part └─/dev/sda5 8:5 0 8G 0 part [SWAP] /dev/sdc 8:32 1 59.5G 0 disk ├─/dev/sdc1 8:33 1 122.1M 0 part └─/dev/sdc2 8:34 1 58.6G 0 part /dev/sdd 8:48 1 57.8G 0 disk └─/dev/sdd1 8:49 1 57.8G 0 part /media/kali/TRAVELER1 /dev/sr0 11:0 1 1024M 0 rom - If there are existing logical partitions on your device, delete them using gparted gui
$ sudo gparted /dev/sdc - Write the image to the sd-card using dd
$ sudo dd if=kali-linux-2020.1-rpi3-nexmon-64.img of=/dev/sdc status=progress 6995849728 bytes (7.0 GB, 6.5 GiB) copied, 1446 s, 4.8 MB/s 13671874+0 records in 13671874+0 records out 6999999488 bytes (7.0 GB, 6.5 GiB) copied, 1449.97 s, 4.8 MB/s- If the image is compressed via xz, then use something like:
$ xzcat kali-linux-2020.1-rpi3-nexmon-64.img.xz | sudo dd of=/dev/sdc status=progress
- If the image is compressed via xz, then use something like:
- Mount the first logical partition to edit cmdline.txt and config.txt
$ sudo mount /dev/sdc1 /mnt - Edit /mnt/cmdline.txt to contain the following
dwc_otg.fiq_fix_enable=2 console=ttyS0,115200 console=tty1 root=/dev/mmcblk0p2 rootfstype=ext4 rootwait rootflags=noload net.ifnames=0 - Edit /mnt/config.txt and add the following line to the end of the file
enable_uart=1 - Unmount the first logical partition
$ sudo umount /mnt - Eject the sd-card before you remove it
$ sudo eject /dev/sdc - Attach the FTDI-USB-Serial cable to your RPI4's UART0 and attach the USB to your PC (see https://github.com/jhu-information-security-institute/NwSec/wiki/RPI4B for wiring); attach the device to your VM and it should be /dev/ttyUSB0
- Open minicom on /dev/ttyUSB0; Settings should be 115200,8N1,No,No
$ sudo minicom -D /dev/ttyUSB0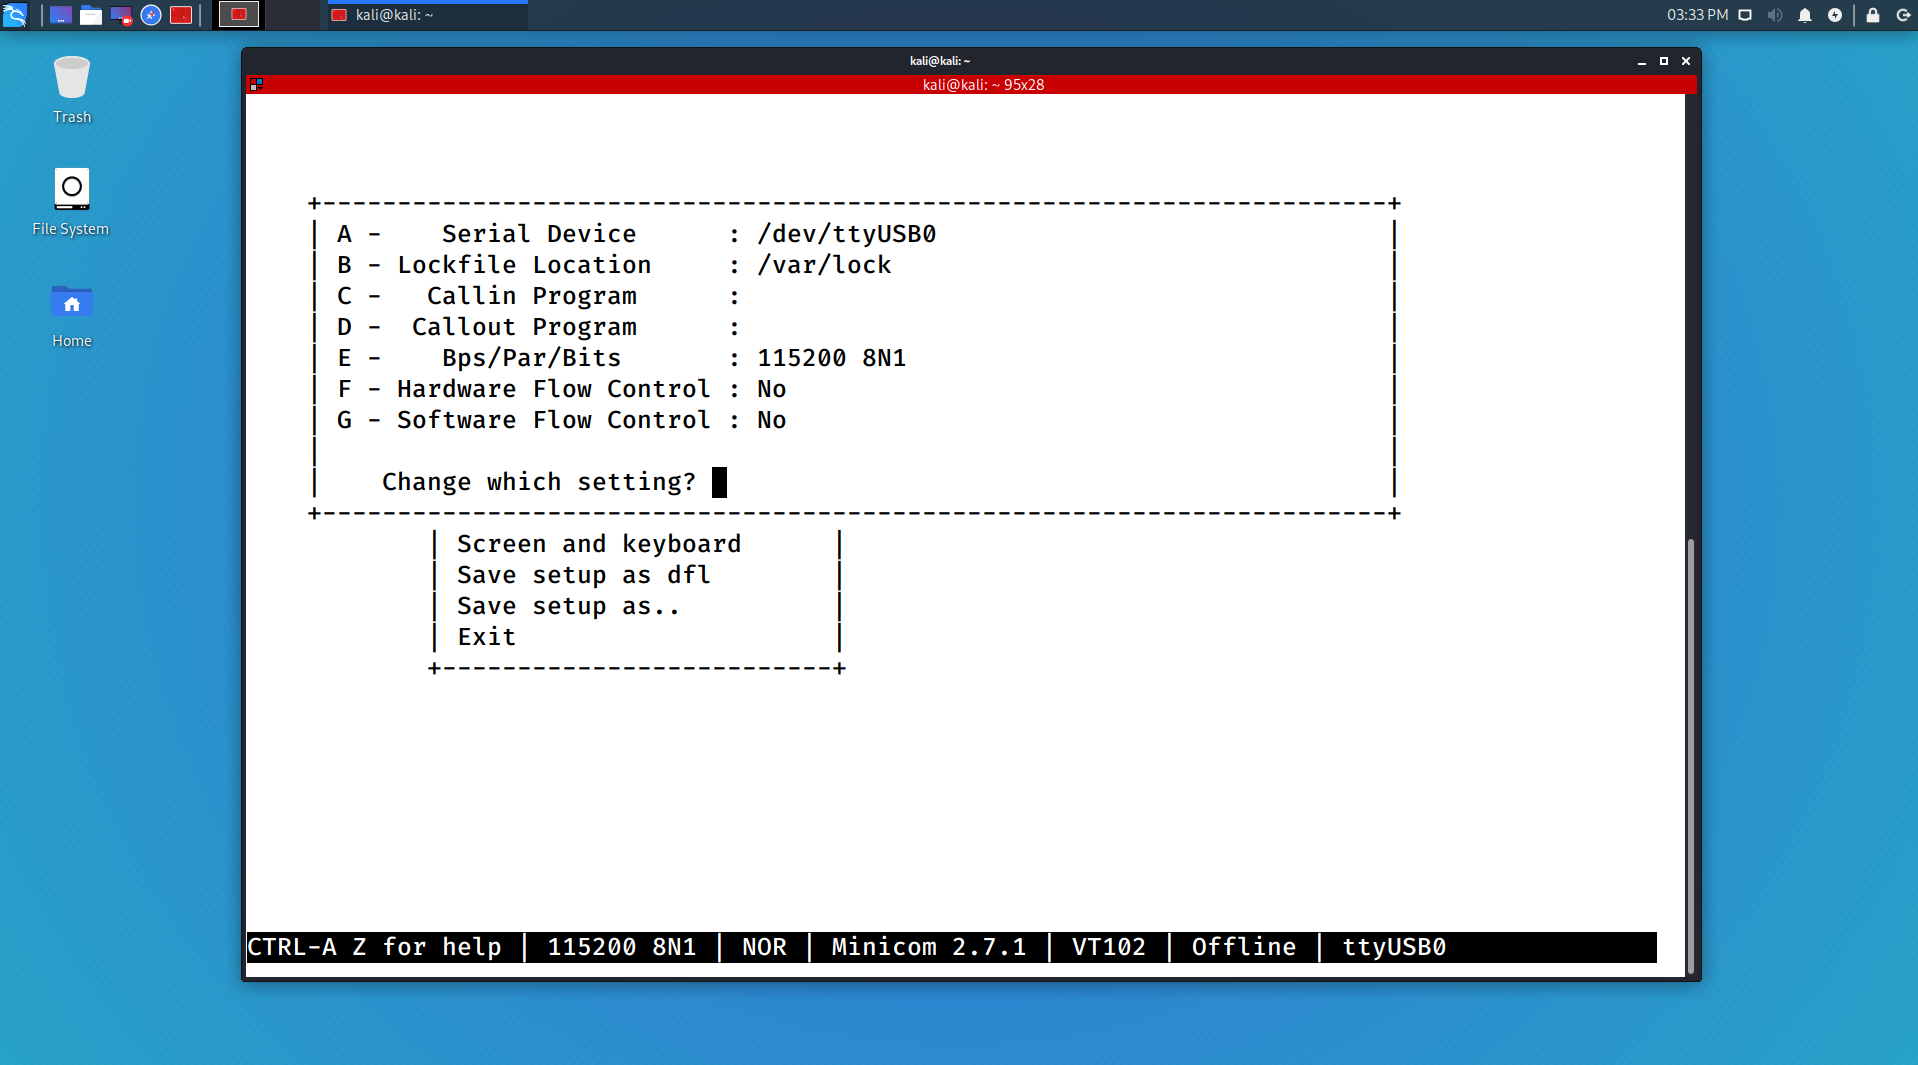
- Insert the sd-card into the RPI4
- Power on the RPI4
- Wait for the RPI4 to boot and login with
root,toor - Setup networking (see the section below)
- Run an update and upgrade sequence
$ sudo apt-get update $ sudo apt-get upgrade -y - Install openssh-server
$ sudo apt-get install openssh-server - Start the server
$ systemctl start ssh.service - Get the ip address of your rpi
$ ifconfig wlan0 - From your Kali VM, SSH into the RPI4 using its ip address
$ ssh root@ipaddressofpihere
E.g., for a home wifi network or when using a wireless hotspot from your smartphone
- Generate a skeleton wpa_supplicant.conf for your SSID and WPA2 pre-shared key (PSK)
$ wpa_passphrase ssidhere pskhere > /etc/wpa_supplicant/wpa_supplicant.conf - Edit /etc/wpa_supplicant/wpa_supplicant.conf and add lines for ctrl_interface, update_config, country, key_mgmt, proto, pairwise, and group; it should look similar to the following
ctrl_interface=DIR=/var/run/wpa_supplicant GROUP=netdev update_config=1 country=US network={ ssid="ssidhere" #psk="pskhere" psk=FFFFFFFFFFFFFFFFFFFFFFFFFFFFFFFFFFFFFFFFFFFFFFFFFFFFFFFFFFFFFFFF key_mgmt=WPA-PSK } - Update /etc/network/interfaces by adding these lines
auto wlan0 iface wlan0 inet dhcp - Create a nwsetup.sh script with the following lines
pkill dhclient pkill wpa_supplicant wpa_supplicant -B -i wlan0 -c /etc/wpa_supplicant/wpa_supplicant.conf ip link set dev wlan0 down ip link set dev wlan0 up dhclient -v wlan0 - Make nwsetup.sh executable
$ chmod +x nwsetup.sh - Run it
$ ./nwsetup.sh
- Instructions are identical to above PSK authentication above, but have a different wpa_supplicant.conf (as described next)
- Create /etc/wpa_supplicant/wpa_supplicant.conf similar to the following (replace
cooluserandsupersecretwith your MSSI-LAB credentials)ctrl_interface=DIR=/var/run/wpa_supplicant GROUP=netdev update_config=1 country=US network={ ssid="MSSI-LAB" identity="cooluser" password="supersecret" key_mgmt=WPA-EAP eap=PEAP phase1="peapver=0" phase2="auth=MSCHAPV2" }
- Install the dependencies
# apt-get install openssh-server - Start the sshd service
# systemctl start ssh.socketOnce you have sshd up, identify the ip address for your RPI4B and exit out of minicom. Then, ssh in to the RPI4B (as this is better than using minicom). Also, once sshd is up, you can usescpto copy files back and forth between your VM and the RPI4B. E.g.,$ scp root@192.168.1.1:~/hello .or$ scp hello root@192.168.1.1:~/. - To copy your keys over, use:
$ ssh-copy-id -i path_to_id_rsa.pub username@ipaddress_of_rpi
- Install the dependencies
# apt-get install tightvncserver - Create .vnc/xstartup with the following contents:
#!/bin/sh set -xv xrdb $HOME/.Xresources xsetroot -solid grey # Fix to make GNOME work export XKL_XMODMAP_DISABLE=1 /etc/X11/Xsession /usr/bin/startxfce4 vncconfig -iconic & - Start it using
vncserver(on first run it will ask you to set the password) - Connect to the server using a vncclient running on your Kali VM (need your ip address of the RPI4B and port should be 5901)
- List open vnc sessions using
ps -ef | grep vnc - Kill vncserver using
vncserver -kill:<DISPLAY#>
- Image downloads
- Kali documentation