
Welcome to the GitHub organization for building Red List of Ecosystems (RLE) assessment reports!
The RLE Assessment GitHub organization makes it easier to build IUCN Red List of Ecosystems assessment reports following the Global Ecosystem Typology classification framework. This workflow creates a skeleton website, notebooks, and PDF document with standard RLE calculations that can be customized by the assessment authors.
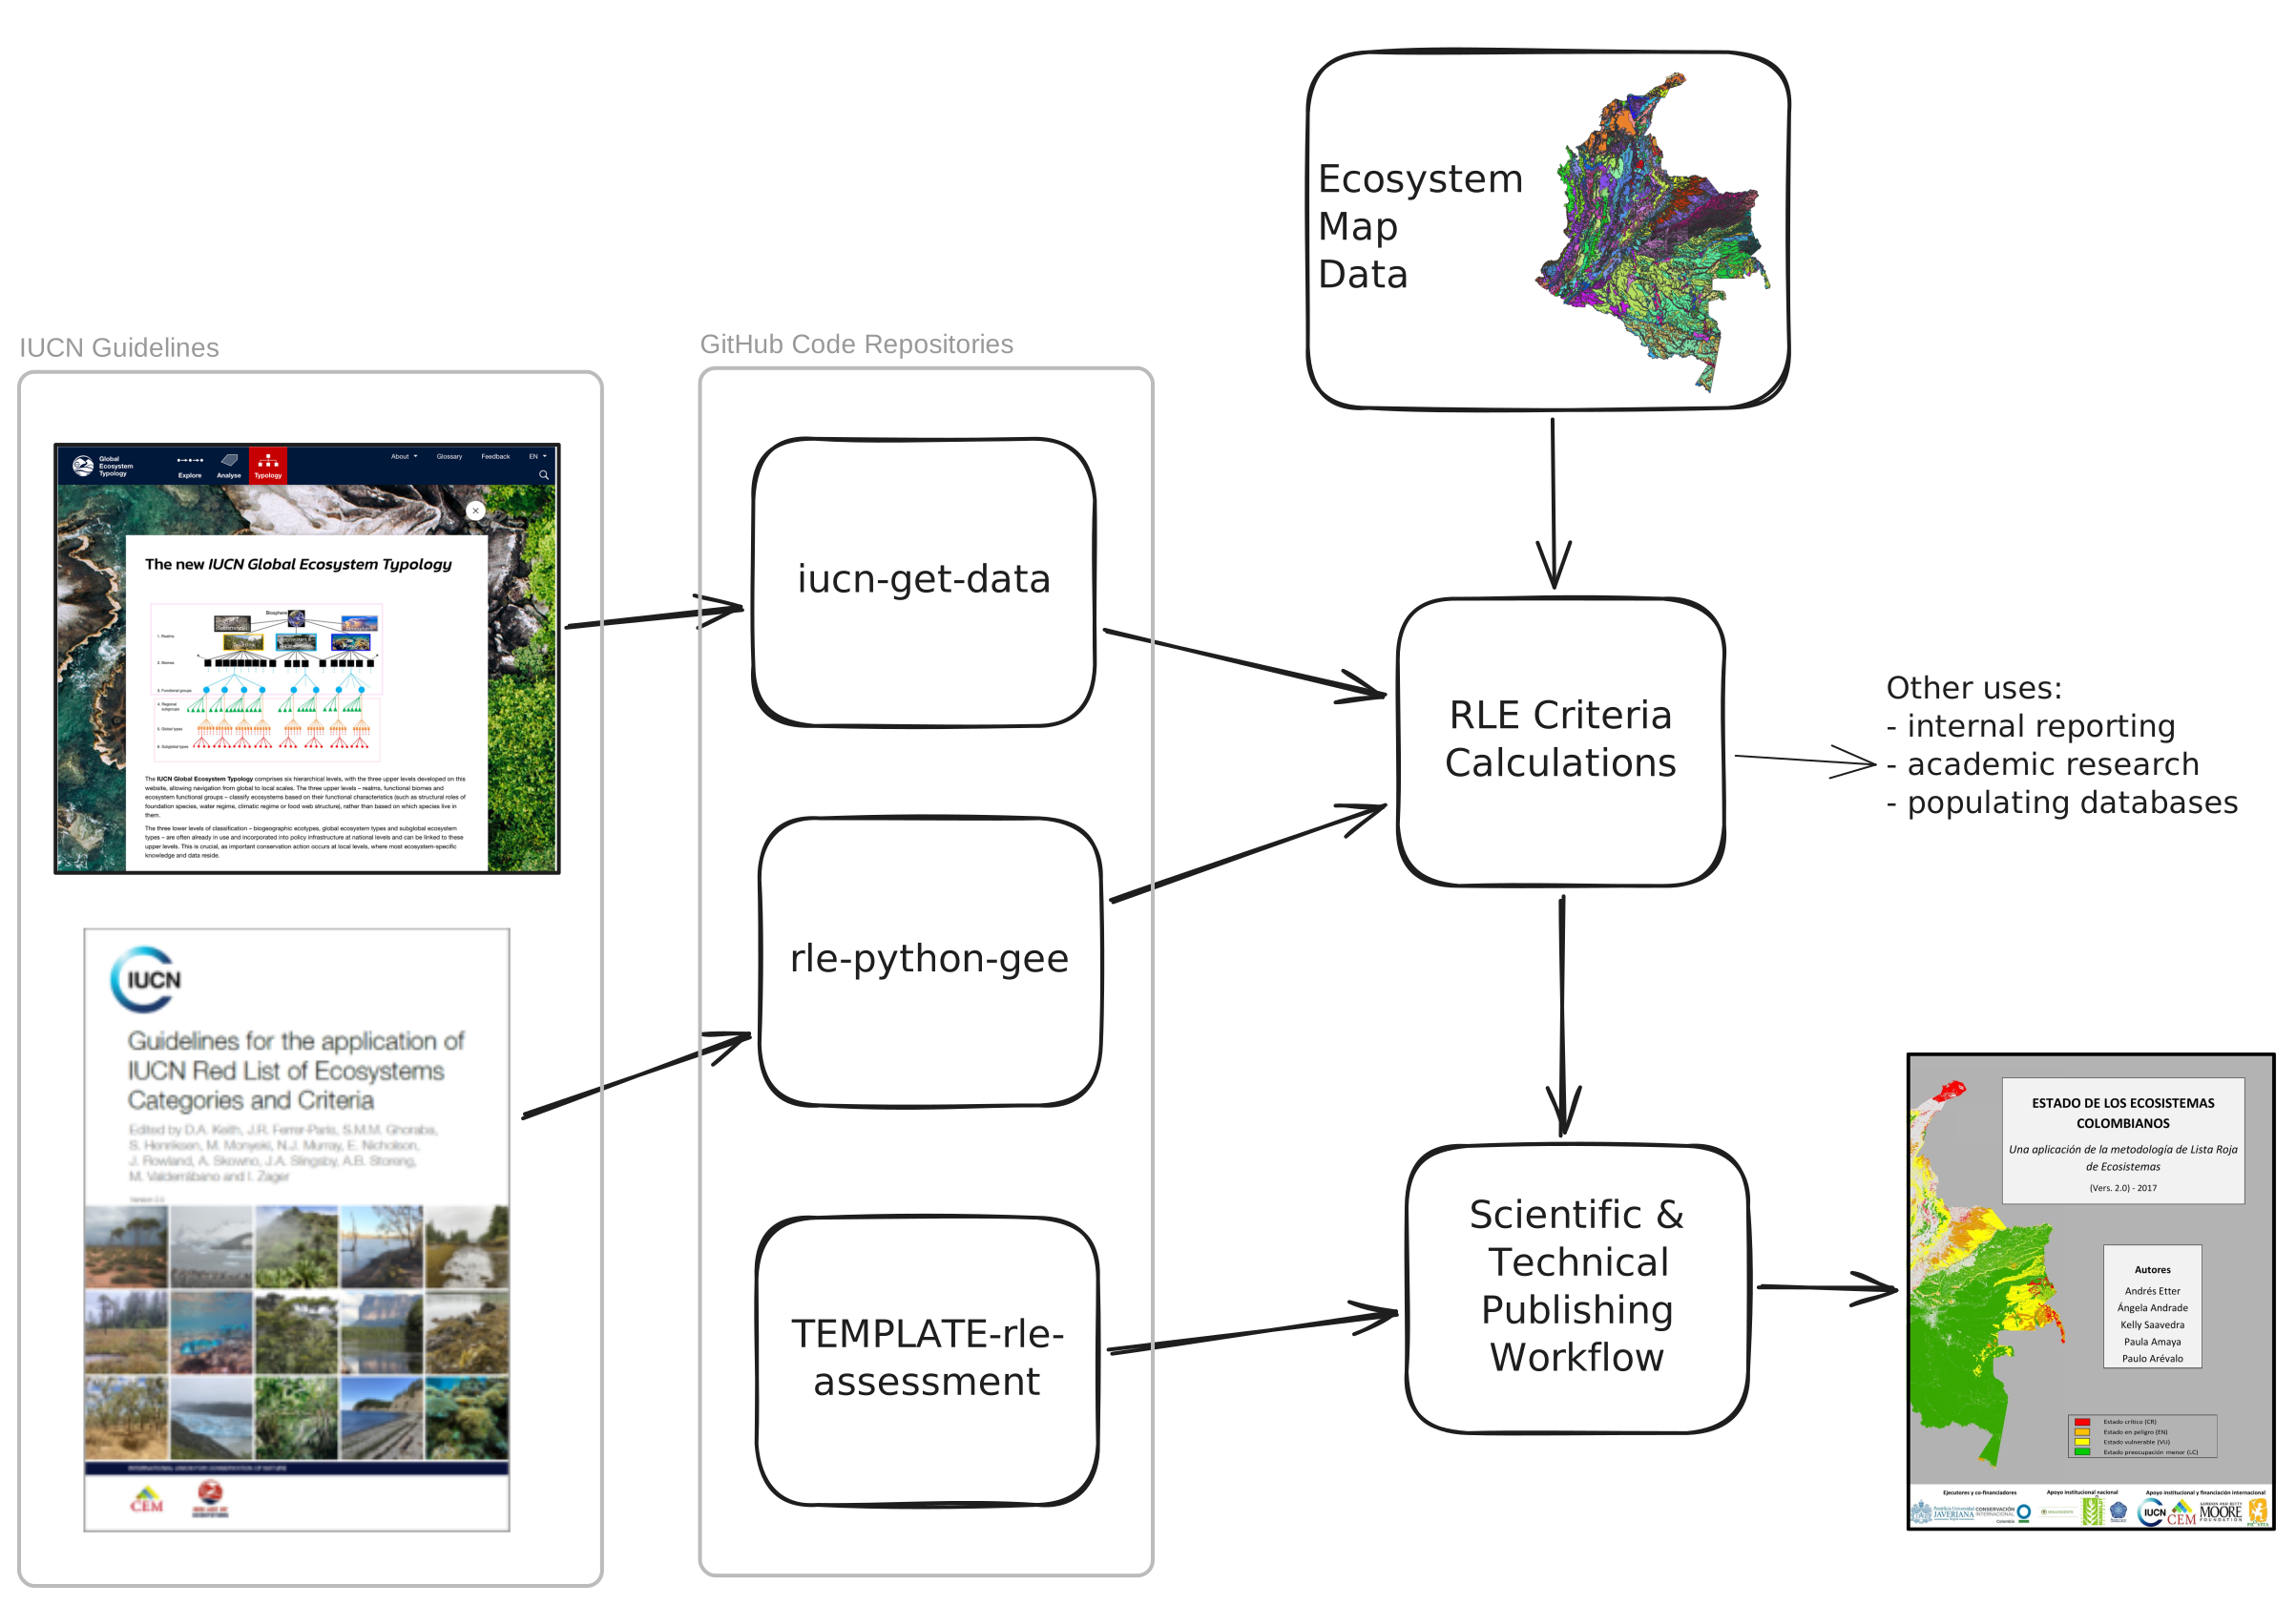
- A Google Cloud Project (GCP) account
- If you need to create a new account, visit https://console.cloud.google.com
- A GitHub account
- If you need to create a new account, visit https://github.com/signup
Creating a new assessment report repository involves configuring a GitHub code repository (for content) and a Google Cloud Platform project (for data access and storage). An initialization script automates the full setup process: creating a GitHub repository from the template, provisioning a GCP project with Workload Identity Federation, configuring GitHub secrets, and cloning the repository locally. The script displays each command it runs with a detailed explanation of what it does and why.
Instructions are provided for either local development or in a GCP Cloud Shell development.
Local development
Make sure additional prerequisites are installed:
- GitHub CLI (
gh) installed and authenticated (gh auth login). This is used to create and configure GitHub repositories.- Google Cloud CLI (
gcloud) installed and authenticated (gcloud auth login). This is used to create and configure Google Cloud Platform projects.- uv installed. This is used to run the initialization script (dependencies are resolved automatically).
- pixi installed. This is used to manage the project's development environment and dependencies.
The script checks for these prerequisites and gives clear instructions if anything is missing.
GCP Cloud Shell development
In a browser, open a GCP Cloud Shell terminal by going to:
https://shell.cloud.google.com/?show=terminal
The Google Cloud Shell has several of the prerequisites (GitHub CLI (
gh), Google Cloud CLI (gcloud), uv) automatically installed.However, the package manager pixi is not pre-installed in Cloud Shell. Install it by running the script:
curl -fsSL https://pixi.sh/install.sh | sh
source ~/.bashrc
Note: Cloud Shell has limited storage (~5 GB). If you encounter "No space left on device" errors during package installation, free up space by clearing caches:
rm -rf ~/.cache/rattler/cache/ ~/.cache/pip/You can also check what's using space with
du -sh ~/* | sort -hr | head -10and remove any unnecessary project directories.

The uv run command downloads the script directly from GitHub and automatically installs its dependencies (in an isolated, temporary environment) before running it -- no cloning or manual setup required.
Replace the placeholder values below with your own before running:
uv run https://raw.githubusercontent.com/RLE-Assessment/.github/main/scripts/init_repo.py --country-name "Ruritania" --gcp-project-id rle-ruritania --gh-repo-name rle-ruritania --project-dir .
| Option | Description |
|---|---|
--country-name |
Name of the country for the assessment. Also used to auto-estimate the initial map view coordinates (latitude, longitude, zoom) via geocoding. |
--gcp-project-id |
A globally unique GCP project identifier (lowercase letters, digits, and hyphens) |
--gcp-project-name |
(Optional) Display name for the GCP project. When creating a new project, defaults to a de-slugged version of the project ID (e.g. rle-ruritania → Rle Ruritania). |
--gh-repo-name |
Name for the new GitHub repository |
--gh-owner |
(Optional) GitHub username or organization. Defaults to the authenticated user. |
--project-dir |
Directory in which to clone the repository (use . for current directory) |
--yes / -y |
(Optional) Skip confirmation prompts (useful for non-interactive use) |
Most options are prompted interactively if omitted. The --gh-owner option defaults to the authenticated GitHub user when not specified; pass it explicitly to create the repository under an organization.
The script displays each command with an explanation before running it and asks for confirmation. Use --yes to skip the prompts.
The script runs four phases:
- GitHub Repository Setup -- creates the repo from the template and configures GitHub Pages deployment
- GCP Project Setup -- creates (or reuses) a GCP project, enables APIs, sets up Workload Identity Federation for keyless authentication, and verifies Earth Engine registration
- GitHub Secrets -- stores the WIF provider, service account, and project ID as repository secrets
- Local Setup -- clones the repository and installs packages
The script is idempotent -- it skips resources that already exist, so it is safe to re-run if a step fails partway through.
The following diagram illustrate the system components and the steps taken to configure and connect them.
flowchart LR
    subgraph GitHub
        subgraph Assessment Template
            T(["`**Assessment Template**<br/>***TEMPLATE-rle-assessment***`"])
        end
        subgraph Assessment Repo
            R(["`**Assessment Repo**<br/>***--gh-repo-name***<br/>***Step 2*** Create GitHub Pages Environment<br/>***Step 3*** Add 'main' as Deployment Branch<br/>***Step 4*** Customize project config<br/>***Step 5** Customize _quarto.yml`"])
        end
    end
    subgraph GCP["**GCP Project**"]
        P["`**Project Config**<br/>***Step 6*** Create/Use project --gcp-project-id<br/>***Step 7***Ensure Owner permissions<br/>***Step 8*** Enable APIs<br/>***Step 11*** Create service account*`"]
        WIP[["Workload Identity Pool<br/>*github-pool*<br/>***Step 9*** Create WIP"]]
        Bucket["Storage buckets"]
    end
    GEE(["Google Earth Engine"])
    T -- ***Step 1*** Create GitHub Repository --> R
    WIP -- ***Step 10*** Create OIDC Provider --> R
    GCP <-- ***Step 12*** Grant IAM Roles --> GEE
    P <-- ***Step 13*** Bind Repository to Service Account--> R
    P <-- ***Step 14*** Grant Token Creator Role --> R
    GCP <-- ***Step 15*** Register Project with Earth Engine --> GEE

    subgraph Dev Environment
        RClone(["`Assessment Repo (clone)<br/>***--gh-repo-name***<br/>*Step 20 Install Packages*`"])
    end
    R -- Step 19 Clone Repository --> RClone
If you just ran the initialization script above, skip to step 4.
-
Open the repository files in an editor
Local development
The repository files can be edited with any text editor. Because there a large number of files, it may be helpful to use a full Integrated Development Environment (IDE) like Visual Studio Code (VS Code).
GCP Cloud Shell development
In a browser, open a GCP Cloud Shell terminal by going to:
https://shell.cloud.google.com/?show=terminal
In the Cloud Shell terminal, enter
cloudshell open-workspace . -
Install
pixiPixi is a package management tool that can be used to create reproducible development environments.
curl -fsSL https://pixi.sh/install.sh | shThe pixi install modifies your shell's startup script, so after installing you need to re-execute the startup script to update your current shell.
source ~/.bashrcIf you already have pixi installed, make sure it is recent enough to read the project's lock file (pixi
>=0.68.0). Upgrade an existing install with:pixi self-update -
Create a local clone
Clone the repository for editing on your local computer or within Cloud Shell. Change the working directory to be the root of the cloned repository.
gh repo clone ${GH_OWNER}/${GH_REPO_NAME} cd ${GH_REPO_NAME} -
Authenticate for Earth Engine
The assessment notebooks use Python libraries that access Google Earth Engine. These libraries require Application Default Credentials (ADC), which are separate from the
gcloudCLI credentials used by the init script.gcloud auth application-default loginThis opens a browser sign-in flow and stores credentials that Python can use. You only need to do this once per machine (or once per Cloud Shell session).
-
Install packages
Install packages in the development environment and open a shell containing those packages.
pixi shell -
Preview the website
Local development
quarto previewThis opens the site in your default browser and auto-reloads when you save changes.
GCP Cloud Shell development
quarto preview --port 8080 --host 0.0.0.0 --no-browserUse Cloud Shell's Web Preview (port 8080) to view the site. It may take a minute to update after saving changes.
-
Publish the website
The website is automatically updated whenever you push committed changes to GitHub.