This was my final year Honours Project for my Computer Science degree.
Dissertation is available on request, Contact Email: ryanburrett17@gmail.com.
The aim of this project was to improve the medical literacy of people with communication and learning difficulties by developing a system to help doctors explain complex idea in a simple way. The developed application would be used by doctors as a tool to access and create simplified information about medical conditions. These would then be given to appropriate patients as an aide to help them understand their own health. The author aimed to use a combination of simple text and supplementary images to allow people with communication or learning difficulties to get the maximum information from anything produced by the system. Ultimately the system was developed successfully and the ability to create and search for simplified medical condition was added. The evaluations of created medical condition summaries, produced with the system, allowed for the discovery of which sort of creation method worked best. Guidelines were able to be recommended for how to use images as effectively as possible when creating a new condition summary.
Application was developed in C# with MySQL database and several API's to facilitate functionality e.g. Google's Text-2-Speech API
When launching the program you will be met with the start screen, this is the place where you search for a condition or start the process to create a new condition summary.
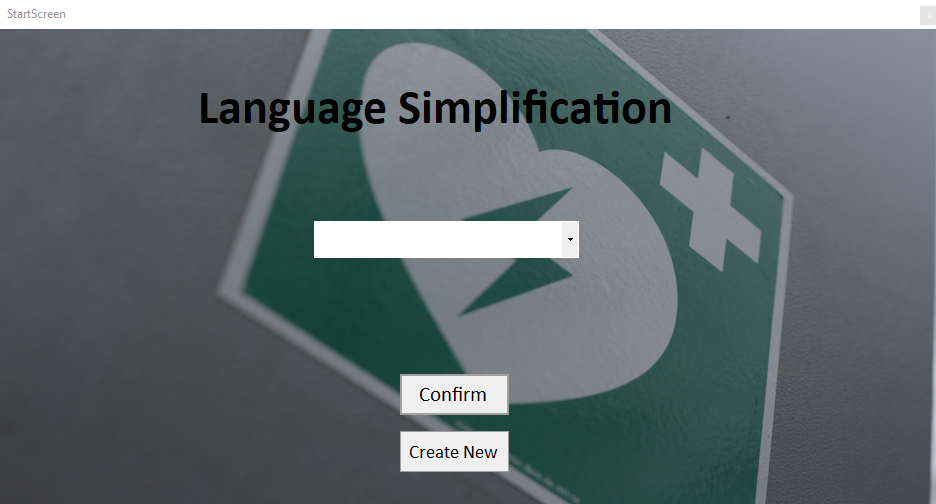
[Figure 1] Image of Start Screen Showing Available Buttons
When searching for a condition, the application will try and autocomplete your search with conditions already in the system. Selecting the condition you want and clicking confirm will bring you to the Consultation screen. 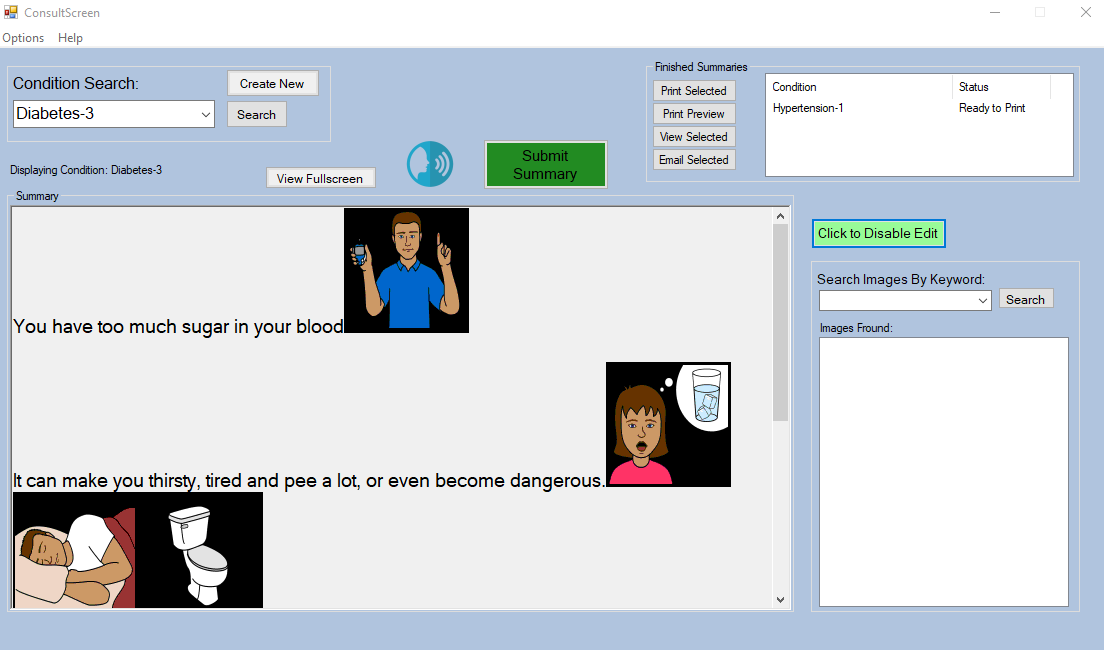
[Figure 2] Consultation Screen, showing a searched condition and an already submitted condition
Once you have search for a condition, you will be presented with the simplified summary, explaining said condition. You can now do several things with this summary.
You can enable the edit mode to change text or images to suit the patients needs. This is done by clicking the "Click to Enable Edit" button on the right-hand side of the window.
You can also click the Text-To-Speech button to play to the patient. This is done by clicking the Text-To-Speech Icon.
If you are satisfied with the summary content, you can now start the process of giving it to the patient. This can be done several ways:
- Display the summary full screen. This covers any confidential information and allows you to guide a patient through the summary verbally.
- You can print the summary out and then give the patient it, to take away. This is done by submitting the summary. This is done by clicking the submit summary button
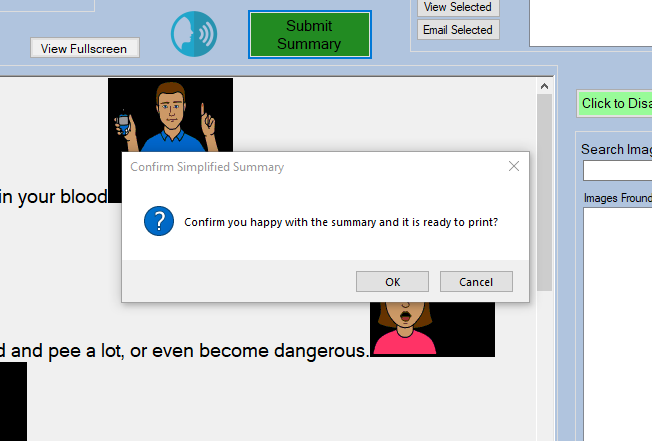
[Figure 3] Submit button confirmation on click
After a summary is submitted, it is considered done and is stored, ready to be given to the patient. An example of a submitted summary is below.
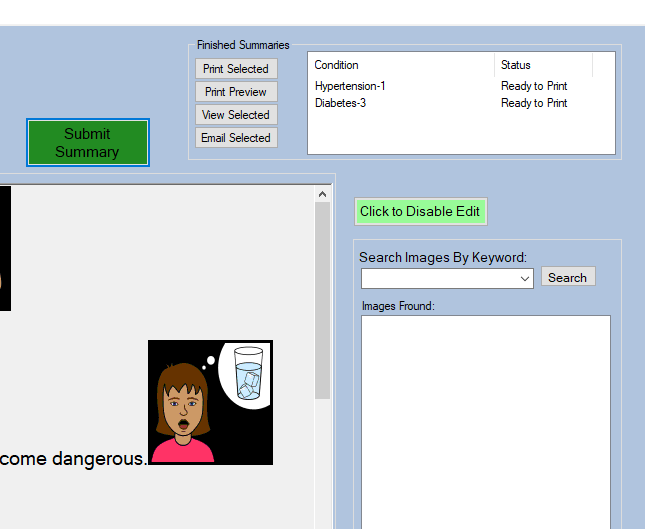
[Figure 4] Image of Finished, Submitted Summaries awaiting further action
Once submitted you can click the summary you want to perform an action for. To print the selected summary you can click the print summary button which will allow you to select a printer and start printing the summary.
- The final way to give the patient a summary is to send them it through email. This is done the same way as printing; you have to submit the summary you want to send and then press the email button as seen in Figure 4.
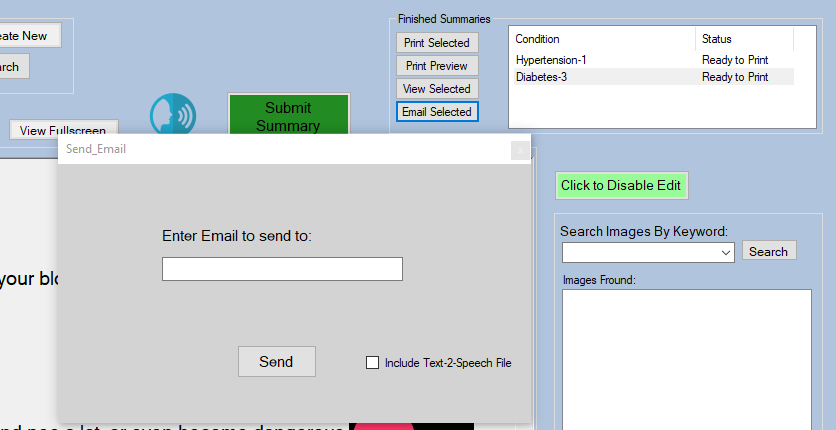
[Figure 5] Showing Email User Interface
You will be presented with a small window and will be requested to enter an email to send the selected summary to.
You may have a time when the condition you request isn't in the database and as such you have to create a new summary describing said condition. This can be done from the start screen by clicking "Create New" button, see Figure 1.
You will be presented with the window to create a new summary. 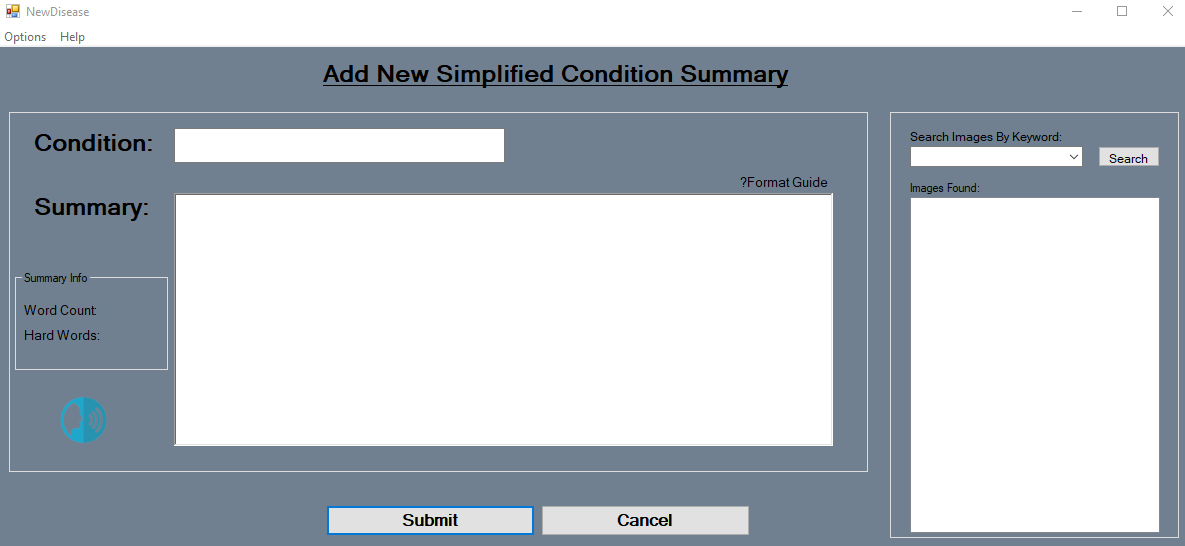
[Figure 6] Create New Condition Summary
Figure 6 shows the user interface you will see. This allows you to enter the name of the condition and then the simplified summary. An image search is displayed to the right side of the window and this is used to add images to the summary. Images are assigned keywords that relate to their content.
To add an image to the summary, you drag and drop the image into the position you want it. The image has to be appended to text. So usually at the end of a sentence.
If unsure about how to structure the summary, there is a helpful guide available. You can click the "?Format Guide" button to launch a window which gives some guidelines about structuring and formatting a summary to maximize its effectiveness at allowing a learning impaired understand the condition as best as possible.
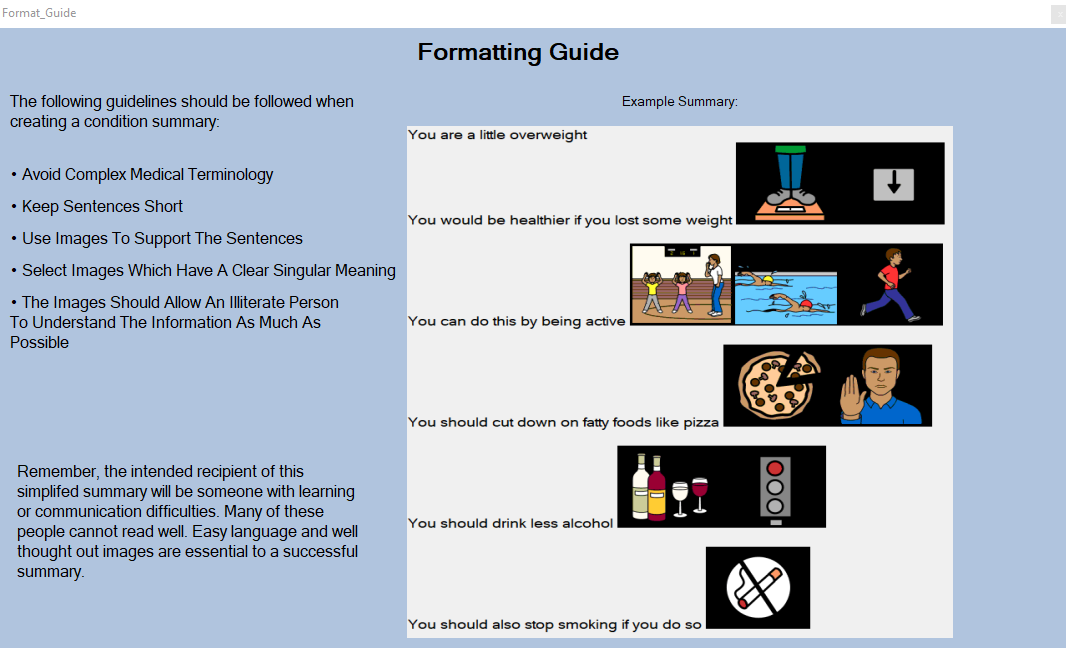
[Figure 7] Formatting Guide Information Page
Once you are happy with your created summary you can then submit it. This can be done by clicking the submit button, as seen in Figure 6.
The application comes with some maintenance tools which can be used to manage the stored database content within the program. Stored Images, Keywords, Condition Summaries etc…
You may come across a time when you need to add an image to the application. This maybe because you have searched for an image to represent something and no appropriate images can be found.
To add an image to the application you can select the option from the menu bar on the consultation screen. The option called "Add external Images" is the option you want to click. See Figure 8.
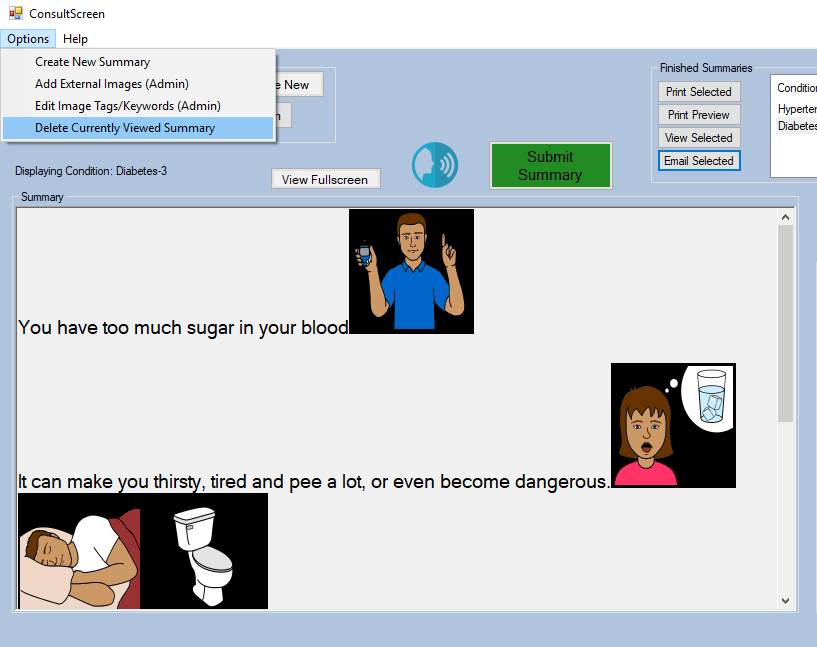
[Figure 8] Image showing the menu options on the consultation screen
Upon clicking the option you will be presented with the add a new image user interface. This interface is shown in Figure 9.
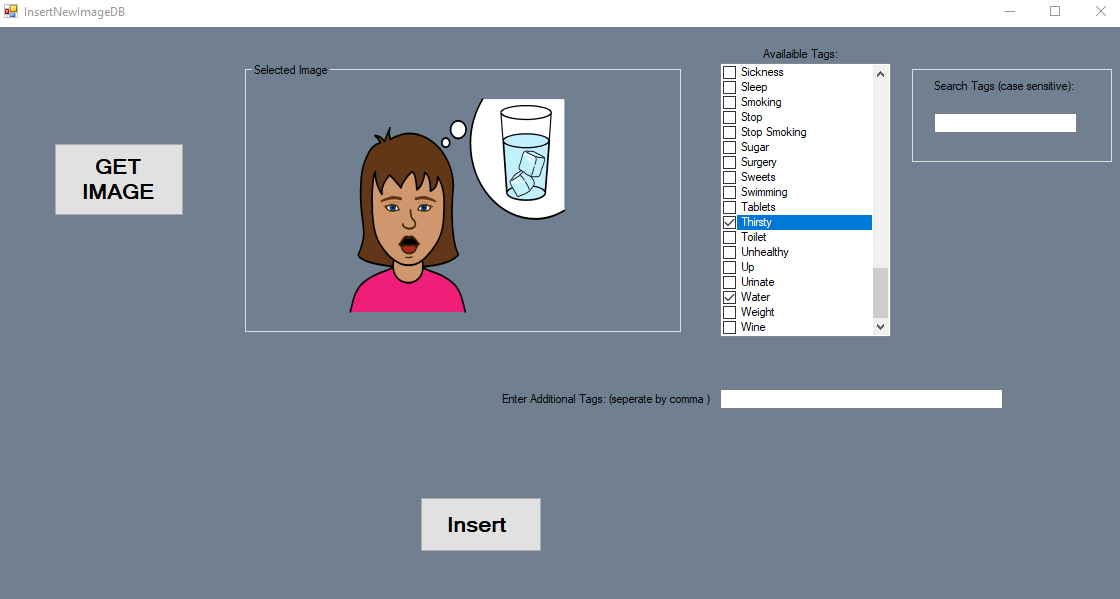
[Figure 9] Adding a new image to the application for future use when creating summaries
To add a new image, you click the "get image" button and this opens the file browser. Select an image and it will display in the "selected image" box. An example of this is in Figure 9.
Once an image is selected it has to have tags/keywords added to it before being added to the application.
These tags/keywords allow users to search for the added image. You can select tags/keywords from the list. You can also add new tags/keywords if none in the list are appropriate.
Once happy with the tags/keywords you can click the "Insert" button to add the image to he application. Once added you can then use the image in the future.
This option allows the editing of an image's tags/keywords. If you need to change an images searchability then this option can be used to edit the search terms for when the image shows up.
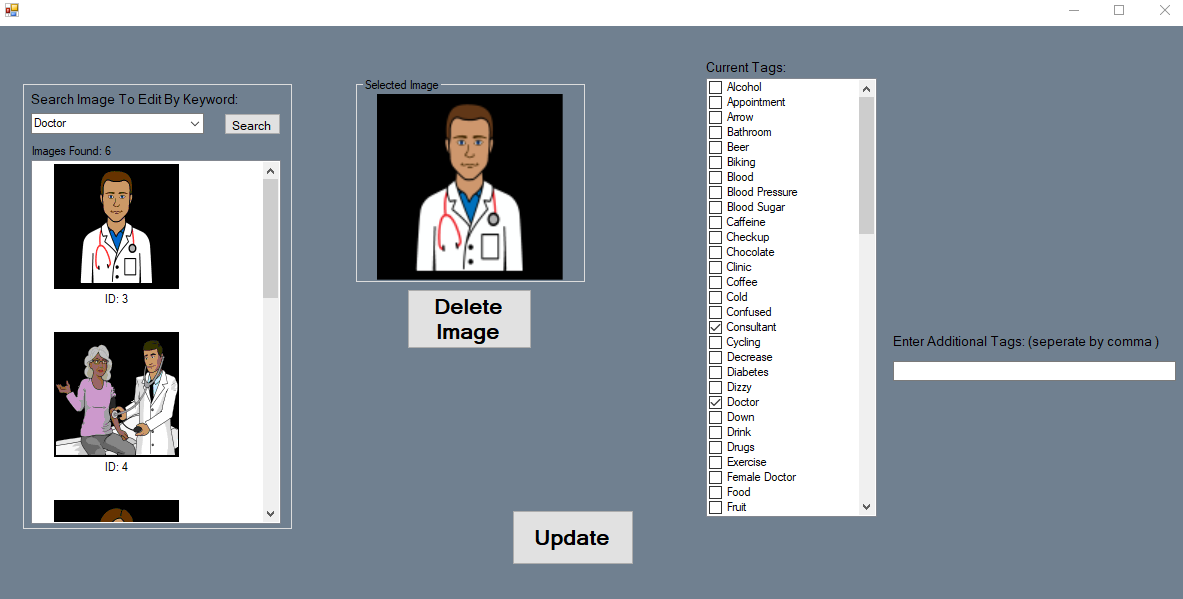
You first search for an image you want to edit. You can then choose to change the tags/keywords by selecting options from the list or adding new tags/keywords by typing them into the textbox for additional tags/keywords.
You can also choose to delete images from the application from this page. This is done by clicking the "Delete Image" button.
Once changes are completed, you can click "Update" button, and this updates the backend of the application.
An option exists to delete a condition summary required. You do this by searching for a condition on the consultation window. Opening the menu, as seen in Figure 8, you can click the "Delete Currently Viewed Summary". This deletes the summary from the application and stops anyone from searching for it.