
A comprehensive emulator collection for the Nintendo® Game & Watch™ with SD Card support, allowing you to play your favorite retro games on the go!
If you are looking for the mod without SD Card (Flash mod only), check https://github.com/sylverb/game-and-watch-retro-go
- Nintendo® Game & Watch™ Retro-Go SD
- Pokémon Mini Emulator
You can support the development by donating via PayPal
- 🎮 Support for multiple retro gaming systems
- 💾 SD Card storage for ROMs and games
- 💾 4 save state slots per game
- 🎨 Cover art support
- 🔄 Easy firmware updates
- 🌐 Unicode support (Latin and Cyrillic, more to come)
- 🎯 Cheat code support for multiple systems
- 🔄 Dual boot capability (original firmware preservation)
Current limitations :
- Up to 1000 roms/disks will be visible for each system
- CJK characters not yet visible
If you prefer professional installation, contact:
- Europe: Sylver (u/Sylver7667 on Reddit, sylver__ on Discord)
- USA: hundshamer (u/hundshamer on Reddit)
To install the hardware mod, you need:
-
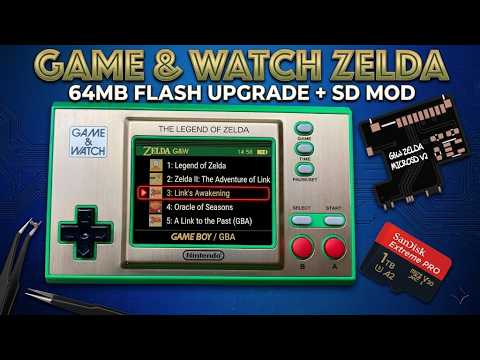
SD Card flex PCB adapter:

- Tim Schuerewegen / hundshamer Zelda v2 Gerber file (recommended for Zelda install)


- PrimoAngelo Mario Gerber file (recommended for Mario install)
- PrimoAngelo Zelda Gerber file
-
1x MX25U51245GZ4I00 (64MB SPI flash 1.8v) or bigger
-
1x 0402 100k resistor (0805 will fit too)
-
2x 0402 1uf (0805 will fit too)
-
1x RT9193-28GB LDO regulator


-
Original Firmware Backup / Unlock
- Install gnwmanager, follow installation instructions
- Connect your JTAG device (ST-Link v2 or others supported devices)
- Run
gnwmanager unlockto backup and unlock the console. Follow instructions on computer's screen with attention. - If you already have a backup, use
gnwmanager unlock --no-backupto skip the backup steps
-
Flash Chip Installation
- Install the MX25U51245GZ4I00 flash chip, follow instructions in this video if needed
-
Patched OFW / Bootloader Installation
-
For dual boot (recommended):
- Zelda model :
gnwmanager flash-patch zelda internal_flash_backup_zelda.bin flash_backup_zelda.bin --bootloader
- Mario model :
gnwmanager flash-patch mario internal_flash_backup_mario.bin flash_backup_mario.bin --bootloader
- Zelda model :
-
Without dual boot (not recommended but could help troubleshooting issues if dual boot fails to install):
gnwmanager flash-bootloader bank1
-
You can now use bootloader to check that your flash chip is correctly installed. Power on the console (and press GAME+Left if patched OFW is installed) to run the bootloader. You should see a screen like this:

Note: If you installed the recommended 64MB chip, you should see "MX25U51245G (64MB)" on the screen.
-
-
SD Card Mod Installation
Check this great install video by NaGa : -
Retro-Go-SD Installation
-
Format micro SD card as exFAT (recommended) or FAT32
-
Download latest
retro-go_update.binfrom releases page -
Place the file in the root folder of your SD card
-
Insert SD card and start the console

-
You can start filling the created folders on your sd card with uncompressed roms (in /roms/gb, roms/gbc, roms/nes, ...)
-
-
Pico-8
- Requires a separate package installation, please refer to the Pico-8 section for more details


To help to properly cut the shell, facelesstech designed some drill jig, they can be found here
For people who do not want to cut their original shell, Aradia (on Discord) has designed a replacement back shell with SD card access. Note that this shell is designed for the GnW_SD_v2.zip version of the flex cable (the one provided earlier on this page) The 3D printable file can be downloaded here.
When there is a new Retro-Go-SD release available on github, to install it, just proceed as described :
- Download latest
retro-go_update.binfrom releases page - Place the file in the root folder of your SD card
- Insert SD card and start the console
- Turn on the Game & Watch and wait for the installation to complete. Once the update is done, you are ready to use new version
The bootloader is the application which is allowing to install/update retro-go from update file as described in Retro-Go-SD Update Steps.
It is possible to update the bootloader (check bootloader changelog to check if you have latest version and if it could be useful for you to update).
Even if the operation should be safe, be aware that in case of problem during the bootloader update, you'll have to reprogram the bootloader using JTAG as described in [Installation] chapter.
To perform a bootloader update, perform the following steps :
- Download latest gnw_bootloader.bin (no dual boot) / gnw_bootloader_0x08032000.bin (dual boot) files from Bootloader releases page
- Copy these files to the root folder of the SD Card.
- Copy the
retro-go_update.bin(v1.1.1 above) file to the root directory of your micro SD card (check previous chapter for instructions) - Insert the micro SD card into your Game & Watch.
- Turn on the Game & Watch and wait for the installation to complete. It will update Retro-Go and also update the bootloader.
Note that the update process will detect if you have dual boot or not and will try to install gnw_bootloader.bin if you don't have dual boot and gnw_bootloader_0x08032000.bin if you have dual boot. If you are not sure of what is the right file for you, just put both files and the correct one will be used.
Due to memory and power constrains of the Game & Watch hardware, it's not possible to use full size png/jpg/bmp images for cover art.
Automation: When building with COVERFLOW=1, covers are automatically downloaded and processed.
- Scraping:
tools/download_covers.pyfetches raw images intoroms/. GitHub limits unauthenticated requests to 60/hr. Large collections may require multiple runs or a token (GITHUB_TOKEN=xxxvia make, or manually with--token). UseDOWNLOAD_COVERS=0to disable. - Thumbnailing:
tools/gencovers.pyconverts images into optimized.imgfiles insd_content/covers/.
Due to current implementation of the covers management, having covers with different sizes for a given system can cause incorrect alignement of images in "CoverLight H" view
User dadagm wrote a macos/windows tool to convert covers in an easy way ! Check https://github.com/dadagm/GameWatchCoverMaker to get his application !
The tools/gencovers.py script helps you generate cover art thumbnails for your games. It can process individual images or batch process all images in a directory.
Note that you will have to run python3 -m pip install -r requirements.txt once to install dependencies required by the script.
Process a single image:
python tools/gencovers.py --image /path/to/image.png
# Creates image.img in the same directory

python tools/gencovers.py --image /path/to/image.png --output /path/to/output.img
# Creates the .img file at the specified location
Batch process all images in a directory:
python tools/gencovers.py --src roms --dst covers
# Processes all images in the 'roms' directory and creates thumbnails in 'covers'--image: Path to a single image file to process (PNG, JPG, JPEG, BMP)--output: Output path for the single image (only used with --image)--src: Source directory for batch processing (default: "roms")--dst: Destination directory for batch processing (default: "covers")--width: Thumbnail width (default: 128)--height: Thumbnail height (default: None, uses width-based scaling)--jpg_quality: JPEG quality 0-100 (default: 85)
The script automatically resizes images to fit within 186x100 pixels while maintaining aspect ratio, and saves them as optimized JPEG files with the .img extension.
The .img files have to be stored in the /covers folder of your sd card : for the game /roms/msx/Aleste.rom, the cover file should be /covers/msx/Aleste.img.
Extract PICO-8 cart labels and generate G&W cover art (.img JPEG files).
Reads .p8 (text) or .p8.png (PNG) carts, extracts the 128x128 label, renders it with the PICO-8 palette, and saves as a JPEG cover.
  # Single cart:
  python3 pico8covers.py --cart celeste.p8 --output covers/pico8/celeste.img

  # All carts in a directory:
  python3 pico8covers.py --src roms/pico8 --dst covers/pico8

  # Custom size/quality:
python3 pico8covers.py --src roms/pico8 --dst covers/pico8 --width 128 --jpg_quality 90- Amstrad CPC6128 (beta)
- Atari 2600
- Atari 7800
- Atari Lynx (experimental)
- ColecoVision
- Gameboy / Gameboy Color
- Game Boy Advance (experimental, SD card only)
- Game & Watch / LCD Games
- MSX1/2/2+
- Nintendo Entertainment System
- Pico-8
- PC Engine / TurboGrafx-16
- PC Engine CD / TurboGrafx-CD (beta, SD card only)
- Pokémon Mini
- Sega Game Gear
- Sega Genesis / Megadrive
- Sega Master System
- Sega SG-1000
- Tamagotchi P1
- Watara Supervision
- The Legend of Zelda: A Link to the Past
- Super Mario World
- Celeste Classic
GBA support is currently experimental and available on SD-card builds only. It has choppy sound randomly and every 15s.
- Put GBA ROMs in:
/roms/gba/
By default, the firmware uses the bundled open-source BIOS. If you provide the official BIOS file on SD, it will be used automatically:
- Path:
/bios/gba/gba_bios.bin - Required size: exactly
16 KiB(16384bytes)
If the file is missing or has the wrong size, the emulator falls back to the bundled open BIOS. (The open BIOS works for many titles, but some games are more reliable with the official one.)
PC Engine CD support is currently beta and available on SD-card builds only (not on flash-only builds).
- Put disc images under:
/roms/pcecd/- Flat layout:
.cue(+ referenced tracks) directly in/roms/pcecd/ - Or one folder per game:
/roms/pcecd/<game>/…
- Flat layout:
- HuCard games stay in
/roms/pce/as usual
A Super System Card 3.0 dump is required:
- Path:
/bios/pce/syscard3.pce(or/bios/pce/syscard3.bin) - Expected MD5:
38179df8f4ac870017db21ebcbf53114
Without this BIOS file, CD games will not boot.
Lynx support is currently experimental.
- Put ROMs in:
/roms/lynx/(extensions:.lnx,.lyx) - No external BIOS file is required (the port uses an internal HLE BIOS)
GAME→STARTTIME→SELECTPAUSE/SET→ Emulator menu
| Button combination | Action |
|---|---|
PAUSE/SET + GAME |
Store a screenshot (Disabled by default on 1MB flash builds) |
PAUSE/SET + TIME |
Toggle speedup (1x/1.5x) |
PAUSE/SET + UP |
Brightness up |
PAUSE/SET + DOWN |
Brightness down |
PAUSE/SET + RIGHT |
Volume up |
PAUSE/SET + LEFT |
Volume down |
PAUSE/SET + B |
Load state |
PAUSE/SET + A |
Save state |
PAUSE/SET + POWER |
Poweroff without save-state |
- Bootloader as a diagnostic menu, you can show it by booting with PAUSE/SET button pressed at startup.
- If a savestate is causing crash when power on the console, boot with TIME button pressed to force system to boot in games list menu.
-
I'd like to play Zelda 3 in French/Italian/German/... How to change language ?
First follow the steps to create a zelda3_assets.dat file including wanted languages. Load Zelda 3, press Pause/Set button to enter menu, select Options, select Language line and press left/right to change current language. Text for Player Select/Create/... is always in English, but dialogs will be in selected language. Do not change language when a dialog is shown on the screen, it can cause some issues.
-
Can you add [new system name] support ?
Maybe ... Probably not ! G&W system is very limited, it has only about 1MB of RAM free for code + dynamic ressources for each emulator. Most of the time emulators have to be deeply optimized to reduce their memory use so they can fit. Each emulator port is a challenge and some have failed already (fake-08, picodrive, ...).
Note: Currently cheat codes are only working with GB, GBC, NES, PCE and MSX games.
To enable, add CHEAT_CODES=1 to your make command. If you have already compiled without CHEAT_CODES=1, I recommend running make clean first. To enable or disable cheats, select a game then select "Cheat Codes". You will be able to select cheats you want to enable/disable. Then you can start/resume a game and selected cheats will be applied. On GB, GBC and MSX systems, you can enable/disable cheats during game.
To add Game Genie codes, create a file ending in .ggcodes in the /cheats/nes/ directory with the same name as your rom. For instance, for "/roms/nes/Super Mario Bros.nes" make a file called "/cheats/nes/Super Mario Bros.ggcodes". In that file, each line can have up to 3 Game Genie codes and a maximum of 16 lines of active codes (for a max of 3 x 16 = 48 codes). Each line can also have a description (up to 25 characters long). You can comment out a line by prefixing with # or //. For example:
SXIOPO, Inf lives
APZLGG+APZLTG+GAZUAG, Mega jump
YSAOPE+YEAOZA+YEAPYA, Start on World 8-1
YSAOPE+YEAOZA+LXAPYA, Start on World -1
GOZSXX, Invincibility
# TVVOAE, Circus music
You can enable / disable each of your codes in the game selection screen.
A collection of codes can be found here.
To add Game Genie/Game Shark codes, create a file ending in .ggcodes in the /cheats/gb/ or /cheats/gbc/ directory with the same name as your rom. For instance, for "/roms/gb/Wario Land 3.gb" make a file called "/cheats/gb/Wario Land 3.ggcodes". In that file, each line can have several Game Genie / Game Shark codes (separate them using a +) and a maximum of 16 lines of active codes. Each line can also have a description (up to 25 characters long). You can comment out a line by prefixing with # or //. For example:
SXIOPO, Inf lives
APZLGG+APZLTG+GAZUAG, Mega jump
YSAOPE+YEAOZA+YEAPYA, Start on World 8-1
YSAOPE+YEAOZA+LXAPYA, Start on World -1
GOZSXX, Invincibility
# TVVOAE, Circus music
You can enable / disable each of your codes in the game selection screen or during game.
Now you can define rom patch for PCE Roms. You can found patch info from Here. To add PCE rom patcher, create a file ending in .pceplus in the /cheats/pce/ directory with the same name as your rom. For instance, for "/roms/pce/1943 Kai (J).pce" make a file called "/cheats/pce/1943 Kai (J).pceplus". A collection of codes file can be found here.
Each line of pceplus is defined as:
01822fbd,018330bd,0188fcbd,	Hacked Version
[patchcommand],[...], patch desc
Each patch command is a hex string defined as:
01822fbd
_
|how much byte to patched
 _____
   |patch start address, subtract pce rom header size if had.
      __...
       |bytes data to patched from start address
You can use blueMSX MCF cheat files with your Game & Watch. A nice collection of patch files is available Here. Just copy the wanted MCF files in the /cheats/msx/ folder with the same name as the corresponding rom/dsk file. On MSX system, you can enable/disable cheats while playing. Just press the Pause/Set button and choose "Cheat Codes" menu to choose which cheats you want to enable or disable.
NES emulation uses fceumm (FCEUmm). It has very good compatibility but uses significant CPU: typically about 65–85% depending on games; FDS titles can reach about 95%.
Mappers compatibility is basically the same as fceumm version from 01/01/2023. Testing all mappers is not possible, so some mappers that could try to allocate too much ram will probably crash. If you find any mapper that crash, please report on discord support, or by opening a ticket on github.
As Game & Watch CPU is not able to emulate YM2413 at 48kHz, mapper 85 (VRC-7) sound will play at 18kHz instead of 48kHz.
FDS support requires you to put the FDS firmware in /bios/nes/disksys.rom file
MSX system is a computer with a keyboard and with multiple extensions possible (like sound cartridges). The system needs bios files to be in the roms/msx_bios folder. Check roms/msx_bios/README.md file for details.
What is supported :
- MSX1/2/2+ system are supported. MSX Turbo-R will probably not work on the G&W.
- ROM cartridges images : roms have to be named with rom, mx1 or mx2 extension.
- Disks images : disks images have to be named with dsk extension. Multiple disks games are supported and user can change the current disk using the "Pause/Options/Change Dsk" menu.
- Cheat codes support (MCF files in old or new format as described Here)
- The file roms/msx_bios/msxromdb.xml contains control profiles for some games, it allows to configure controls in the best way for some games. If a game has no control profile defined in msxromdb.xml, then controls will be configured as joystick emulation mode.
- Sometimes games require the user to enter his name using the keyboard, and some games like Metal Gear 1/2 are using F1-F5 keys to acces items/radio/... menus. It is possible to virtually press these keys using the "Pause/Options/Press Key" menu.
Note that the MSX support is done using blueMsx 2.8.2, any game that is not working correctly using this emulator will not work on the Game & Watch. To fit in the G&W, a some features have been removed, so it's possible that some games running on blueMSX will not work in the G&W port. The emulator port is still in progress, consider it as a preview version.
Amstrad CPC6128 system is a computer with a keyboard and disk drive.
What is supported :
- Amstrad CPC6128 system is the only supported system. CPC464 could be added if there is any interest in doing this. Note that CPC464+/6128+ systems are not supported (running a around 40% of their normal speed so it has been removed)
- Disks images : disks images have to be named with dsk extension. Due to memory constraints, disks images are read only. Multiple disks games are supported and user can change the current disk using the "Pause/Options/Change Dsk" menu. Both standard and extended dsk format are supported.
- Normally when the amstrad system starts, it will wait the user to enter a run"file or |CPM command to load the content of the disk. As it's not very friendly, the emulator is detecting the name of the file to run and enter automatically the right command at startup
- Sometimes games require the user to enter his name using the keyboard. It is possible to virtually press these keys using the "Pause/Options/Press Key" menu.
- Amstrad screen resolution is 384x272 pixels while G&W resolution is 320x240. The standard screen mode (with no scaling) will show the screen without the borders which will be ok in most cases, but in some cases games are using borders to show some content. If you want to see the whole Amstrad screen on the G&W, set options/scaling to "fit".
Tape support has not been ported, if there is any interest in adding this, it could be considered.
Note that the Amstrad CPC6128 support is done using caprice32 emulator, any game that is not working correctly using this emulator will not work on the Game & Watch. To fit in the G&W, a some features have been removed, so it's possible that some games running on caprice32 will not work in the G&W port. The emulator port is still in progress, consider it as a preview version.
Vectrex/Odyssey2 is provided by a modified version of o2em emulator. Support is currently in development so it's unstable, has lots of bugs and it's not really playable. To play, you need a bios file, for now rename your bios file to bios.bin and put it in the roms/vectrex folder
https://github.com/libretro/PokeMini was used for porting. You can provide a bios file in /bios/mini/bios.min file, but it's optional : if no bios file is provided, an integrated open source bios will be used.
Some homebrew/SNES games have been ported to the G&W.
To play The Legend of Zelda: A Link to the Past, you need to generate the zelda3_assets.dat file by following these steps :
- clone the project with submodules if not already done :
git clone --recurse-submodules https://github.com/sylverb/game-and-watch-retro-go-sd - install python requirements :
python3 -m pip install -r requirements.txt - copy zelda3.sfc (USA version, sha1 = '6d4f10a8b10e10dbe624cb23cf03b88bb8252973') rom to external/zelda3/tables/
- run 'make -C external/zelda3 tables/zelda3_assets.dat' command
The file zelda3_assets.dat will be created in external/zelda3/tables. Copy the zelda3_assets.dat file in /roms/homebrew/ folder of your sd card.
If you want to create zelda3_assets.dat file with several languages, the steps are :
- copy all zelda3_xx.sfc files (including us zelda3.sfc) from languages you want to include (check names and sha1 below)
- go in tables folder : 'cd external/zelda3/tables'
- for each rom run this command : 'python3 restool.py --extract-dialogue -r ./zelda3_xx.sfc' (replace _xx with real rom names)
- run the command to build assets file : 'python3 restool.py --extract-from-rom --languages=fr,fr-c,de,en,es,pl,pt,nl' (adapt the languages list to fit the languages you did provide)
The file zelda3_assets.dat will be created in external/zelda3/tables. Copy the zelda3_assets.dat file in /roms/homebrew/ folder of your sd card.
When playing, you'll be able to change current language by going in the options menu.
Due to the limited set of buttons (especially on the Mario console), the controls are peculiar:
| Description | Binding on Mario units | Binding on Zelda units |
|---|---|---|
A button (Pegasus Boots / Interacting) |
A |
A |
B button (Sword) |
B |
B |
X button (Show Map) |
GAME + B |
TIME |
Y button (Use Item) |
TIME |
SELECT |
Select button (Save Screen) |
GAME + TIME |
GAME + TIME |
Start button (Item Selection Screen) |
GAME + A |
START |
L button (Quick-swapping, if enabled) |
- |
GAME + B |
R button (Quick-swapping, if enabled) |
- |
GAME + A |
Some features can be configured with flags:
| Build flag | Description |
|---|---|
LIMIT_30FPS |
Limit to 30 fps for improved stability. Enabled by default. Disabling this flag will result in unsteady framerate and stuttering. |
FASTER_UI |
Increase UI speed (item menu, etc.). Enabled by default. |
BATTERY_INDICATOR |
Display battery indicator in item menu. Enabled by default. |
FEATURE_SWITCH_LR |
Item switch on L/R. Also allows reordering of items in inventory by pressing Y+direction. Hold X, L, or R inside of the item selection screen to assign items to those buttons. If X is reassigned, Select opens the map. Push Select while paused to save or quit. When L or R are assigned items, those buttons will no longer cycle items. |
FEATURE_TURN_WHILE_DASHING |
Allow turning while dashing. |
FEATURE_MIRROR_TO_DARK_WORLD |
Allow mirror to be used to warp to the Dark World. |
FEATURE_COLLECT_ITEMS_WITH_SWORD |
Collect items (like hearts) with sword instead of having to touch them. |
FEATURE_BREAK_POTS_WITH_SWORD |
Level 2-4 sword can be used to break pots. |
FEATURE_DISABLE_LOW_HEALTH_BEEP |
Disable the low health beep. |
FEATURE_SKIP_INTRO_ON_KEYPRESS |
Avoid waiting too much at the start. Enabled by default. |
FEATURE_SHOW_MAX_ITEMS_IN_YELLOW |
Display max rupees/bombs/arrows with orange/yellow color. |
FEATURE_MORE_ACTIVE_BOMBS |
Allows up to four bombs active at a time instead of two. |
FEATURE_CARRY_MORE_RUPEES |
Can carry 9999 rupees instead of 999. |
FEATURE_MISC_BUG_FIXES |
Enable various zelda bug fixes. |
FEATURE_CANCEL_BIRD_TRAVEL |
Allow bird travel to be cancelled by hitting the X key. |
FEATURE_GAME_CHANGING_BUG_FIXES |
Enable some more advanced zelda bugfixes that change game behavior. |
FEATURE_SWITCH_LR_LIMIT |
Enable this to limit the ItemSwitchLR item cycling to the first 4 items. |
By default, dialogues extracted from the US ROM are in english. You can replace dialogues with another language by using a localized ROM file. Supported alternate languages are:
| Language | Origin | Naming | SHA1 hash |
|---|---|---|---|
| German | Original | zelda3_de.sfc | 2E62494967FB0AFDF5DA1635607F9641DF7C6559 |
| French | Original | zelda3_fr.sfc | 229364A1B92A05167CD38609B1AA98F7041987CC |
| French (Canada) | Original | zelda3_fr-c.sfc | C1C6C7F76FFF936C534FF11F87A54162FC0AA100 |
| English (Europe) | Original | zelda3_en.sfc | 7C073A222569B9B8E8CA5FCB5DFEC3B5E31DA895 |
| Spanish | Romhack | zelda3_es.sfc | 461FCBD700D1332009C0E85A7A136E2A8E4B111E |
| Polish | Romhack | zelda3_pl.sfc | 3C4D605EEFDA1D76F101965138F238476655B11D |
| Portuguese | Romhack | zelda3_pt.sfc | D0D09ED41F9C373FE6AFDCCAFBF0DA8C88D3D90D |
| Dutch | Romhack | zelda3_nl.sfc | FA8ADFDBA2697C9A54D583A1284A22AC764C7637 |
| Swedish | Romhack | zelda3_sv.sfc | 43CD3438469B2C3FE879EA2F410B3EF3CB3F1CA4 |
To play Super Mario world you need to copy the smw_assets.dat file in /roms/homebrew/ folder of your sd card. the smw_assets.dat file can be generated by doing the following steps :
- clone the project with submodules if not already done :
git clone --recurse-submodules https://github.com/sylverb/game-and-watch-retro-go-sd - install python requirements :
python3 -m pip install -r requirements.txt - copy smw.sfc (USA version, sha1 = '6B47BB75D16514B6A476AA0C73A683A2A4C18765') rom to external/smw/assets/
- run 'make -C external/smw smw_assets.dat' command The file smw_assets.dat will be created in external/smw.
Due to the limited set of buttons (especially on the Mario console), the controls are peculiar:
| Description | Binding on Mario units | Binding on Zelda units |
|---|---|---|
A button (Spin Jump) |
GAME + A |
SELECT |
B button (Regular Jump) |
A |
A |
X/Y button (Dash/Shoot) |
B |
B |
Select button (Use Reserve Item) |
TIME |
TIME |
Start button (Pause Game) |
GAME + TIME |
START |
L button (Scroll Screen Left) |
- |
GAME + B |
R button (Scroll Screen Right) |
- |
GAME + A |
Some features can be configured with flags:
| Build flag | Description |
|---|---|
LIMIT_30FPS |
Limit to 30 fps for improved stability. Enabled by default. Disabling this flag will result in unsteady framerate and stuttering. |
This is a port of the Pico-8 version of Celeste Classic. Not a Pico-8 emulator.
An original implementation of the PICO-8 fantasy console engine for Game & Watch hardware, developed by macs75. The engine core is written from scratch in C/C++ and tailored to the STM32H7B0's tight memory budget, while a modified version of Z8lua by Sam Hocevar serves as the Lua interpreter — providing the 16.16 fixed-point math and PICO-8 dialect extensions that real cartridges expect.
The G&W hardware (STM32H7B0VBT6, 1.4 MB SRAM) is significantly more constrained than a desktop PICO-8 host, so behavior varies between cartridges:
- Most simple and mid-complexity carts run at full 30/60 FPS.
- More demanding carts may drop frames, especially those with heavy per-frame Lua workloads or large draw call counts.
- A small number of carts will exceed the available memory budget and fail to load.
Enabling overclock in the retro-go settings is strongly recommended — it noticeably improves frame pacing and broadens the set of carts that run at full speed.
The PICO-8 binaries are not bundled with the retro-go G&W firmware and must be installed separately.
- Download the latest release from the pico8_gnw_distro releases page.
- Unzip the archive at the root of your SD card.
- Three files will be placed in the
cores/directory:pico8.bin— main engine binarypico8.ro— read-only data segmentpico8_itcm.bin— performance-critical code loaded into ITCM RAM
Once installed, PICO-8 carts placed in the appropriate roms folder will be picked up by the retro-go launcher.
Place .p8 or .p8.png cartridge files in your SD card's PICO-8 roms directory and select them from the retro-go menu like any other system.
If the game requires to load other carts put them in a ".multicarts" subfolder. The code will be able to find them and they will not appear in the game list.
If you want to have the official carts covers use the specific python toolpico8covers.py. More details in the Tools section.
For development on macOS/Linux without Docker you need arm-none-eabi-gcc v10+ (tested against 15.2.rel1) and the Python requirements.txt (python3 -m pip install -r requirements.txt, which installs gnwmanager).
The device needs SylverB's bootloader in bank 1, with Retro-Go-SD in bank 2. Without it, the firmware-update flow that creates the SD card directory tree (/cores, /bios, /roms/homebrew, …) cannot run.
# Install the bootloader to bank 1 (one-time):
gnwmanager flash-bootloader bank1
The Makefile defaults INTFLASH_BANK=2 to match that bootloader. Pass make INTFLASH_BANK=1 only if you installed without it.
A freshly formatted (exFAT or FAT32) SD card lacks the directories sdpush needs as parents; the bootloader creates them when it unpacks retro-go_update.bin:
make release_sdpush GNW_TARGET=marioWait for the launcher menu to appear on the device before running any other gnwmanager command, or the extraction is interrupted and aborted.
Once the directory tree exists, flash the firmware and regenerate the SD content locally:
make flash create_sd_data GNW_TARGET=mariocreate_sd_data writes the SD files under sd_content/. Push only the ones you changed instead of re-sending every core, e.g.:
gnwmanager sdpush --file sd_content/cores/nes.bin --dest-path /cores/- Debug-probe
BAD_DECOMPRESS. Some CMSIS-DAP probes drop LZMA chunks at gnwmanager's default speed. Lower it withmake GNWMANAGER="gnwmanager --frequency 1000000". - Stale objects after toggling a
-Dflag. Make doesn't track-Dchanges, so togglingCHEAT_CODES/COVERFLOW/etc. between builds mixes definitions and causes link errors. Runmake cleanwhen you change one.
If you are familiar with Docker and prefer a solution where you don't have to manually install toolchains and so on, expand this section and read on.
To reduce the number of potential pitfalls in installation of various software, a Dockerfile is provided containing everything needed to compile and flash retro-go to your Nintendo® Game & Watch™ (Mario/Zelda) system. This Dockerfile is written tageting an x86-64 and arm64 machine running Linux or macOS.
Steps to build and flash from a docker container (running on Linux/macOS, e.g. Archlinux, Ubuntu or macOS):
# Clone this repo
git clone --recursive https://github.com/sylverb/game-and-watch-retro-go-sd

# cd into it
cd game-and-watch-retro-go-sd

# Optional : Build the docker image (takes a while)
# You can generate the docker image locally but it's
# not needed as generated image is available on
# https://hub.docker.com/repository/docker/sylverb/retro-go-sd-builder
# for x86-64 and arm64 architectures.
make docker_build

# Run the container.
# The current directory will be mounted into the container and the current user/group will be used.
make docker
The install/update file will be available in release/retro-go_update.bin
Please join the Discord.
This project uses Fusion Pixel Font (SIL Open Font License 1.1)
This project is licensed under the GPLv2. Some components are available under the MIT license. Respective copyrights apply to each component.