#Cmfive Developer workflow with Docker
This repository contains the DockerFile and resources to build the 2pisoftware/cmfive docker.io image which contains everything needed to install cmfive and run tests.
This document provides details on working with the image and repository.
See also 2PI CI
- Install docker and Kitematic GUI
- Using Kitematic you can click
Newand search the docker hub for cmfive then click to download and run the image.- This is a very large download ~400MB!!

- Click the kitematic web preview link to access the CmFive web interface login admin/admin.
- Read on for docker basics and how to map /var/www to your host or use the built in tools codiad and ungit and phpmyadmin to develop with the image.
- Read the 2piSoftware quality assurance guidelines. (Code standards doc should be in wiki)
The DockerFile defining the image is a combination of the phusion base image, selenium-firefox and customisations.
The image includes
- nginx, php7, mysql
- ssh access
- selenium and vncserver and firefox
- web folders for cmfive and testrunner
The image exposes the following ports 22 ssh 80 http 443 https (not working) 3306 mysql 4444 selenium 5900 vncserver
One line restart of a cmfive container
docker stop cmfive; docker rm cmfive; docker run --name cmfive -d -P 2pisoftware/cmfive; docker exec -it cmfive bash
docker run --name <container> -d -P 2pisoftware/cmfivestart the container with a name, auto map ports and start as daemondocker exec -it <container> bashstart an interactive bash shell inside the containerdocker stop <container>stop the containerdocker start <container>start a stopped containerdocker rm <container>delete a container (and any changes to the filesystem)docker help XXX
Port mapping can be controlled explicitly using -p :
eg -p 8080:80 to map www to 8080 on host
Other useful flags include
- --restart=no|on-failure|always|unless-stopped
- --rm delete container when stopped
- -- e VIRTUAL_HOST=yourdomain.com (default cmfive.docker) domain based mapping to containers in combination with nginx-proxy (see below)
The VM is configured with a 20G drive by default. When building images and running many images the drive may fill and cause unpredictable problems. Use the following command to clean old images.
docker rm -v $(docker ps -a -q -f status=exited) ; docker rmi $(docker images -f "dangling=true" -q) ; docker run -v /var/run/docker.sock:/var/run/docker.sock -v /var/lib/docker:/var/lib/docker --rm martin/docker-cleanup-volumes
It may also be necessary to manually remove installed images
docker images
docker rmi <imageHash>
To work directly with the container filesystem, VOLUMES can be mapped to the client. In this way platform based tools for editing and version management can be used.
docker run --name <container> -d -P -v <hostPath>:<containerPath> 2pisoftware/cmfive
On windows, a cygwin style path is required
eg -v //c/projects/www:/var/www
It is also possible to map a volume using kitematic.
The contents of the target container path will be replaced by the content of the host path. The contents of the volume to be mapped should be copied to the host before mapping.
docker cp <containerName>:/var/www/ /projects/www
To avoid problems with symbolic links, Windows users will need to run bash inside the image, zip the target folder and use docker copy and extract to the host.
Docker has images, containers and volumes. An image is a base filesystem for a container.
A container is a running (or stopped) instance. Containers reset their filesystem to the base image on restart.
A volume is is a storage folder that will persist between container restarts.
- Volumes are destroyed when their parent container is destroyed.
- Volumes can be defined in the build or with docker run.
- Volumes are stored in the master linux filesystem so inside virtual box for windows/mac.
- Volumes can be lost when docker engine restarts??
Where host mapping is used as described above, the content of the mount point persists no matter what.
It is also possibly to explicitly create Data Volumes using
docker volumes create -name <volume name>
This approach allows the volume to be mounted anywhere in a target image with
docker run -v <volume name>
You can run any command inside the image docker exec <containerName> <command>
You can run an interactive bash shell using docker exec -it <containerName> bash
The cmfive installer /installcmfive.sh writes config files, runs composer updates then initialises the database and runs migrations as a one step solution for installing cmfive from source. The install script is run before each test run.
Tests can be run using the /runtests.sh script inside the image.
Parameters include
- testPath: filesystem path to search for tests
- testSuite: unit|acceptance
- test: individual test name (must also provide testSuite option)
- composer:no to disable composer update when installing cmfive
eg
/runTests.sh testPath:/var/www/cmfive/system/tests testSuite:unit test:ConfigTest:testKeys
will run a single test.
To enable ssh, port 22 maps to a host port. To login as root, use the key file docker.ppk from the docker-cmfive repository.
PhpMyAdmin is available through the web interface as a top level subdirectory
http://host:port/phpmyadmin.
Login credentials admin/admin.
Mysql port 3306 is exposed in the images so it is possible to map that port to a host port and use a GUI client to connect.
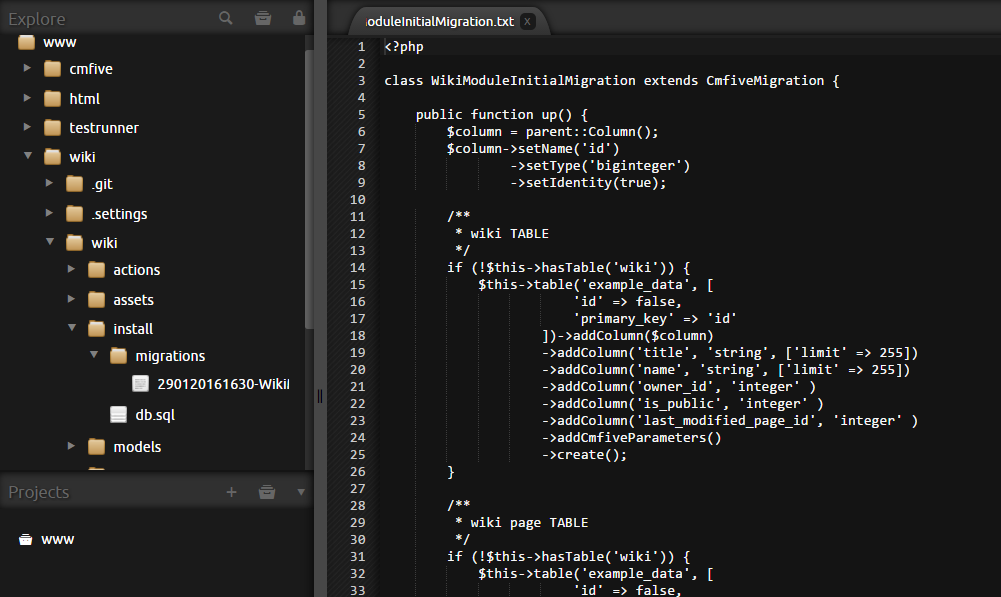
Codiad is a web based programmers editor.
It is available through the web interface as a top level subdirectory http://host:port/codiad. Use login credentials admin/admin.
Codiad can be installed as a docker image to edit files in any container volume
docker run -e VIRTUAL_HOST=codiad.docker -v <\\c\host path>:/opt/codiad/workspace -v /opt/codiad/plugins trobz/codiads
The /opt/codiad/plugins volume allows mapping of plugin folder from the host system. A collection of most codiad plugins is available as part of the docker-cmfive repository.
Git is installed and available from the command line.
Ungit UI is available as a docker image reinblau/ungit.
If you have access to the file system as a host volume mapping, you can run ungit with access to that folder
docker run -e VIRTUAL_HOST=ungit.docker -v <\\c\host path>:/git reinblau/ungit
When using the ungit UI, you search inside /git for www files.
To use ungit you must first gain shell access to the repository and to allow commit
git config user.name "User Name"
git config user.email "user@2pisoftware.com" <mailto:"user@2pisoftware.com">
git config core.fileMode false
Visit http://ungit.docker in a browser
Enter /git/ into the search bar and look for completions.
- Click enter to load the repository
- Click plus to save the repository
- ......
For a user guide see https://www.youtube.com/watch?v=hkBVAi3oKvo
Codiad also provides git workflows
As you add containers it can be handy to refer to them by domain name.
- A DNS proxy will allow wildcard domain configuration (as compared to tweaking hosts entry). Acrylic DNS proxy works well on windows. DNS entries need to point to the virtual box IP address on windows.
- Install and run nginx-proxy docker image using DOCKER CLI powershell.
docker run --name nginxproxy --restart always -d -p 80:80 -p 443:443 -v /etc/nginxcerts:/etc/nginx/certs -v /var/run/docker.sock:/tmp/docker.sock:ro jwilder/nginx-proxy - Restart your container with VIRTUAL_HOST set as an environment veriable and nginx-proxy will pick up the changes and detect the container port then create virtual host entries for nginx.
docker run -e VIRTUAL_HOST=foo.bar.com ...For more details see https://hub.docker.com/r/jwilder/nginx-proxy https://hub.docker.com/r/jwilder/nginx-proxy
The images contain a script that is run at image startup to generate and configure SSL certificates.
The generated certificates are used
- inside the running container with nginx.
- by nginx-proxy on the code server through a host mount to a shared certificates folder.
- to upload and deploy to the AWS load balancer
The behavior depends on environment variables and available volumes
-
SSL_HOST is required to trigger any SSL support and VIRTUAL_HOST is required and must match.
-
If SSL_CERT and SSL_KEY are contain paths to files that exist, those files will be used for SSL configuration instead of generating them.
-
If /etc/nginxcerts is available, certificates are exported to that folder for nginx-proxy
-
If AWS variables are available, the certificate is deployed to the AWS load balancer.
Environment variables can be set in the Dockerfile of deployment repositories or at runtime.
The SSL generation using letsencrypt requires that the domain for which a certificate is generated is delegated to the running container before it starts.
For the code server the ip is 52.64.247.205 . All subdomains of code.2pisoftware.com are already delegated to this ip address.
For AWS EB deployments, you can create a CNAME record for the subdomain to be directed to the instance. Where the deployment is triggered with the -c parameter, the target of the CNAME should be $name.$region.elasticbeanstalk.com
eb init --profile=default -r us-west-2  --platform="Docker 1.11.1"
eb create -c  crm-syntithenai-com -ip code.2pisoftware.com_registry production
then create a CNAME record for crm (as a subdomain of syntithenai.com) pointed to crm-syntithenai-com.us-west-2.elasticbeanstalk.com BEFORE deploying the image.
Alternatively for AWS EB deployments, you can delegate domain resolution to AWS Route53 so that the domain can be dynamically delegated to the load balancer. Create an AWS Hosted Zone to discover the aws name servers for your domain then delegate the domain (or subdomain) by creating NS records or setting DNS servers for the domain in your domain management tool.
Nginx-proxy must be told about the certificates folder for this to work
docker run -d -p 80:80 -p 443:443 -v /etc/nginxcerts:/etc/nginx/certs -v /var/run/docker.sock:/tmp/docker.sock:ro jwilder/nginx-proxy
The host mount for shared certificates must be at runtime (host mounting using the dockerfile is no longer possible). This means that if you are using the code server and want SSL you must include -v /etc/nginxcerts:/etc/nginxcerts in your run command.
docker run --name myssl -d -P -e VIRTUAL_HOST=myssl.code.2pisoftware.com -e SSL_HOST=myssl.code.2pisoftware.com -v /etc/nginxcerts:/etc/nginxcerts 2pisoftware/cmfive
The repository deploy_crm.code.2pisoftware.com is intended to be used this way. It encapsulates the environment variables and can be used by
docker build -t crm.code.2pisoftware.com .
docker run -d -P -v  /etc/nginxcerts:/etc/nginxcerts  crm.code.2pisoftware.com
Environment vars set in the Dockerfile
ENV VIRTUAL_HOST=myssl.syntithenai.com
ENV SSL_HOST=myssl.syntithenai.com
ENV AWS_USER=AKIAJVKTBVY7KVVLT3IQ
ENV AWS_PASS=ZQOrpL3GE6z6qKCJ+a4IPzE1JelvlJu2cg0qiW3b
ENV AWS_REGION=us-west-2
#
# SSL_CERT and SSL_KEY can contain the path to pregenerated key and certificate files.
# the files would need to be added using ADD in the Dockerfile or volume mounts at runtime.
ADD aa.key /aa.key
ENV SSL_KEY=/aa.key
ADD aa.cert /aa.cert
ENV SSL_KEY=/aa.cert
The repository deploy_crm.syntithenai.com is an example of a deployment repository tailored for AWS deployment.
VIRTUAL_HOST=crm.syntithenai.com VIRTUAL_HOST_KEY=crm-syntithenai-com SSH_KEYPAIR=syntithenaicmfive REGION=us-west-2 ENVIRONMENT=live
To deploy the repository
git clone https://steve_ryan@bitbucket.org/steve_ryan/deploy_$VIRTUAL_HOST.git
cd deploy_crm.aws.syntithenai.com
eb init --profile=default -r $REGION -k $SSH_KEYPAIR --platform="Docker 1.11.1"
eb create -c  $VIRTUAL_HOST_KEY -ip code.2pisoftware.com_registry $ENVIRONMENT
zoneId=`aws route53 list-hosted-zones --query 'HostedZones[*].[Name,Id]' --output text|grep $VIRTUAL_HOST|cut -f 2|cut -d / -f 3`
if [ -z $zoneId ]; then
echo create hosted zone for $VIRTUAL_HOST
aws route53  create-hosted-zone --name $VIRTUAL_HOST --caller-reference code_$VIRTUAL_HOST;
zoneId=`aws route53 list-hosted-zones --query 'HostedZones[*].[Name,Id]' --output text|grep $VIRTUAL_HOST|cut -f 2|cut -d / -f 3`;
echo zone id for new hosted zone is $zoneId
else
 echo hosted zone already exists for $VIRTUAL_HOST
fi;

# LOG NAMESERVERS FOR EXTERNAL DELEGATION
nameServers=`aws route53 get-hosted-zone --id $zoneId --query DelegationSet.NameServers --output=text`
echo "DELEGATE $VIRTUAL_HOST to $nameServers";
aws route53 list-hosted-zones --query 'HostedZones[*].[Name,Id]' --output text|grep $VIRTUAL_HOST_KEY.$REGION.elasticbeanstalk.com|cut -f 2|cut -d / -f 3

# CREATE RECORD SET FOR HOSTED ZONE WITH A RECORD AS ALIAS TO LOAD BALANCER
filestuff='{
  "Comment": "ADD alias A record pointed to load balancer",
  "Changes": [
    {
      "Action": "CREATE",
      "ResourceRecordSet": {
        "Name": "$VIRTUAL_HOST",
        "Type": "A",
        "AliasTarget": {
          "HostedZoneId": "$zoneId",
          "DNSName": "$VIRTUAL_HOST_KEY.$REGION.elasticbeanstalk.com",
          "EvaluateTargetHealth": "false"
        }
      }
    }
  ]
}'

sub=${filestuff/\$REGION/$REGION};
sub=${sub/\$VIRTUAL_HOST_KEY/$VIRTUAL_HOST_KEY};
sub=${sub/\$zoneId/$zoneId};
echo ${sub/\$VIRTUAL_HOST/$VIRTUAL_HOST} > /tmp/recordset-$VIRTUAL_HOST_KEY.json ;
aws route53 change-resource-record-sets --hosted-zone-id $zoneId --change-batch file:///tmp/recordset-$VIRTUAL_HOST_KEY.json
In general, any changes to the image should be trialed in an extension image first. Create a new repository and Dockerfile that is FROM the base image and make changes there.
After ensuring the changes are good, update the docker build file rebuild the base image.
The docker build file is available as part of the docker-cmfive repository.
Checkout and change directory to the docker-cmfive repository then run
docker build -t 2pisoftware/cmfive .
Tag the image
docker tag -f 2pisoftware/com code.2pisoftware.com:5000/2pisoftware/cmfive
To upload the built image to docker hub
(docker login)
docker push code.2pisoftware.com:5000/2pisoftware/cmfive
The image is based on phusion/baseimage. Detailed instructions on adding services, startup scripts and other modifications is available at phusion.github.io and blog
The image incorporates elements from the Dockerfiles for the selenium project.
The image configures a Php, nginx, mysql environment with cmfive source code.
        <https://github.com/wsargent/docker-cheat-sheet> <https://github.com/wsargent/docker-cheat-sheet>>
        jonathan.bergknoff.com > Journal > Building-good-docker-images <http://jonathan.bergknoff.com/journal/building-good-docker-images> <http://jonathan.bergknoff.com/journal/building-good-docker-images>>
        crosbymichael.com > Dockerfile-best-practices <http://crosbymichael.com/dockerfile-best-practices.html> <http://crosbymichael.com/dockerfile-best-practices.html>>
These images are hopelessly insecure with published default passwords for important services and a published key for root login.