| Name | Admission ID |
|---|---|
| Leong Ming Liang Timothy | P1907799 |
| Ron Tan Zi Yu | P1908521 |
| Tiamzon Joseph Martin | P1907492 |
Users will need to set up their device to be connected to the database. To do that, the first thing a user will need to do is to register an account through the website. https://iots.vercel.app/ . After they signed in, they will click create a new device. They fill in the form then press create. Take not of the device id as you will need it later. You can create, read, update and delete your devices through the website. After the user has created a new device in the website, they will go to the door lock and turn it on. After the door lock boots up, they will be prompted to add in the device id they got earlier on.
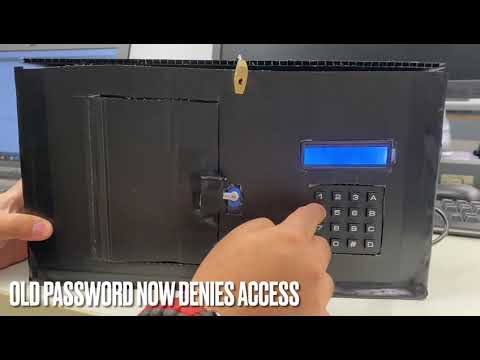
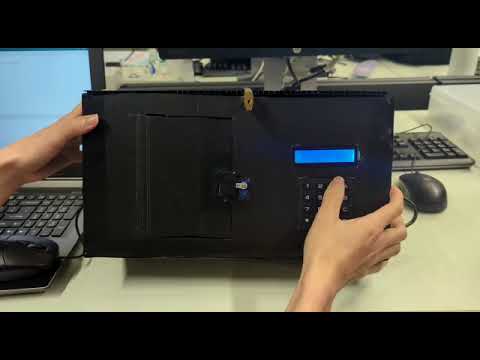
After they add in their device id, the door will prompt for the password (which was set in the website). When the user adds in their password, the door will check the pasword. If it is authorised, the door will unlock else it will not open.
Since our smart door lock system utilises a website, cloud database and the lock itself, our security objective would be to:
- prevent threat actors from tampering with the door lock system
- prevent unauthorized users from unlocking the door system
- protect user information
- protect user door system information
- Hardware
- Esp32
- 4x4 Keypad
- I2C LCD 16x2 with PCF8574 IIC I2C Serial Interface Adapter
- SG90 Servo Motor
- 12x Female-to-Male Jumper Wires
- 3x Male-to-Male Jumper Wires
- Breadboard
- Website
- NextJS
- ReactJS
- Auth0
- Vercel
- Database
- Mongodb

This diagram shows how the different components of the system interact with each other. The ESP32 reads the password and sends it together with the pre-configured device id to Mongodb which stores the door system configurations. The Mongodb will run a function to check the device id and password like a username and password function. If the device id and password is correct, it will return http code 200 (success) else a http code 401 (unauthorised). The user can also use the website to do CRUD operations to their own data (RBAC).

This diagram demonstrates how we have implemented our trust boundaries and the different features we have put in place to safeguard our data. Our entry points into our system where data is input is at the ESP32 and the website.
The privileged codes that we have identified are:
- ESP32 Microcontroller Firmware: The ESP32 microcontroller firmware controls the lock mechanism based on Mongodb reply. This code has access to the lock control functionality and be able to perform critical tasks like reading the keypad input and controlling the lock mechanism.
- HTTPS Communication between ESP32 and MongoDB: The code responsible for sending and receiving HTTPS requests and responses between the ESP32 and the MongoDB database would also have privileged code. This code would have access to the network stack and be responsible for authenticating and validating the MongoDB server's identity and securing the communication between the ESP32 and the MongoDB server.
- HTTPS Communication between ESP32 and MongoDB: The code responsible for sending and receiving HTTPS requests and responses between the ESP32 and the MongoDB database would also have privileged code. This code would have access to the network stack and be responsible for authenticating and validating the MongoDB server's identity and securing the communication between the ESP32 and the MongoDB server.
- MongoDB Database: The code that manages the door lock configuration data in the MongoDB database would also have privileged code. This code would have access to the MongoDB database and be responsible for managing user accounts and door lock configuration data.
- Auth0: Although theres no code, the system manages the user and password of the Vercel-hosted website and is privileged. This system have access to the user accounts and password data stored in the MongoDB database and be responsible for performing critical tasks like authenticating users, managing passwords, and updating the MongoDB database.
The implementation of our website follows the OAuth 2.0 framework. The user will first go through a Authorisation Request to Auth0. If the user is authorised, they will get a Authorisation Grant from Auth0. The user will then use the Authorisation Grant received to retrieve a Access Token from Auth0. The user can then use this Access Token to retrieve data from Mongodb. For a better user experience, Auth0 uses refresh token to silently retrieve a access token when it is expired without user intervention. This allows our user to stay authenticated in our application without needing to logging everytime. The access token expiry set in our application is 86,400 seconds (24 hours) and the refresh token expiry set is 2592000 seconds (30 days).

| TR64 Category | Compliance Request ID |
|---|---|
| Cryptographic Support | CS-01, CS-02, CS-03, CS-04, CS-05 |
| Security Function Protection | FP-01, FP-02 |
| Identification & Authentication | IA-01, IA-02, IA-03, IA-04 |
| Data Protection | DP-02, DP-04 |
| Access Protection | AP-01, AP-02, AP-04, AP-05 |
| Security Management | MT-01, MT-02 |
| Resiliency Support | RS-03, RS-04 |
| Security Audit | AU-01, AU-02 |
| Lifecycle Protection | LP-01, LP-02, LP-03, LP-07, LP-09 |
For each of the attack surfaces, we performed a DREAD analysis as well as a Common Vulneribility Scoring System assessment (CVSS) in order to identify the threat level. Based on this threat level, we came up with proper mitigation techniques that will be implemented into our existing solution.
For the DREAD rating:
Damage: How bad would the damage of the attack be. (1-Low, 3-High)
Reproducibility: How easy is it to reproduce the attack. (1-Difficult, 3-Easy)
Exploitability: How much work is it to launch the attack. (1-Little, 3-A lot)
Affected Users: How many users would be affected by the attack. (1-Little, 3-A lot)
Discoverability: How easy is it to discover the threat. (1-Difficult, 3-Easy)
Physically tampering with the door access system and injecting of external code into the microcontroller controlling the door system could potentially result in the whole system failing.
| Category | Description |
|---|---|
| Damage (3) | An attack on the physical hardware would have a very high impact as the physical hardware is the core of the Door Access System. |
| Reproducability (1) | An attack on the hardware level would be very hard to reproduce as it would require the attacker to be physically present at the same location as the hardware |
| Exploitability (2) | This attack would be considered as medium level exploitability since our product is already placed in a tamper-proof box to secure it. |
| Affected Users (1) | The home owner would be the main affected user as it would compromise the entire security system, allowing anyone to enter the home of the home owner. |
| Discoverability (1) | Discoverability for physical attacks would be considered as a low level since it would require the threat actor to successfully get into the house in order to inject their code into the microcontroller. |

CVSS:3.0/AV:P/AC:H/PR:H/UI:N/S:C/C:N/I:N/A:H
Risk Response: Treat
In order to treat this attack, physically securing the Door Access System with proper procedures would be recommended. In order to achieve this, we created a tamper proof enclosure for the ESP-32 microcontroller so that it would be very difficult for them to inject their own code and tamper with the microcontroller.
Intercepting of packets being sent from the "Door Access" terminal to the secure endpoint on MongoDB would result in the Personal Identifiable Information (PII/SPI) being leaked to the threat actor as they would be able to know the specific time as to when the home owner leaves and returns.
| Category | Description |
|---|---|
| Damage (1) | An attack at this level would be be very low in damage as there are proper security procedures implemented into this. For example, packets are sent through using TLS, meaning that it is very hard for hackers to identify and decrypt the Personal Identifiabe Information. |
| Reproducability (1) | In order to reproduce this type of attack, it would be very easy. However, the exploitaility of this attack is not easy. |
| Exploitability (2) | This attack has a medium level exploitability as it would require a specific skillset from the threat actor in order to perform this successfully. |
| Affected Users (1) | Home Owners are the only users that would be affected. |
| Discoverability (2) | Discovering a vulnerability in order to perform an eavesdropping attack would be considered medium level since it is not very easy to find a vulnerability to intercept the packets. |

CVSS:3.0/AV:N/AC:L/PR:N/UI:R/S:U/C:L/I:N/A:N
Risk Response: Tolerate
In order to mitigate this attack, we chose to encrypt the data at rest as well as the data in transit. The data at rest is encrpted using the PBKDF2 algorithm and the data in transit is encrypted using TLS. This way, even if there was an attacker listening on the packets being transmitted, they would have to find out the encryption algorithm and decrypt the packet before being able to identify the data.
Breach of Administrator account credentials. With a breached administrator account, the threat actor would have a full access to the Mongo Database which consists of all the information of end users.
| Category | Description |
|---|---|
| Damage (3) | The damage would be high if the administrator account were to be accessed by a threat actor. This is because the administrator has full access to all the data that resides in the database and is able to configure all the server settings |
| Reproducability (3) | The reproducability is would be considered high if the threat actor has found the credentials of the administrator account as they have full access to the database and can make changes as and when they please |
| Exploitability (3) | The exploitability would be considered as high since it would be very difficult for a threat actor to gain access to the account. The administrator account for the MongoDB database is securely protected with the use of social logins and 2 factor authentication. The social login also consists of a strong password, reducing the possibility of having a breached administrator account. |
| Affected Users (3) | An attack on the database would affect all users, including the Administrator and all end-users |
| Discoverability (1) | The discovery of an IoT threat at this level would be considered as low as it could be very difficult to identify that an account has been breached. This is very similar to the Verkada Breach which occured in 2021 |

Risk Response: Transfer
The best mitigation techniques would be implementing social logins that make use of 2 factor authentication, creating a strong password for the social login account, limiting the amount of people that have administrator privileges and having an audit log for important events such as authentications. The main purpose of implementing a strong password would be to minimize the risk of having a compromised password. Having a 2 factor authentication on top of the strong password would act as a gateway to the account, reducing the impact of a compromised user account. Limiting the number of administrator accounts would then help limit the number of potential compromised administrator accounts, reducing the risk of having an administrator account be compromised.

Distributed Denial of Service (DDoS) of the Vercel webserver to take down the entire website. This attack would have a big impact on availability as the website will become inaccessible to all end-users.
| Category | Description |
|---|---|
| Damage (2) | An attack of a web server attack would be considered as a middle damage level attack as it would completely prevent users from CRUD functions (Create, Read, Update and Delete functions). This would result in the end-users being unable to change any configuration related to their security system. |
| Reproducability (1) | In order to reproduce an attack at this level, it would be extremely difficult as Vercal has taken proper precautions to prevent high level threats such as DDoS which could reflect badly on the companys reputation |
| Exploitability (1) | To perform a DDoS at such a large scale, one that is able to take down a major cloud hosting such as Vercel, the threat actor would be required to be highly skilled and knowledgeable. They would also be require to make use of a extremely large number of zombies |
| Affected Users (3) | All users would be affected if Vercel were to be taken down as it would prevent them from being able to access and view their cloud based dashboards, which prevents them from using CRUD functions. |
| Discoverability (1) | It would be very hard to discover how to perform a DDoS attack on such a big cloud hosting service such as Vercel. |

Risk Response: Treat & Transfer
Proper mitigation techniques we could for this type of attack would be an automatic identification of any and all suspicious activities from users as well as black listing of the User/IP addresses that may be considered as attempting any malicious activities. However, a Distributed Denial of Service with the use of spoofing of the attacker's IP address would not be within our capabilities to treat. As such, we would be transferring those risks with the use of cloud service providers, which in this case would be Vercel.

One of the most common IoT attacks on web applications that require authentications would be brute force attack. Brute force attack is the act where the threat actor constantly attempts to get into the system by guessing the user credentials on the website application.
| Category | Description |
|---|---|
| Damage (3) | The damage would be considered high for this attack as the threat actor would be able to reconfigure the settings of the home owner, potentially allowing the threat actor to get into the home of the account owner. |
| Reproducability (1) | The reproducability of this attack would be considered as low since there are proper precautions in place to prevent such attacks. Some examples would be a restriction and notification alert sent to the account owner if there was a number of failed attempts. |
| Exploitability (1) | A brute force attack would be considered as low exploitability since it required a large amount of effort and time to enter each potential password. |
| Affected Users (1) | The only affected user would be the end-user whose account was breached by this attack. |
| Discoverability (3) | It does not difficult for a threat actor perform a brute force attack as it requires little to no knowledge about IoT attacks. |

Risk Response: Treat
Recommended mitigation techniques for this attack would include an alert and locking of the account after a set number of failed attempts. This has been implemented as part of Auth0's compliance. An additional method in preventing this attack would be the implementation of 2FA. With the use of 2FA, if the threat actor were to successfully authenticate themselves with the use of the username and password, they would still require authentication from the 2nd factor, which is highly unlikely.
| TR64 Req ID | Explanation |
|---|---|
| CS-02;IA-01 | User created passwords for Auth0 are hashed using bcrypt. |
| FP-02 | FP-02: Website application configuration variables are stored under vercel environment variables which are encrypted via AES256 |
| RS-03 | Web server is secured by vercel with security grade procedures. Able to withstand malicious threats such as Denial of Service (DoS) and Distributed Denial of Service (DDoS). |
| MT-02 | Users are only able to create, read, update and delete their own data so to uphold confidentiality and that data will not be tampered by unauthorized users. |
| TR64 Req ID | Explanation |
|---|---|
| CS-01 | API keys are generated by Mongo. |
| CS-04 | RS256 asymmetric encryption algorithm is used to sign Json Web Tokens (JWTs) for authentication to web application. |
| CS-05;FP-01 | API Keys are created for trusted endpoints and are fully managed by MongoDB with industrial grade security features. |
| DP-04 | Role based access is assigned for different users. |
| RS-04 | MongoDB Atlas provides a tool that enables backups of the entire database to be created easily. The backup can be used for disaster recovery in the event of an IoT attack. |
| AU-01;AU-02 | Audit log consists of all entries, including Create, Read, Update and Delete (CRUD) as well as any successful or unsuccessful authentications. Audit logs are also secured and tamper proof. Only the authorized user with the proper credentials/API key would be able to access it. |
| MT-02 | Role based access is granted to specific users such that there are no over privileged accounts, which poses as a IoT security vulnerability. |

User dashboard view only consists of personal devices

Audit Log for CRUD and Authentications

Saving of user does not include saving of PIIs
| TR64 Req ID | Explanation |
|---|---|
| CS-05;IA-01 | Passwords created for specific user accounts are hashed using bcrypt before being stored in the Auth0 database separate from our resource database (Mongodb) following OAuth 2.0 to ensure confidentiality of user credentials. |
| IA-02 | Authentication to web server has a set session expiry of 7 days before the user is prompted to sign in again. |
| IA-03 | Unique tokens are generated and assigned to users using JWTs to guarantee the Authenticity of users. |
| IA-04;AP-02;MT-01 | Users are required to create a complex password upon signing up. 2 factor authentication is also required for users who sign in using third-party applications such as Google or Microsoft Account. (Refer to Attack Surface 3) |
| DP-02 | Digital signatures are created using RS256 to sign Json Web Tokens for Non-Repudiation and Integrity, making sure the content has not been tampered with. |
| AP-01 | Failure to enter password consecutively would result in an account lockout followed by blocking of the suspected user IP Address. Account owner would also be notified of the suspicious activity and given a choice to unblock the IP Address. (Refer to Attack Surface 4) |

Hashing of passwords for Auth0 login credentials
| TR64 Req ID | Explanation |
|---|---|
| CS-02;IA-01 | We used a cryptographic algorithm (PBKDF2) to hash the device password with salt for better confidentiality. |
| AP-04 | In order to prevent threat actors from physically accessing the microcontroller, which is the core of the physical system, we created a tamper-resistant box which is used to hold the microcontroller |

Tamper Proof Enclosure
| TR64 Req ID | Explanation |
|---|---|
| LP-01 | Threat modelling was performed and used to improve our security features based on the DREAD threat modelling method |
| LP-02 | System was designed using the secure systems engineering approach. Minimal inputs are taken from users, system was designed to be as simplified as possible and permissions are only granted as and when required. |
| LP-03 | System was constructed using components provided by Singapore Polytechnic. Components were presumably sourced from a authorized seller. |
| LP-07 | Penetration testing for the cloud services are done by the service providers upon new updates and releases. Penetration testing for the ESP-32 data transmission was done with Kali Linux by legal means and under a controlled environment. |
| LP-09 | MongoDB manages all the user data for authenticated clients and Auth0 helps to provide certificates to allow proper authentication for all authorized clients. |
For the Security Testing portion, we have come up with two separate methods that would successfully penetrate the developed IoT Product.
For method 1, we would be performing a Distributed Denial of Service Attack (DDoS). This attack has a sole purpose of denying the end user from being able to access the IoT Device, completely stopping the Smart Door System from working. For this DDoS attack, we would be flooding the network address with an absurd amount of traffic to the point where the IoT Devices would not be able to receive any incoming commands from the IoT Gateway.
Access Kali and kill all processes using the WiFi interface
airmon-ng check kill
Start the network adapter in monitor mode and view all nearby access points to identify target network.

All Nearby AccessPoints (GeeksforGeeks, 2022)
airodump-ng -c 1 --bssid 80:35:C1:13:C1:2C -w /root wlan0mon
Deauthenticate all clients from the network in order to get them to re-authenticated themselves. While clients attempt to re-authenticate themselves, we would be able to capture the WPA handshake.
aireplay-ng -0 10 -a 80:35:C1:13:C1:2C wlan0mon
After obtaining the handshake, compare the handshake with a dictionary consisting of all common passwords.
aircrack-ng -a2 -b 80:35:C1:13:C1:2C -w /root/passwords.txt /root/hacking-01.cap

After gaining access to the same network as the IoT device, we would be able to scan the network using third-party softwares such as "Advanced IP Scanner" to identify the device we are trying to attack. In this case, it would be the device under the manufacturer "Espressif Systems".

After we successfully identified the IP address of the target IoT device, we would be able to perform the Distributed Denial of Service attack by flooding the network with hping or with the use of zombies.
sudo hping3 "192.168.9.243" -q -n -d -S -p 443 --flood --rand-source
An alternative way to make use of the device would be to convert the Smart Door System into a Zombie for DDoS attacks on the internal network. Since we have attained access to the IoT Device, we could turn it into an IoT threat for the rest of their network, completely breaking down the home network of the end user.
For a guide on how to set up zombies, see here https://www.geeksforgeeks.org/slowloris-ddos-attack-tool-in-kali-linux/.
For method 2, we are going with the assumption that the IoT Device has been mass produced and deployed. This would result in the product connecting to the Access Points to gain access to the internet. As such, another threat that the IoT product faces would be Man in the Middle Attacks (MITM). For MITM attacks, there would be a fake access point that would be identical to that of the real one, causing the end user to misinterpret the fake access point as the real one and connecting to it, sending their personal data directly to the threat actor.

Follow the guide provided for Method 1 Step 1.
After identifying the network access point details, create a fake access point using any of the preferred tools such as wifiphisher. In this case, we will be using wihotspot, which is a GUI based tool.
In the GUI of wihotspot, set the SSID and password of fake access point to be that of the real one and click on create. This will create the fake access point which will act as a bait for the end user to connect to.

aireplay-ng -0 10 -a 80:35:C1:13:C1:2C wlan0mon
After the users have connected to the fake access points, all the data that is intended to be sent to the cloud database will be sent to the threat actor instead. The last step would be to decrypt the received packets and we would have successfully obtained the private data of the end user.
The website is hosted on vercel and is reachable via https://iots.vercel.app/ . The website is built on NextJS which is a meta ReactJS framework which allows developers to create full stack web application. It also uses MongoDB as a database to store the user device information and Auth0 to handle user authentication and storing of user information.- next (Framework built for full stack ReactJS web application)
- next auth (Handle authentication and middleware of the website)
- MUI (Design library)
- cypto-js (Cyptography library for the PBKFD2 hashing client side)
- ReactJS
- You will need to have nodejs installed. Go over to https://nodejs.org/en/ to install nodejs
- Clone this repository or download the zip file
- Open it up using visual studio code or equivalent and go to the root path of the dashboard which is /IOTS/IOTS-dashboard
-
From here you can choose to either run it in localhost mode or push it to the cloud.
If you want to push it to the cloud- Create a new github repository and push the code to the repository
- Create a vercel account and link it to your github https://vercel.com/
- After signing in to vercel, go to add new project
- Import the repository that you created
- Select the NextJS under the Framework Preset
- Ensure that the Root Directory is the root path of the website
- Then click deploy
- All codes that are commited to github will be rebuilt and redeployed on vercel.
- Go to the root path of the website locally from your terminal in visual studio code or equivalent
- Type in npm run dev
- Open your browser and go to http://localhost:3000/
- You should see the website running
- Now you need to create a new Auth0 account https://auth0.com/
- Login to auth0
- Go to applications and create a new application
- Select Regular Web Application
- Take note of the Client ID and Client Secret
- Scroll down to Allowed Callback URLs
- Add in https://YOUR-VERCEL-APP-URL/api/auth/callback/auth0, http://localhost:3000/api/auth/callback . You do not need to add in the first one if you did not push the code to vercel
- Scroll down and save your changes
- Now you need to create your MongoDB database
- Head over to https://www.mongodb.com/ and create a new account
- Create a new project and name it IOTS
- Create a new cluster and select shared and change the cluster name to IOTS-database
- Go to browse collection of IOTS-database
- Go to collections tab and create a new database
- Go to collections tab and create a new database
- Name the database name as IOTS_dashboard and the Collection name as users
- Hover over IOTS_dashboard and create another collection and name it as users
- Go over to App Services
- Go to Authentication tab
- Click on edit for Custom JWT Authentication
- Enable the provider and select Use a JWK URI
- Under JWK URI go back to auth0 application settings and scroll all the way down to advanced settings
- Go to the Endpoints tab and copy the JSON Web Key Set. It should look something like https://YOUR-TENANT/.well-known/jwks.json
- Go back to the MongoDB and paste what you copied to the JWK URI
- Go to trigger and add a new trigger
- Set the trigger type to Authentication
- Name the Trigger AddUserToDatabase
- Set your Cluster name to IOTS-database
- Set your Database name to IOTS-dashboard
- Set your Collection name to users
- Scroll down and click on select a function and create a new function
- Name the function addUserToDatabase
-
Copy this code and place it in the function
exports = function(authEvent) {
  const user = authEvent.user;
  const mongodb = context.services.get("IOTS-database");
  const usersCollection = mongodb.db("IOTS_dashboard").collection("users");
  usersCollection.insertOne({
    ...user
  });
};
- Save it and go back to the Authentication tab
- Click on edit for the API Keys and create a new API Key and name it Door_Auth. Save the API key somewhere safe as you will not see it again. This will be your API key that you will use for the esp32 query
- While you are saving the api key, on the sidebar, at the top, there is a copy icon. Click on it as save it as that is your app id and you will need it later go back to the auth0
- Go over to APIs and create a new API
- Name it whatever you want and the identifier is the mongodb app id which you saved and the click create
-
Now if you are running the code on localhost, create a .env file at the root directory. If you are using vercel go over to settings and Environment Variables. Then add this into your env either on vercel or your .env file in your root directory
AUTH0_CLIENT_ID = <Your auth0 application client ID> AUTH0_CLIENT_SECRET = <Your auth0 application client secret> AUTH0_ISSUER = https://<your auth0 application domain> NEXTAUTH_URL = <your website url either localhost or the vercel url> NEXT_PUBLIC_APP_ID= <your mongodb app id that you saved> AUTH0_AUDIENCE= <your mongodb app id that you saved> NEXTAUTH_SECRET= <random secret of any length that you can use openssl to generate for you. would recommend 32 characters long> NEXT_PUBLIC_SALT = <the salt that you will use to hash the users device password. would also recommend to use openssl and 32 characters long to generate the salt> - Go back to mongodb app services
- Go to HTTPS Endpoints and create a new HTTPS Endpoint
- Set the route to be /doorauth
- Under Operation Type copy the url
- Set the HTTP Method to post
- Set the Return Type to JSON
-
Under Function add a new function and copy this code
exports = async function({ query, headers, body}, response) {
  const CryptoJS = require("crypto-js");

    const serialized = body.text();
    const data = JSON.parse(serialized);

    const {deviceId, userPassword} = data;
    console.log(deviceId);
    console.log(userPassword)
    const dbPassword = await context.services.get("IOTS-database").db("IOTS_dashboard").collection("iot").findOne(
    {device_id: deviceId},
    {password: 1}
    )
    console.log(dbPassword);

    console.log("dbpassword", dbPassword)

    if (dbPassword){
      console.log("not null")
       if (dbPassword.password === CryptoJS.PBKDF2(userPassword, "<Your salt that you generated just now>",  {
              keySize: 256 / 32,
              iterations: 1000,
            }).toString()){
              console.log("authorised")
         return "authorised"
       }
        return "Username or Password is invalid"
    }else{
      console.log('invalid')
      return "Username or Password is invalid";
    }

};
- Go to your esp32 code and add the API key of the doorauth you saved just now as well as add your http endpoint url to the endpoint variable
The diagram below shows how the components are connected to create the circuit diagram. the tables shows the different pin connections to the Esp32 I/O pins.

- Once the circuit has been set up, connect the Esp32 to the computer
- Install the necessary libraries needed:
- keypad by Mark Stanley, Alexander Brevig
- LiquidCrystal I2C by Frank de Brabander
- ESP32Servo by Kevin Harrington, John K. Bennett
- Download and open the program file Esp32 INO file [6 kB]
- Upload the code
- Once the code is uploaded, hold on the 'boot' button on the Esp32 to run the program in the board
if the 'Output' displays an error of the I2C LCD not compatible with Esp32, proceed to file explorer to edit the library
- Go to file explorer/Arduino/libraries/LiquidCrystal_I2C
- open library.properties in notepad
- Include Esp32 to the architechtures. That line of the library property should look like "architectures=avr,esp32"
- save changes and run the code again