Repository navigation
Tutorial: Building with Variations & Clips
Variation menu (accessible with the 4-shape icon, LShift + 1 in Vanilla mode / LShift + 5 in Unlimiter 2.0 mode) is an important element of track building, as it allows you to have full control over every aspect of block placing. For the easiest example of this, let's switch the type of placing to Semi-Automatic and observe how the editor reacts.
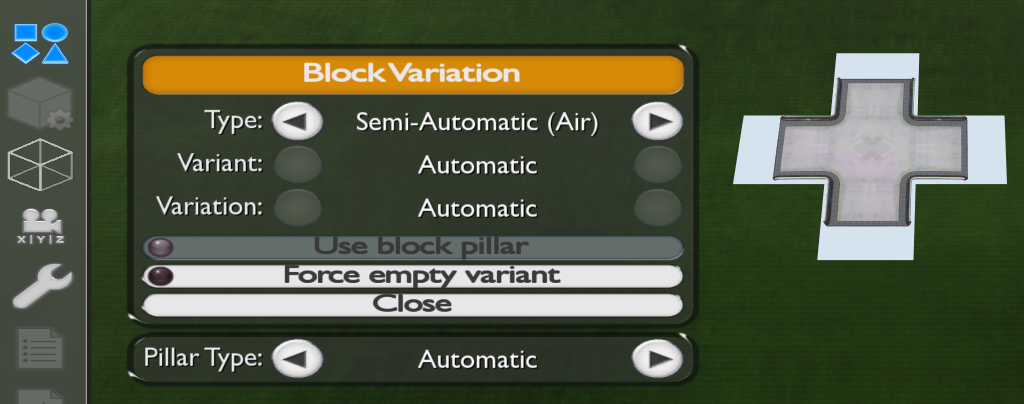 |
| Road block under a Semi-Automatic (Air) placing mode. |
Semi-Automatic (Ground) puts blocks in ground-only mode, while Semi-Automatic (Air) puts blocks in air-only mode. Blocks in their respective modes will always look and behave the same way regardless of whether you place them on ground or not - this is why the block makes holes on the ground in the screenshot.
You can have even more granular control by enabling the manual modes, which also exist as both ground & air.
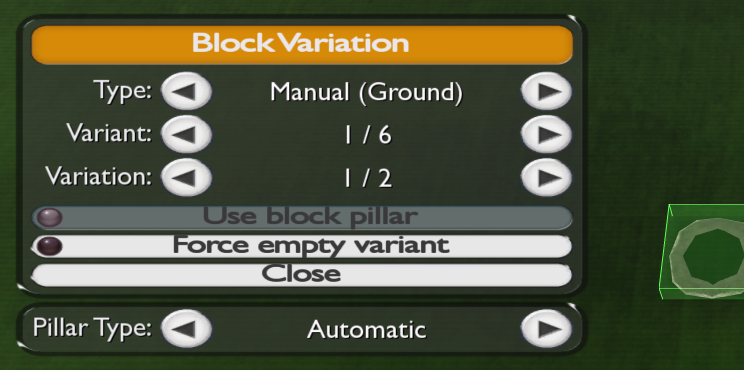 |
| Dirt road block under a Manual (Ground) placing mode. |
Most blocks in the game have some variants. Variants define individual shapes of the block - in case of road: a dead end, a straight, a 1x1 curve & intersections. Roads will generally have 12 variants - 6 ground & 6 air. (You can check them out on a screenshot below.) Meanwhile, variations define minor alterations of a block, such as the arrangement of bumps or tiny objects on the mesh. The dirt road will look slightly different depending on the variation, but its shape will be mostly the same.
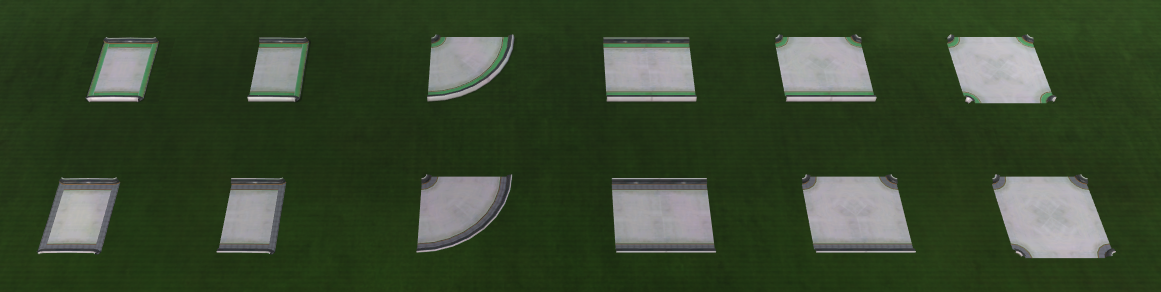 |
| All variants of a road block. |
Some blocks are more complicated and feature pillars. Pillars are bottom parts of blocks that automatically connect themselves to the ground, such as pipes or inflatables on Stadium.
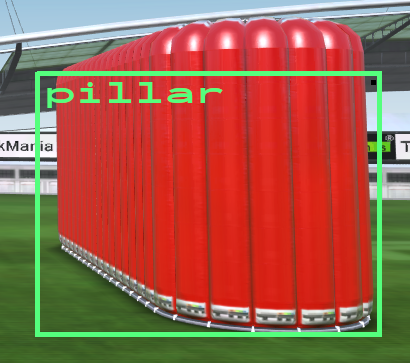 |
| Visual explanation of a pillar. |
You can also use the Semi-Automatic modes on pillars with the Pillar Type option. Ground mode will change all of the pillar to ground variants of that pillar, while air mode will do the opposite. You can also choose Disabled - which will not place a pillar entirely, leaving you with just the top of the block.
To use a Manual mode with the pillar, you have to switch to Manual mode in Type selection, then enable "Use block pillar". You will be able to choose between pillar's variants & variations.
After placing the pillar, you might want to be able to remove only a part of it. In order to do that, go to the Miscellaneous menu represented by a wrench icon (or press LShift + 4 in Vanilla mode / LShift + 9 in Unlimiter 2.0 mode), then enable "Slice mode". Then click on a pillar to remove it like you would normally do - this will delete only the selected part instead of the entire block.
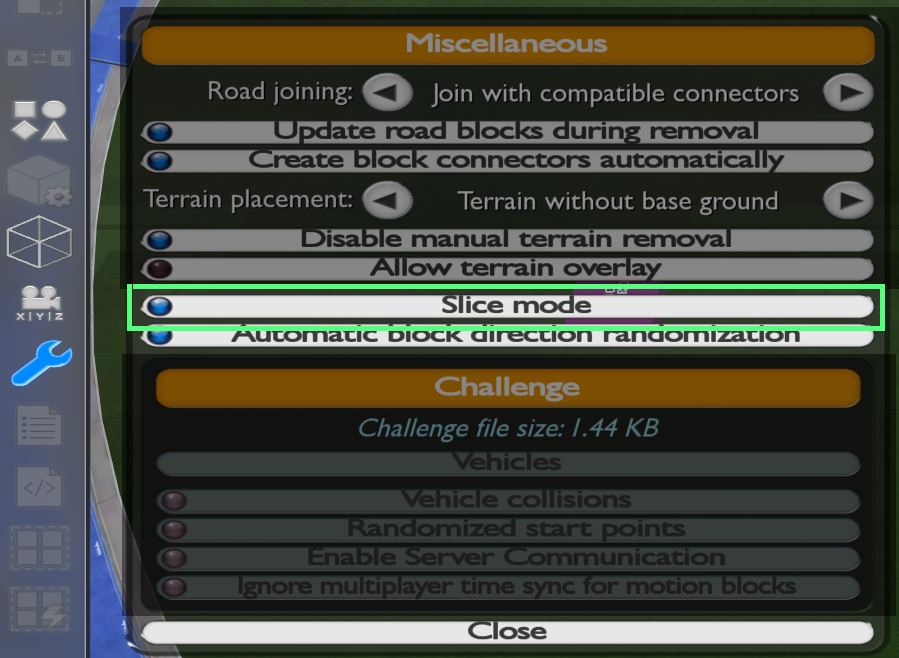 |
| Slice mode in the menu. |
Some blocks can be placed outside of the standard map base, and up to 255 blocks in any direction. You can do this with any block that does not have any air variants, isn't a pillar or terrain & isn't placeable on a pillar. You can quickly check if a block has air variants by going to the Manual (Air) mode - the Variations need to be "None" for this to work.
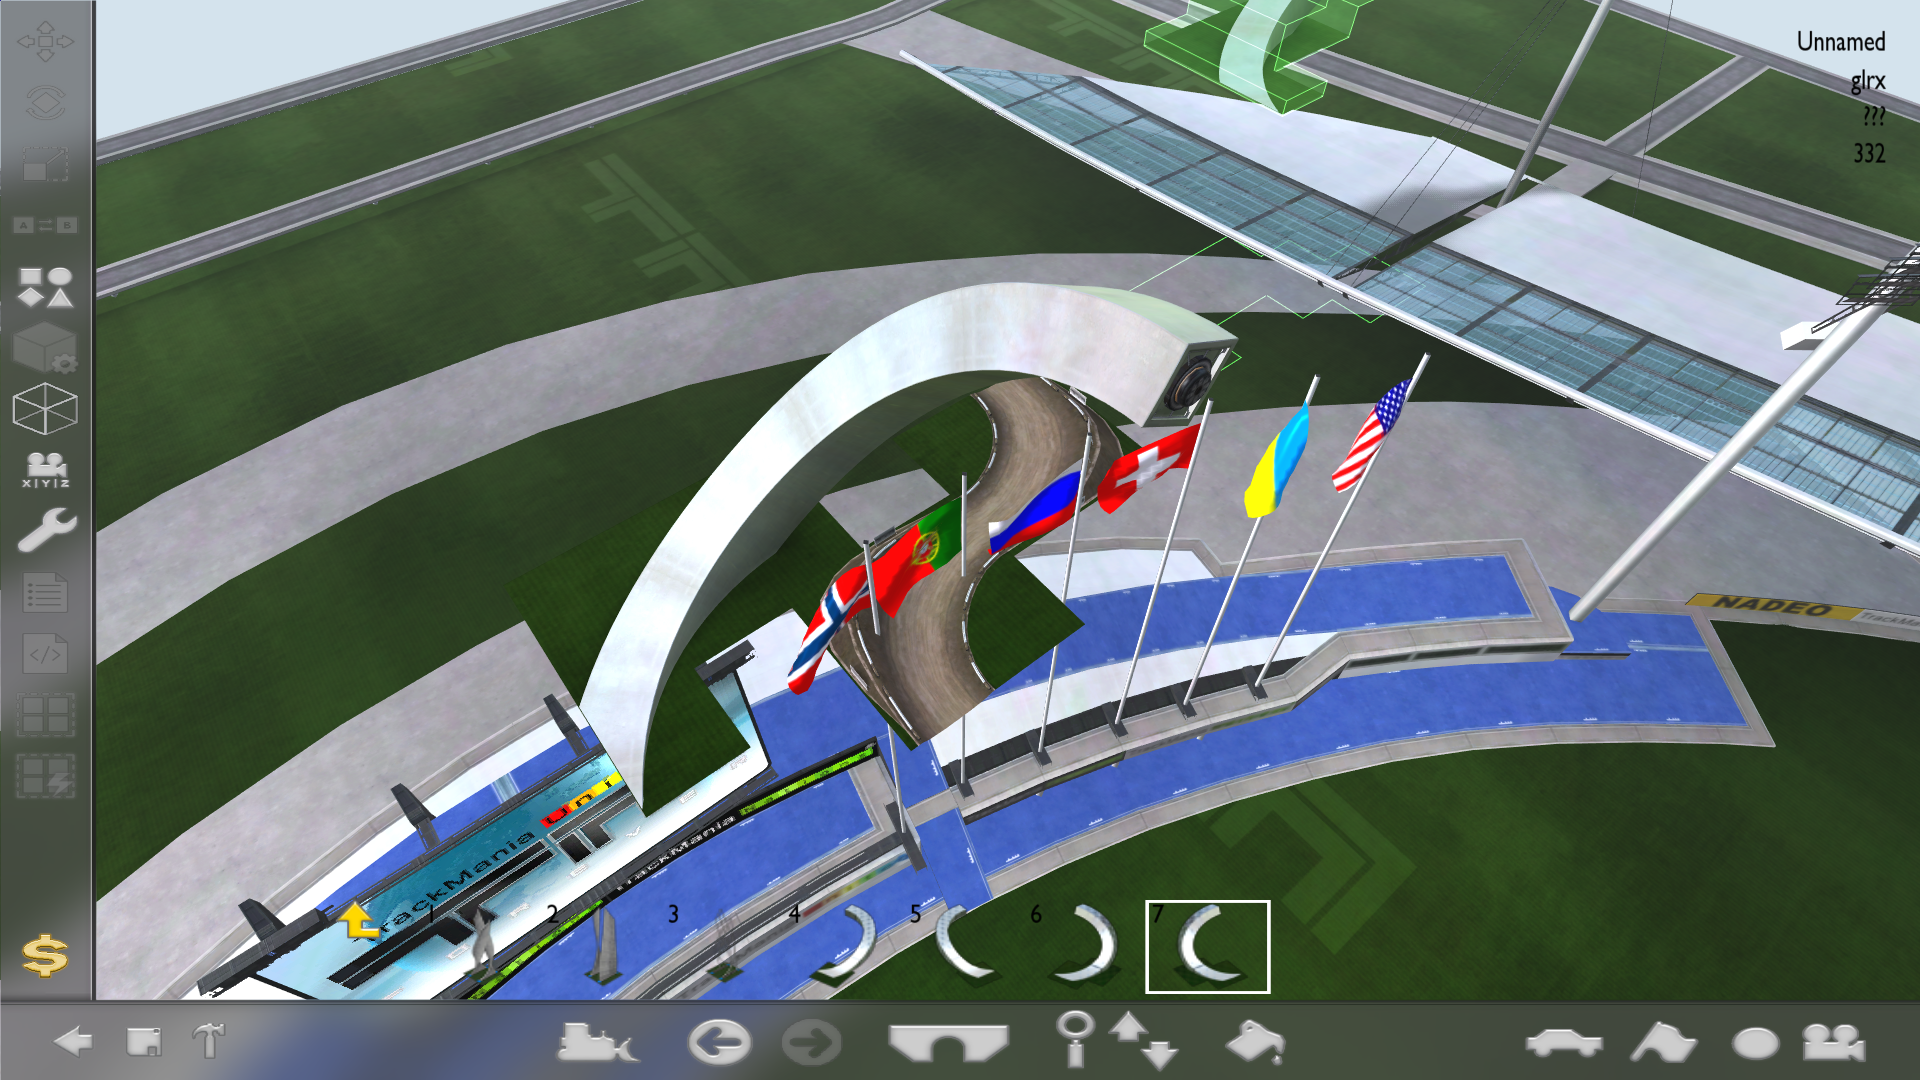 |
| Dirt placed outside of the map. |
This was one of the first United blockmixing techniques, now reintroduced in 2.0. Of course, if you're creating an Unlimiter 2.0 map and not a vanilla one, you can instead increase the map size, even beyond 255 blocks.
Clicking "Force empty variant" in the variation menu will present a different image entirely.
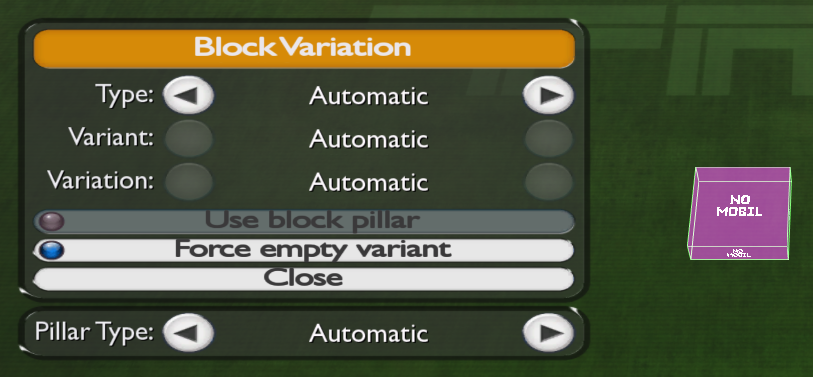 |
| A result of forcing an empty variant. |
Every block has its empty variant; a valid variant like every other one, but not included in the manual selection, as it doesn't have any visible mesh whatsoever. Having an invisible block doesn't sound helpful, but it can be used for a variety of things. This includes removing clips, removing the ground in a vanilla-compatible way, or the following:
This is very simple: in 2.0, you can place a blue ground without any visible roof. In order to do this, pick the block 8-8-1 in the Stadium folder, enable the "Force empty variant" switch & place the block anywhere above the ground you want to turn blue. The no-mobil block will be invisible in gameplay, leaving you with only ground.
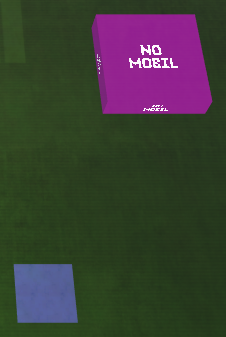 |
| Blue ground with an invisible block. |
Warning
Empty variants might turn invisible right after placing. In order to see them again (because you might want to see where they are, or to be able to delete them), find the icon below in the sidebar (or alternatively, LShift + 2 in Vanilla mode / LShift + 7 in Unlimiter 2.0 mode).

Once you're in the "Block Visibility" menu, enable the "Include blocks without a mobil" switch.
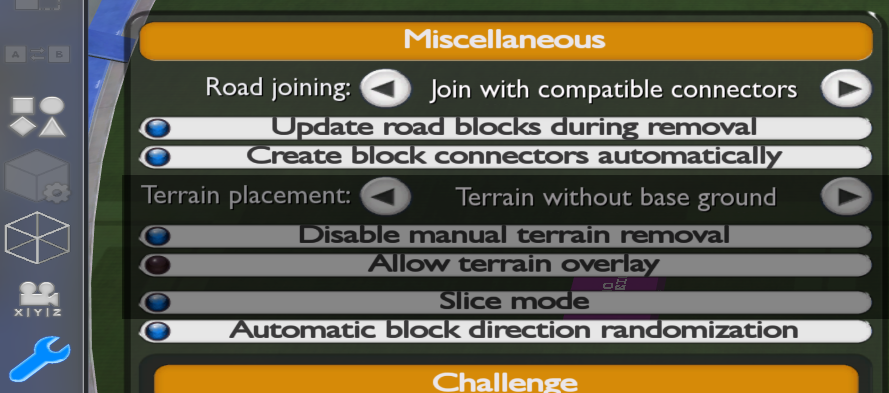 |
| Placing options in the Miscellaneous menu. |
Here are some globally applied options which might speed up your workflow.
Road joining will make roads connect to each other via clips - for example, a corner piece will connect to a straight piece when enabled, and won't when disabled. There are two options for enabling it: "compatible connectors", which means only the roads with the same clips get connected, and "all connectors", which means roads will connect to each other no matter the clip.
Update road blocks during removal has a similar effect, but for deleting blocks. Disabling this option will not change the variant of the existing road no matter what (which is shown on the screenshot below).
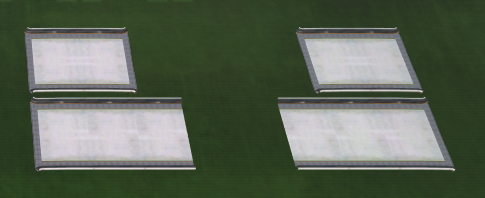 |
| Effect of removing a middle part of the road: "Update road..." enabled (above) and disabled (below). |
Automatic block connectors means clips. Enabling this option will add block clips anywhere they would be normally added in vanilla, while disabling it will not create clips altogether. This doesn't mean that any block connections won't be made anymore (use the road joining options for this), it just stops free clip generation.
Automatic block direction randomization is self-explanatory - it allows or stops direction randomization of certain blocks. Such behaviour is very rare in practice - it can be found most noticeably on cacti & rocks on Desert.
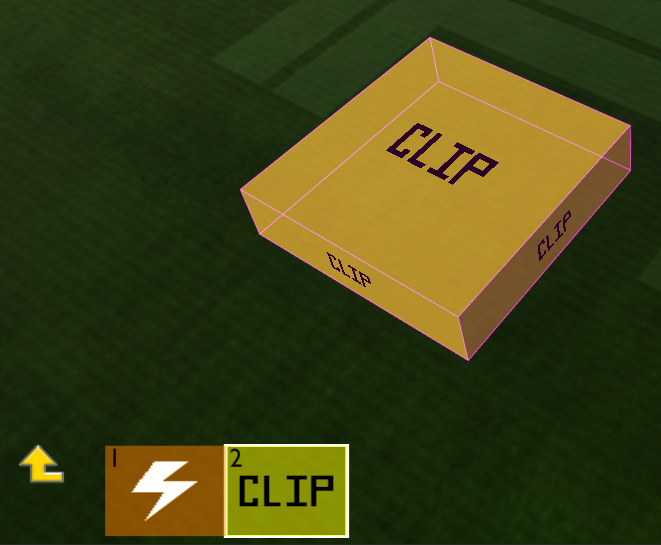 |
| Clips in the folder. |
Clips in TrackMania are internally represented by clip blocks. The Unlimiter clip item available in a separate folder (last folder of the editor) is a way to place these clip blocks to your liking. You won't be able to create individual clips (because this is simply not how the original game is programmed), but this will give you some control over which blocks have connectors & which don't.
An example situation is shown below. One click of the clip item in this situation will add clips to both boost blocks, even though you didn't place the block twice. This is because you're really placing a clip block in this area; then the TrackMania editor does the background calculations, and puts the clips where it thinks they should be.
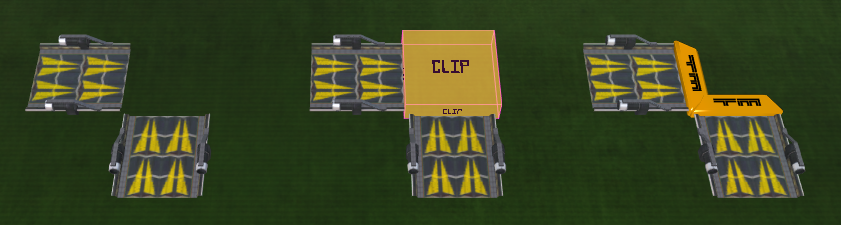 |
| The before-and-after of placing a clip item. |
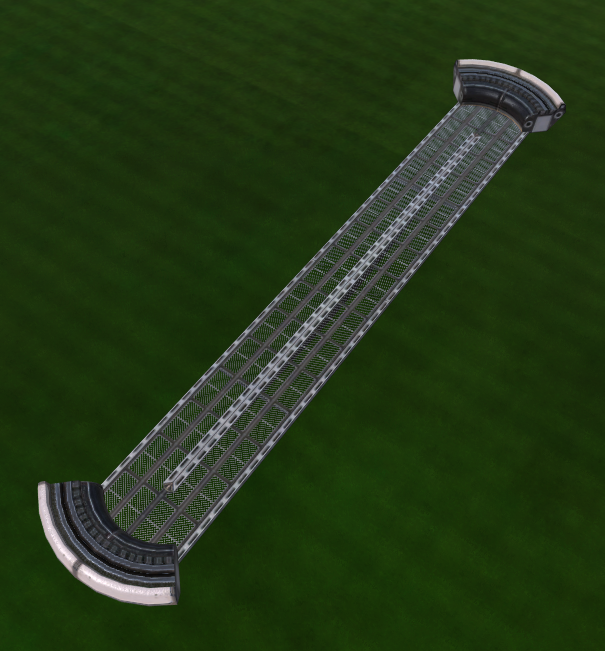
Let's combine different techniques from this tutorial to create a double-clip block.
 |
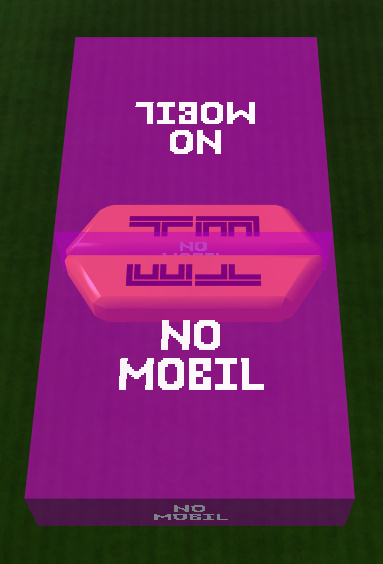 |
| A double-clip. | The in-editor view. |
To create this, you need to do the following:
- Choose any road block with a clip on the sides, for example a boost block.
- Put the block you chose as an empty-variant block and add a clip to the right side of it.
- Put another empty-variant block where you put the clip last time, and instead add a clip to the left side of it.
- You should have a construction like in the image to the right.