Vibrotactile Icon Editor
double click : add a keyframe
click+drag : box select
shift+click : add keyframe to selection
arrow keys : move playhead left or right.
-/delete : remove selected keyframe(s)
ctrl+(>/<) : x-scale
ctrl+/ : simplifies selected keyframe points by removing half of them.
ctrl+(left/right) : increment playhead
ctrl+i : invert selected keyframes
ctrl+c : copy
ctrl+v : paste (at playhead)
ctrl+shift+i open console (Chrome shortcut)
cmd+(>/<) : x-scale
cmd+/ : simplifies selected keyframe points by removing half of them.
cmd+(left/right) : increment playhead
cmd+i : invert selected keyframes
cmd+c : copy
cmd+v : paste (at playhead)
cmd+shift+c : open console (Chrome shortcut)
2016.05.31 : added a random noise parameter.
2016.05.31 : changed simplify shortcut from ctrl+s to ctrl+/ because ctrl+s also saves the page.
2016.05.30 : added x-scale functionality with ctrl-< and ctrl->, where selected points are scaled, and the rest are translated.
2016.05.30 : added a simplify functionality with ctrl-s, where points are decimated by half
-
Make sure you have node and NodeJS Package Manager (NPM) in your path. You can install node [here][https://nodejs.org/en/].
-
Clone the git repository by opening a terminal window and navigating to a directory of your choise and typing
git clone https://github.com/ubcspin/MacaronBit.git -
If you are on mac or linux rename "package[mac_use_this].json" -> "package.json". If you are on windows, rename "package[windows_use_this].json" -> "package.json".
-
In terminal, navigate into the newly cloned MacaronBit folder and type
npm install.
-
Open a terminal window, navigate to /MacaronBit, and type
npm run dev. -
While the server is running, open a new terminal window, navigate to /MacaronBit, and type
npm start. -
Open a web browser and navigate to
localhost:8080.
Macaron requires the following libraries:
Begin by installing NPM for your OS. Once NPM is installed, install react as follows:
npm install react --savenpm install react-file-input --save
and install webpack:
npm install -g webpacknpm i webpack --save-devnpm i webpack-dev-server --save
and the JSX syntax handler:
npm install babel-loader --save-dev
You will also need to install the following libraries:
And you will need two custom loaders for webpack, to import Audiolet, a non-NPM library contained in thirdparty/audiolet:
npm install imports-loader --savenpm install script-loader --save
As well, the following two loaders for loading CSS stylesheets:
npm install style-loader css-loader --save-dev
You'll need this for websockets:
npm install socket.io --savenpm install express --save
And this to talk to the Arduino:
npm install johnny-five --save
Now, you can build the environment with npm run deploy.
Note that there are two packages for windows and mac users: "package[mac use this].json", and "package[windows use this].json". Rename the package corresponding to your OS to "package.json". Also note that .gitignore has been updated to ignore "package.json", so if you are adding packages...beware!
Make sure the Arduino is loaded up with StandardFirmata (Examples > Firmata > Standard Firmata). The Bit should be plugged in as follows:
- Data pin (usually orange or yellow) : 10
- High/positive (usually red) : 5V
- Low/negative/ground (usually black or brown) : any GND
You can start serving on localhost:8080 with node server.
###Setting up the Arduino
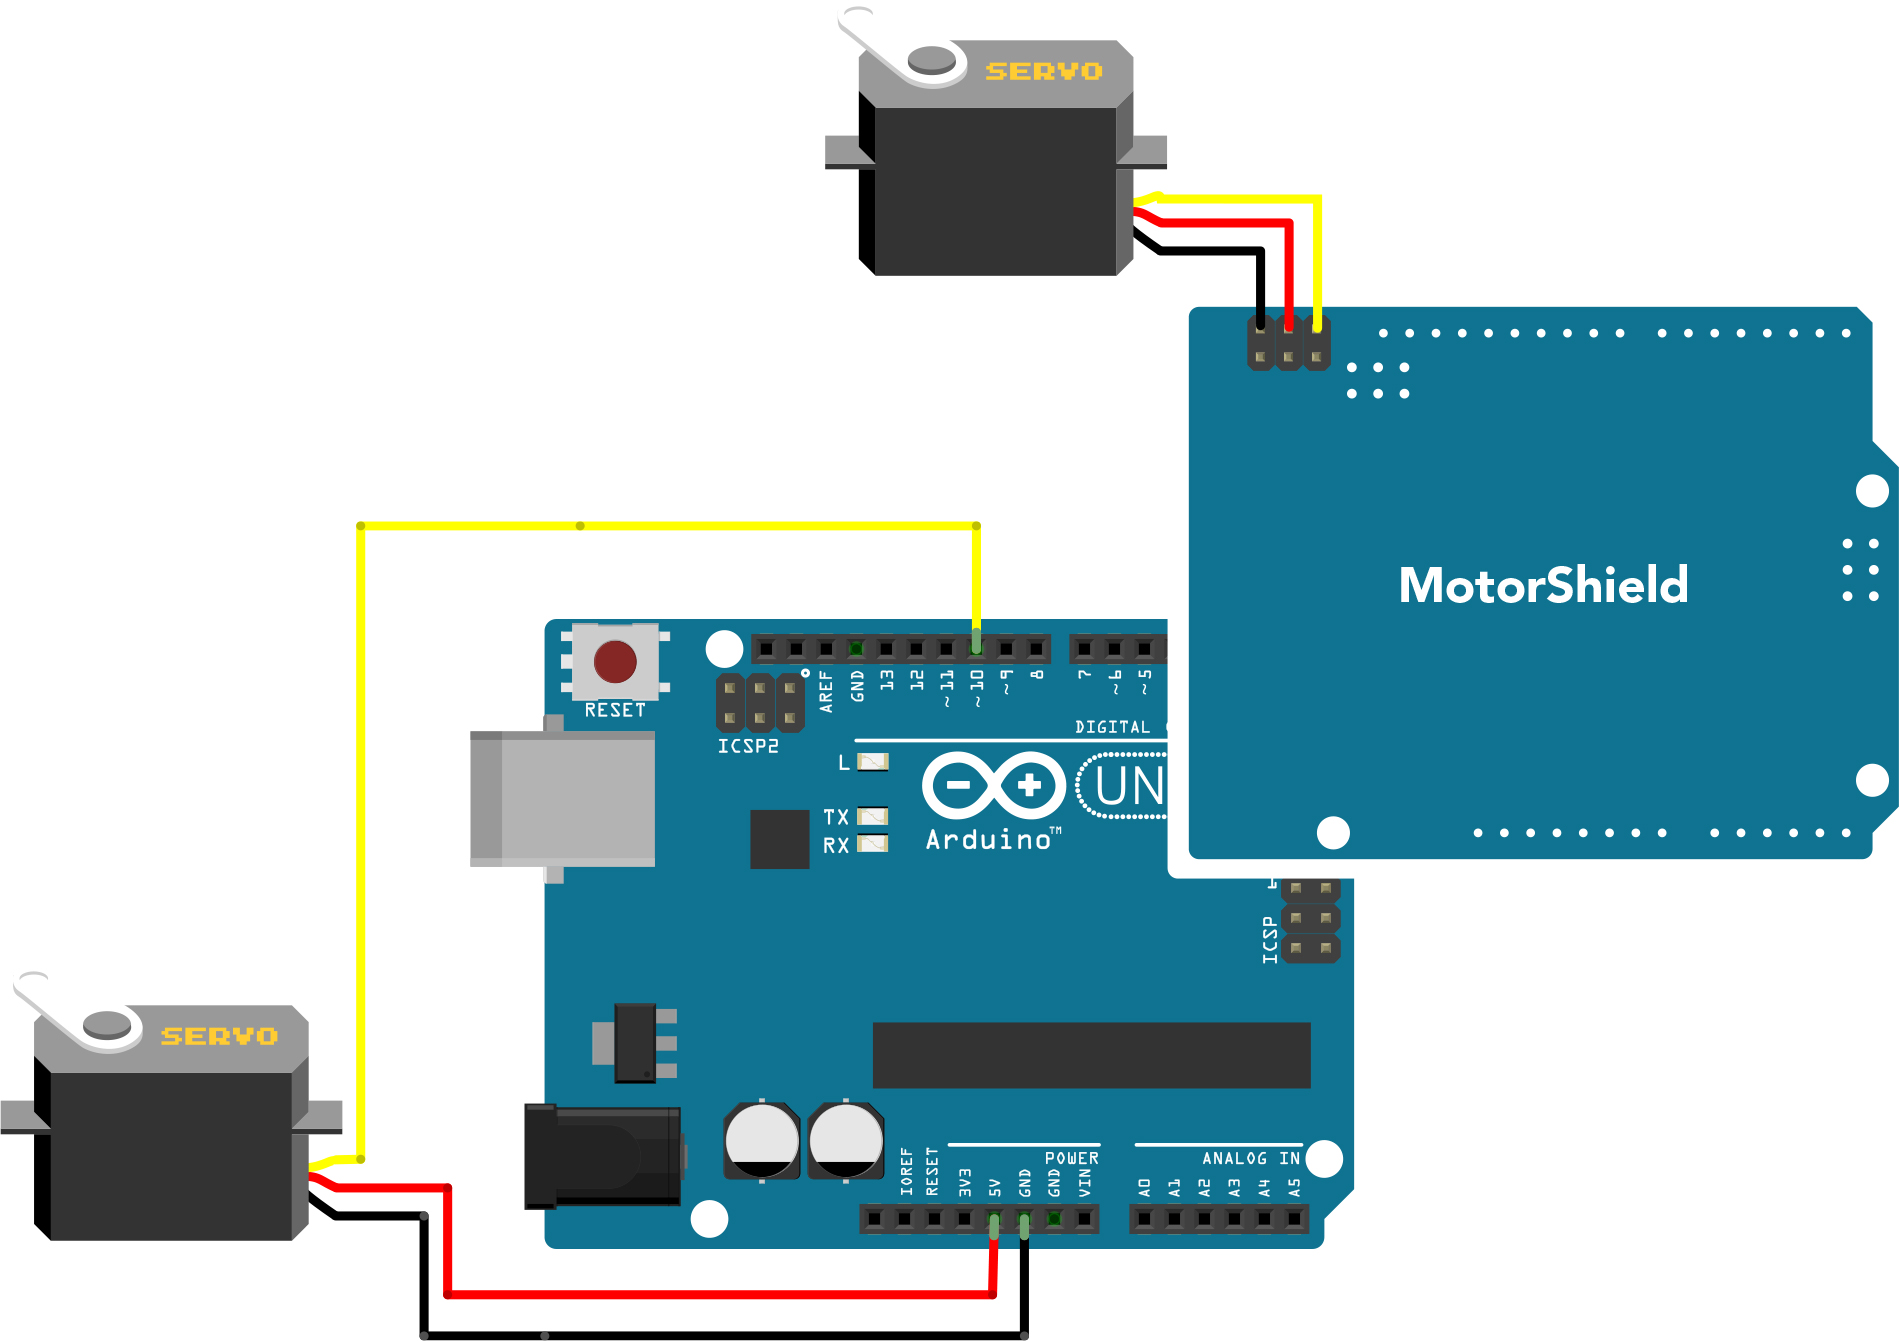
Power pin can be any 3-6V source. Ground pin must be common with the microcontroller, i.e., you can use any ground as long as it is connected to an Arduino ground. Data pin must be one of the PWM pins on the Arduino. In this case, it’s pin 10.