Documentation
- Introduction
- OpenStreetMap files
- Installation
- Usage
- Import Settings
- Tips and Tricks
- Limitations
- Links
The addon imports a file in the OpenStreetMap format (.osm).
By buying the addon you support the addon development. All customers will get the addon source code under GPL license!
The following items can be imported by the addon:
- Buildings. Building height, number of floors are used to create the final scene. Composition into 3D parts for a building with the complex structure is also processed. A large number of roof shapes is supported: flat, gabled, hipped (for a quadrangle outline only), mono-pitched, half-hipped, round, pyramidal, gambrel, dome, onion and saltbox.
- Water objects (rivers and lakes). Imported as polygons. Coastlines for seas and oceans are importes as edges.
- Vegetation areas (forests, grass, scrubs). Imported as polygons.
- Highways, paths and railways. Imported as edges.
Polygons with holes are supported!
The addon requires at least Blender 2.76, but it makes sense to use the latest version of Blender.
Buy the addon for just $3.85. You will get a zip archive. Do not unpack it! Install it via the usual Blender way:
- Delete the previous version of the addon if you have one:
- File → User Preferences... → Addons
- Type osm in the search box in the top left corner of the Addons tab to find the addon
- Press Remove button in the GUI box with the header Import-Export: Import OpenStreetMap (.osm)
- File → User Preferences... → Addons → Install from File...
- Find the zip archive in your file system and press Install from File... button
- Enable the addon by checking the Enable an addon
- Press Save User Settings in the Blender User Preferences window
Small OSM files (several megabytes) for an area of interest can be downloaded from the main OSM website. Press Manually select a different area to select the area of interest interactively or enter its coordinates in the input fields. The same webpage lists additional services to download larger extracts from the OSM database.
- File → Import → OpenStreetMap (.osm)
- Find an OpenStreetMap file in your file system
- Press Import OpenStreetMap button
- Enjoy the imported scene!
The addon comes with reasonable default settings. However you might want to tweak some of them. The panel with the import settings is located on the left side of the dialog window for choosing an OSM file.
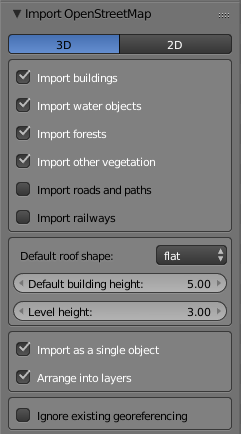
The first setting sets the mode of operation: either 3D or 2D. In the 2D mode buildings are imported as flat polygons.
The next group of settings defines which items will be imported.
Import buildings
If checked import buildings. The addon follows OSM Simple 3D buildings specification in the 3D mode.
Import water objects
If checked import water objects (rivers and lakes) as polygons and coastlines for seas and oceans as edges. You will need to create one or more faces manually for the seas and oceans limited by the edges representing those coastlines. Obviously you can skip this step, if your OSM file doesn't contain any coastline. Besides coastlines the other water objects (rivers and lakes) are also imported as edges, if they were mapped as OpenStreetMap multipolygon relations and lie partially beyond the bounds of the OSM file. In that case create faces manually for the related water objects as well.
Import forests
If checked import forests and woods as polygons.
Import other vegetation
If checked import other vegetation (grass, meadow, scrub) as polygons
Import roads and paths
If checked import roads and paths as edges.
Import railways
If checked import railways as edges.
Default building height
The setting defines the default building height in meters. It is assigned to an imported building if the building height (either in meters or in the number of levels) wasn't set for the building in the OSM file.
Level height
The setting defines the level height in meters. It is used by the addon if the building height is defined by the number of levels (i.e. not by the total height in meters).
Import as a single object
Arrange into layers
These two settings influence the import result together.
Layers (further referred to as addon layers) meant in the setting Arrange into layers are not to be confused with Blender layers! The addon layers are defined by the settings mentioned above: buildings, roads and paths, railways, water, forests, vegetation.
☑ Import as a single object checked
☑ Arrange into layers checked
This is the default state of the settings.
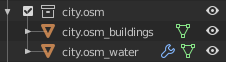
OSM elements belonging to a specific addon layer are imported as the single Blender object, so a separate Blender object is created only for each addon layer (not for each OSM element).
_________________________________________________
☐ Import as a single object unchecked
☑ Arrange into layers checked
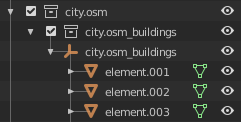
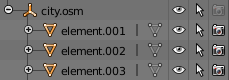
An OSM element is imported as a separate Blender object and parented to a Blender EMPTY object representing the related addon layer. A complex building composed of several parts is imported as a single Blender object in the 3D mode. Only the building outline is imported for that complex building in the 2D mode.
All OSM tags of each imported OSM element are set as Blender custom properties for the related Blender object:

_________________________________________________
☑ Import as a single object checked
☐ Arrange into layers unchecked

All OSM elements are imported as the single Blender object.
_________________________________________________
☐ Import as a single object unchecked
☐ Arrange into layers unchecked
An OSM element is imported as a separate Blender object. All created Blender objects are parented to the same Blender EMPTY object. A complex building composed of several parts is imported as a single Blender object in the 3D mode. Only the building outline is imported for that complex building in the 2D mode. All OSM tags of each imported OSM element are set as Blender custom properties for the related Blender object.
Set far clipping distance of the 3D View and your render cameras at least to 10 thousand! The imported scene can be dozens of kilometers wide!
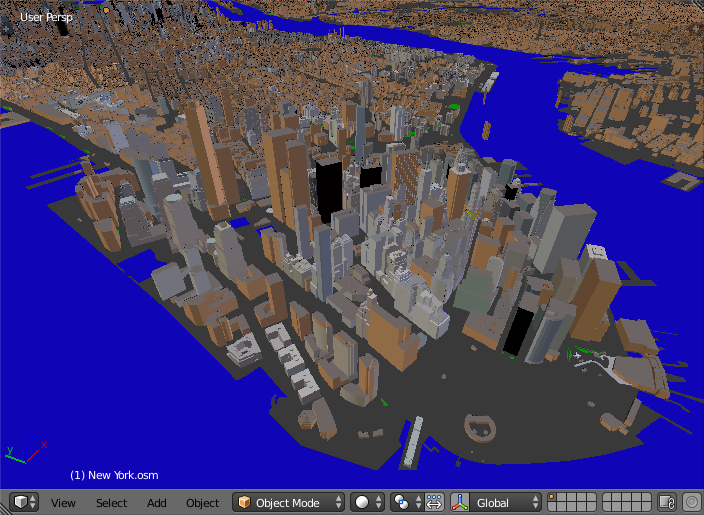
Take care with large .osm files (hundreds of megabytes and more)! For example, an OSM file used to create the scene of New York center shown on the very top image had the size of 350 Mb. It contained more than 100.000 buildings. It took around 1 hour to import the file. Even larger .osm files may hang up your computer completely.
Color and physical material for the walls and the roof aren't set for each building in an OSM file. If they are missing, the addon applies the default Blender materials for the walls and the roof. Those default Blender materials have the names wall and roof respectively.
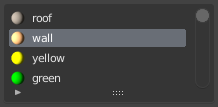
You can edit the Blender materials wall and roof or replace them with your own.
- Hipped roofs are supported only for a quadrangle building outline
- Only simple diffuse materials are applied to the imported objects at the moment.
- Addon
- e-mail: prokitektura+support@gmail.com
- facebook: prokitektura
- twitter: @prokitektura
- blenderartists.org: thread
post questions, nice renderings created with the addon and your experience with the addon - bugs and feature requests: issues