This project provides a Python-based tool (CLI + GUI) for controlling Schneider Electric Pro-face XVGU3SHAG and XVGU3SWG USB signal towers from a Raspberry Pi.
Tested on: Raspberry Pi 5 with Raspberry Pi OS 64-bit
Compatible devices: XVGU3SHAG, XVGU3SWG
⚠️ This project is an independent implementation and not affiliated with Schneider Electric.
Watch the XVGU Tower in Pink (demo video)
xvgu.py--- USB control script (command-line interface)xvgu_gui.py--- Tkinter GUI for light and buzzer control99-xvgu.rules--- udev rule to allow USB access without sudo
This project controls Schneider Electric Pro-face XVGU USB signal towers using Python on Raspberry Pi.
For a detailed walkthrough, development background, and examples (including CO₂ monitoring integration), check out the full article on Qiita: USBパトライト (EZタワーライト/Schneider XVGU) をPythonから制御してみた.
Plug the XVGU signal tower into a USB port on your Raspberry Pi.
sudo apt update
sudo apt install -y python3-tk libusb-1.0-0 python3-pip
pip3 install pyusbsudo cp 99-xvgu.rules /etc/udev/rules.d/
sudo udevadm control --reload-rules
sudo udevadm triggerThen unplug and reconnect the XVGU device.
# Turn on red on layer ONE
python3 xvgu.py ledset --layer ONE --name red --pattern ON

# Start buzzer (default: tone=high, volume=mid)
python3 xvgu.py buzzer

# Start buzzer with custom tone and volume
python3 xvgu.py buzzer --tone high --volume big --seconds 2

# Stop buzzer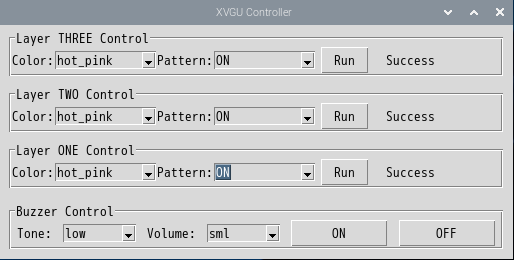
python3 xvgu.py buzzer --offpython3 xvgu_gui.pyThis opens a graphical interface to control lights and buzzer.
The tool communicates with the XVGU device using:
- VID:
0x16DE - PID:
0x000C
MIT License
This project is an independent implementation.
It is not affiliated with or endorsed by Schneider Electric or Pro-face.
Schneider Electric and Pro-face are trademarks of their respective owners.