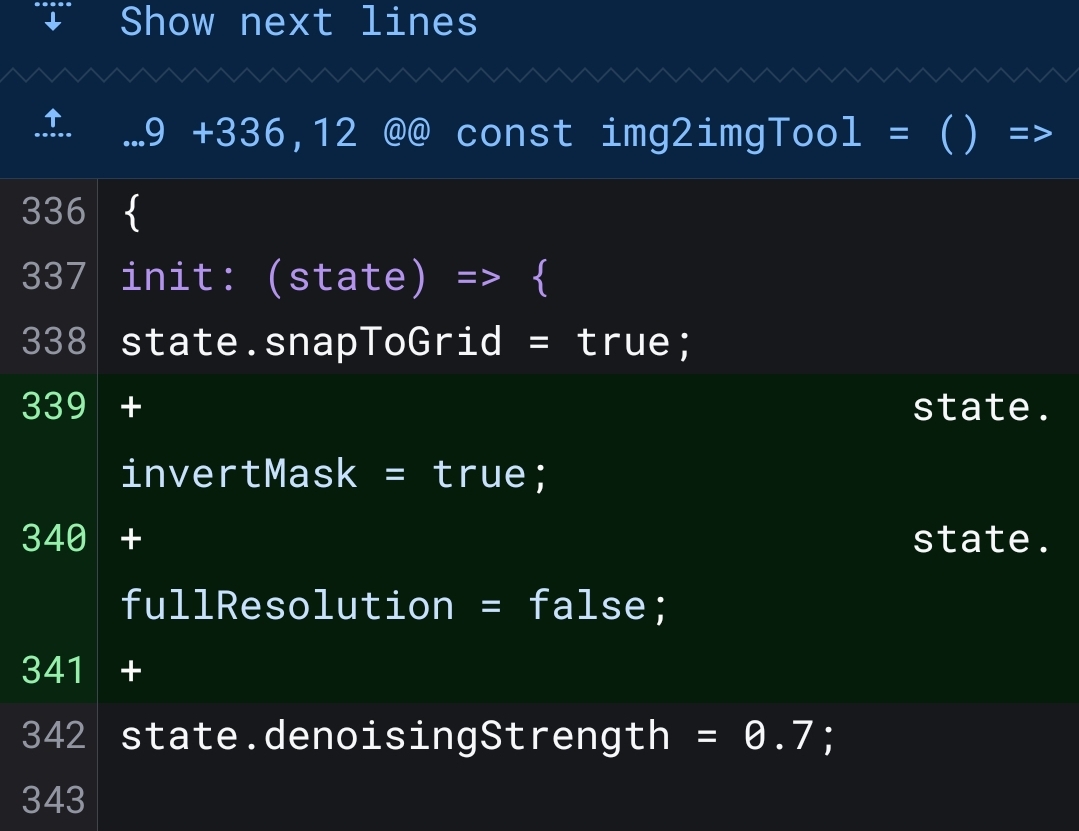
Allow mask inversion in both dream tools#56
Conversation
Signed-off-by: Victor Seiji Hariki <victorseijih@gmail.com>
Signed-off-by: Victor Seiji Hariki <victorseijih@gmail.com>
Signed-off-by: Victor Seiji Hariki <victorseijih@gmail.com>
|
huh, so i think i might be missing the intent of mask inversion; with normal image dreams, enabling the inversion seems to make a completely unrelated image which is... probably expected behavior, thinking about what it does lol
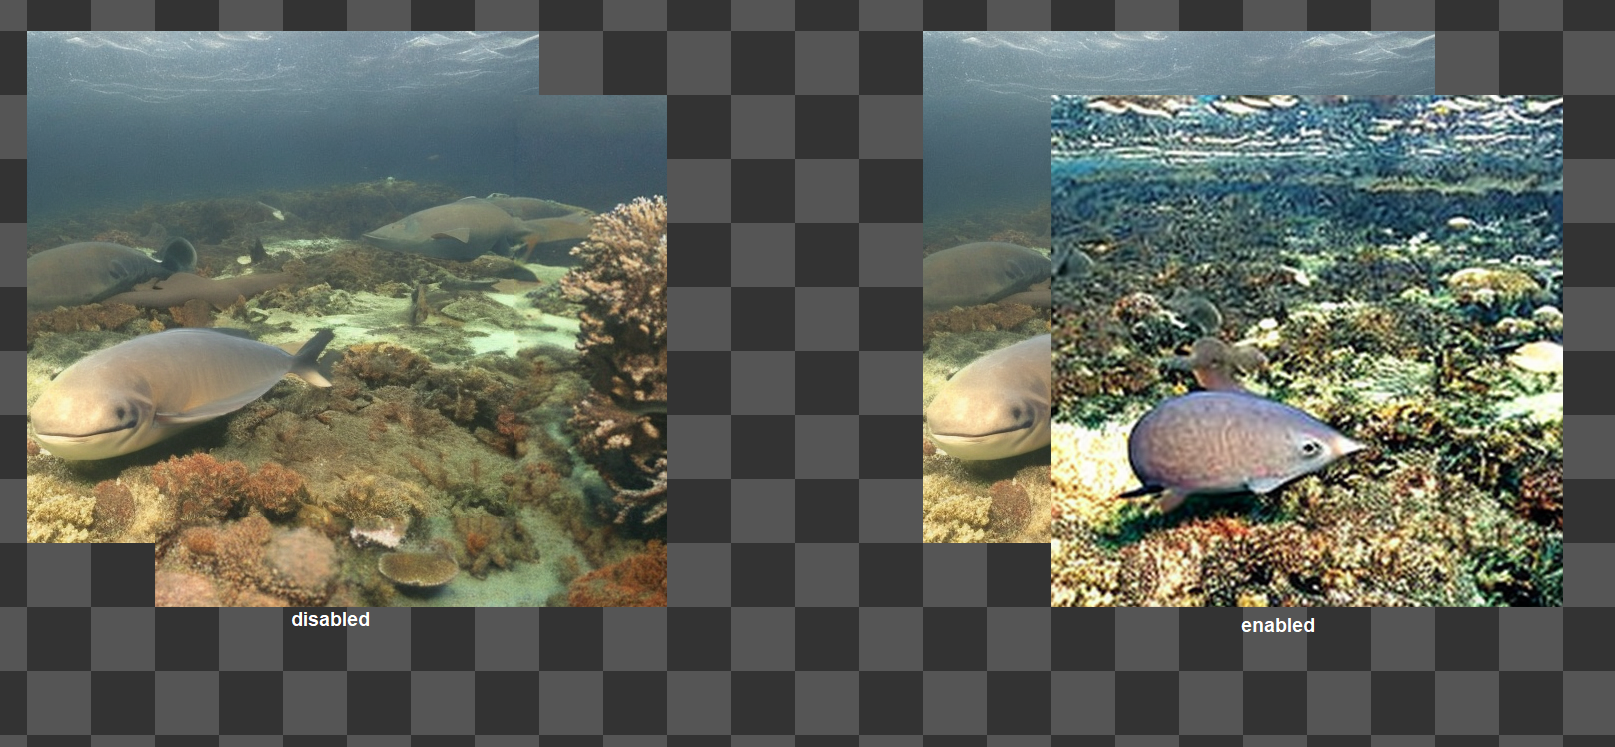
with the img2img tool however, leaving it disabled seems to have zero effect on the output result, while enabling it appears to work like it did previously (similar to above, disabled on left, enabled on right) invmask.webm |
|
sigh i'm an idiot, i warned you repeatedly i do still wonder if the img2img tool's implementation of the inversion is currently backwards however? currently on main, no drawn mask is necessary for the img2img tool to work (minus border masks of course) but now you have to manually define the area with a brushed mask, or enable mask inversion... highly likely i'm just misunderstanding something (all things?) however :D |
|
Oh, maybe it was kind of unintuitive; Actually, I had quite some trouble implementing the mask inversion because I was not sure what I had to do. But strangely, I settled on this format for consistency.
About mask inversion in img2img, it is only really useful when using the mask brush. For an example, say you want to perform inpainting on a face, to redo only the face itself. What I was doing before was to mask the whole area of the reticle, and then erase the mask over the face of the person. Now, if I have mask inversion off, I can just mask over a few areas to inpaint, then go running an img2img for each without having to expand the mask, paint all over, then erase on the spots I want. Granted, img2img is usually more useful when Mask inversion is on, and dream is usually better when it's off. That's why these tools have different default values for this checkbox. Mask inversion in the dream tool is... actually not that useful. I put it there for consistency between tools. Maybe you liked a generated face very much, and you want to fix it in place while regenerating the rest? I guess it could be made more intuitive. A thought I had just now is, what if we change the hue of the mask according to what the mask is doing? Red for removing the selected area and green/blue for holding it in place? Maybe that could help visualize what's happening better. |
|
About the red/blue thing, I already had to change the color of the border mask to show that it does not necessarily do the same as the mask brush (It always, disregarding mask inversion, hold the image in place). Maybe we could always color code, using blue to signify that an area would be held in place, and red to signify that an area would be modified? |
100% logical and completely agreed consistency between tools is WAY more important than my workflow being mildly inconvenienced
lmaooo i erased a sentence in my previous comment saying something like "i don't know that it particularly benefits txt2img dreams but better to have it there than not" :D
this is extra clever and i honestly kind of intuitively wondered if img2img was about to Do Something Different™ when i activated it and noticed the new blue overlay; definitely 100% all in for blue == preserve, red == mutate |
|
also once again, seriously, thanks for all you're doing :) i technically work partially in a software development industry and i feel like i should be paying you for not only your fantastic improvements to this repo, but also kinda teaching me new things even if you didn't mean to <3 |
Hm... Strange, by default, and not changing any settings, they should work exactly the same as before. Could you elaborate on what you have to do extra compared to before?
Yeah, this one is only there for the ride.
This should be simple enough to implement |
oh, quite literally just simply enable mask inversion before using the img2img tool before clicking an un-brush-masked region and expecting it to change - previously, i'd just change the prompt, select the img2img tool, make sure what i wanted to mutate wasn't in the border masked region and click the canvas; now i have to go through the massive effort of clicking the invert enable checkbox first ;) |
|
That's weird, mask inversion in img2img should be enabled by default:
Will check what's happening as soon as I get home. |
|
Okay, so... this is quite a pickle. For me, it comes enabled by default: Peek.2022-11-26.21-57.mp4So, I have no clear idea on what is happening on your side. If you can check and try addressing this issue, I would be most grateful. Maybe it is a caching issue? Can you clear all site data and try again? |
|
🤦 ok would you believe that i've been actively unchecking the checkbox to simulate previous usage conditions and basing my "expectations" on that yep it absolutely inverts by default perfectly fine and i apologize for the wild goose chase :( |
Blue masking means SD will try to keep image as-is under the mask. Red
masking means SD will try to replace whatever is under the mask. (Red is
default masking, Blue is inverted masking)

Signed-off-by: Victor Seiji Hariki <victorseijih@gmail.com>
Oh, that's absolutely fine! Also, just pushed a new commit with the colorful masks I mentioned before. Give it a look. Any feedback is appreciated. For it to work more smoothly, I had to use some black magic normally used for transforming black icons into colorful icons with a combination of CSS filters: https://codepen.io/sosuke/pen/Pjoqqp But it seems to work remarkably well even with canvases and mixed with opacity. |
Add clear to clear all mask, add preview to show mask in full opacity

Signed-off-by: Victor Seiji Hariki <victorseijih@gmail.com>
Signed-off-by: Victor Seiji Hariki <victorseijih@gmail.com>
|
genuinely brilliant, a++++ also i love the clear mask button so much lol |
|
Okay, will merge changes for now |
Seemed kind of limiting that each tool had its own mask mode. Dream tool still always outpaints outside images, img2img keepborders tool also does not invert in function.