For simulation engineers getting started, we recommend using the Basic Mode:
- Quick Start: Run
start_chatem_simple_enhanced.bat - Choose Option 2: FastAPI server mode (most stable)
- Direct API: Access full CST control via REST API at
http://localhost:8089/docs - No Complex Setup: No need for additional agent installations or configurations
This provides immediate access to 80+ CST simulation tools through a clean REST API interface, perfect for integration with existing workflows or custom scripts.
ChatEM is a revolutionary platform that bridges the gap between natural language and complex electromagnetic simulation. It allows engineers, researchers, and students to control the powerful CST Studio Suite® through an intuitive, modern chat interface.
Say goodbye to complex UI navigation and repetitive manual scripting. With ChatEM, you can design, simulate, and analyze electromagnetic devices simply by talking to an AI assistant.
*This project is currently in its alpha stage.
- 🤖 Intuitive Chat Interface: Interact with CST using natural language commands. Describe the model you want to build, the simulation you want to run, and the results you need, just as you would with a human colleague.
- ⚙️ End-to-End CST Automation: Full control over the simulation workflow:
- Geometry Modeling: Create complex 3D structures from simple text descriptions.
- Material & Port Setup: Define materials and configure waveguide ports effortlessly.
- Simulation Control: Set up solvers, define frequency ranges, and run simulations.
- Results Post-processing: Automatically extract and plot S-parameters, fields, and other critical results.
- ⚡ Asynchronous Task Management: Powered by Celery, ChatEM runs time-consuming simulations in the background. You can start a simulation, close the browser, and get notified upon completion without tying up the interface.
- 📊 Real-time Monitoring: Keep an eye on your simulation tasks and system status through a dedicated monitoring panel.
- 🧠 AI-Powered Translation: Leverages advanced AI models to understand user intent and translate it into precise, executable simulation commands.
- 🔌 Extensible Framework: The architecture is designed to be modular, paving the way for future integration with other simulation tools like ANSYS HFSS or FEKO.
This guide provides the simplest way to get ChatEM running on your Windows machine, with no programming experience required.
Before installing ChatEM, you need to ensure three key programs are installed.
- CST Studio Suite®:
- You must have a working installation of CST Studio Suite (2024 or newer is recommended).
ChatEM can leverage external AI agents like Gemini CLI or Claude Code to enhance its capabilities. Choose one of the following options to install your preferred agent:
The Gemini CLI allows you to interact with Google's Gemini models directly from your command line.
-
Install the Gemini CLI: Follow the official installation instructions on the Gemini CLI GitHub repository: https://github.com/google-gemini/gemini-cli
-
Configure Gemini CLI: After installation, you'll need to configure your Gemini API key or use your gmail account. Refer to the Gemini CLI documentation for detailed steps on authentication and configuration.
Claude Code provides a command-line interface for interacting with Anthropic's Claude models.
-
Install Claude Code: Follow the official installation instructions on the Claude Code GitHub repository: https://github.com/anthropics/claude-code
-
Configure Claude Code: After installation, you'll need to configure your Claude API key. Refer to the Claude Code documentation for detailed steps on authentication and configuration.
-
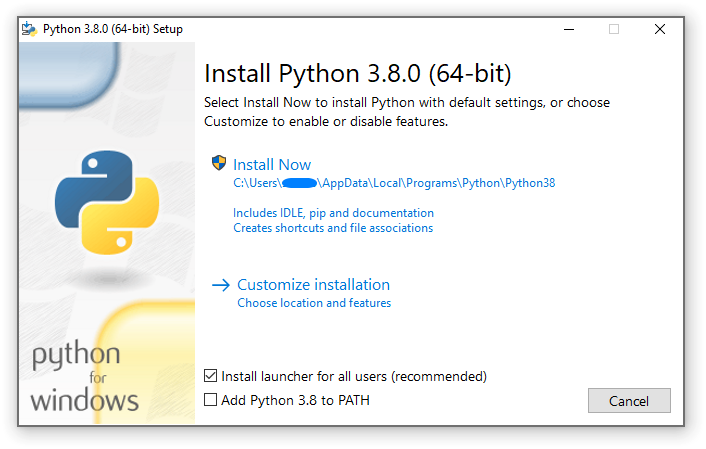
Python:
- Download: Python 3.9+ from python.org
- Important: During installation, make sure to check the box that says "Add Python to PATH". This is crucial for the scripts to work correctly.
-
Node.js:
- Download: Node.js 20.x+ from nodejs.org
- Install the "LTS" (Long-Term Support) version. The default installation settings are fine.
Note: ChatEM now uses SQLite as the default message queue (built into Python), so no additional database installation is required. Enterprise users who need Redis for high-performance scenarios can configure it separately.
-
Download the Code:
- Click here to download the project files as a ZIP.
- Unzip the downloaded file (
chatem-main.zip) into a folder of your choice (e.g.,D:\ChatEM).
-
Configure the Environment:
- In the folder where you unzipped the files, find the file named
.env.example. - Make a copy of this file and rename the copy to
.env. - Open the new
.envfile with a text editor like Notepad. - Fill in the necessary paths, such as
CST_PATH(the location of your CST installation) andPROJECT_DIR(where you want to save your simulation files).
- In the folder where you unzipped the files, find the file named
- Navigate to the ChatEM folder.
- Find the file
setup.batand double-click it. - A command prompt window will appear and automatically install all the necessary components. This may take several minutes. Please wait for it to finish and the window to close.
- In the same folder, find the file
start_chatem.batand double-click it. - Language Selection: The launcher will first ask you to choose your preferred language (English or 中文).
- Startup Mode: You can choose between:
- Complete Mode: All services (MCP + Celery + AgentAPI + Flower + Frontend UI)
- Minimal Mode: Core services only (MCP + Celery for background tasks)
- Several command prompt windows will open. These are the different parts of the ChatEM system.
- Do not close these windows! They must remain running for ChatEM to function.
- Process Management: Each service now has meaningful process names in Task Manager:
ChatEM-MCP-Server(MCP tools server)ChatEM-Celery-Worker(background task processor)ChatEM-Flower-Monitor(task queue monitor)agentapi.exe(AI agent interface)
- Open your web browser (like Chrome, Firefox, or Edge).
- Navigate to the following address:
http://localhost:3000 - You should now see the ChatEM chat interface, ready for your commands!
- When you're done using ChatEM, you can stop all services by running
stop_chatem.bat. - The stop script also supports language selection and offers options for clean shutdown.
- Alternatively, you can use Task Manager to stop the named processes listed above.
Let's see how you can design a simple patch antenna by chatting with ChatEM.
-
Start a new project:
You:
Hello, let's create a new project named 'PatchAntenna'.ChatEM:
Project 'PatchAntenna' created. What would you like to do first? -
Create the geometry:
You:
Create a substrate using Rogers RO4350B, with dimensions 20mm by 20mm and a thickness of 0.8mm.ChatEM:
Substrate created. What's next?You:
Now add a copper patch on top of it, 10mm by 8mm, centered on the substrate.ChatEM:
Done. The patch has been added. -
Set up the simulation:
You:
Add a waveguide port to the edge of the patch.ChatEM:
Port 1 has been configured. Which frequency range should I use for the simulation?You:
Set up a frequency sweep from 4 GHz to 6 GHz. -
Run and get results:
You:
Run the simulation now.ChatEM:
Simulation started. You can track its progress in the monitoring panel. I'll let you know when it's done.(...after some time...)
ChatEM:
Simulation for 'PatchAntenna' is complete.You:
Great. Please plot the S11 parameter.ChatEM:
Of course. Here is the S11 plot:(ChatEM displays the S11 chart directly in the interface)
We have an ambitious roadmap for ChatEM. Here are some of the features we're planning:
- [ ] Broader Solver Support: Add adapters for other major EM simulation tools like ANSYS HFSS and FEKO.
- [ ] Advanced Agent Capabilities: Enable the AI to perform more complex, multi-step tasks from a single command (e.g., "Design a horn antenna for 28 GHz, optimize its gain, and generate a performance report.").
对于刚开始使用的仿真工程师,我们推荐使用基础模式:
- 快速启动: 运行
start_chatem_simple_enhanced.bat - 选择选项 2: FastAPI 服务器模式(最稳定)
- 直接 API: 通过 REST API 访问完整的 CST 控制,地址:
http://localhost:8089/docs - 无复杂配置: 无需额外的代理安装或配置
这提供了通过简洁 REST API 接口立即访问 80+ CST 仿真工具的功能,非常适合与现有工作流程或自定义脚本集成。
ChatEM 是一个革命性的平台,它弥合了自然语言与复杂电磁仿真之间的鸿沟。它允许工程师、研究人员和学生通过直观、现代的聊天界面来控制功能强大的 CST Studio Suite®。
告别复杂的 UI 导航和重复的手动脚本编写。使用 ChatEM,您只需与 AI 助手对话,即可设计、仿真和分析电磁设备。
本项目目前处于 Alpha 阶段。欢迎您的反馈和贡献!
- 🤖 直观的聊天界面: 使用自然语言命令与 CST 交互。就像与人类同事交流一样,描述您想要构建的模型、要运行的仿真以及需要的结果。
- ⚙️ 端到端 CST 自动化: 全面控制仿真工作流程:
- 几何建模: 从简单的文本描述创建复杂的 3D 结构。
- 材料与端口设置: 轻松定义材料并配置波导端口。
- 仿真控制: 设置求解器、定义频率范围并运行仿真。
- 结果后处理: 自动提取和绘制 S 参数、场和其他关键结果。
- ⚡ 异步任务管理: 由 Celery 提供支持,ChatEM 在后台运行耗时的仿真。您可以启动仿真,关闭浏览器,并在完成后收到通知,而不会占用界面。
- 📊 实时监控: 通过专用监控面板密切关注您的仿真任务和系统状态。
- 🧠 AI 驱动的翻译: 利用先进的 AI 模型理解用户意图,并将其转化为精确、可执行的仿真命令。
- 🔌 可扩展框架: 架构设计为模块化,为未来与 ANSYS HFSS 或 FEKO 等其他仿真工具集成铺平了道路。
本指南提供了在您的 Windows 机器上运行 ChatEM 的最简单方法,无需任何编程经验。
在安装 ChatEM 之前,您需要确保安装了三个关键程序。
- CST Studio Suite®:
- 您必须安装了可正常工作的 CST Studio Suite(建议使用 2024 或更高版本)。
ChatEM 可以利用外部 AI 代理(如 Gemini CLI 或 Claude Code)来增强其功能。请选择以下选项之一来安装您偏好的代理:
Gemini CLI 允许您直接从命令行与 Google 的 Gemini 模型进行交互。
-
安装 Gemini CLI: 请遵循 Gemini CLI GitHub 仓库上的官方安装说明: https://github.com/google-gemini/gemini-cli
-
配置 Gemini CLI: 安装后,您需要配置您的 Gemini API 密钥。请参阅 Gemini CLI 文档以获取有关身份验证和配置的详细步骤。
Claude Code 提供了一个命令行界面,用于与 Anthropic 的 Claude 模型进行交互。
-
安装 Claude Code: 请遵循 Claude Code GitHub 仓库上的官方安装说明: https://github.com/anthropics/claude-code
-
配置 Claude Code: 安装后,您需要配置您的 Claude API 密钥。请参阅 Claude Code 文档以获取有关身份验证和配置的详细步骤。
-
Python:
- 下载: 从 python.org 下载 Python 3.9+
- 重要提示: 在安装过程中,请务必勾选 "Add Python to PATH" 选项。这对于脚本的正常运行至关重要。
-
Node.js:
- 下载: 从 nodejs.org 下载 Node.js 20.x+
- 安装 "LTS"(长期支持)版本。默认安装设置即可。
注意: ChatEM 现在默认使用 SQLite 作为消息队列(Python 内置),因此无需安装额外的数据库。需要高性能的企业用户可以单独配置 Redis。
-
下载代码:
- 点击此处下载项目文件 ZIP 包。
- 将下载的文件 (
chatem-main.zip) 解压到您选择的文件夹中(例如,D:\ChatEM)。
-
配置环境:
- 在您解压文件的文件夹中,找到名为
.env.example的文件。 - 复制此文件并将其重命名为
.env。 - 使用记事本等文本编辑器打开新的
.env文件。 - 填写必要的路径,例如
CST_PATH(您的 CST 安装位置)和PROJECT_DIR(您希望保存仿真文件的位置)。
- 在您解压文件的文件夹中,找到名为
- 导航到 ChatEM 文件夹。
- 找到文件
setup.bat并双击它。 - 将出现一个命令提示符窗口,并自动安装所有必要的组件。这可能需要几分钟。请等待它完成并关闭窗口。
- 在同一文件夹中,找到文件
start_chatem.bat并双击它。 - 语言选择: 启动器首先会询问您选择偏好的语言(English 或 中文)。
- 启动模式: 您可以在以下模式中选择:
- 完整模式: 所有服务(MCP + Celery + AgentAPI + Flower + 前端界面)
- 最小模式: 仅核心服务(MCP + Celery,用于后台任务)
- 将打开几个命令提示符窗口。这些是 ChatEM 系统的不同部分。
- 请勿关闭这些窗口! 它们必须保持运行才能使 ChatEM 正常工作。
- 进程管理: 每个服务现在在任务管理器中都有有意义的进程名称:
ChatEM-MCP-Server(MCP工具服务器)ChatEM-Celery-Worker(后台任务处理器)ChatEM-Flower-Monitor(任务队列监控器)agentapi.exe(AI代理接口)
- 打开您的 Web 浏览器(例如 Chrome、Firefox 或 Edge)。
- 导航到以下地址:
http://localhost:3000 - 您现在应该会看到 ChatEM 聊天界面,准备好接收您的命令!
- 使用完 ChatEM 后,您可以通过运行
stop_chatem.bat来停止所有服务。 - 停止脚本同样支持语言选择,并提供干净关闭的选项。
- 或者,您也可以使用任务管理器停止上面列出的命名进程。
让我们看看如何通过与 ChatEM 聊天来设计一个简单的贴片天线。
-
开始一个新项目:
您:
Hello, let's create a new project named 'PatchAntenna'.ChatEM:
Project 'PatchAntenna' created. What would you like to do first? -
创建几何结构:
您:
Create a substrate using Rogers RO4350B, with dimensions 20mm by 20mm and a thickness of 0.8mm.ChatEM:
Substrate created. What's next?您:
Now add a copper patch on top of it, 10mm by 8mm, centered on the substrate.ChatEM:
Done. The patch has been added. -
设置仿真:
您:
Add a waveguide port to the edge of the patch.ChatEM:
Port 1 has been configured. Which frequency range should I use for the simulation?您:
Set up a frequency sweep from 4 GHz to 6 GHz. -
运行并获取结果:
您:
Run the simulation now.ChatEM:
Simulation started. You can track its progress in the monitoring panel. I'll let you know when it's done.(...一段时间后...)
ChatEM:
Simulation for 'PatchAntenna' is complete.您:
Great. Please plot the S11 parameter.ChatEM:
Of course. Here is the S11 plot:(ChatEM 直接在界面中显示 S11 图表)
我们为 ChatEM 制定了雄心勃勃的路线图。以下是我们正在计划的一些功能:
- [ ] 更广泛的求解器支持: 为 ANSYS HFSS 和 FEKO 等其他主要电磁仿真工具添加适配器。
- [ ] 高级代理功能: 使 AI 能够从单个命令执行更复杂的、多步骤的任务(例如,“设计一个 28 GHz 的喇叭天线,优化其增益,并生成性能报告。”)。