Object classifications
As described in Object-oriented analysis, objects in QuPath have (among other things):
- A name
- A classification (e.g. tumor, stroma, artefact)
The name is optional and can be unique for the object. It can be useful for identifying TMA cores (e.g. by storing the grid position) or annotations, but otherwise the name, frankly, doesn't matter much from a QuPath point of view. QuPath will display and export the name, but that is about all.
The classification is different, and really has an impact on the analysis results. The classification is what can distinguish an object representing a tumor from a stromal region, for example, or whether a cell is positive or negative for a particular staining. As such, classifications are essential for many of the Summary statistics that QuPath computes, and determining and assigning appropriate object classifications is often one of the primary tasks in analyzing an image with QuPath.
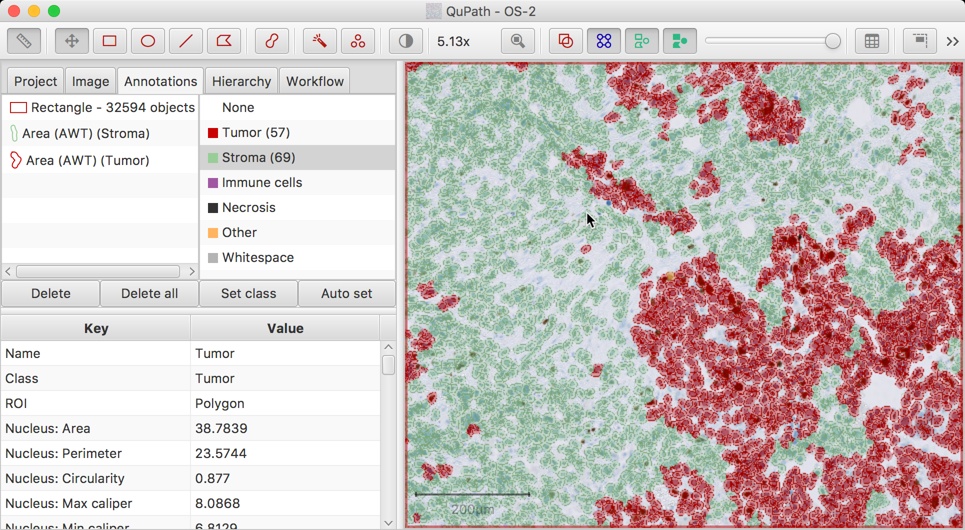
When applying analysis within QuPath, there are a default list of available classifications. These are listed in the Annotations tab of the Analysis panel.
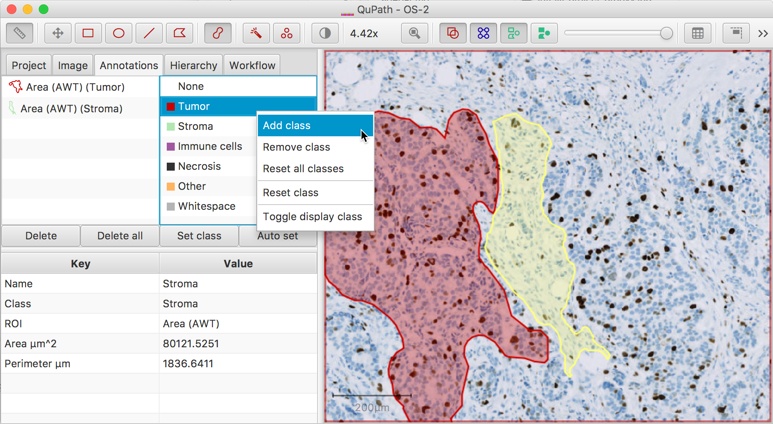
Double-clicking on any classification within this list gives the option of changing its default color, while right-clicking opens up a menu with options to change the list in some way, such as by adding or removing classes.
Classifications can be assigned to selected annotations directly. For convenience, there are three main approaches to achieve the same goal.
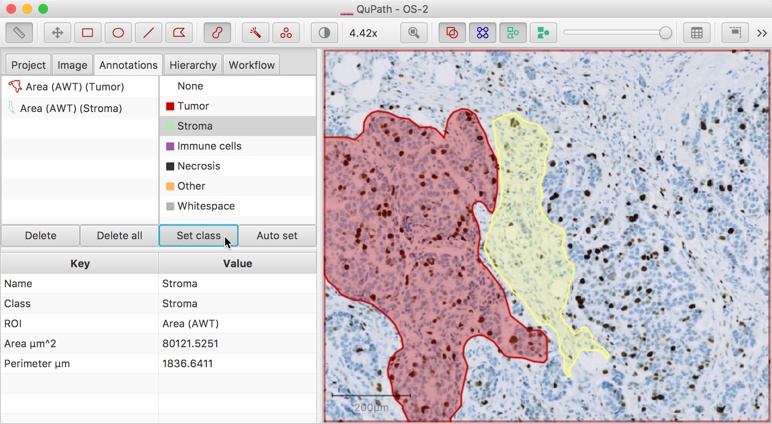
The Set class button below the classification list can be used to explicitly set the class of the annotation to whichever class is selected in the list.
The Auto set button can be used to ensure that all new annotations are automatically set to have the selected class. This can help slightly when quickly drawing large numbers of annotations that should all have the same class.
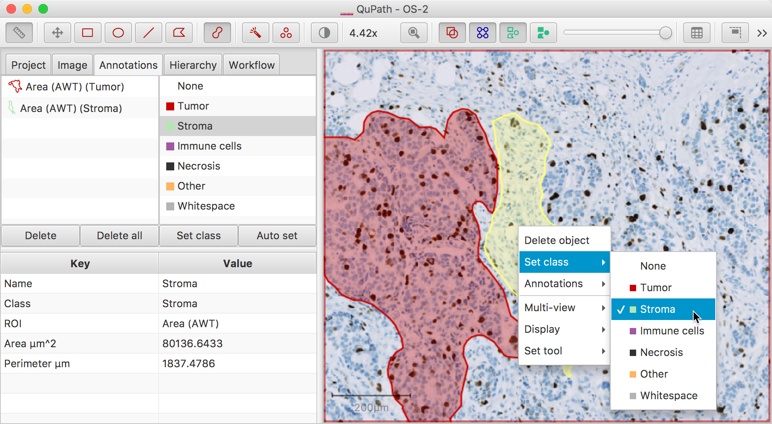
Right-clicking on the image whenever an annotation is selected brings up a context menu through which the classification can be set.
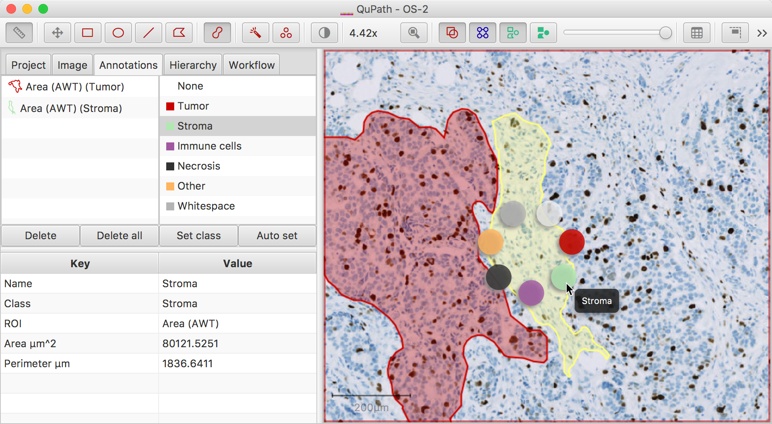
Right-clicking on the image while holding down the Shift key whenever an annotation is selected brings up a circular menu through which the classification can be quickly set. Hovering the mouse over a color should display the name of the classification that will be applied.
The 'normal' way to classify detections within QuPath is by training up a detection classifier, as described in Classifying objects. This applies machine learning techniques to automatically assign classifications based upon:
- a number of 'training' detections for which the classification is assigned manually (by creating annotations around them)
- the measurements of each detection
An simple example of how this works: suppose you have a large number of tumor and immune cells and want to train a detection classifier to classify them. First, you create annotations around cells of each class, as described in Classifying objects. Then the detection classifier will use the measurements of the cells that were annotated to 'learn' what a tumor and immune cell looks like. It will then apply this knowledge to classify all the cells in the image.
For example, if all annotated tumor cells had large Nucleus: Area values, and immune cells had small values for this measurement, then the Nucleus: Area value of the cell being classified will help decide the classification that it will receive. However, the detection classifier does not only consider individual measurements in isolation, but can consider combinations of measurements when making its decision - to help it make a more informed decision.
There are some other methods of classification that can be used, e.g. by scripting, or by using the Classify → Classify by specific feature command.
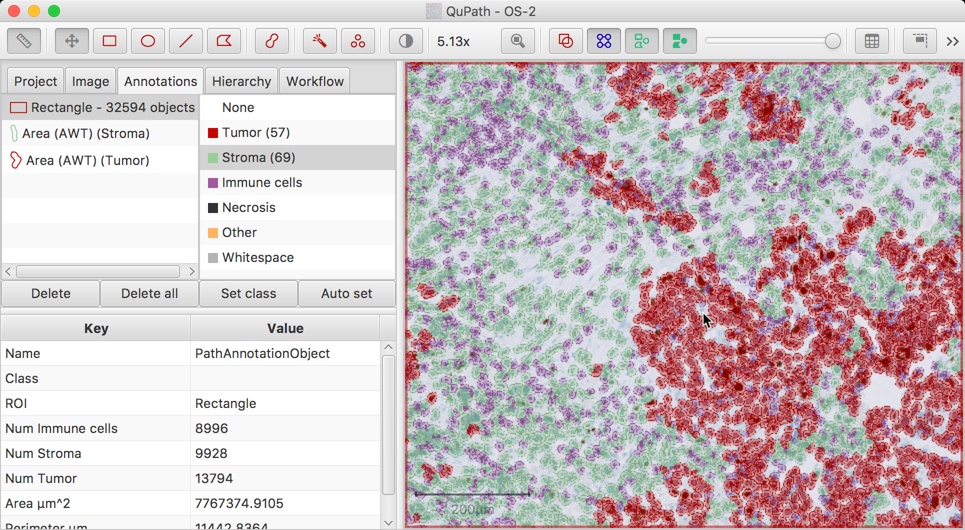
This makes it possible to classify detections according to one specific measurement, e.g. immune cells based upon size alone.
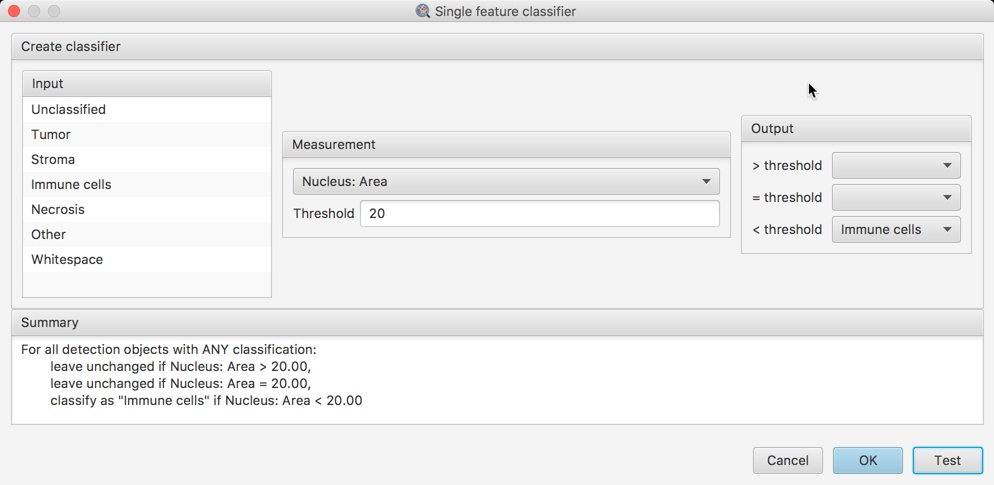
An example of classifying cells by a single feature. Here, all cells for which the nucleus area is less than 20µm² are classified as 'Immune cells'. All the other cells have their classifications unchanged
While the basics of classification within QuPath have been described above, as is so often the case, the truth is a bit more complicated than that.
Objects within QuPath can only have a single classification. However, it is often the case that none of the kinds of classifications provided above would be capable of providing enough information about the actual 'class' of an object.
To take a common example in biomarker scoring, it is not enough to know whether a cell is a tumor cell; rather, we also need to know if it is positive or negative for the biomarker - and, if positive, we might even want to know if it is strongly or weakly positive. As another example, an epithelial cell might also need a designation as benign or malignant.
One way to deal with this would be to create and assign completely separate classifications ('Benign epithelial' and 'Malignant epithelial') that could be used. While this would be possible, it misses the connection between the cell types.
The solution QuPath gives is to allow new classifications to be derived from existing classifications.
The classifications listed within the Annotations tab (shown above) are really base classifications. Any number of additional (sub)classifications can be derived from this.
To take an example, suppose a cell is classified as 'Tumor'. A staining intensity threshold might then be set within QuPath, with the result that the cell is identified as being 'Positive' for a particular biomarker - and somehow QuPath needs to store that information as well within the object's class. Since it is not possible to add a second classification to the object, the solution is to derive a classification 'Tumor: Positive', and assign this to the cell - replacing its initial classification 'Tumor'.
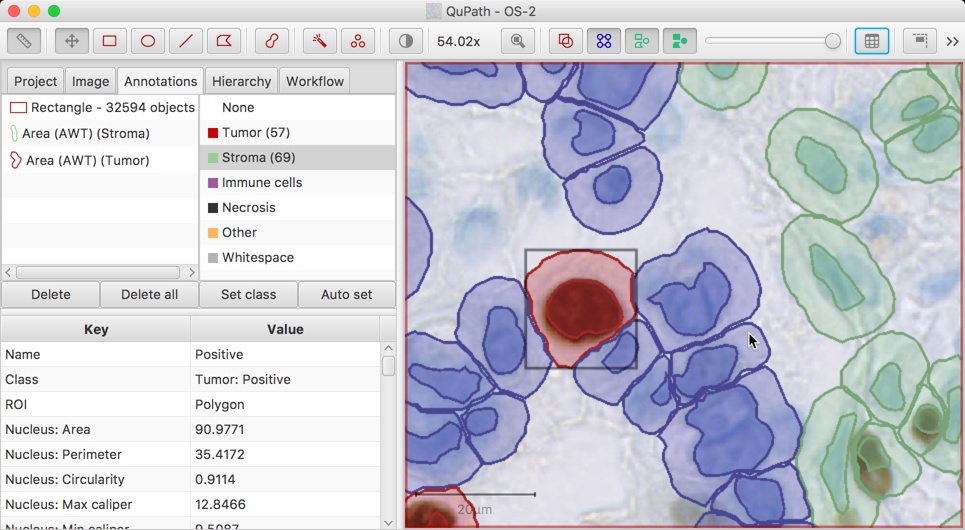
The above screenshot shows a 'Tumor: Positive' cell in context. Note that this class is shown in the embedded measurements table on the left, at the bottom of the Analysis panel.
Derived classes give the possibility to store multiple pieces of relevant information within a single classification. This is essential to some important features of QuPath, such as the use of dynamic Summary statistics. These are able (for example) to calculate the percentages of cells that are positive or negative, split according to base classification (e.g. tumor or non-tumor).
One way to visualize base and derived classifications is in terms of a tree-like structure - very much like the way objects are stored within QuPath, as described in Object hierarchies.
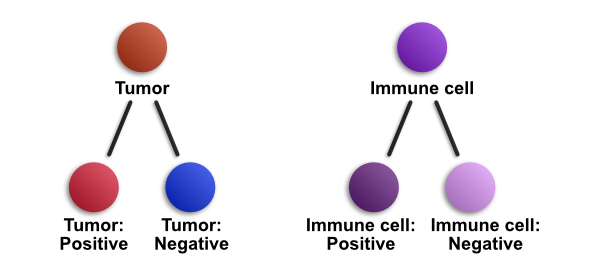
The diagram above shows conceptually how derived classifications work. 'Tumor' and 'Immune cell' are base classifications, while 'Tumor: Positive', 'Tumor: Negative', 'Immune cell: Positive' and 'Immune cell: Negative' are all derived classifications.
It is important to note that 'Tumor: Positive' is a completely different classification from 'Immune cell: Positive' - and both are distinct from a single 'Positive' classification (which does not have a base class). But if a cell has the classification 'Tumor: Positive', QuPath knows that the cell is both tumor and positive.
The colors in the above diagram are not particularly pleasant, or as distinct as they might be. The reason for this is that it becomes really rather difficult to come up with nice colors for all the different classes (and derived classes) that are possible.
By default, QuPath shows 'Tumor' in red, while it also shows 'Tumor: Positive' in (a different shade of) red and 'Tumor: Negative' in blue. This is because scoring biomarkers in tumor cells is a common application, for which these colors match quite intuitively with conventional hematoxylin and DAB staining.
However, positive and negative classes derived from other base classes tend to be distinguishable based upon being slightly lighter or darker than the corresponding base class.
In principle, it's possible to have longer lists of derived classifications, e.g. 'Epithelial: Malignant: Positive: Strong'. The object itself stores the derived classification with the most information, but it's always possible to check the 'ancestors' of the classification to see where it comes from.
Still, for most practical purposes a one or two-level classification is sufficient, e.g. 'Tumor', 'Tumor: Positive' or 'Tumor: Negative'. Analysis of large images is complicated enough, that it is generally best to reduce complexity where possible.
Reading the above, you may wonder if it is really necessary. For example, it would be natural to think that the same goal could have been achieved in a simpler way by allowing objects to have multiple classifications.
However, QuPath wasn't designed this way for two reasons:
- I didn't think of allowing multiple classifications at the start (the reason for many things).
- After I did think of it, I decided it would be too difficult to manage.
My reasoning was that the approach of enforcing one-classification-per-object, and overcoming its limitations using derived classifications, is that this reduces the risk of inadvertently creating complicated, non-sensical results.
For example, suppose that many different cell types were being classified. If multiple classifications were to be allowed, then it might be easy to accidentally assign incompatible classifications to the same cell. The same cell could end up being classified as both 'Epithelial' and 'Red blood cell'. This would not only give 'wrong' results on a cell-by-cell basis, but counting up all cells of each class separately could result in a total number of cells that exceeds the actual number of cells within the image.
With derived classifications, this simply cannot happen. Of course, if the user really wanted to, there could be a 'Epithelial: Red blood cell' classification. But even here, the base class would still be 'Epithelial'. It wouldn't be the same as a 'Red blood cell: Epithelial' classification.
In other words, there is considerable flexibility with the current approach. It can still be abused to result in meaningless classifications, but it's much harder to do by accident than it would be if multiple classifications per object were allowed.