Projects
Projects provide a means to:
- Group together related images
- Easily switch between images (by clicking on thumbnails in the project image list)
- Organize your .qpdata files, along with scripts, classifiers and other useful things
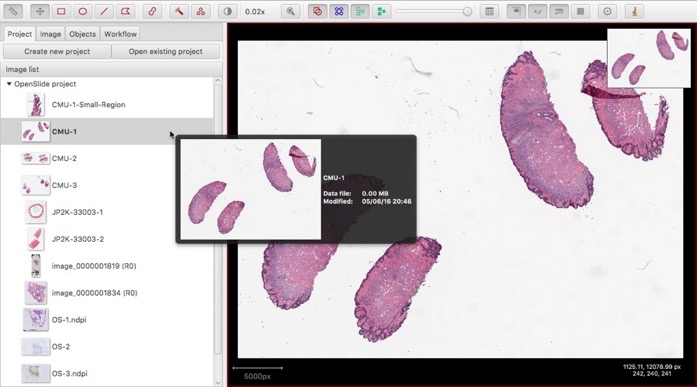
- View a larger thumbnail and some file data by hovering the mouse over an image, without needing to open it fully
For any serious studies using QuPath where you need to work with more than one image, you will almost certainly want to make a project.
There is also a tutorial video showing projects in action.
To create a project, choose File → Project... → Create new project. You will then have to select a folder in which the project will be made.
Warning! The new project folder must be empty. QuPath will assume it's allowed to do whatever you like within the folder you give it - which may include overwriting files.
For this reason, it's best to leave the management of that folder entirely up to QuPath and to avoid adding, removing or renaming files manually within it (at least unless you've read the Project structure section thoroughly).
Before adding images to a project, you have a choice to make.
One option is to add the images directly from wherever they are on your hard disk. QuPath will then store the path to the images. This will work for so long as you keep them in the same place, but if you move the images (or transfer the project to another computer) then the images won't be found - and you will need to manually update the paths.
Alternatively, you can create an images folder inside your project folder, and copy (or move) your images inside it now. In this case, everything will be kept in the same folder - and continue to work, no matter where you move the project folder. The disadvantage of this is that your project folder will be a lot bigger... since it needs to contain all the images inside it.
Either way, you will also need to do the following steps to tell QuPath which images you want.
Once a project has been created and opened, any time you open another image you will be asked whether you want to add it to the project.
So if you want to add a single image, just open it as normal - i.e. drag it only QuPath, or use File → Open. If you choose Yes when prompted to add the image to the project, it will appear in the list shown on the Project tab of the left-hand panel, along with a thumbnail image.
One of the main benefits of projects is that they help with managing large numbers of images. Adding them one-by-one to a project would be rather time-consuming.
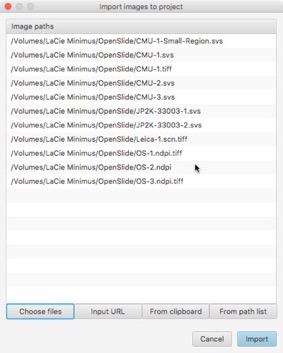
A better option is File → Project... → Import images to project. Here, you can manually select multiple files from a file chooser, or else copy and paste lists of file paths or URLs. For the latter, the paths should be represented as plain text, with each path on a new line.
Select the image you want to remove in the Project tab's image list, and right-click to see the option to remove it.
There is currently a (rather rudimentary) sorting facility for the Project tab's image list, again accessed by right-clicking. If you are fortunate, this will allow you to sort images by biomarker. However if you are unfortunate, the sorting will not be very meaningful. It is parsed automatically from the file paths, and isn't guaranteed to be correct.
It isn't yet possible to correct any errors here from within QuPath's main user interface, although this is planned for a future release.
For now, QuPath's projects are rather simple. At some point it's planned to make them rather more sophisticated, and able to represent more complicated relationships between images or to store additional data... but not everything is there yet.
If you would like more of the technical details about projects as they currently are - which can help overcome some of their limitations - see the Project structure section.