A Graphical User Interface (GUI) for audio/video file transcription powered by Whisper, an open-source speech recognition model from OpenAI.
- Speech-to-text for audio/video files. Easily get subtitle files.
- Creates .txt, .vtt, and .srt files for each transcribed file.
- Speech-to-text in English for audio/video files.
- Choose multiple files to transcribe them all.
- Language: Use autodetection for the file(s) or choose a language if it's known.
- The selection applies to all files selected for transcription.
- GPU acceleration will automatically be used if possible.
- Choose a transcription model based on your needs and PC hardware.
- A bigger model gives better results but takes more time.
- It's recommended to use the English-only models if it's known that the files only have English audio.
- When using a model for the first time, it will need to be downloaded. This can be avoided by downloading all of the models before use. See the Models section for details.
- Initial prompt: Give a hint to the transcriber about the dialect/style of a language or punctuation.
- Does NOT guarantee the result will follow the initial prompt.
- Initial prompt will NOT be included in the result.
- Try a larger model if the result does not follow the initial prompt.
- Example initial prompts
- Chinese traditional: 淨師專網極樂學離。
- Chinese simplified: 净师专网极乐学离。
- Prompt Profiles: Use prompt profiles to save initial prompts and switch between them.


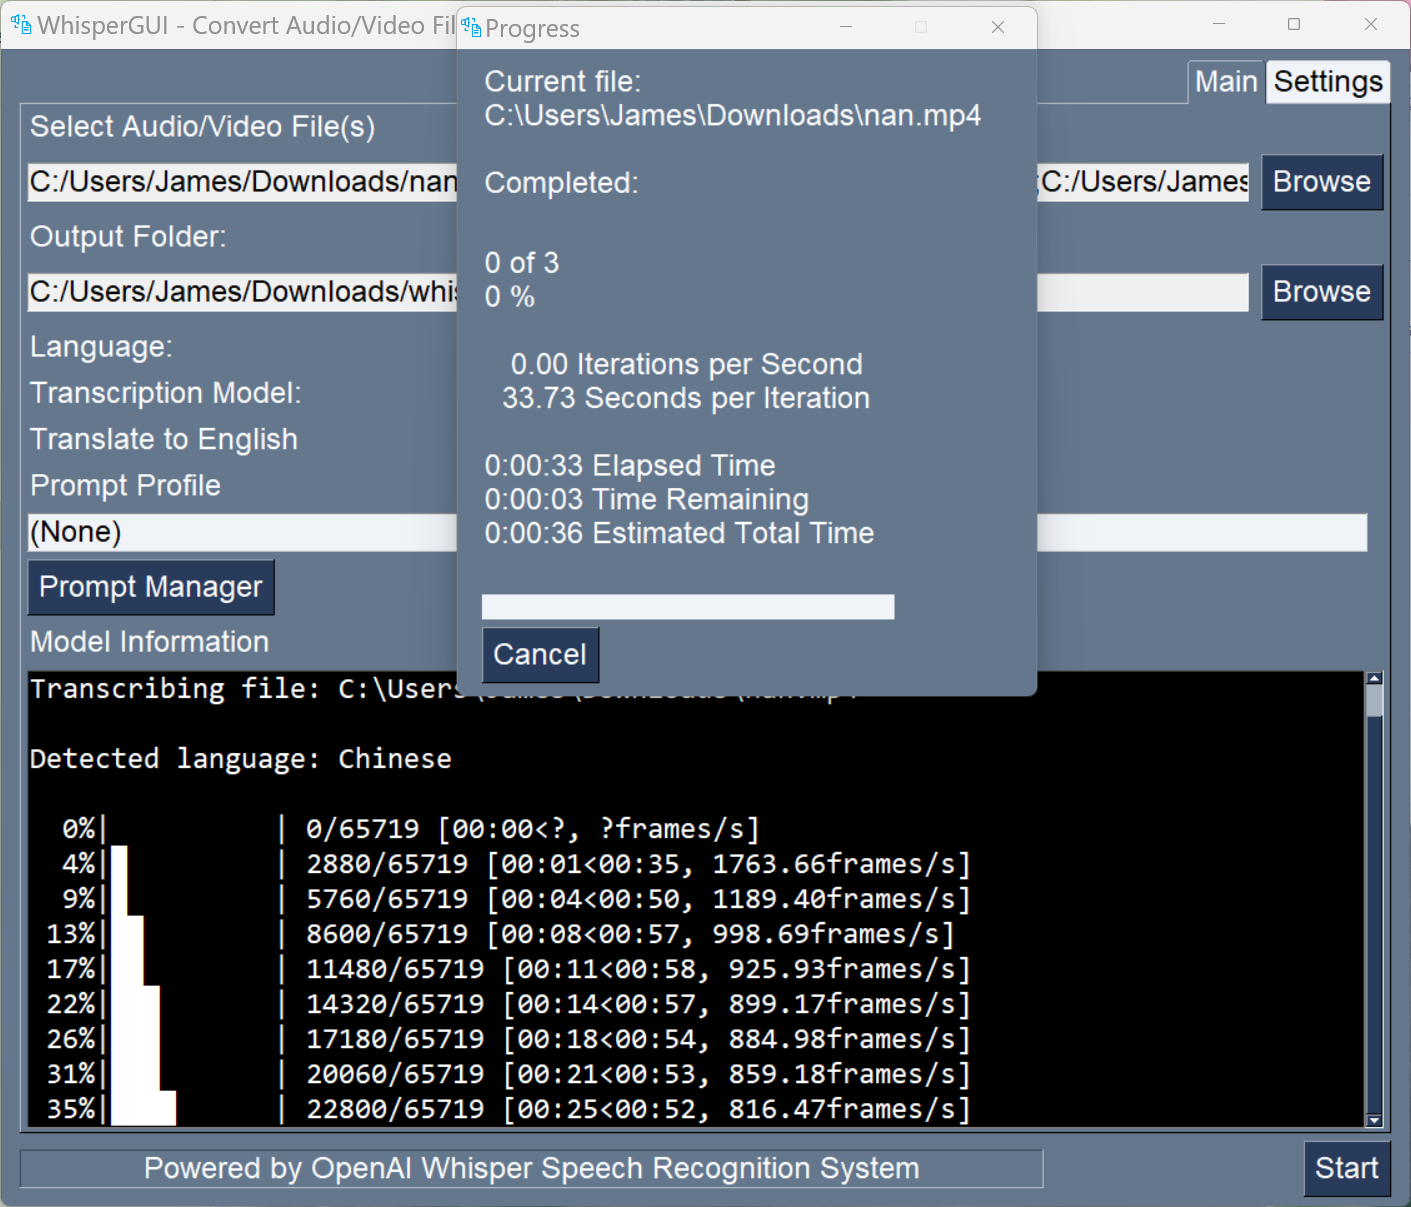
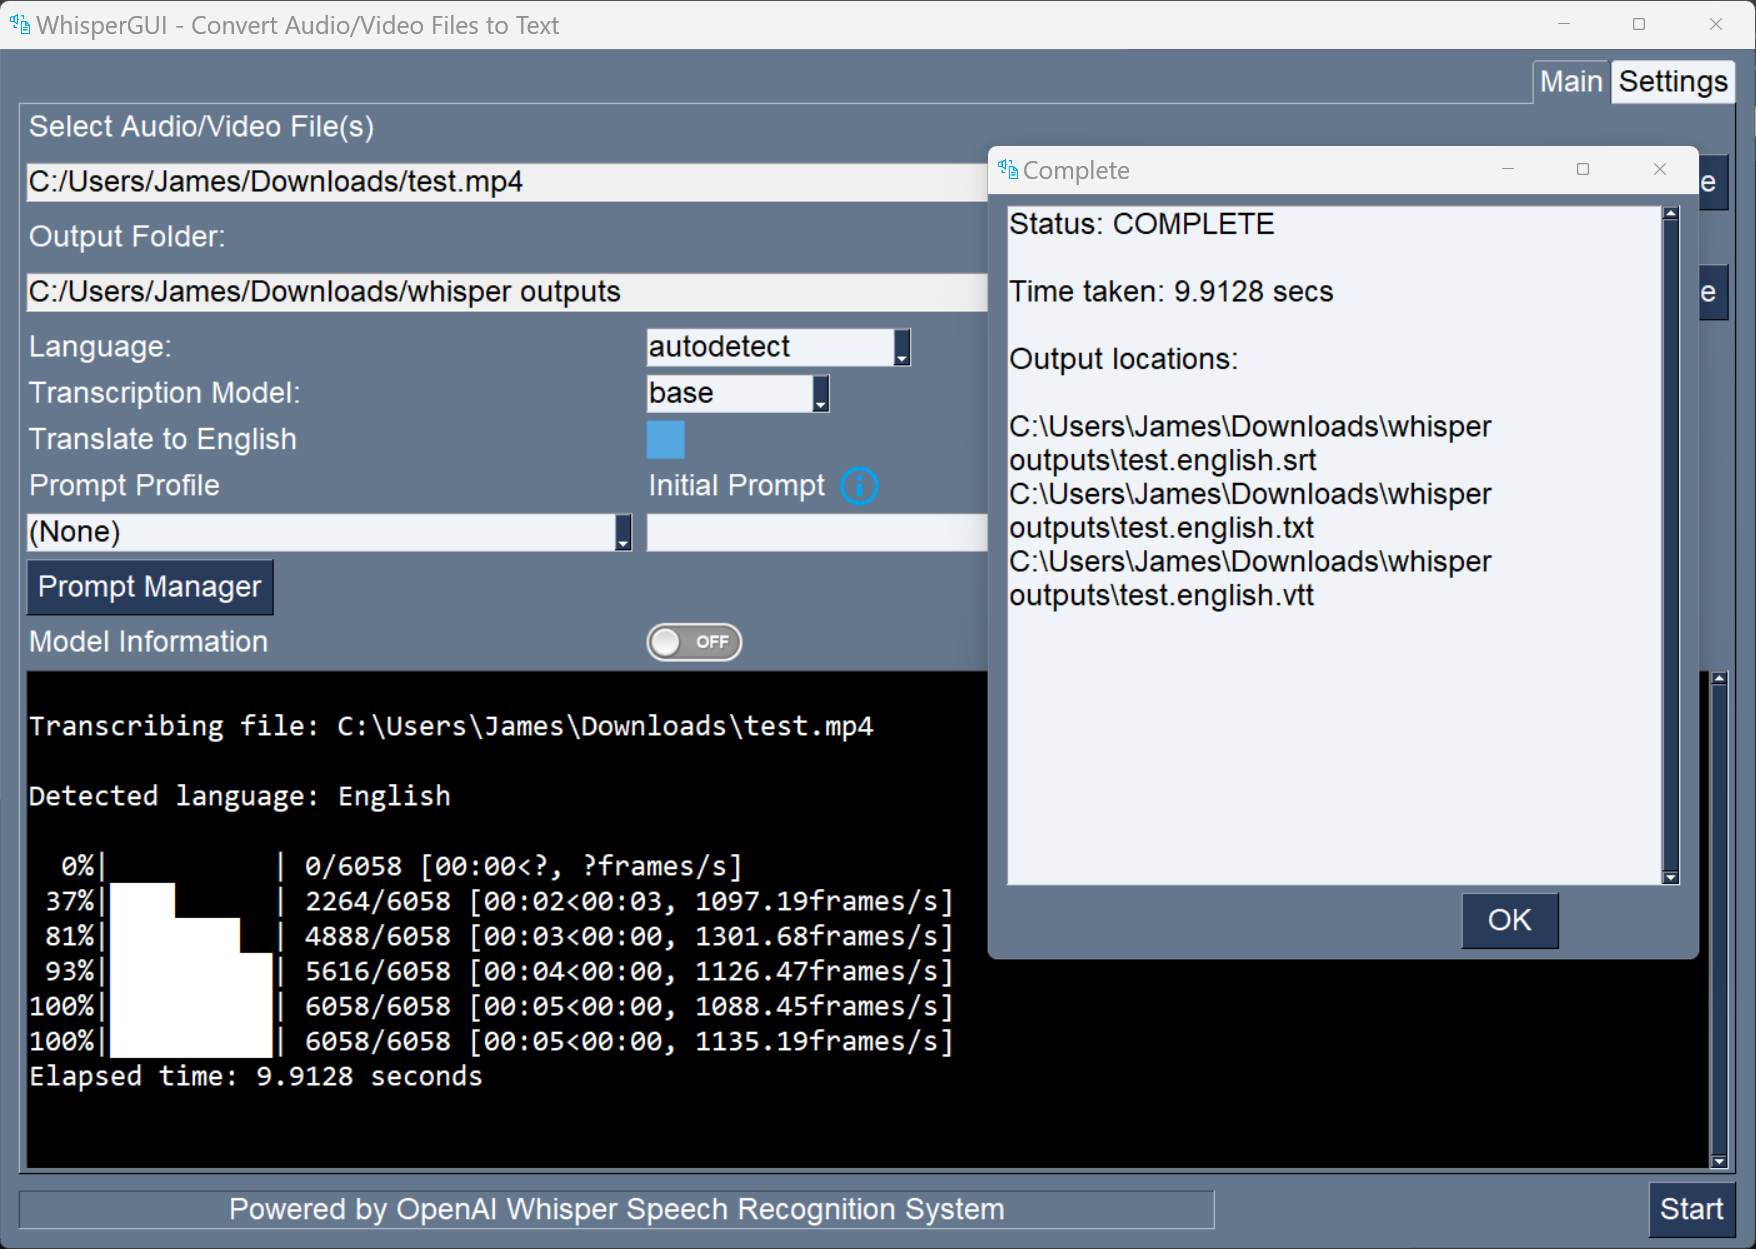

The video tutorial (Windows) that I initially followed to get set up for whisper on the command line (where the ffmpeg and whisper terminal commands come from) is at https://www.youtube.com/watch?v=msj3wuYf3d8.
This application is built using python 3.10. Other versions of python may or may not work with the project.
Install python. A good guide at https://realpython.com/installing-python/.
- Remember to install your desired version of python, it's corresponding pip, and venv.
Install python version X on Linux
- Start by updating the packages list and installing the prerequisites:
sudo apt update
sudo apt install software-properties-common
- Next, add the deadsnakes PPA to your sources list:
When prompted press Enter to continue:
sudo add-apt-repository ppa:deadsnakes/ppa
- Press [ENTER] to continue or Ctrl-c to cancel adding it.
- Once the repository is enabled, install Python X with:
sudo apt install pythonX
- At this point, Python X is installed on your Ubuntu system and ready to be used. You can verify it by typing:
pythonX—versionCopy
- Install the other needed packages
sudo apt install pythonX-dev
sudo apt install pythonX-minimal
sudo apt install pythonX-distutils
sudo apt install pythonX-venv
- Update
pipfor pythonXpythonX -m pip install --upgrade pip
Create a virtual environment (venv will be used throughout this document).
- Example using
venvpython3 -m venv venv
Activate a virtual environment (or use an alias for the cmd)
deactivate &> /dev/null; source ./venv/bin/activateNote: convention is to call the virtual environment directory venv and the alias assumes you follow that convention.
(Optional) Make a permanent alias for activating/deactivating the virtual environment. Copy these lines into your .bashrc file.
alias ae='deactivate &> /dev/null; source ./venv/bin/activate'
alias de='deactivate'
These aliases only work if you create virtual environment directories that are always called venv in each project folder.
These aliases must be used in a project directory that contains a venv virtual environment directory.
Install ffmpeg (if NOT using a ffmpeg static binary)
sudo apt update && sudo apt install ffmpeg- Installing ffmpeg is not needed. We use a static binary for ffmpeg to avoid installing it.
Update pip if you haven't already done so.
python3 -m pip install --upgrade pipInstall packages using the requirements.txt file with whichever tool you prefer.
- Example using
pip-toolspip3 install pip-tools pip-sync
If you see installation errors during the pip install command for whisper, install rust with:
curl --proto '=https' --tlsv1.2 -sSf https://sh.rustup.rs | shThen try to install whisper again
pip3 install git+https://github.com/openai/whisper.gitffmpeg v5 binaries are currently being used.
MacOS (Intel):
https://evermeet.cx/pub/ffmpeg/ffmpeg-5.0.zip
Windows:
https://www.gyan.dev/ffmpeg/builds/packages/ffmpeg-5.0.1-full_build-shared.7z
Linux:
https://johnvansickle.com/ffmpeg/releases/ffmpeg-release-amd64-static.tar.xz https://johnvansickle.com/ffmpeg/releases/ffmpeg-release-i686-static.tar.xz https://johnvansickle.com/ffmpeg/releases/ffmpeg-release-arm64-static.tar.xz https://johnvansickle.com/ffmpeg/releases/ffmpeg-release-armhf-static.tar.xz https://johnvansickle.com/ffmpeg/releases/ffmpeg-release-armel-static.tar.xz
- CUDA support comes with Linux
whisperpackage install of pytorch by default.
Delete existing Pytorch
pip3 uninstall torchClear the pip cache
pip3 cache purgeInstall Pytorch with CUDA support :
pip3 install torch torchvision torchaudio --extra-index-url https://download.pytorch.org/whl/cu116https://github.com/mifi/lossless-cut/releases
There are five model sizes, four with English-only versions, offering speed and accuracy tradeoffs. Below are the names of the available models and their approximate memory requirements and relative speed.
| Size | Parameters | English-only model | Multilingual model | Required VRAM | Relative speed |
|---|---|---|---|---|---|
| tiny | 39 M | tiny.en |
tiny |
~1 GB | ~32x |
| base | 74 M | base.en |
base |
~1 GB | ~16x |
| small | 244 M | small.en |
small |
~2 GB | ~6x |
| medium | 769 M | medium.en |
medium |
~5 GB | ~2x |
| large | 1550 M | N/A | large |
~10 GB | 1x |
For English-only applications, the .en models tend to perform better, especially for the tiny.en and base.en models. We observed that the difference becomes less significant for the small.en and medium.en models.
Whisper's performance varies widely depending on the language.
Update: openai whisper released a new large model named large-v2. The old large model has been renamed to large-v1.The large-v2 model performs better on average than the large-v1 model but not always. Check the result for each file and use large-v1 instead if needed.
- large-v2 has been known to sometimes generate text which does not match the audio or is missing some text.
whisper converts your input with ffmpeg (effectively the console command ffmpeg -i \<recording> -ar 16000 -ac 1 -c:a pcm_s16le \<output>.wav) and pre-processes it before doing any speech recognition.
You can just give it your video files, except when that command wouldn't work (like if you have multiple audio languages and don't want the default track).
In such a case, you would need to use ffmpeg to convert the video file to an audio/video file with the desired audio track. See ffmpeg's documentation for details.
How to extract sound of any video with ffmpeg
ffmpeg -i "test_video.webm" -q:a 0 -map a test_video.mp3Note: whisper command line will not work without one of the following:
- Add the file path of the directory for the
ffmpegstatic binary for your operating system to thePATHenvironment variable (basically whatset_env.pydoes for the GUI application) .- Linux: Add directory for amd64
ffmpegusing.bashrcfile.Or in 1 line without aexport FFMPEGPATH='~/whisperGUI/ffmpeg/linux/amd64/' export PATH=$PATH:$FFMPEGPATH
FFMPEGPATHenvironment variable.export PATH=$PATH:~/whisperGUI/ffmpeg/linux/amd64/
- Windows: Add directory for windows
ffmpegusing powershell profile.$env:Path += [IO.Path]::PathSeparator + 'C:\path\to\whisperGUI\ffmpeg\windows'
- If you don't know how to set up a powershell profile, a decent guide is at https://lazyadmin.nl/powershell/powershell-profile/. I used the Current user – Current host profile.
- Note: Windows uses
;while Linux uses:as the path separator character.
- Linux: Add directory for amd64
- Install
ffmpeg.- Not recommended if building a standalone executable using a tool like
pyinstaller. Your python project may appear to work but actually use an installedffmpeginstead of a static binaryffmpeg. This would lead toffmpegissues when running the standalone executable.
- Not recommended if building a standalone executable using a tool like
How to transcribe an English video
whisper "C:\speech to text\test_video.mp4" --language en --model base.en --device cpu --task transcribeHow to transcribe an English video with CUDA support
whisper "C:\speech to text\test_video.mp4" --language en --model base.en --device cuda --task transcribeHow to transcribe a Turkish video
whisper "C:\speech to text\test_video.mp4" --language tr --model base.en --device cpu --task transcribeHow to transcribe a Turkish video with translation
whisper "C:\speech to text\test.mp4" --language tr --model small --device cuda -o "C:\speech to text" --task translateHow to transcribe a Chinese video with CUDA support that outputs to an 'outputs' subdirectory
whisper "C:\speech to text\test_video.mp4" --language Chinese --model large --device cuda --task transcribe -o outputsIf needed, install packages from the requirements.txt file (for example, using a fresh VM).
pip3 install -r requirements.txtInstall additional packages
python -m pip install --upgrade pip
pip install six pyinstaller importlib_metadata  wheel
Build with pyinstaller
- Run the
pyinstallercommand in your project directory (the one withwhisperGUI.py)
Windows
pyinstaller -D -w --uac-admin --python-option="u" --paths="./venv/Lib/site-packages" --hidden-import=pytorch --collect-data torch --copy-metadata torch --copy-metadata tqdm --copy-metadata regex --copy-metadata requests --copy-metadata packaging --copy-metadata filelock --copy-metadata numpy --copy-metadata tokenizers --copy-metadata importlib_metadata --add-binary="ffmpeg/windows;ffmpeg/windows" --collect-data "whisper" --runtime-hook=set_env.py whisperGUI.py --noconfirmLinux
pyinstaller -D -w --python-option="u" --paths="./venv/lib/python3.10/site-packages/" --hidden-import=pytorch --collect-data torch --copy-metadata torch --copy-metadata tqdm --copy-metadata regex --copy-metadata requests --copy-metadata packaging --copy-metadata filelock --copy-metadata numpy --copy-metadata tokenizers --copy-metadata importlib_metadata --add-binary="ffmpeg/linux:ffmpeg/linux" --collect-data "whisper" --runtime-hook=set_env.py whisperGUI.py --noconfirm- Use
/in path strings to avoid needing to use\\ - Use
-D/--onedirinstead of-F/--onefileoption for creating a directory with the exe instead of a single exe file. - For
--pathsoption, use the path to yoursite-packagesdirectory. It will differ depending on your operating system and where you installed python packages (in a virtual environment or globally).- The above OS-specific commands use a
site-packagesdirectory in a virtual environment subdirectory calledvenvwith python 3.10 in the project directory.
- The above OS-specific commands use a
- A static binary for
ffmpegis used so we must include it with--add-binary. - Our runtime hook enables the use of
ffmpegon the command line which will run our included static ffmpeg binary. - Use
--noconfirmto automatically overwrite the build and dist directories. - Use python 3.8 or lower due to issue with pyinstaller and python
This is the first version of Python to default to the 64-bit installer on Windows. The installer now also actively disallows installation on Windows 7. Python 3.9 is incompatible with this unsupported version of Windows.
Use a tool like 7-Zip with high compression settings.

Navigate to the project directory's dist folder whisperGUI/dist (it contains the whisperGUI folder created by the pyinstaller command) and then run the following.
tar -cf - whisperGUI/ | xz -9 --threads=0 - > whisperGUI_Linux.tar.xz- -9 is highest compression level. use -9e for xz if you need even more compression (extreme) at the cost of higher (~2x) compression time.
- Use -T0 or --threads=0 to makes xz use as many threads as there are CPU cores on the system
You can directly download all of the models if you need them.
_MODELS = {
    "tiny.en": "https://openaipublic.azureedge.net/main/whisper/models/d3dd57d32accea0b295c96e26691aa14d8822fac7d9d27d5dc00b4ca2826dd03/tiny.en.pt",
    "tiny": "https://openaipublic.azureedge.net/main/whisper/models/65147644a518d12f04e32d6f3b26facc3f8dd46e5390956a9424a650c0ce22b9/tiny.pt",
    "base.en": "https://openaipublic.azureedge.net/main/whisper/models/25a8566e1d0c1e2231d1c762132cd20e0f96a85d16145c3a00adf5d1ac670ead/base.en.pt",
    "base": "https://openaipublic.azureedge.net/main/whisper/models/ed3a0b6b1c0edf879ad9b11b1af5a0e6ab5db9205f891f668f8b0e6c6326e34e/base.pt",
    "small.en": "https://openaipublic.azureedge.net/main/whisper/models/f953ad0fd29cacd07d5a9eda5624af0f6bcf2258be67c92b79389873d91e0872/small.en.pt",
    "small": "https://openaipublic.azureedge.net/main/whisper/models/9ecf779972d90ba49c06d968637d720dd632c55bbf19d441fb42bf17a411e794/small.pt",
    "medium.en": "https://openaipublic.azureedge.net/main/whisper/models/d7440d1dc186f76616474e0ff0b3b6b879abc9d1a4926b7adfa41db2d497ab4f/medium.en.pt",
    "medium": "https://openaipublic.azureedge.net/main/whisper/models/345ae4da62f9b3d59415adc60127b97c714f32e89e936602e85993674d08dcb1/medium.pt",
    "large": "https://openaipublic.azureedge.net/main/whisper/models/e4b87e7e0bf463eb8e6956e646f1e277e901512310def2c24bf0e11bd3c28e9a/large.pt",
}- Above is from
.../site-packages/whisper/__init__.pyand may change. - Tip: To avoid the GUI needing to download a model when using it for the first time, download the models and place them all in the directory that whisper auto downloads models into.
- Models auto downloaded by whisper will be in
~/.cache/whisper/on Linux and%USERPROFILE%\.cache\whisper\on Windows.
Running process X results in the program getting killed with the message 'Killed'.
- The process is being killed by the OOM killer (Out Of Memory Killer), which is a process of the operating system whose job it is to kill jobs that are taking up too much memory before they crash your machine. This is a good thing. Without it, your machine would simply become unresponsive.
- So, you need to figure out why your python script is taking up so much memory, and try to make it so that it uses less. The only other alternative is to try and get more swap, or more RAM.
- Fix (VSCode only): Open another workspace, switch back to your original workspace, and then try running the process again.
A pip package install results in the program getting killed with the message 'Killed'
-
add the
--no-cache-diroption when usingpip, i.e.,pip3 install X --no-cache-dir
PermissionError: [Errno 13] Permission denied: 'ffmpeg'
- On Linux, you need to give executable permissions to the
ffmpegfile.- Ex.
ffmpegfile for amd64chmod +x ~/whisperGUI/ffmpeg/linux/amd64/ffmpeg- The above command assumes the whisperGUI repo is in the user's home directory.
- Ex.
whisper (either through cmd line or whisper python package) uses CPU when a CUDA GPU is installed and no option to use CPU is given.
- Restart your computer. Sometimes the torch detects the GPU as unavailable for some reason.
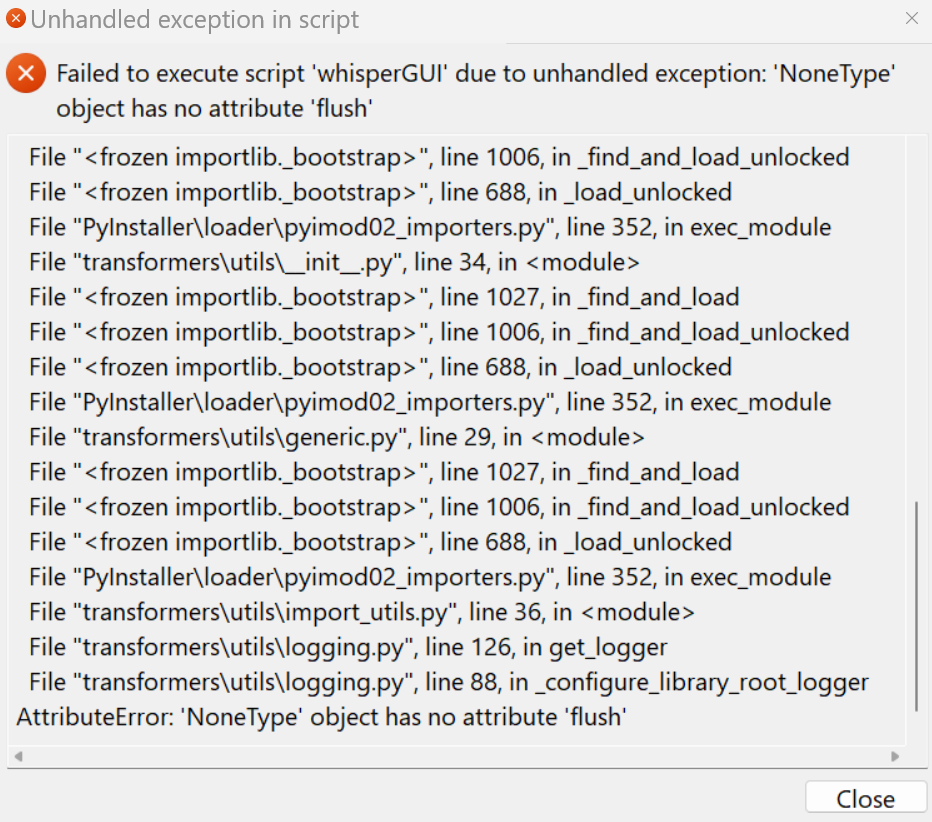
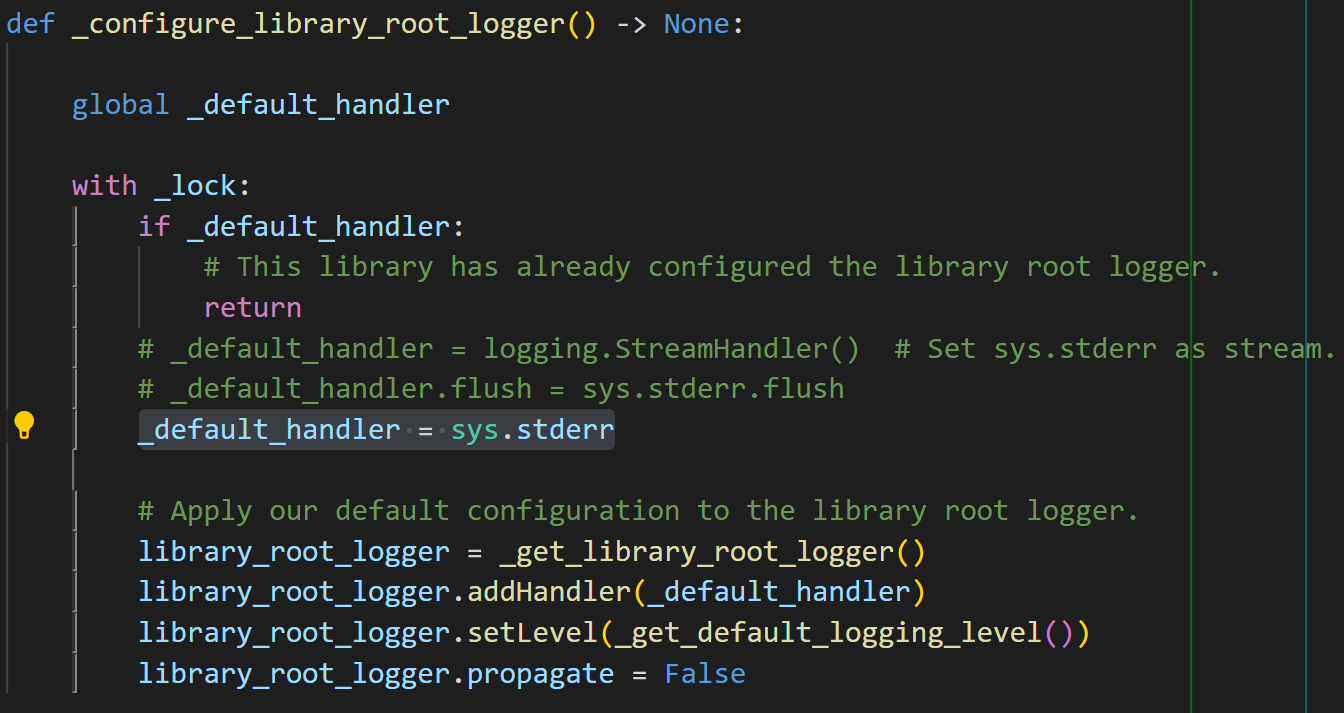
pyinstaller builds successfully but running the executable results in an error in transformers\utils\logging.py's _configure_library_root_logger function with the message Failed to execute script 'whisperGUI' due to unhandled exception: 'NoneType' object has no attribute 'flush'.
-
Open the following file in the
site-packagesdirectory.\transformers\utils\logging.py.- The
site-packagesdirectory path can be found by running the following in the terminal.python -c "from distutils.sysconfig import get_python_lib; print(get_python_lib())"
- The
-
Go to the function definition for
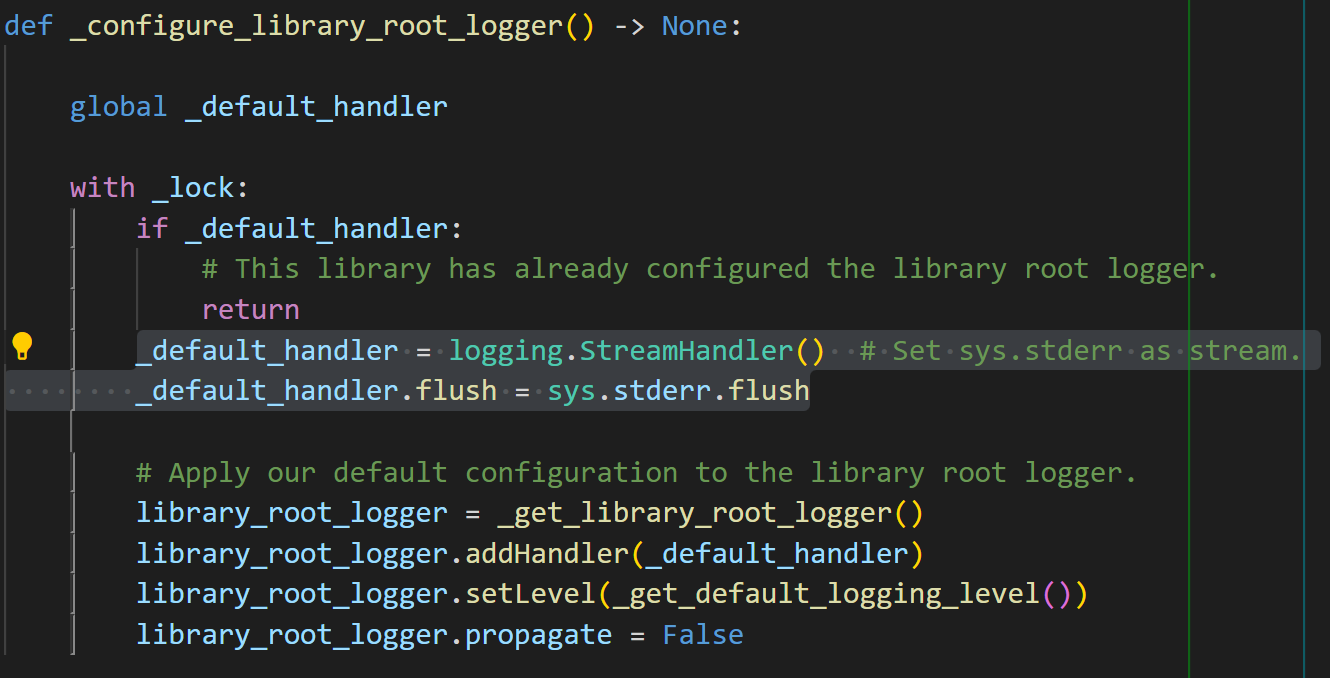
_configure_library_root_loggerand replace the following code inside of it.Original Code
_default_handler = logging.StreamHandler()  # Set sys.stderr as stream.
_default_handler.flush = sys.stderr.flush
 New Code
_default_handler = sys.stderr
-
Save the
logging.pyfile and rebuild using pyinstaller.
When the application is finally running, it gets stuck when downloading a model. Some code may use functions that need to get print messages from cmd or display them in cmd. It may be caused by using tqdm to display the progress bar. So find this code in whisper's __init__.py file and comment out the two lines of code as shown in the figure below.
- Search for this Code
with tqdm(total=int(source.info().get("Content-Length")), ncols=80, unit='iB', unit_scale=True, unit_divisor=1024) as loop:
 Commented Code

This GUI would not be possible without openai whisper. Read more about it at https://openai.com/blog/whisper/.