


Home Assistant component for TP-Link and Mercusys routers administration based on the TP-Link Router API
Warning
A new router firmware update breaks the compatibility. Please try this fix
Warning
Please temporarily disable the integration before accessing the router admin page. TP-Link admin page only allows one user at a time. This integration will log you out of the admin page every time it scans for updates (every 30s by default).
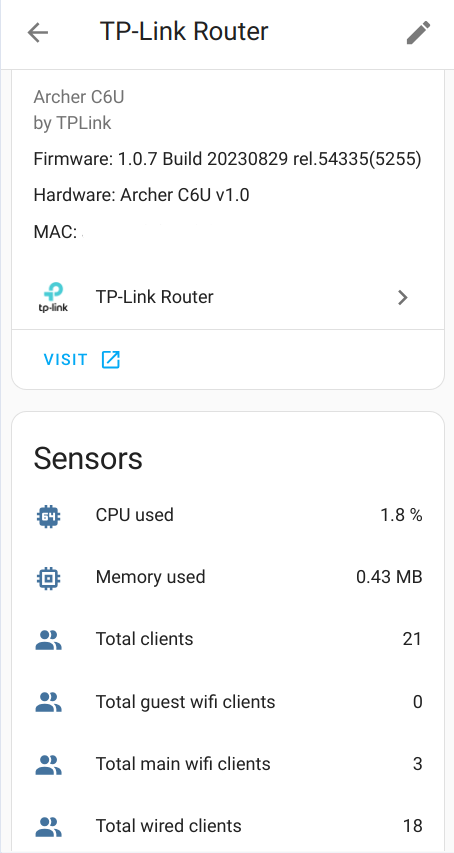
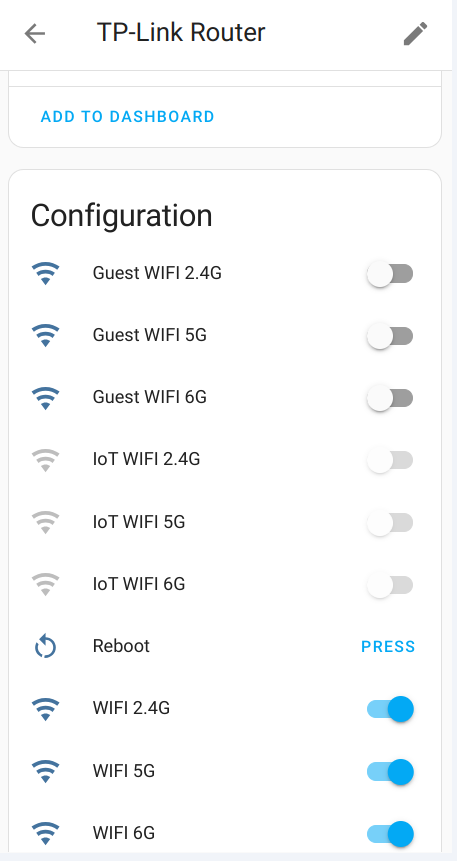
- tplink_router_new_device: Fired when a new device appears in your network
- tplink_router_device_offline: Fired when a device becomes offline
- tplink_router_device_online: Fired when a device becomes online
- tplink_router_new_sms: Fired when a new sms received by LTE router
- Router Reboot
- Router data fetching - you may disable router data fetching before accessing the router, so it wont logging your out.
If you forget to enable it back - it would be automatically enable after the configured
scan_pauseminutes (default 20; set to0to keep fetching disabled until you turn the switch on again) - 2.4Ghz host wifi Enable/Disable
- 5Ghz host wifi Enable/Disable
- 6Ghz host wifi Enable/Disable
- 2.4Ghz guest wifi Enable/Disable
- 5Ghz guest wifi Enable/Disable
- 6Ghz guest wifi Enable/Disable
- 2.4Ghz IoT wifi network Enable/Disable
- 5Ghz IoT wifi network Enable/Disable
- 6Ghz IoT wifi network Enable/Disable
- VPN Client (for some routers)
- Control VPN Server List (for some routers)
- LAN IPv4 DHCP Server Enable/Disable (for some routers)
- E-WAN connect (for MR/EX-family routers with Ethernet WAN) — on = DHCP Renew, off = DHCP Release; useful to reset a stuck WAN link after reboot
Warning
Disabling the LAN IPv4 DHCP server can leave clients without an IP address (including the Home Assistant host, if it uses DHCP). Prefer static addresses or another DHCP server before turning this switch off.
- Total amount of wired clients
- Total amount of IoT clients
- Total amount of host wifi clients
- Total amount of guest wifi clients
- Total amount of all connected clients
- CPU used
- Memory used
- Connection Type
- WAN IPv4 Address
- LAN IPv4 Address
- DHCP Reservations (count; full lease list in attributes — on routers with
get_ipv4_reservations, when enabled in options)
For LTE Routers
- LTE Enabled
- LTE Connection Status
- LTE Network Type
- LTE SIM Status
- LTE Total Statistics
- LTE Current RX Speed
- LTE Current TX Speed
- Unread SMS
- LTE Signal Level
- LTE RSRP
- LTE RSRQ
- LTE SNR
- LTE ISP Name
For TL-SG108E (and switches with get_port_status):
- Per-port connectivity (link up/down)
For TL-SG108E (and switches with get_port_status):
- Per-port negotiated link speed (Mbps), with attributes for duplex, enabled, auto-negotiation, configured speed/duplex, flow control, LAG and TX/RX packet counters
- Track connected to router devices by MAC address with connection information
When using multiple routers (for example, a WAN router and a separate access point), you can disable device trackers for the non-AP router in the integration options to avoid duplicate device entries.
offline_timeout (seconds, default 0) keeps a device marked home for a grace period after it disappears from the router's client list, which reduces false "not home" flips for phones that briefly drop Wi‑Fi to save battery. 0 means mark offline immediately (previous behavior). The grace period applies only when the MAC leaves the client list; if the router still lists the device with active=false, it is marked offline immediately.
To find your device - Go to Developer tools and search for your MAC address - you’ll find sensor like device_tracker.YOUR_MAC or device_tracker.YOUR_PHONE_NAME.
By default tracked clients don't get their own entry in Settings > Devices & Services > Devices - they're plain entities, findable via the Entities list. Enable "Give each tracked client its own device entry" in the integration options if you'd rather see one device card per client; it's off by default since busy networks can end up with a lot of device entries. Turning the option off later does not delete those device-registry entries — remove them manually in Devices if you no longer want them.
It will also fire Home Assistant event when a device connects to router
- Send SMS message - Available only for MR LTE routers
- Add DHCP Reservation (
tplink_router.add_reservation) — available on c6u-family routers that implementadd_ipv4_reservation(when enabled in options) - Delete DHCP Reservation (
tplink_router.delete_reservation) — same routers withdelete_ipv4_reservation
Many router models expose a read-only DHCP reservations sensor via get_ipv4_reservations even when add/delete actions are not supported. Disable "Include DHCP reservations..." in the integration options to skip polling and hide the sensor/services.
To receive notifications of appearing a new device in your network, or becoming device online\offline add following lines to your configuration.yaml file:
automation:
  - alias: "New network device"
    trigger:
      platform: event
      event_type: tplink_router_new_device
    action:
      service: notify.mobile_app_<device_name>
      data:
        content: >-
          New device appear {{ trigger.event.data.hostname }} with IP {{ trigger.event.data.ip_address }}
Available events:
- tplink_router_new_device: Fired when a new device appears in your network
- tplink_router_device_offline: Fired when a device becomes offline
- tplink_router_device_online: Fired when a device becomes online
All available fields in trigger.event.data:
- hostname
- ip_address
- mac_address
- connection
- band
- packets_sent
- packets_received
- up_speed
- down_speed
- tx_rate
- rx_rate
- online_time
- traffic_usage
- signal
To receive notifications of receiving a new sms add following lines to your configuration.yaml file:
automation:
  - alias: "New sms"
    trigger:
      platform: event
      event_type: tplink_router_new_sms
    action:
      service: notify.mobile_app_<device_name>
      data:
        content: >-
          A new SMS from {{ trigger.event.data.sender }} wth text: {{ trigger.event.data.content }}
Available events:
- tplink_router_new_sms: Fired when a new sms received by LTE router
All available fields in trigger.event.data:
- sender
- content
- received_at
To send SMS add following lines to your automation in yaml:
...
action:
  - service: tplink_router.send_sms
    data:
      number: "+1234567890"
      text: "Hello World"
      device: pass_tplink_router_device_id_here
Device id is required because user may have several routers that could send SMS - so you need to select the needed router. You can get the ID from the URL when you visit the tplink device page
Have HACS installed, this will allow you to update easily.

or go to Hacs and search for TP-Link Router.
- Locate the
custom_componentsdirectory in your Home Assistant configuration directory. It may need to be created. - Copy the
custom_components/tplink_routerdirectory into thecustom_componentsdirectory. - Restart Home Assistant.
TP-Link Router is configured via the GUI. See the HA docs for more details.
The default data is preset already.
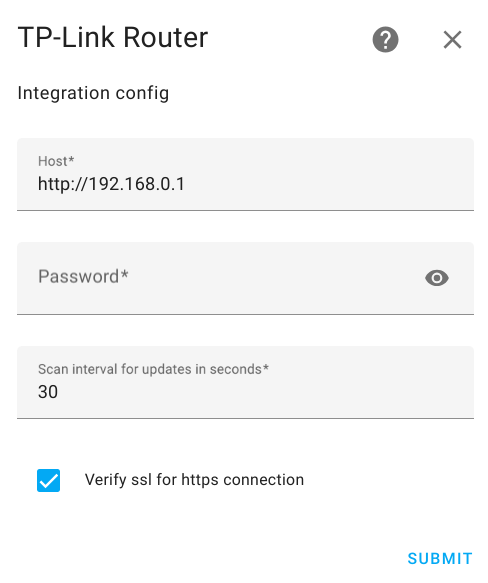
- Go to the Settings->Devices & services.
- Click on
+ ADD INTEGRATION, search forTP-Link Router. - Fill Password.
- Click
SUBMIT
If you got an error please try to use HTTPS connection first
NOTE!
- If you use
httpsconnection - for most routers turn on "Local Management via HTTPS" (advanced->system->administration). Some models (e.g. Archer NX200) already accept local HTTPS without enabling Remote Management via HTTPS. - If you use
httpsconnection to your router you may get errorcertificate verify failed: EE certificate key too weak. To fix this - unsetVerify ssl - Use Local Password which is for Log In with Local Password. Login with TP-LINK ID doesnt work
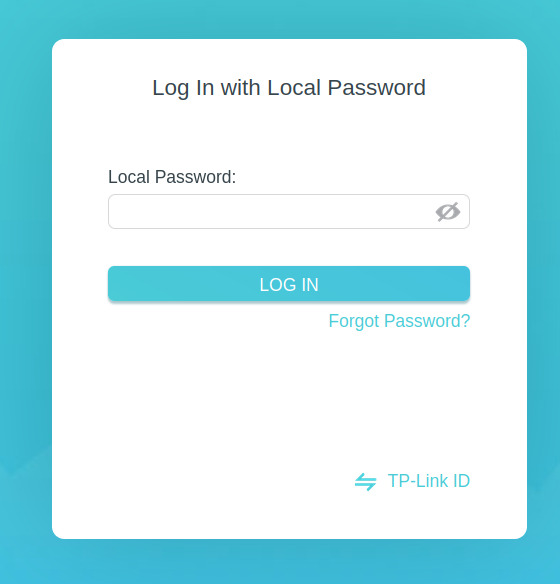
- If you got error -
check if the default router username is correctThe default username for most routers isadmin. Some routers (e.g. Archer NX200) useuserinstead — try Loginuserwith your normal Local Password. - If you got error -
use web encrypted password insteadRead web encrypted password - The TP-Link Web Interface only supports upto 1 user logged in at a time (for security reasons, apparently). So you will be logged out from router web interface when the integration updates data
If setup fails with HTML/welcome-page responses or login errors while the router is reachable:
- Host:
https://192.168.x.1(nothttp://) - Login:
user(notadmin) - Password: normal Local Password (web encrypted password is not needed)
- Verify SSL: off
Remote Management via HTTPS can stay off — local HTTPS access is enough.
If you got error - use web encrypted password instead. Check the documentation!
- Go to the login page of your router. (default: 192.168.0.1).
- Type in the password you use to login into the password field.
- Click somewhere else on the page so that the password field is not selected anymore.
- Open the JavaScript console of your browser (usually by pressing F12 and then clicking on "Console").
- Type
document.getElementById("login-password").value; - Copy the returned value as password and use it.
You may edit configuration data like:
- Router url
- Password
- Scan interval
- Scan retries (1–10; default 3) — how many times a failed data poll is retried
- Scan backoff (0.1–30s; default 1.0) — delay between retries, grows with each attempt
- Scan pause (0–1440 minutes; default 20) — how long "Router data fetching" stays off before auto re-enable (
0= never auto re-enable) - Offline timeout (0–86400 seconds; default 0) — grace period before a missing device tracker goes offline
- Verify https
- Include support for VPN server/client (enable/disable VPN status polling and related VPN entities)
- Include device trackers (disable for non-AP routers to avoid duplicate entries)
- Give each tracked client its own device entry (off by default; disabling later does not remove already-created device cards)
- Include DHCP reservations sensor and add/delete services (default on)
Transient poll failures (timeouts, dropped connections, session expiry) are retried automatically. Authorization failures (wrong password / HTTP 401) are not retried. A failing SMS mailbox fetch does not fail the whole update.
An unreachable router during setup fails only that config entry (Failed to set up) and does not block other TP-Link Router entries.
To do that:
- Go to the Settings->Devices & services.
- Search for
TP-Link Router, and click on it. - Click on
CONFIGURE - Edit the options you need and click
SUBMIT
- Archer A10 v1
- Archer A20 v1.0
- Archer A6 (2.0, 4.0)
- Archer A7 V5
- Archer A8 (1.0, 2.20)
- Archer A9 V6
- Archer AX10 v1.0
- Archer AX11000 V1
- Archer AX12 v1.0
- Archer AX17 v1.0
- Archer AX1800
- Archer AX20 (v1.0, v3.0)
- Archer AX21 (v1.20, v3.0, v4.6)
- Archer AX23 (v1.0, v1.2)
- Archer AX3000 V1
- Archer AX50 v1.0
- Archer AX53 (v1.0, v2)
- Archer AX55 (v1.0, V1.60, v4.0)
- Archer AX55 Pro v1.0
- Archer AX58 v1.0
- Archer AX6000 V1
- Archer AX72 V1
- Archer AX73 (V1, V2.0)
- Archer AX75 V1
- Archer AX90 V1.20
- Archer AX95 v1.0
- Archer AXE16000
- Archer AXE5400 v1.0
- Archer AXE75 V1
- Archer BE220 v1.0
- Archer BE230 (v1.0, v2.0)
- Archer BE3600 (v1.0, v1.2, v1.6)
- Archer BE400 v1.0
- Archer BE550 (v1.0, V2)
- Archer BE800 v1.0
- Archer BE805 (v1.0, v1.20)
- Archer C1200 (v1.0, v2.0)
- Archer C2300 (v1.0, v2.0)
- Archer C24 (1.0, 2.0)
- Archer C3200 v1
- Archer C5400X V1
- Archer C6 (v2.0, v3.0, v3.20, 4.0)
- Archer C50 v4
- Archer C60 v2.0
- Archer C64 1.0
- Archer C6U v1.0
- Archer C7 (v4.0, v5.0)
- Archer C80 (1.0, 2.20)
- Archer GX90 v1.0
- Archer MR200 (v2, v5, v5.3, v6.0)
- Archer MR400 V.4.3
- Archer MR550 v1
- Archer MR600 (v1, v2, v3)
- Archer NX200 (v1.0, v2.0)
- Archer VR1200v (v1, v2)
- Archer VR2100v v1
- Archer VR2800 v1
- Archer VR400 (v2, v3)
- Archer VR600 v3
- Archer VR900v
- Archer VX1800v v1.0
- Archer VX231v v1.0
- BE11000 2.0
- CPE210 v2.0
- CPE220 v3.0
- Deco BE25 1.0
- Deco E4R 4.0
- Deco M4 2.0
- Deco M4R 2.0
- Deco M5 v3
- Deco M9 Plus 1.0
- Deco M9 Pro
- Deco P7
- Deco X20
- Deco X50 v1.3
- Deco X50-5G (1.20, 2.0)
- Deco X55 1.0
- Deco X60 V3
- Deco X90
- Deco XE75 (v1.0, v2.0)
- Deco XE75PRO (v3.0)
- EAP115 v2.0
- EX511 v2.0
- HB810 v2.6
- HX510 v1.0
- M8550 v1
- NE200-Outdoor v1.0
- NE211-Outdoor v1.0
- NX510v v1.0
- NX600 v2.0
- RE305 4.0
- RE315 1.0
- RE330 v1
- TD-W9960 (v1, V1.20)
- TL-7DR6430 1.0
- TL-7DR7270 1.0 (firmware 1.0.18+, new auth)
- TL-MR100 (v2.0, v3.0)
- TL-MR100-Outdoor v1.0
- TL-MR105
- TL-MR110-Outdoor v1.0
- TL-MR150 v2
- TL-MR6400 (v5, v5.3, v7)
- TL-MR6500v
- TL-R470GP-AC (4.0, 6.0)
- TL-R488GPM-AC 2.0
- TL-SG108E v6.0
- TL-WA1201 3.0
- TL-WA3001 v1.0
- TL-WR841N v14
- TL-WR844N v1.0
- TL-WR3002X v1.0
- TL-WDR3600 V1
- TL-XDR3010 V2
- TL-XDR5410 1.0
- TL-XDR6010
- TL-XDR6088 v1.0.30
- VX420-G2h v1.1
- VX800v v1
- XC220-G3v v2.30
- AC10 1.20
- Halo H25BE 1.0
- Halo H3000x 1.0
- Halo H47BE 2.0
- Halo H60XR 1.0
- Halo H80X 1.0
- ME30 1.0
- MR47BE v1.0
- MR50G 1.0
- MR80X v2.0
Please let me know if you have tested integration with any other model. Open an issue with info about router's model, hardware and firmware versions.
Guidelines CONTRIBUTING.md