Repository navigation
How to use ImageLib
Image library is used to store and save all images in a database.This article goes through the steps for using Image Lib in your plugin. To open image Lib, you need to use buildfire:
	var options = { };
	var callback=function(error,result){
		//do your magic...
	};

	buildfire.imageLib.showDialog(options, callback);
showIcons {Boolean} Specifies if you want to show the “icons” tab (Default: true) showFiles {Boolean} Specifies if you want to show the “my files” tab (Default: true) multiSelect {Boolean} allows the user to choose multiple icons and multiple files (Default: true) Callback: it’s a callback function for the selected icons and files. the result will be in this format
{selectedFiles:[url1,url2,...], selectedIcons:[icon1, icon2,...]}
Example: in sdk/plugins/examplePlugin/control/content/index.html
Image 1: Shows a button called “Open Image Lib,” this button will call the following code to show the image Library:
buildfire.imageLib.showDialog({showIcons: false, multiSelection: false},
	function (error, result) {
            	if (result && result.selectedFiles && result.selectedFiles.length > 0) {
                	$scope.data.content.bgURL = result.selectedFiles[0];
                	$scope.$apply();
            }
        });
Image 1
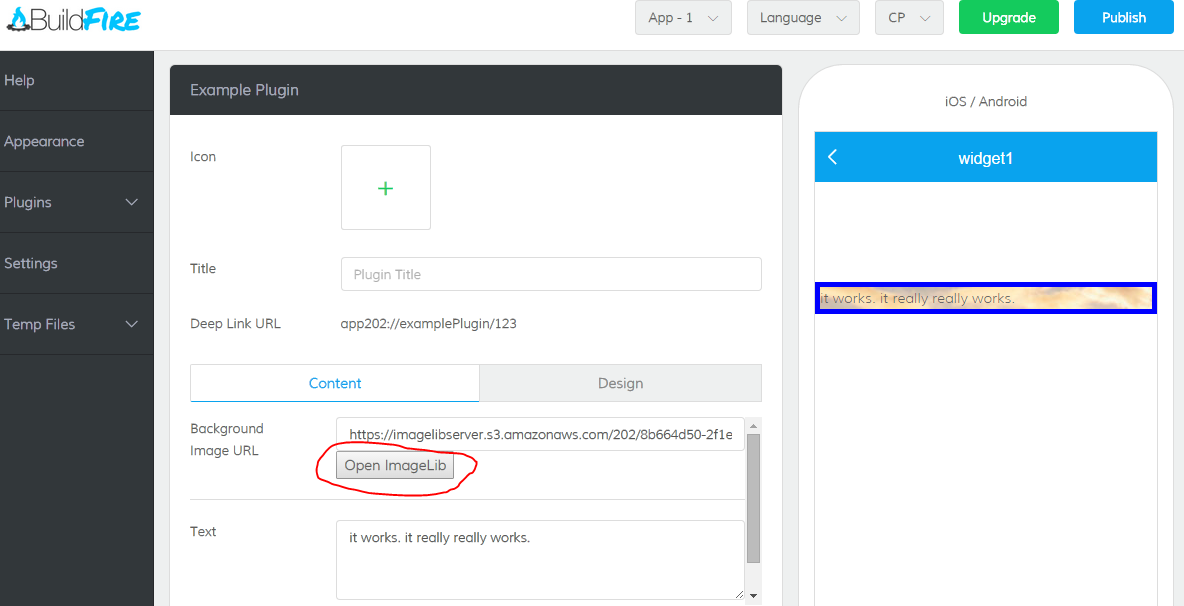
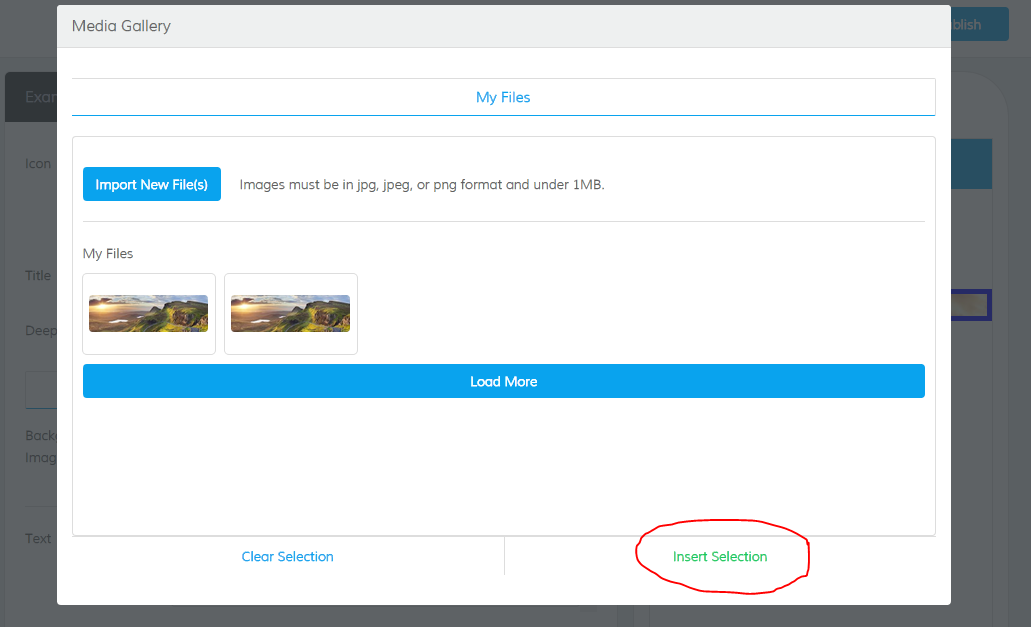
Image 2: Once “Open ImageLib” is clicked, a pop up page will open to your “Media Gallery.” Here the user can select ( by click the file and file will have a blue box around image or icon chosen), add (by clicking “import new files”) and delete files (once your cursor is above the file you can choose to delete). Once the app owner is done selecting a file, he will then click “insert selection.” Insert selection will then call the “callback function” and insert the file as seen in Image 1 shown in the textbox above.
Image 2