
Demonstration of a use case of this technology to automatically blur computer screens while taking a video saving any sensitive information
This is my TensorFlow implementations of U-net as a model for this Image Segmentation Project as inspired from U-Net: Convolutional Networks for Biomedical Image Segmentation and Image Segmentation in Tensorflow

- This deep neural network is implemented with Tensorflow functional API, which makes it extremely easy to experiment with different interesting architectures.
- Output from the network is a 224*224 image which represents mask that should be learned.
- Transfer Learning is used by having MobileNetV2 as the Encoding stack of model.
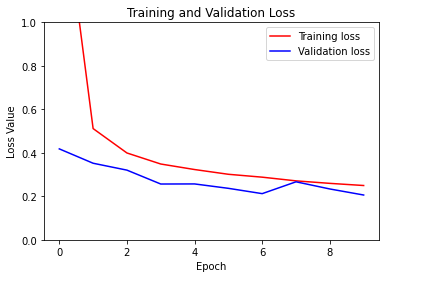
- The model is trained for 10 epochs.
- After 10 epochs, calculated validation loss is approximately about 0.2.
- Loss function for the training is a binary crossentropy.


- Python 3.7
- Tensorflow 2.5.x
- NumPy
- PIL
- Matplotlib
Clone this repo.
git clone https://github.com/Cynamide/Image-Segmentation.gitPython in your machine should be 3.7.x.
Install Jupyter Notebook.
pip install jupyter-notebookThis notebook is trained on the COCO Dataset. To run the notebook, first you will need to downlod their dataset from:
Now make a new Folder named as "COCOdataset2017" with the file structure matching as shown below:
.
├──...
├── make_dataset.py
├── train.py
├── README.md
├──COCOdataset2017
   ├──annotations(.json files go here)
   ├──images
      ├──train
      ├──val
      ├──train_mask(empty directory)
├──train_img(empty directory)After creating the file structure as above, simply run the make_dataset.ipynb notebook to:
- filter images of required annotations
- generate masks
- resize masks and images
- save the images and masks in train_img and train_mask (refer the file structure)
Next and the final step is to run the next notebook train.py to train the model and look at the predictions it has made. You can also create your own masked video by runnig the code cell at the end of the notebook.