Item Scenes and Item Hotkeys
Note: For general information about Items/Assets (custom JPG or PNG images or GIFs you can attach to your model), see the page "Item System".
You can spawn items (or unload them) via Hotkeys.
This works for items that are attached to the model and items that aren't.
To do this, you first have to create an "Item Scene", which is a collection of items that are turned on/off together. If you just want to turn one item on and off, that Item Scene can just contain that one item.
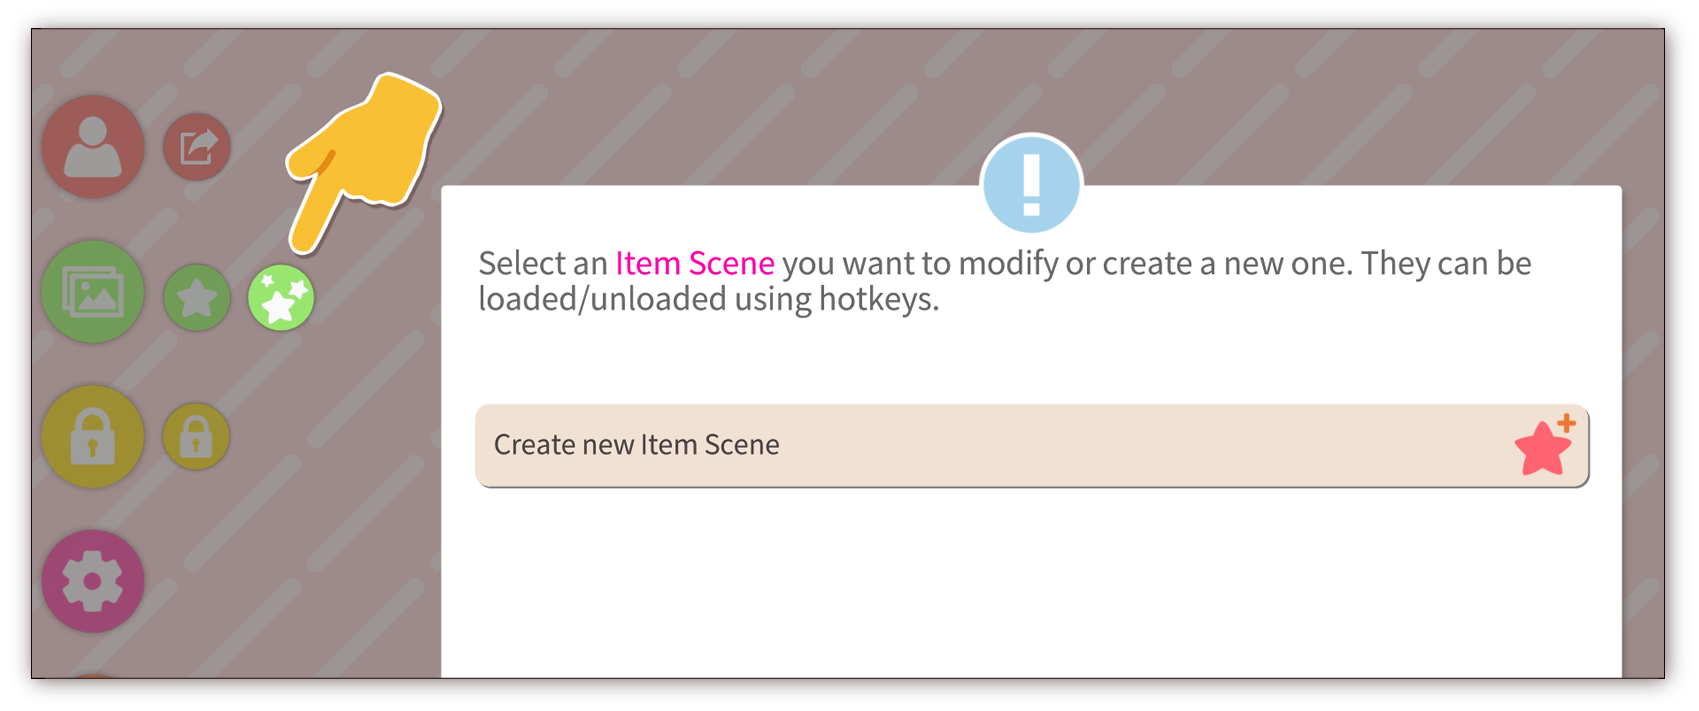
To create an Item Scene, first load all the items you'd like to include and position them however you want them to be saved, including attaching them to the currently loaded model if you want. Then open this menu and create a new Item Scene.
This will open a new window that lets you set up the Item Scene based on the currently loaded items. Click items to remove them from the scene (red) or include them again (blue). The info button ("i") shows information about the respective item, such as the position, rotation, etc.
The number next to the item thumbnail image is the order of the item in the Item Scene. When the Item Scene is loaded, this order will be used when spawning items. When the order is already taken, the next higher order will be used until the scene is full.
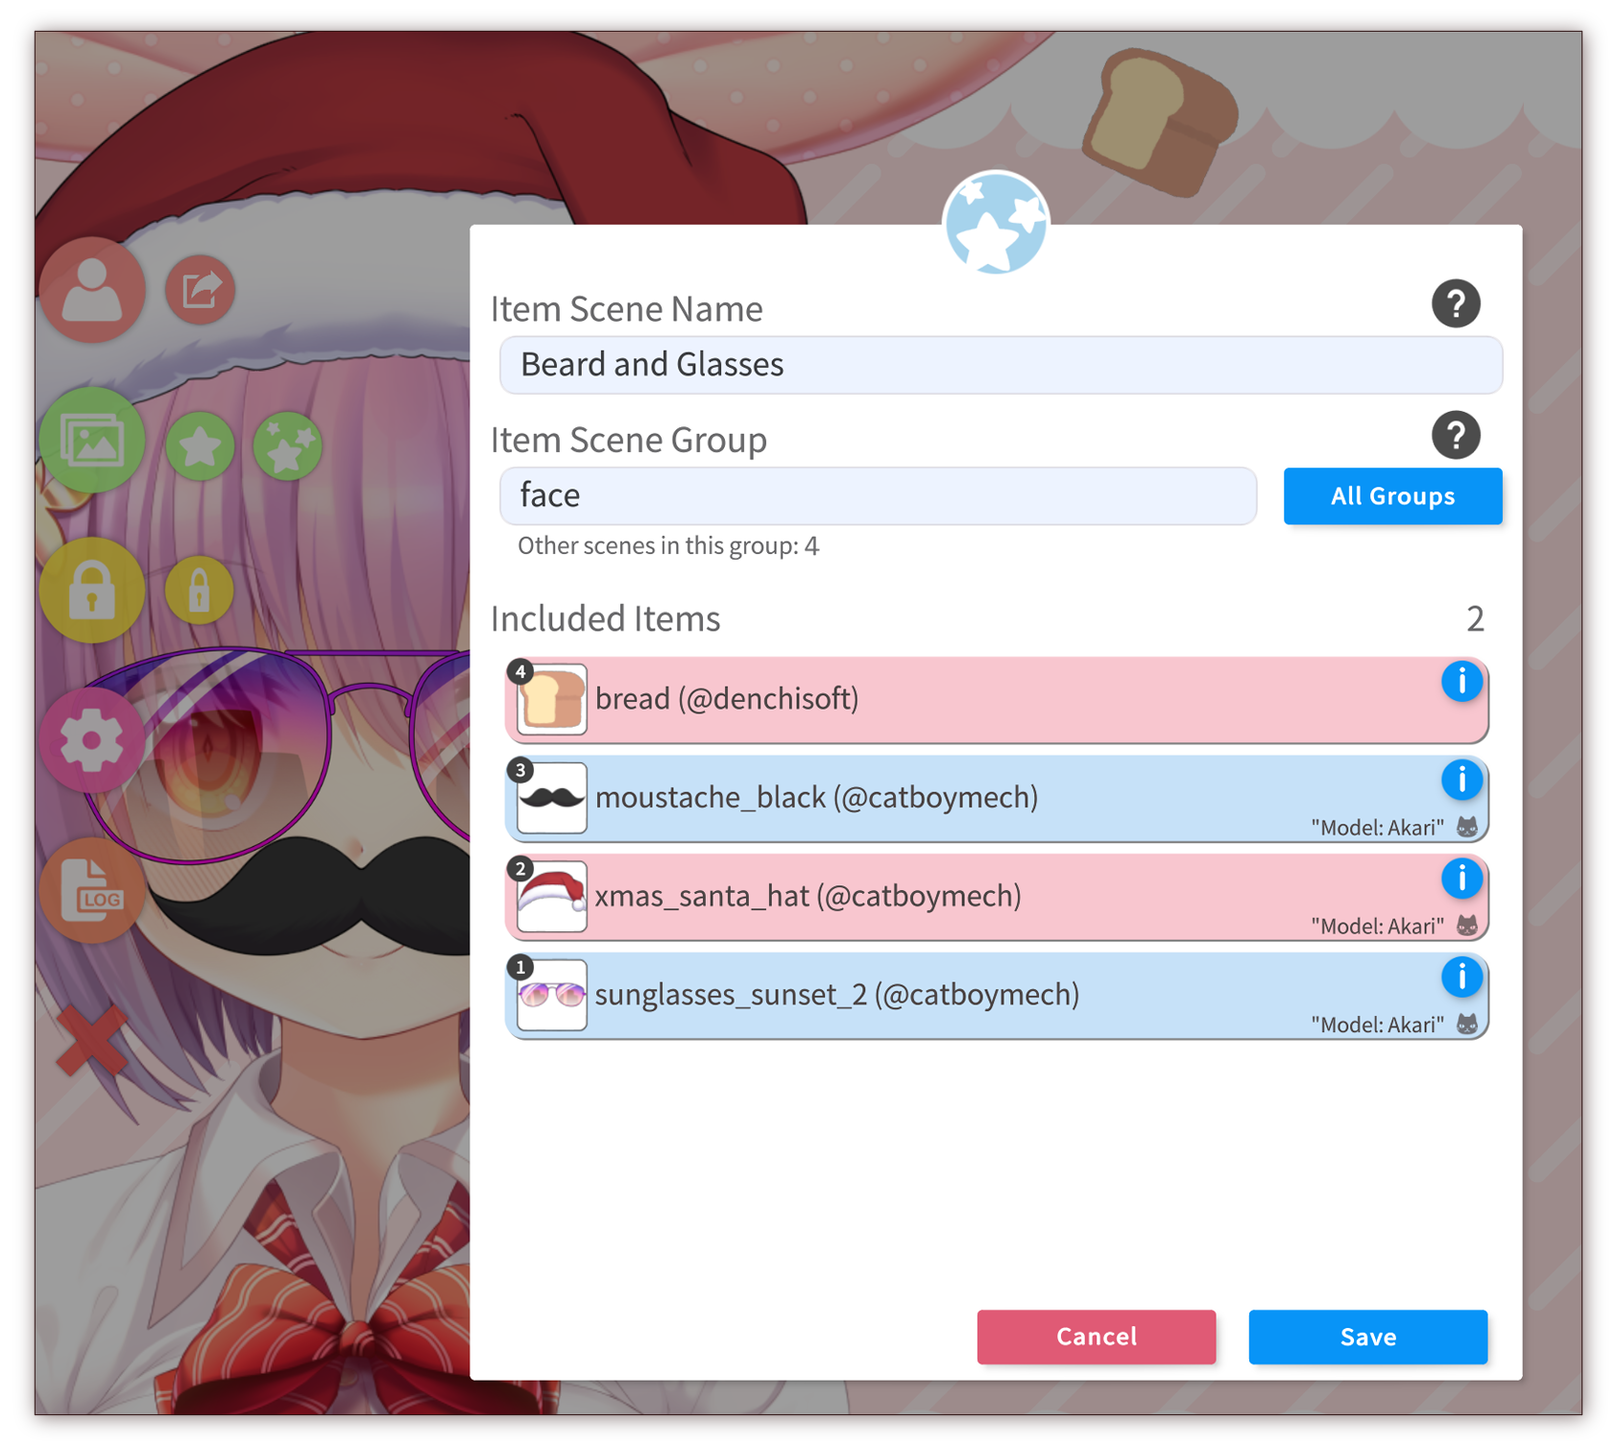
You have to give your Item Scene a name, which will be used to identify the scene. No duplicate names are allowed. Additionally, you can also add a "Item Scene Group" (just called "Group" from here on, more on that later). If the item is attached to a model, this is also shown in the list as you can see.
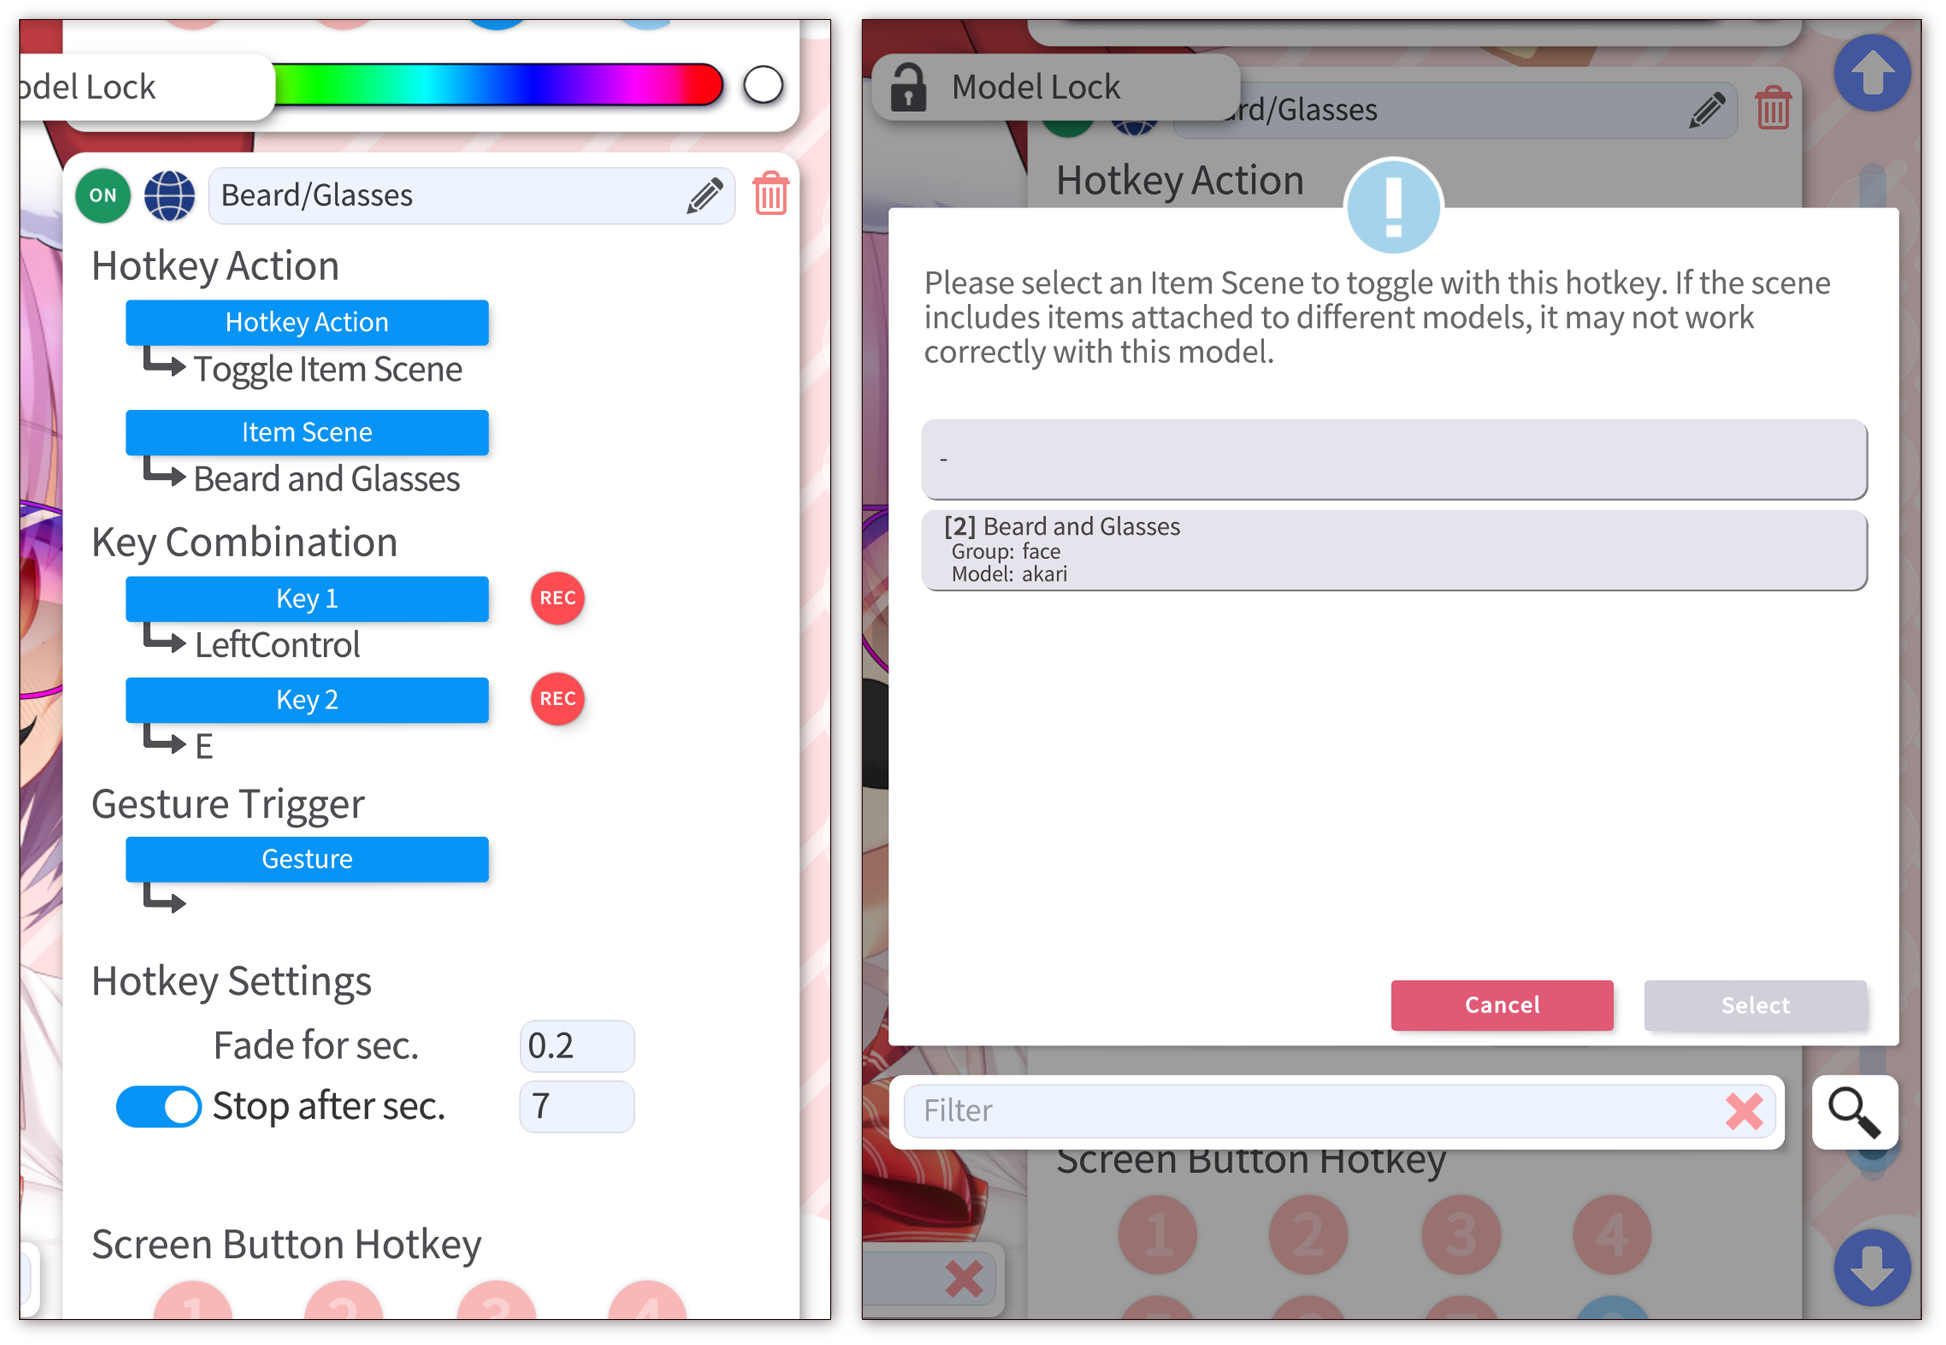
After creating the Item Scene, you can set up a hotkey that toggles that scene. You can set a fade in/out time for the Item Scene (can also be instant) and optionally set the Item Scene to deactivate X seconds after activating it (up to one hour). The idea here is that you could have a Twitch redeem that turns on a hat, glasses, etc. for a certain amount of time.
In this example, the Item Scene "Beard and Glasses will be loaded/unloaded when the hotkey is activated. Items that have been loaded as part of an Item Scene can be used like normal items. You can for example delete them from the scene by dragging them out of the window or drop them on the trash can. When pressing the hotkey again and there is still at least one item from that Item Scene loaded, all remaining items from that Item Scene will be unloaded.
You can set up as many Item Scenes as you want and also load them at the same time. Sometimes there are situations where you want one Item Scene to unload automatically if you load a different one, for example when you have many different hats for your model and only want one to be active at a time. This is what Item Scene Groups are used for.
Example: If an Item Scenes that has the Group <A> is activated, there could be other items already loaded that were loaded by another Item Scene that has the Group <A>. These items would then be automatically unloaded.
You can modify Item Scenes after creating them. This means adding items, removing items or modifying them (for example pinning them to a different position on the model). Just open the Item Scene in the Item Scene selection window and save it again. To modify existing items in the scene, you first have to load that scene via a hotkey, then do your changes (for example moving or pinning the item somewhere else), then open the Item Scene selection window and then save.
The only thing you cannot change is the scene name. If you want to change that, you'll have to delete and recreate the Item Scene from scratch.
Yes, that's possible. Just load the model you want to add items to the Item Scene for and then add those items to the existing Item Scene which already contains items pinned to different models.
When an Item Scene is loaded using a hotkey and it contains pinned items not intended for the currently loaded model, those items are skipped and will not be loaded.
Yes, that's possible! Just create an item hotkey as described above and then use a plugin to let viewers trigger it. You could even set the item scene hotkey to auto-deactivate after a few seconds/minutes.
For more info, check out the plugins page: https://github.com/DenchiSoft/VTubeStudio/wiki/Plugins
Only the first time the Item Scene is loaded after starting VTube Studio. After that, the textures will be cached in memory so loading should be instant.
The item might be pinning to the wrong ArtMesh. Items generally pin to the topmost ArtMesh that's not set as "invisible" (0% opacity) or "deactivated" in your Live2D model. If you for example have some big blush overlay layer in front of your face, items may pin to that and move in unexpected ways.
Open the logs when dropping items on your model to see the ID of the ArtMesh your item is pinning to.
There is a menu that lets you exclude ArtMeshes from having items pinned to them:
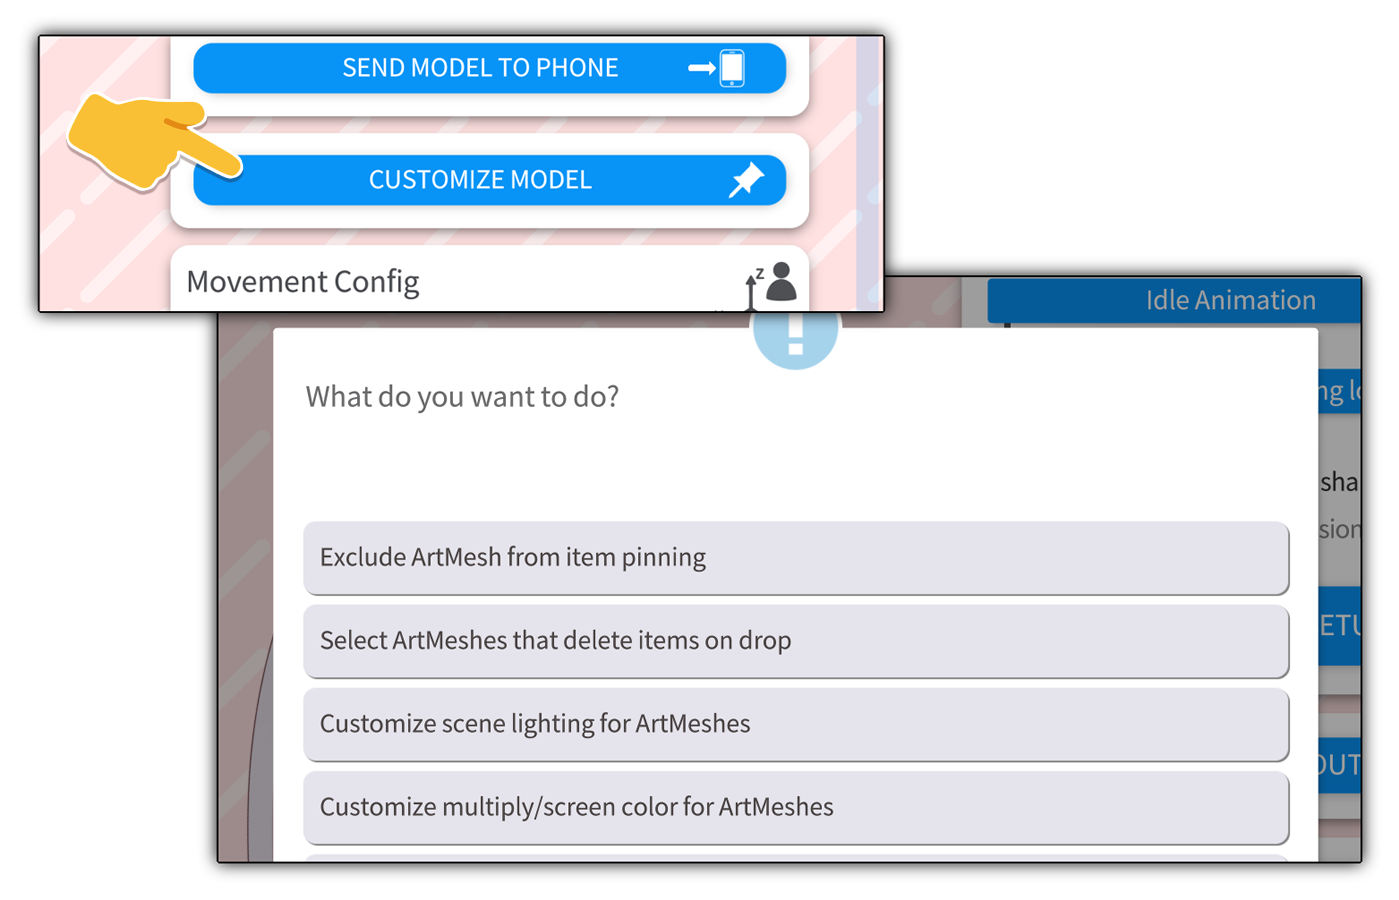
If you're making a Live2D model and have layers in the model that you already know no item should pin to, you can exclude them directly in the model by marking the ArtMeshes. There are two options:
-
[NOT GOOD] Have
vts_ignore_raycastas part of the ArtMesh ID. VTS does a contains-match, so it can be anywhere in the ID. -
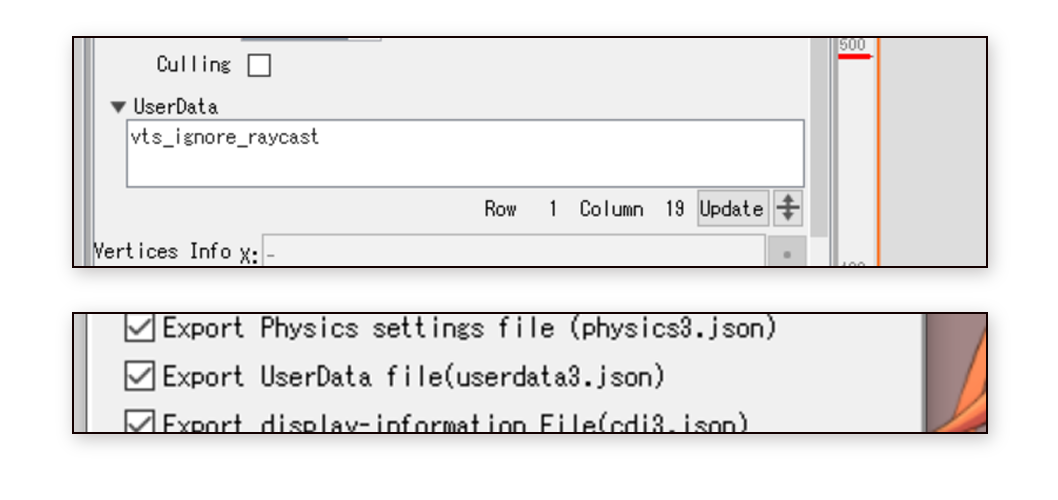
[BETTER] Have
vts_ignore_raycastsomewhere in the UserData field for that ArtMesh. When you export your model, make sure you haveExport UserData file (userdata3.json)checked. This will give you a<modelname>.userdata3.jsonfile that contains the IDs and UserData-tags of tagged ArtMeshes. This is better because it creates an additional JSON file that you can add/remove/modify anytime you want.
![]() If you have any questions that this manual doesn't answer, please ask in the VTube Studio Discord
If you have any questions that this manual doesn't answer, please ask in the VTube Studio Discord![]() !!
!!
![]()
- Introduction & Requirements
- Known Issues
- Where to get models?
- Android vs. iPhone vs. Webcam
- Getting Started
- Loading your own Models
- Loading your own Backgrounds
- VTube Studio Settings
- Display Light Overlay
- Visual Effects
- Spout2 Background
- VTS Model Settings
- Expressions ("Stickers"/"Emotes")
- Animations
- Interaction between Animations, Tracking, Physics, etc.
- Streaming to Mac/PC
- Recording/Streaming with OBS
- Starting without Steam
- Starting as Admin
- Restore old VTS Versions
- NVIDIA Broadcast Face Tracker
- Google Mediapipe Face Tracker
- Tobii Eye-Tracker
- Hand-Tracking
- Lipsync
- Controlling multiple models with one Webcam or iPhone/Android device
- Connection Issues & Troubleshooting
- Taking/Sharing Screenshots
- Item System
- Live2D-Items
- Recoloring Models and Items
- Record Animations
- Multiplayer
- VNet Security
- Twitch Interaction
- Add Special ArtMesh Functionality
- Item Scenes & Item Hotkeys
- Plugins (YouTube, Twitch, etc.)
- VTube Studio Model File
- Copy config between models
- Sending data to VSeeFace
- Steam Workshop
- How to fix lag issues
- How to fix webcam issues
- Live2D Cubism Editor Communication
- FAQ
- Privacy Policy, Licensing and Further Terms