Record Animations
You can record animations in VTube Studio (.motion3.json files). These animations can then be used directly in your model or even re-imported into Live2D Cubism to be used in the Live2D Cubism Animator or the Live2D Cubism Physics Editor.
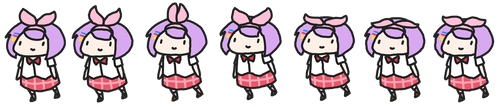
For general information about animations, please check the "Animations" page.
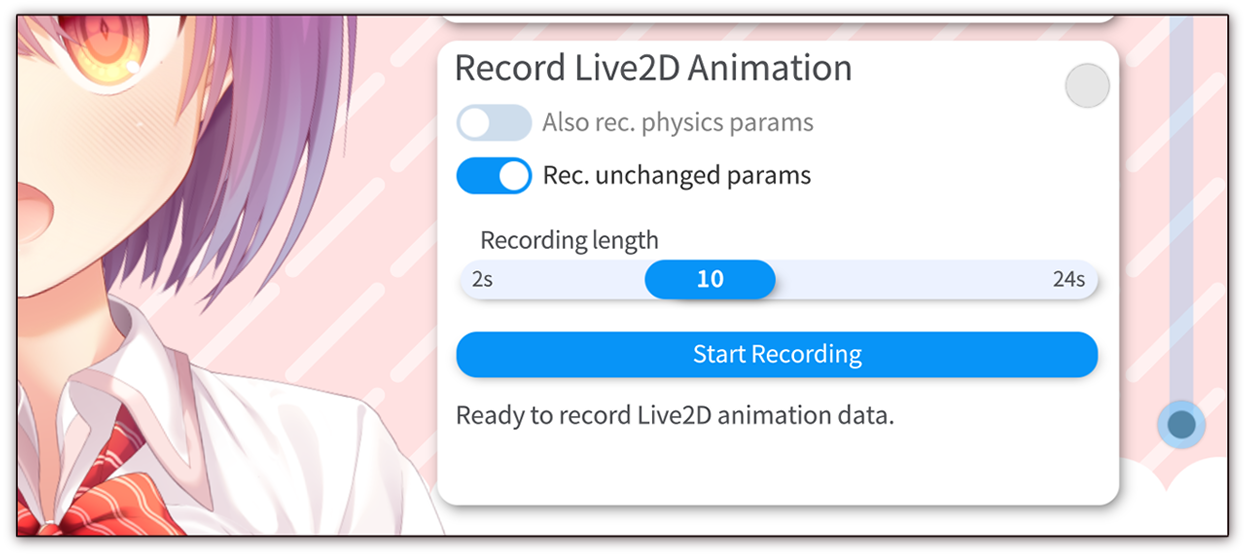
Scroll down in the camera settings tab to "Record Live2D Animation". This is available on all platforms, including mobile. You can choose to record or exclude the physics output parameters as well. Keep in mind that if you save and play the recorded animation later in VTube Studio, physics parameters that are set by an animation will be ignored because they will be overwritten by the physics system.
If you deactivate "Rec. unchanged params", VTube Studio will check for any parameters that did not change at all during recording and exclude them from the animation per default (you can turn them back on manually). This would for example exclude any parameters used as expression toggles that were not toggled during animation recording.
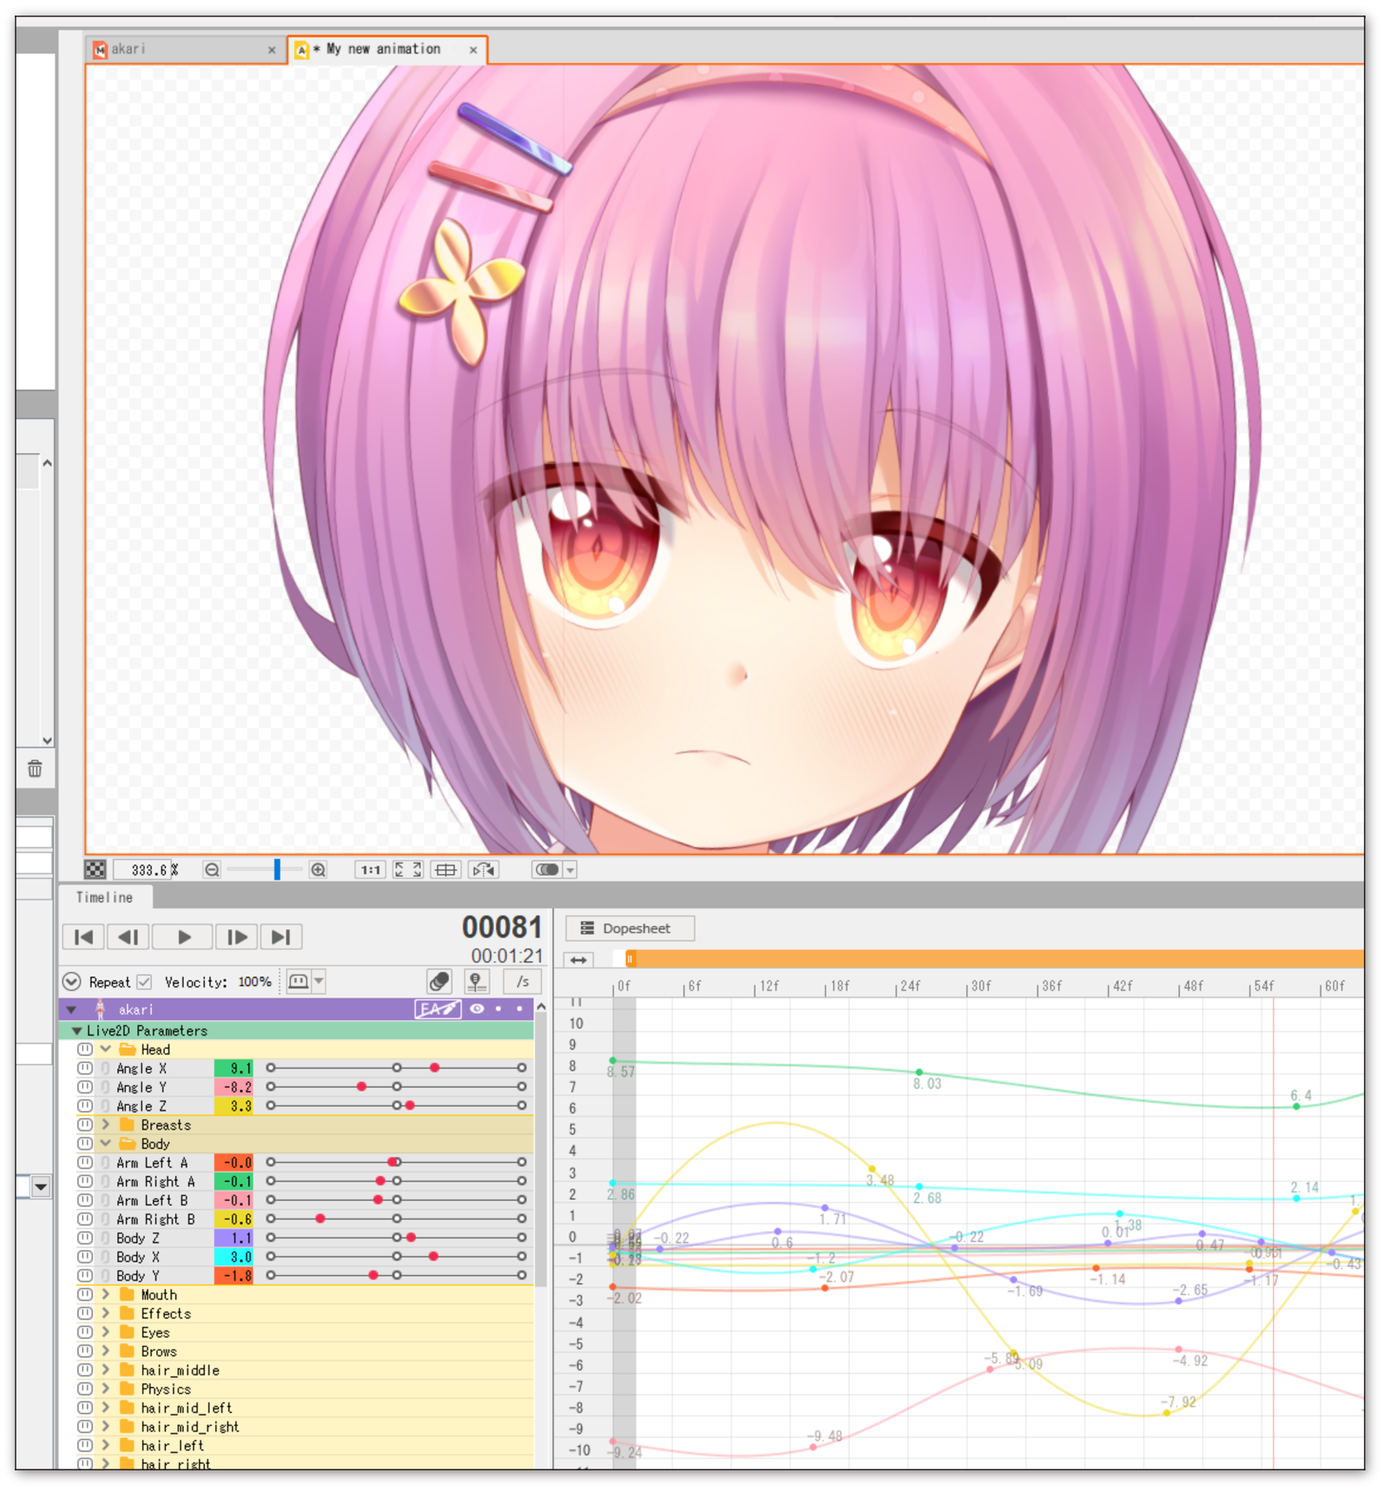
After the recording is finished, you will be presented with the animation config screen. You can toggle individual parameters on and off to include/exclude them from the final animation. The slider lets you choose how much the animation for the selected parameter should be smoothed. The curve preview window will show the final animation curve for that parameter in red and the raw data in gray. The red dots mark the curve segment end points. If you plan to use the animation in the Live2D Cubism Animator, making sure that the curves look good and have a reasonable amount of points is important.
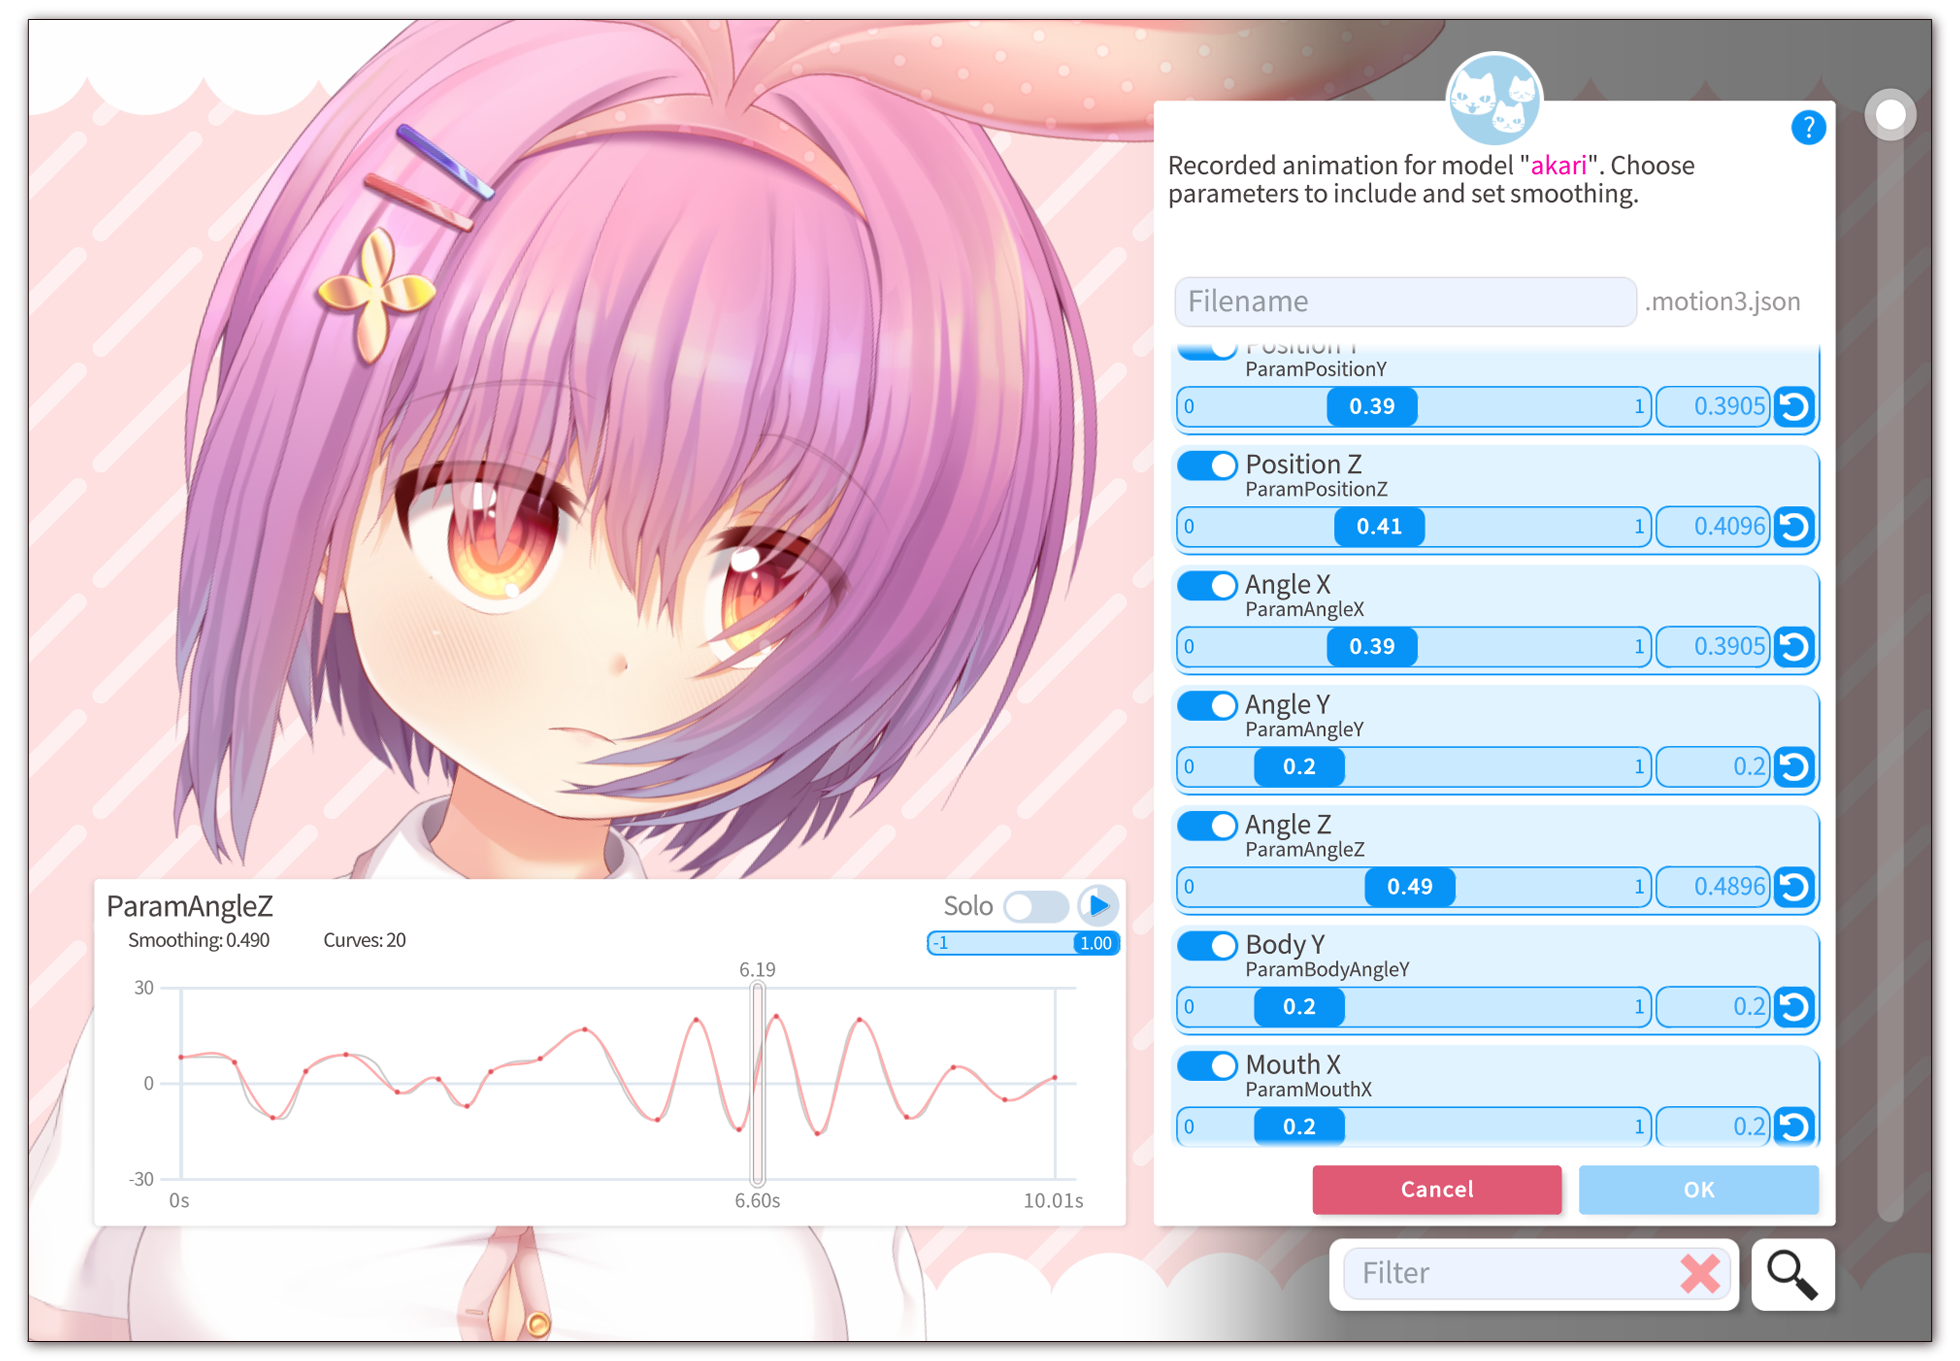
After choosing a filename and saving, the animation will be saved as <name>.motion3.json in the same folder you've used for your other animations or next to the model file if you have no other animations.
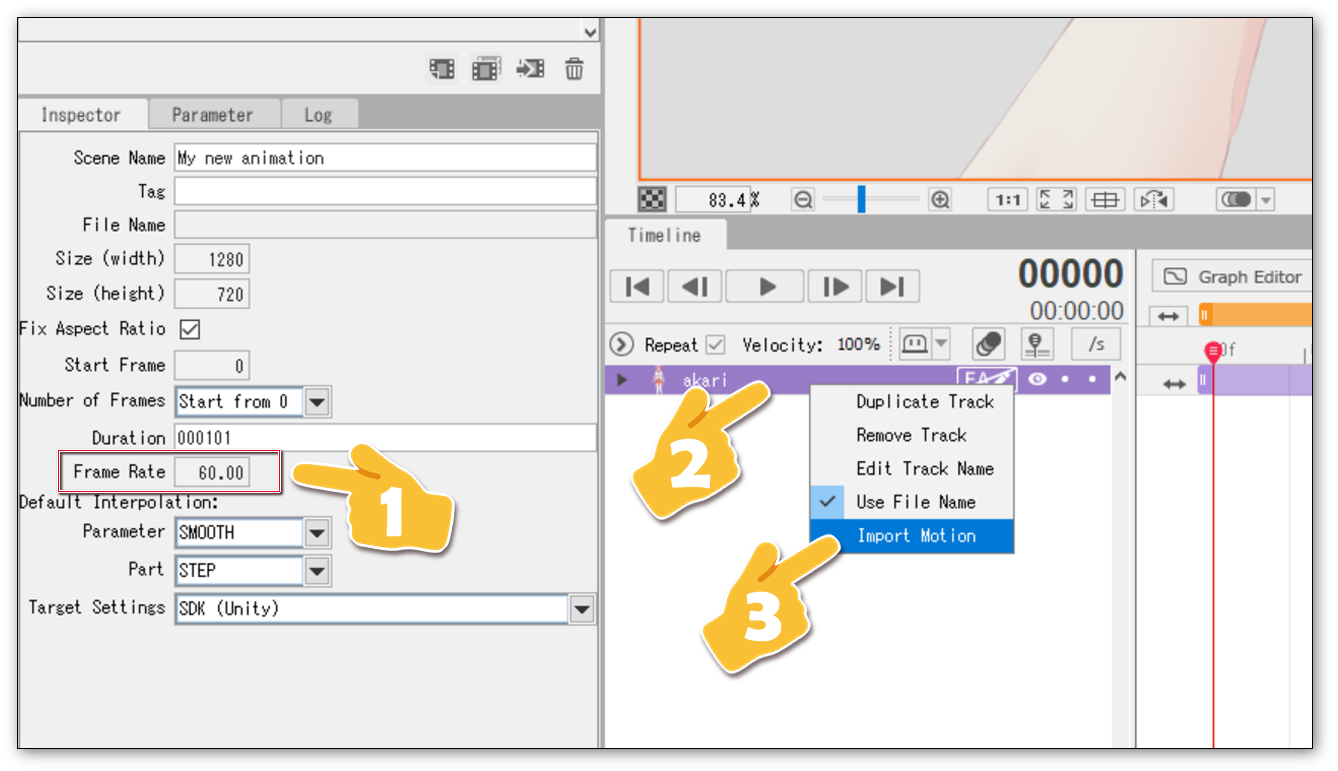
You can re-import animations (.motion3.json files created with VTube Studio) back into the Live2D Cubism Animator. To do that, start the Animator for your model like you normally would (as in open the .can3 file of your model or create one).
Important: Make sure the FPS ("Frame Rate") is set to 60 before importing the animation. VTube Studio animations are always exported as 60-FPS-based curves.
Then, create a new empty Scene for the animation. You can now import your .motion3.json file into that Scene by right-clicking the purple animation track for the model and selecting "Import Motion".
You will now have all animation curves from the .motion3.json file imported into the animator. From there, you can modify the animation in any way you want.
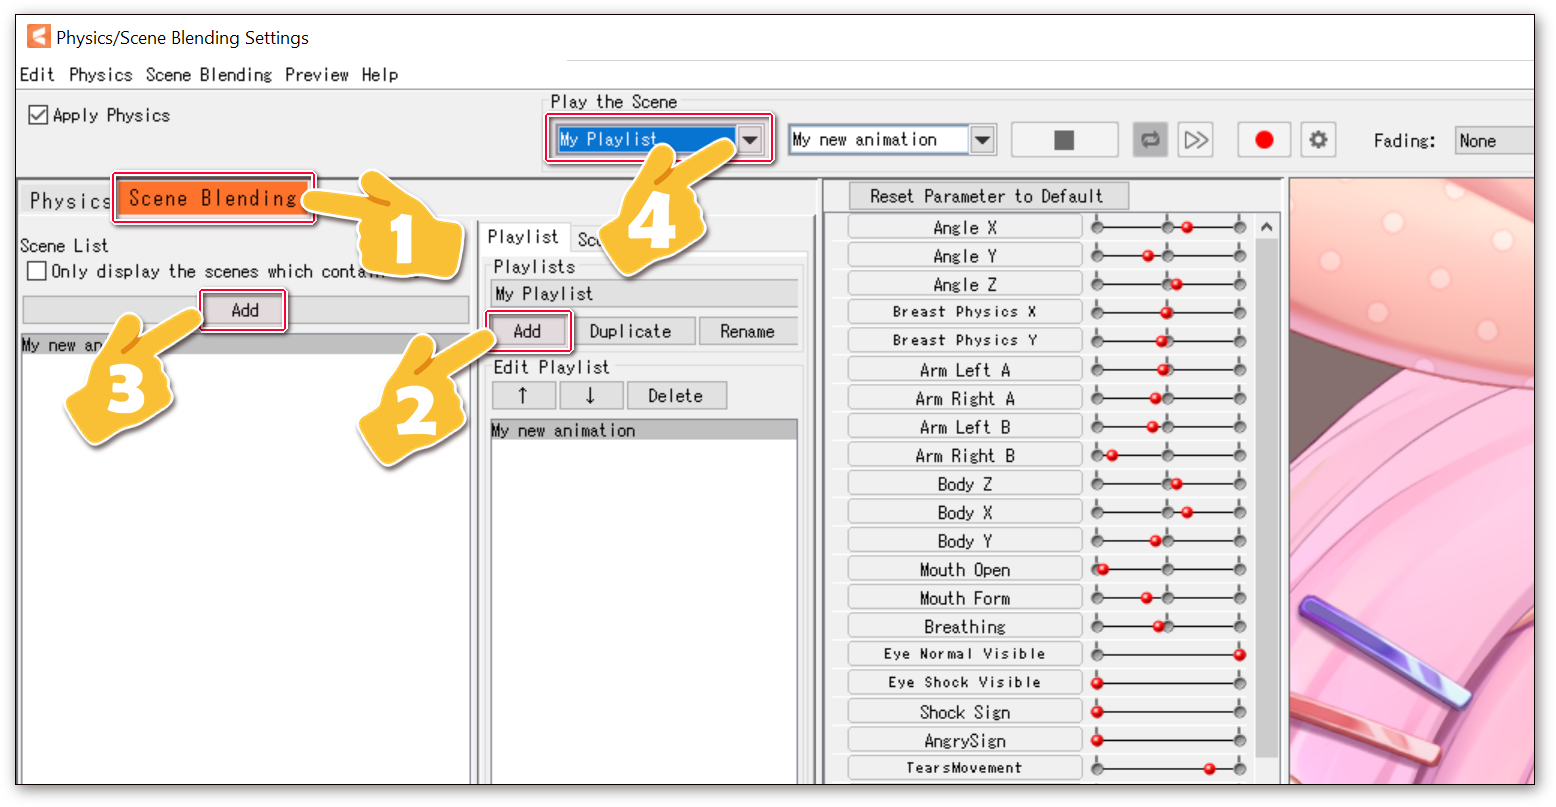
You can play animations in the _Live2D Cubism Physics Editor. This can be useful for comparing how physics calculations behave in VTube Studio vs. Live2D Cubism.
To do that, make sure you have both the model file (.cmo3) and the animation file (.can3) open in the same Live2D Cubism Editor, then open the physics window.
In the physics window, choose the "Scene Blending" tab. Create a new "Playlist" by clicking the "Add" button, then add your animation scene to the playlist. Finally, select the playlist under "Play the Scene". The animation will now play and loop in the physics preview window.
![]() If you have any questions that this manual doesn't answer, please ask in the VTube Studio Discord
If you have any questions that this manual doesn't answer, please ask in the VTube Studio Discord![]() !!
!!
![]()
- Introduction & Requirements
- Known Issues
- Where to get models?
- Android vs. iPhone vs. Webcam
- Getting Started
- Loading your own Models
- Loading your own Backgrounds
- VTube Studio Settings
- Display Light Overlay
- Visual Effects
- Spout2 Background
- VTS Model Settings
- Expressions ("Stickers"/"Emotes")
- Animations
- Interaction between Animations, Tracking, Physics, etc.
- Streaming to Mac/PC
- Recording/Streaming with OBS
- Starting without Steam
- Starting as Admin
- Restore old VTS Versions
- NVIDIA Broadcast Face Tracker
- Google Mediapipe Face Tracker
- Tobii Eye-Tracker
- Hand-Tracking
- Lipsync
- Controlling multiple models with one Webcam or iPhone/Android device
- Connection Issues & Troubleshooting
- Taking/Sharing Screenshots
- Item System
- Live2D-Items
- Recoloring Models and Items
- Record Animations
- Multiplayer
- VNet Security
- Twitch Interaction
- Add Special ArtMesh Functionality
- Item Scenes & Item Hotkeys
- Plugins (YouTube, Twitch, etc.)
- VTube Studio Model File
- Copy config between models
- Sending data to VSeeFace
- Steam Workshop
- How to fix lag issues
- How to fix webcam issues
- Live2D Cubism Editor Communication
- FAQ
- Privacy Policy, Licensing and Further Terms