Live2D Items
Note: This page uses the words "item", "asset" and "prop". They refer to the same thing.
For information about items/assets/props in VTube Studio in general, check out this other page.
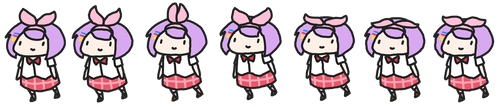
In addition to normal PNG, JPG and animated assets (GIF, etc.), VTube Studio now supports adding Live2D-props into the scene. You can also attach them to your model. With this, you can create props that react to face-tracking, have physics and can even have their own hotkeys to trigger expressions and animations in the prop Live2D models.
You could for example have animated hats, guns that aim depending on your face angle and shoot when you click with your mouse or glasses that properly rotate with your head. Live2D props also support physics.
When set up correctly, their physics setup will also react when they're attached to your model and your model moves them.
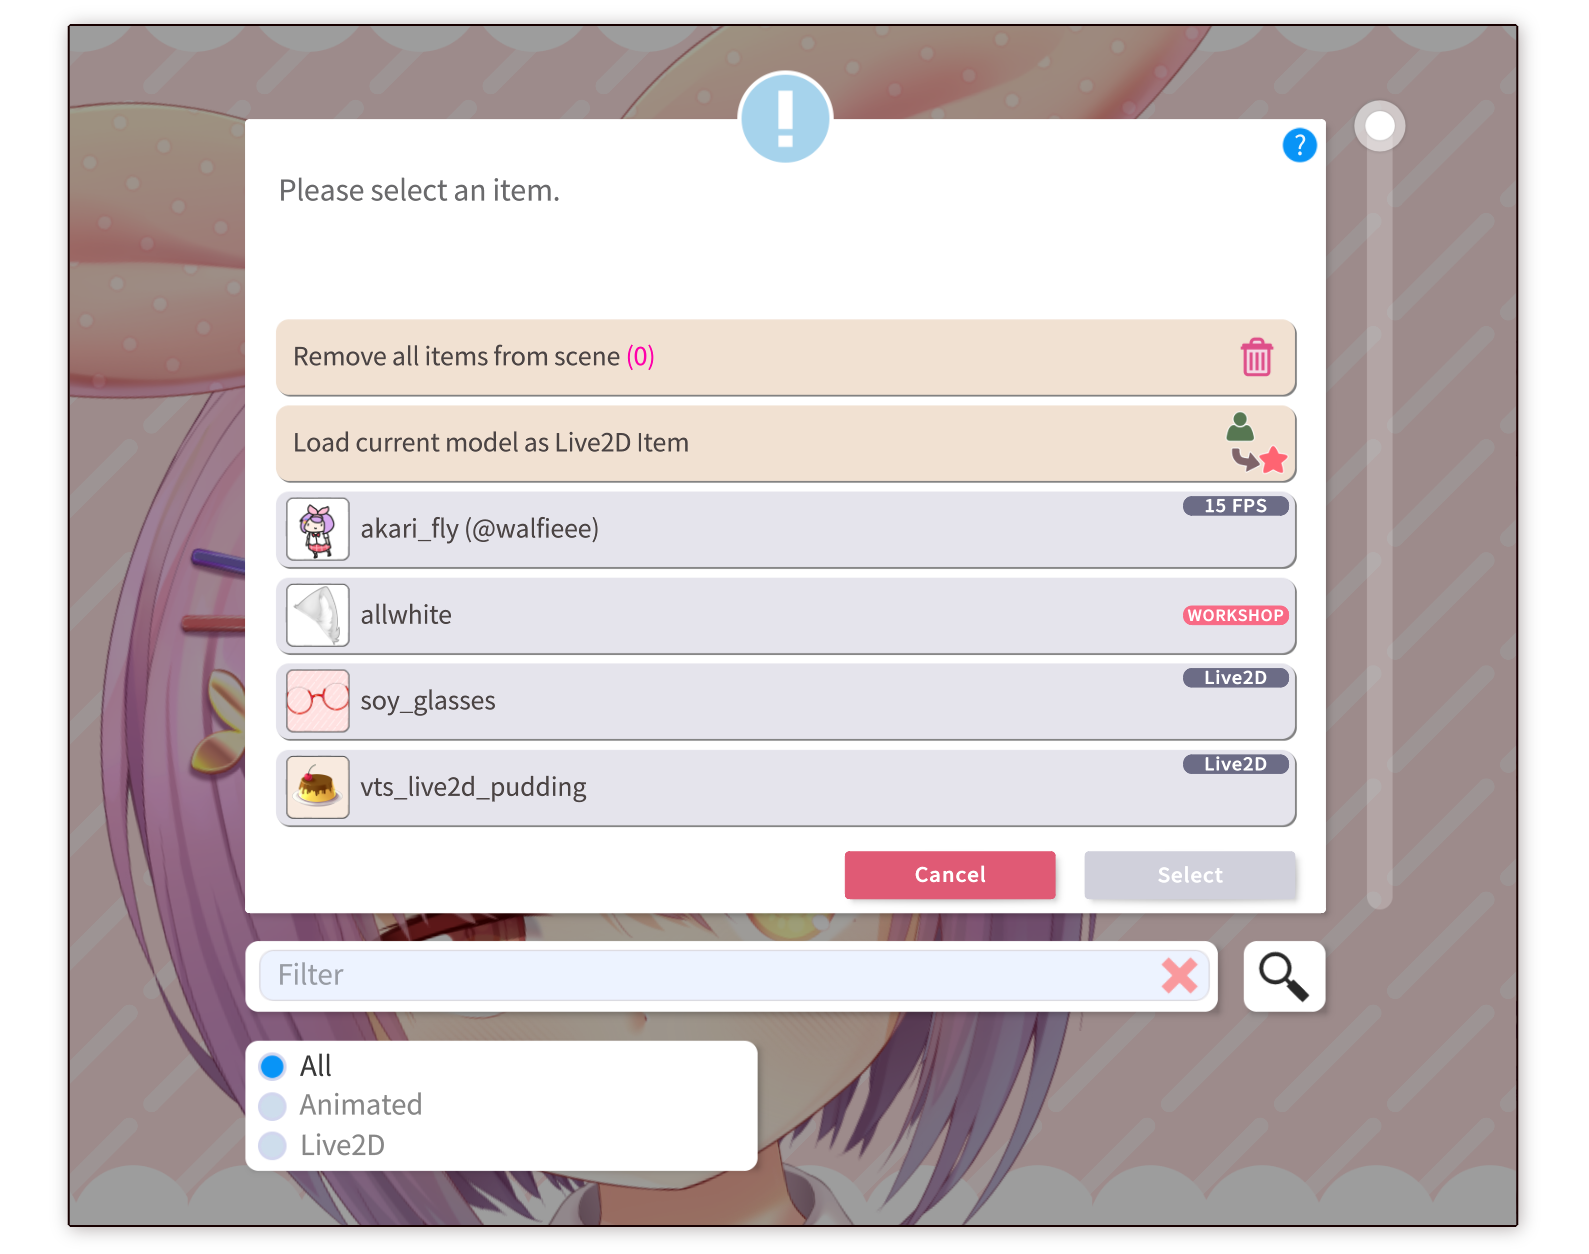
You load them like regular items. You can also filter the item list to only show Live2D items (see image below). Options like "flip" and "item order" are available for Live2D items as well.
Just like normal items, Live2D items are read from the "Items" folder. Any folder in the "Items" folder that contains a valid VTube Studio model will be considered a Live2D item, so you can copy any model you want in there and it show up in the items list.
When you flip a Live2D item, its X/Z axes will be inverted. That way, items like animal ears can easily be loaded into the scene twice, with one of them flipped, and they will rotate correctly.
To flip an item that's been loaded into the scene already, you can [CTRL] + Click it.
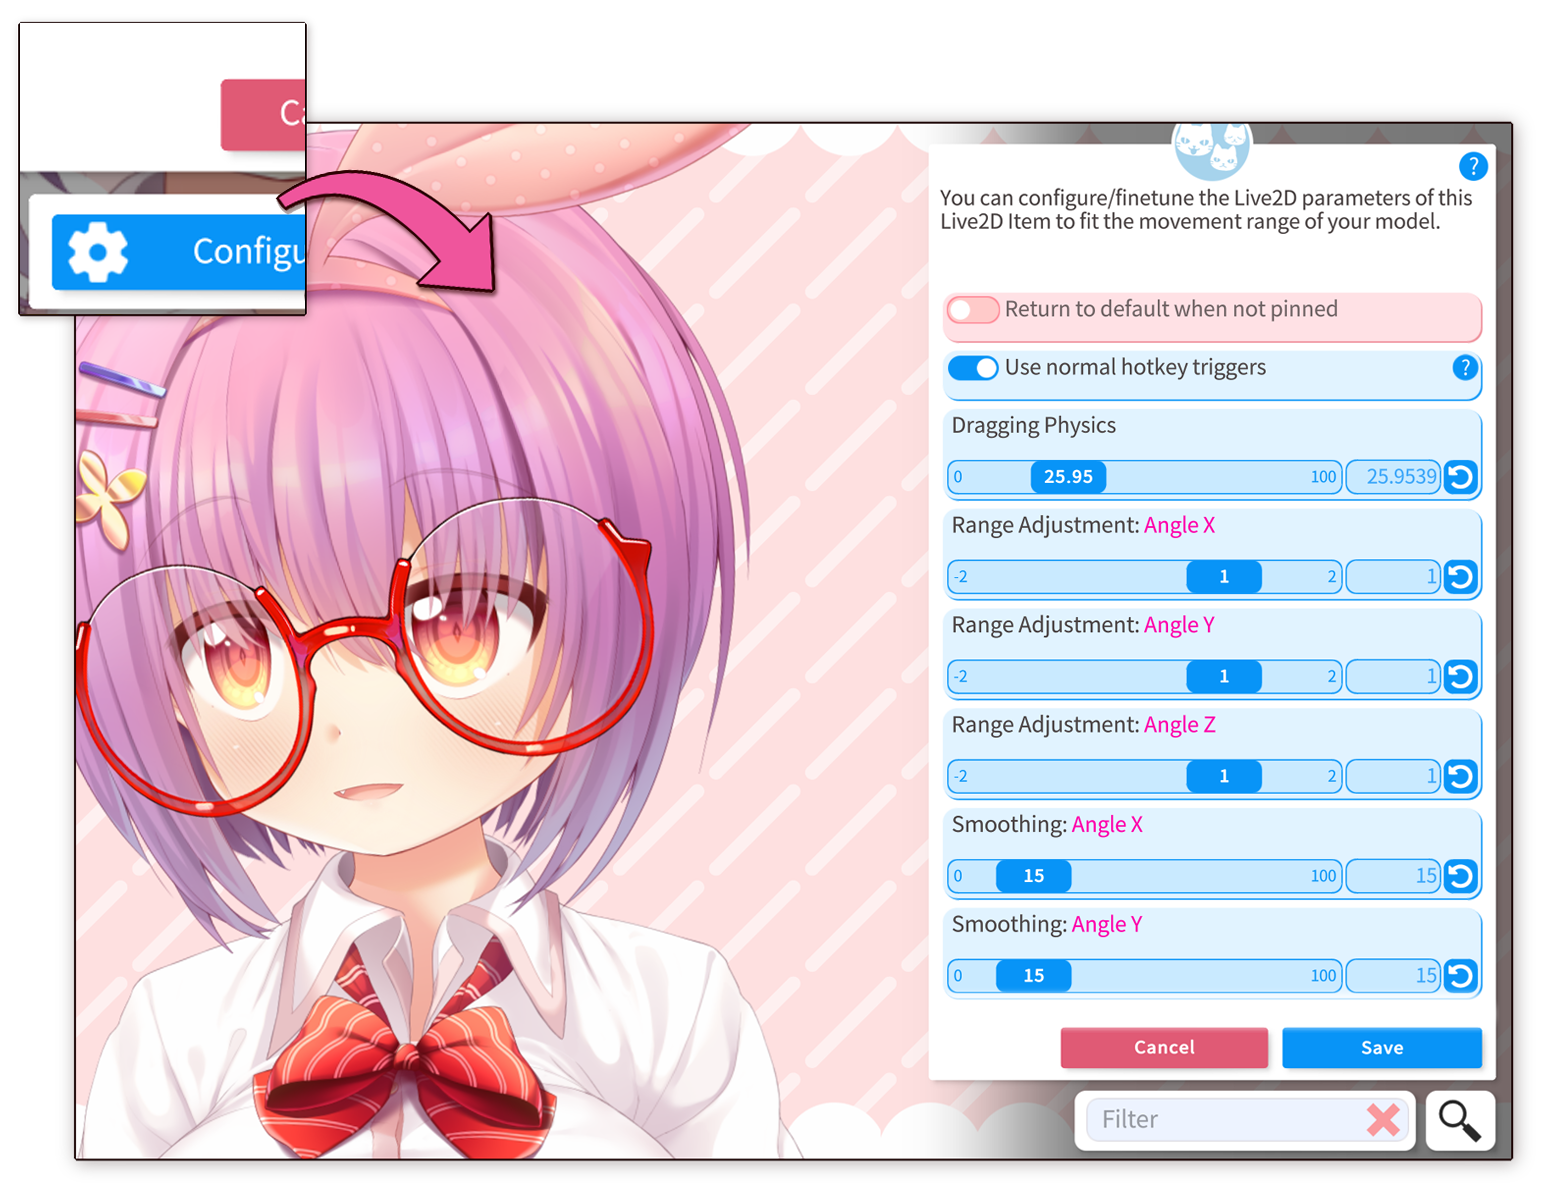
How can I configure/fine-tune my Live2D Items? For example, the head rotation range (X/Y-angle) doesn't fit my model. What do I do?
Sometimes, items were made with models in mind that rotate more/less than your own model in the X/Y head direction. This can be important for assets like glasses.
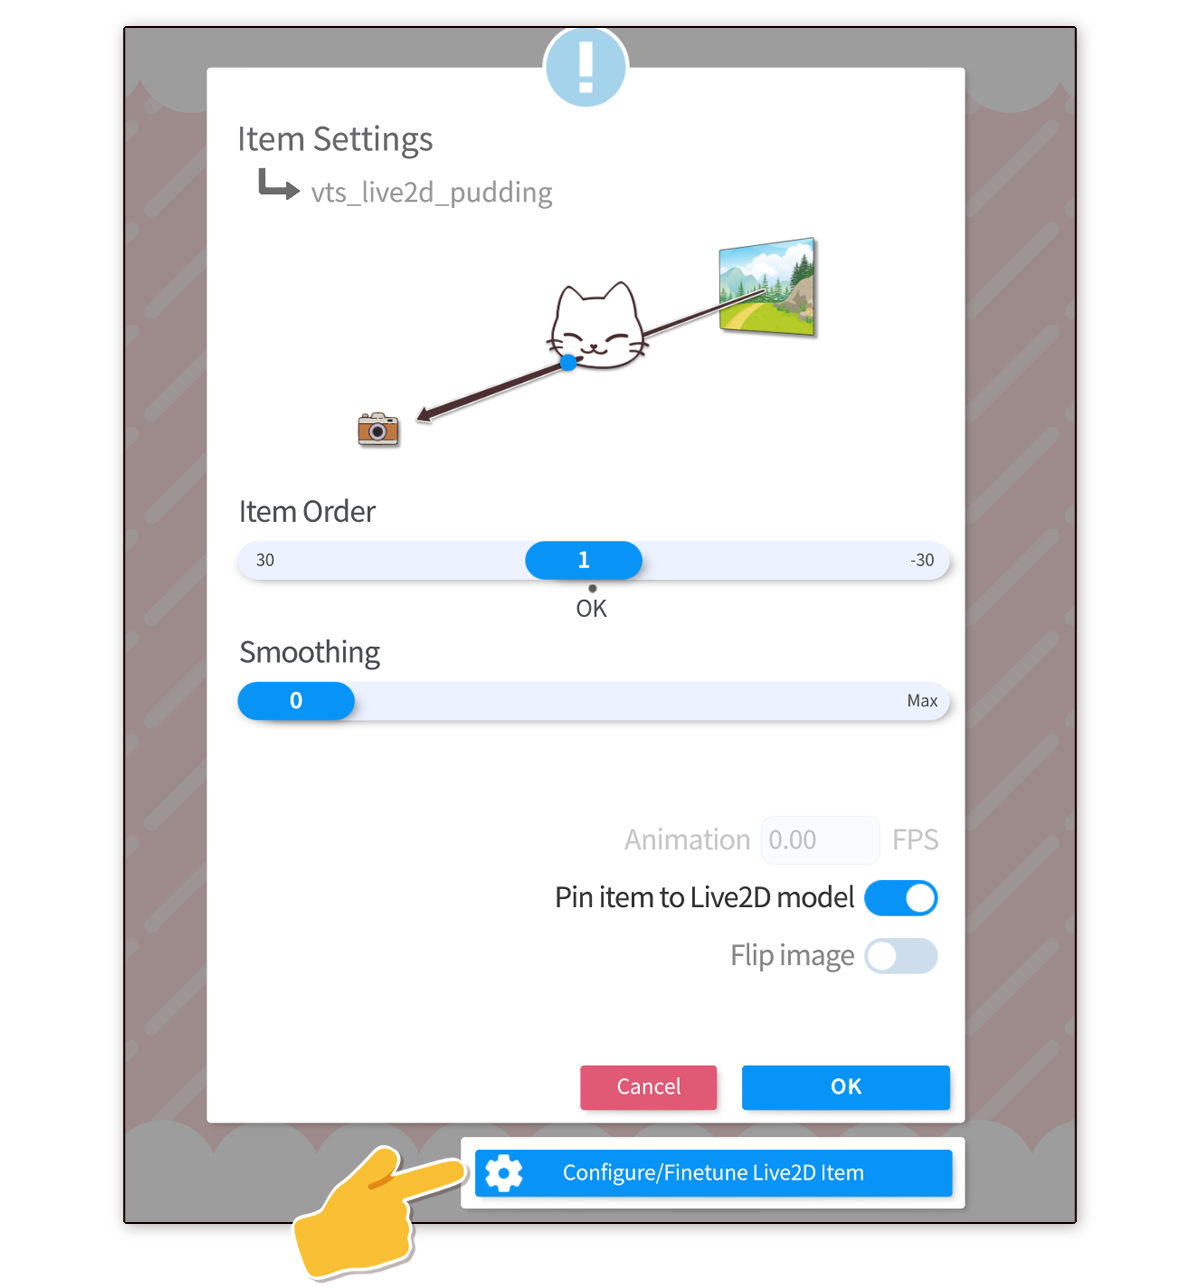
This can easily be fixed by selecting the item you want to configure and pressing the "Configure/Finetune Live2D Item". From there, you can set multipliers for the "ParamAngleX/Y/Z" Live2D output parameters the Live2D item model uses. You can also finetune the smoothing values used by the respective parameters of the Live2D item here.
The "Return to default when not pinned" option will make the item return the "ParamAngleX/Y/Z" parameter values to their default when the item is not pinned. That way, you could for example prevent glasses from rotating/deforming when they're not actually pinned to your model.
If you activate "Use normal hotkey triggers", the normal key combinations set to trigger hotkeys in the item's VTS model can be used to actually trigger the hotkeys when the item is loaded.
Finally, you can adjust the "Dragging Physics". Dragging physics will push the physics inputs left/right when the item is being dragged or is moving because it is attached to the main model.


Dragging physics can also be used for normal VTube Studio models. You can set that up in their physics settings tab.

If you have activated "Use normal hotkey triggers" for the Live2D item, you can use the normal keyboard trigger keys set up in the VTube Studio model of the item to trigger them, as long as they are related to expressions or animations.
You can trigger hotkeys that have been set up in the Live2D item via hotkeys of your main model. Only hotkeys that meet the following requirements can be triggered this way:
- Hotkey must be of type "Expression", "Remove Expressions" or "Animation (idle/normal)"
- Hotkey must have a name set. The name cannot be empty.
You can set up a hotkey in your model of type "Live2D Item Action":
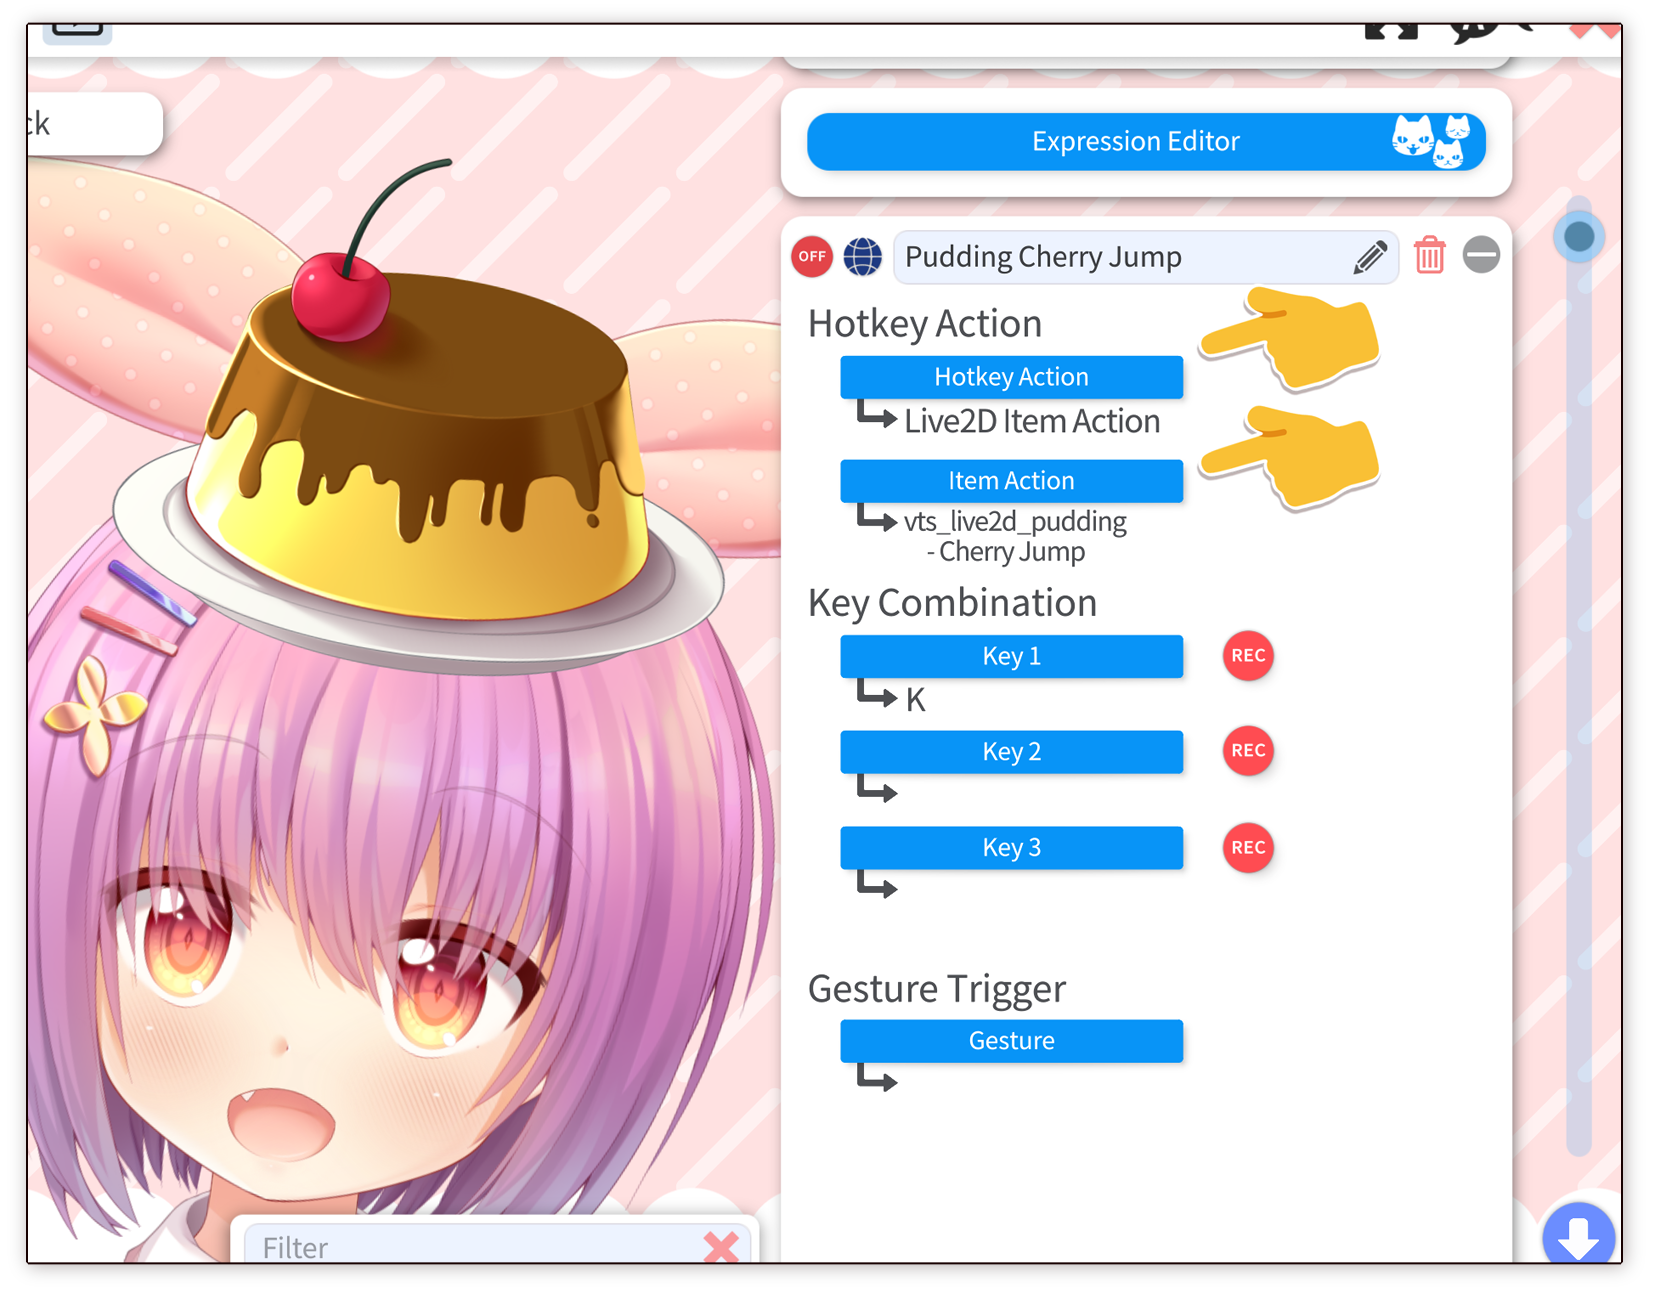
When you set up a hotkey of that type, it will show you a list of all hotkeys in all your Live2D items. So when you trigger that hotkey, it will trigger the selected hotkey in the selected item (but only if it is loaded).
If you have multiple instances loaded of the same Live2D item, this will trigger the hotkey in all of them.
Like normal items, Live2D items can be loaded/unloaded via "Item Scene" hotkeys.
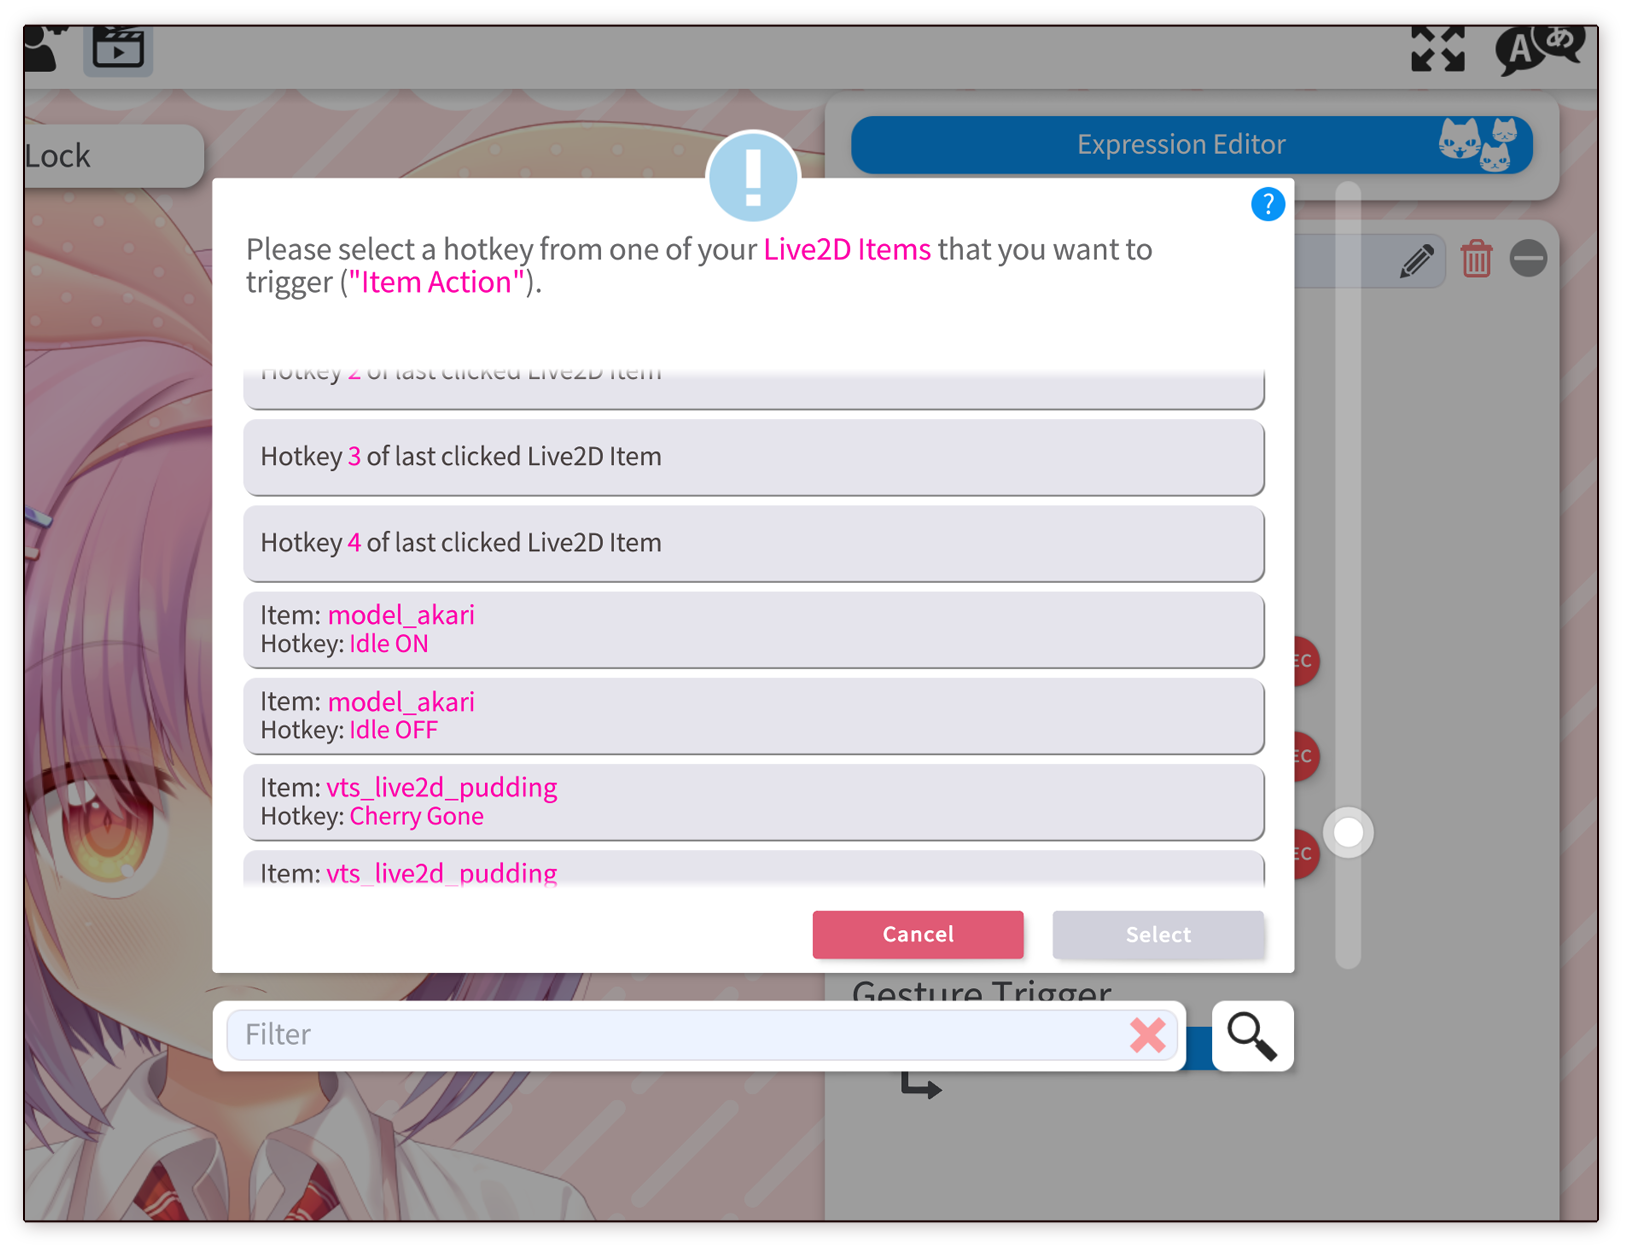
Alternatively, you can also select the options "Hotkey 1/2/3/4 of last clicked Live2D Item". Using this hotkey lets you trigger the X-th (supported) hotkey in the last clicked loaded/clicked Live2D item.
IMPORTANT: Many artists do not want their art to be modified and it can be considered rude to do so. If you re-color parts of your model and you didn't draw it yourself, please make sure you have the permission of your artist.
For some items, you may want to change the colors of certain parts. For example, you could change the skin color of assets that contain hands to match the skin color of your model. Other uses include re-coloring drinks, glasses and much more.
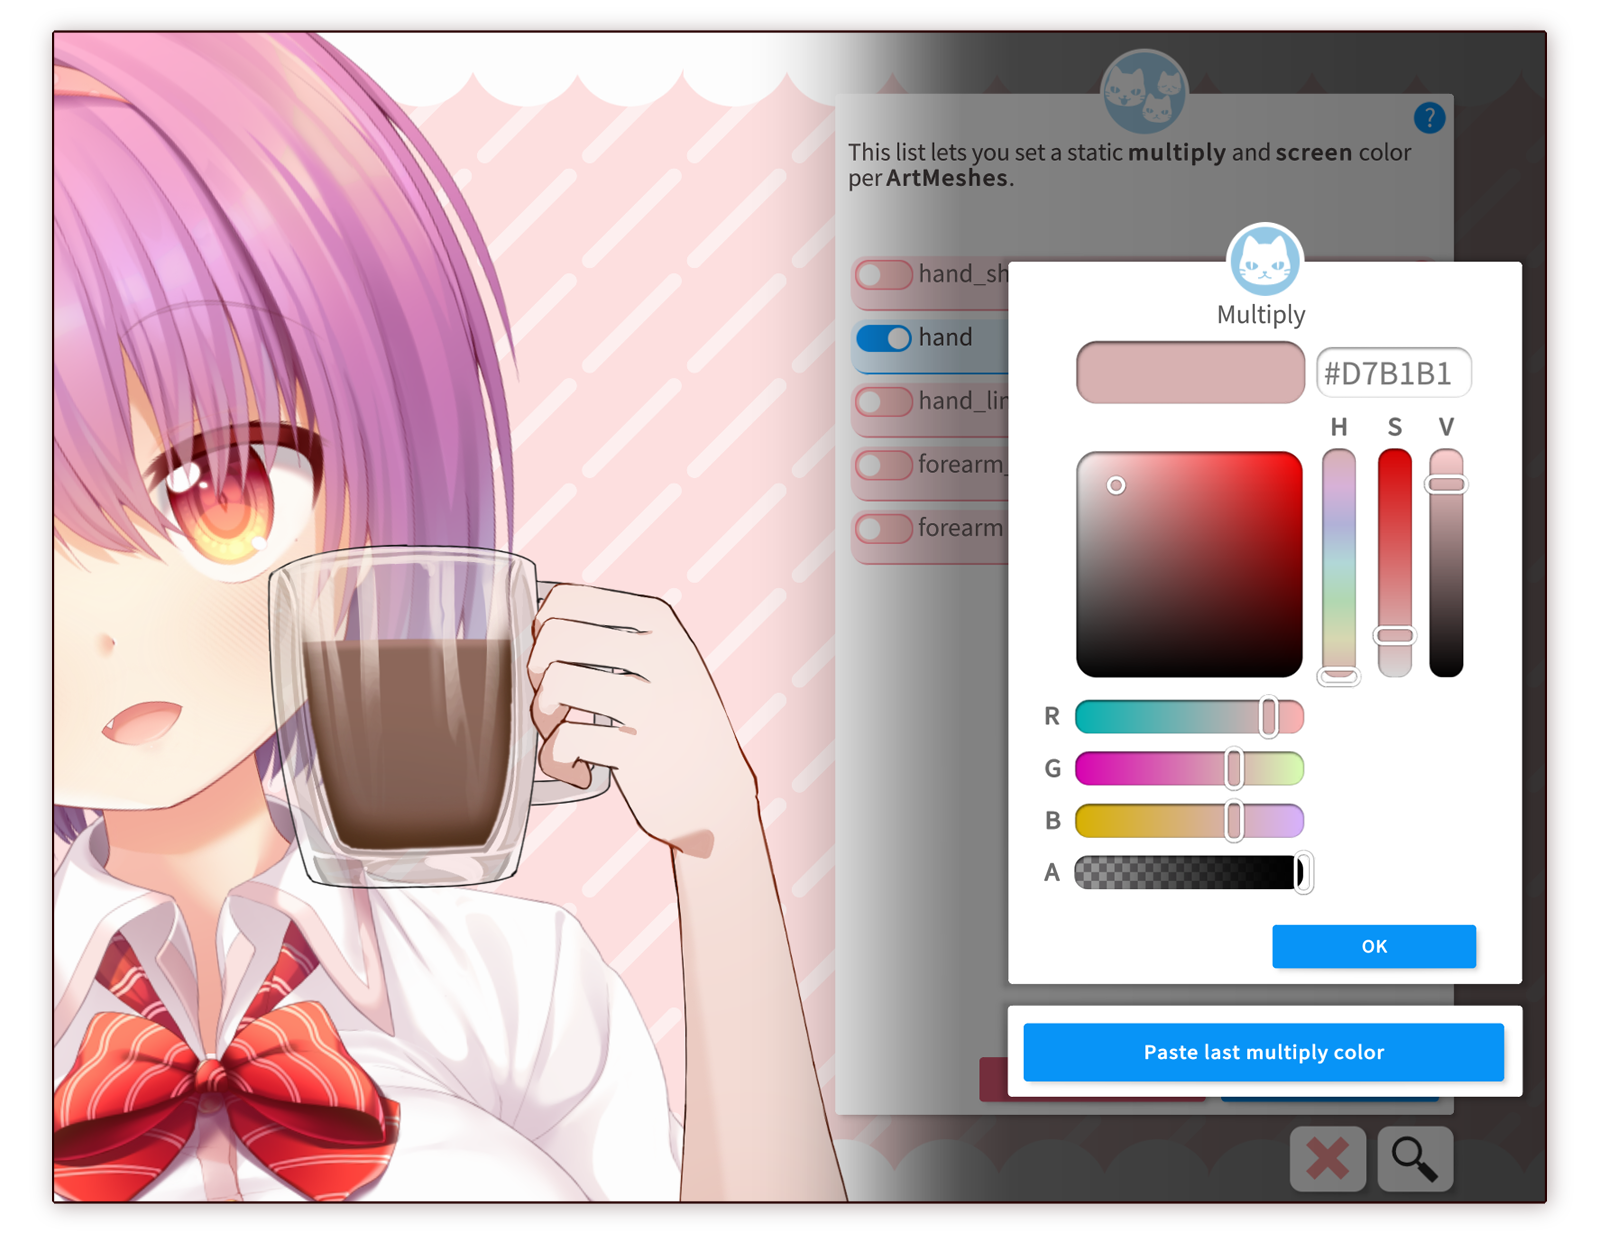
To that, load the Live2D item you want to re-color using the "Configure/Finetune Live2D Item" button. After pressing "Save", you will see this prompt:
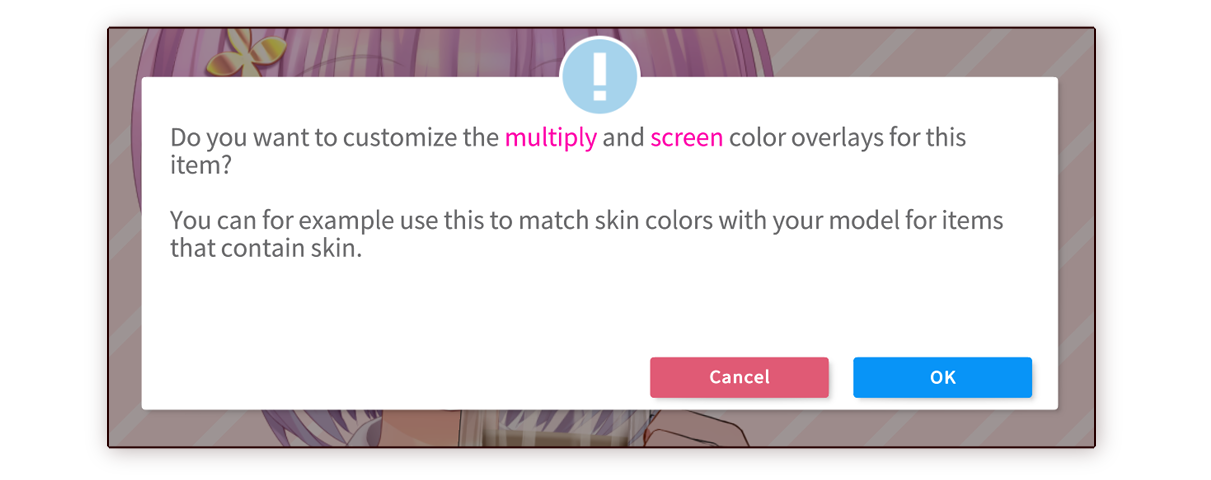
From there, you can now configure a "multiply" and "screen" color per ArtMesh. When applying these settings, they will be saved into your model file so whenever you next load that item, it will have your color settings applied (including when you load the Live2D Item via Item Hotkeys).
Setting "Screen" and "Multiply" overlays via normal Live2D parameters (Live2D Cubism 4.2 and up) will no longer work for the ArtMeshes you re-color using this menu.
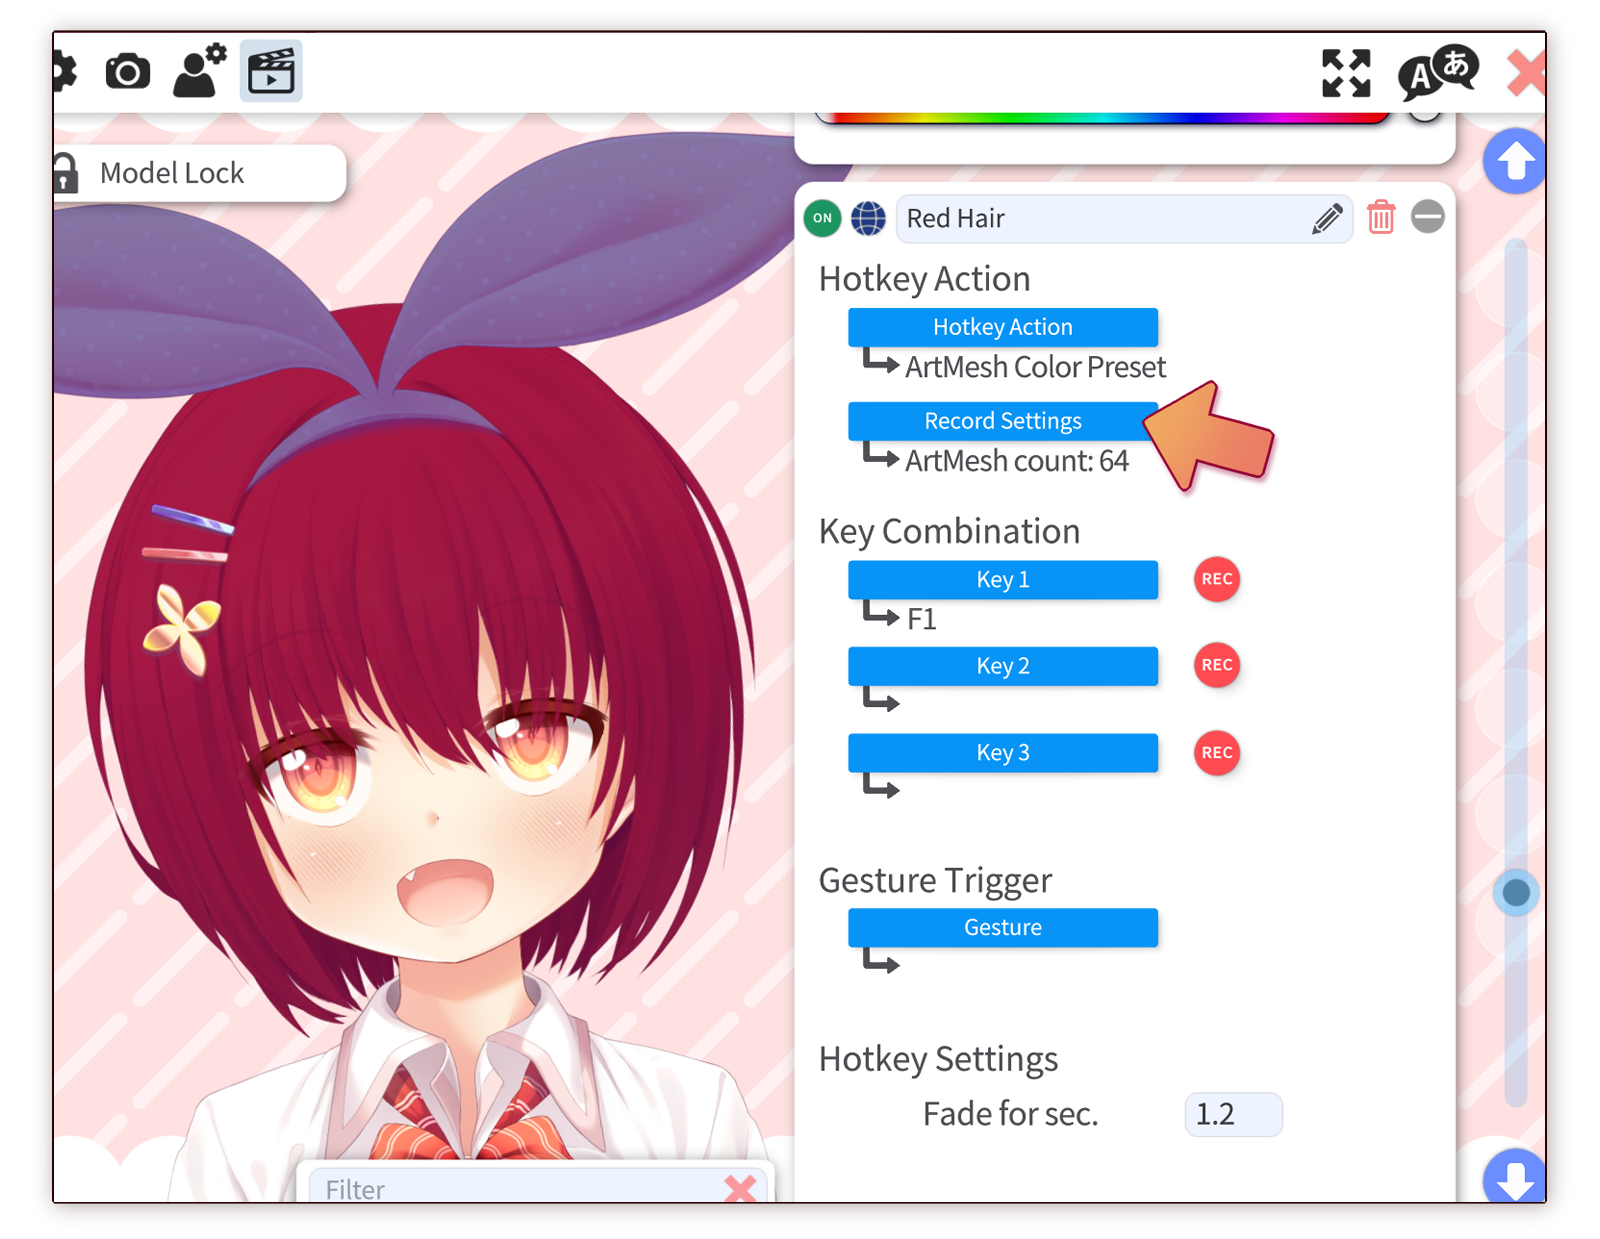
You can also use Hotkeys to load these screen/multiply color presets for any model or Live2D item in the scene. To do that, prepare your model with the ArtMesh colors you want to register, then create a new hotkey of type "ArtMesh Color Preset". Use the "Record Settings" button on the hotkey UI to record the current settings. This hotkey can then be used to load/unload that screen/multiply color preset.
You can also create a hotkey of that type with empty settings to create a hotkey that removes the currently loaded color preset for that model.
Live2D items are essentially just normal VTube Studio models.
First, load the VTube Studio model you want to set up as Live2D item. Then do all the normal setup that you would normally do for a VTube Studio model. When you're happy with how it looks, open the item menu and select the "Load current model as Live2D Item" option.
All this does is, it copies the currently loaded model's folder into the "Items" folder and loads it as Live2D item. You can then load another model and attach your new Live2D item to it.
There are no limits to what a Live2D item can be, so you could even load fully modeled Live2D models or use this to load multiple instances of your main Live2D model. However, loading multiple big/complex models will definitely freeze the app for a couple seconds when loading and having many big models active in the scene may not work well unless you have a strong CPU.
Generally, it's recommended to only use simple Live2D models as Live2D items, such as glasses, drinks, ears, etc.
Specifically, it is recommended to not use Live2D texture map resolutions higher than 1024 or 2048 for your Live2D items to ensure a smooth experience.
This can happen for assets like glasses. You may want to drag them in the center, but there is no ArtMesh in the center of the glasses: the model is invisible there. Because of that, VTube Studio can only drag the model when you click on the lenses of the glasses.
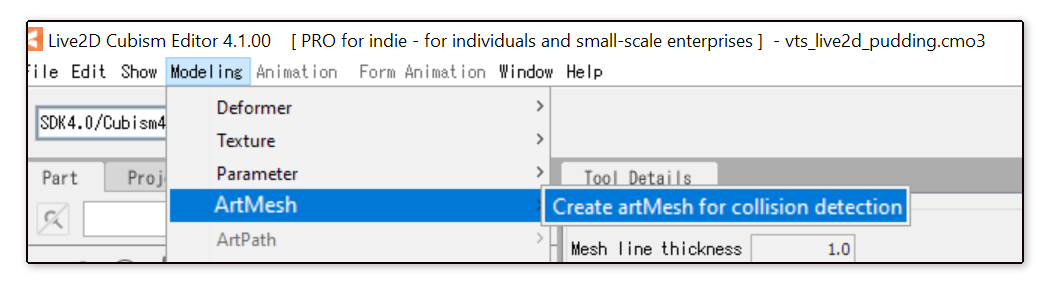
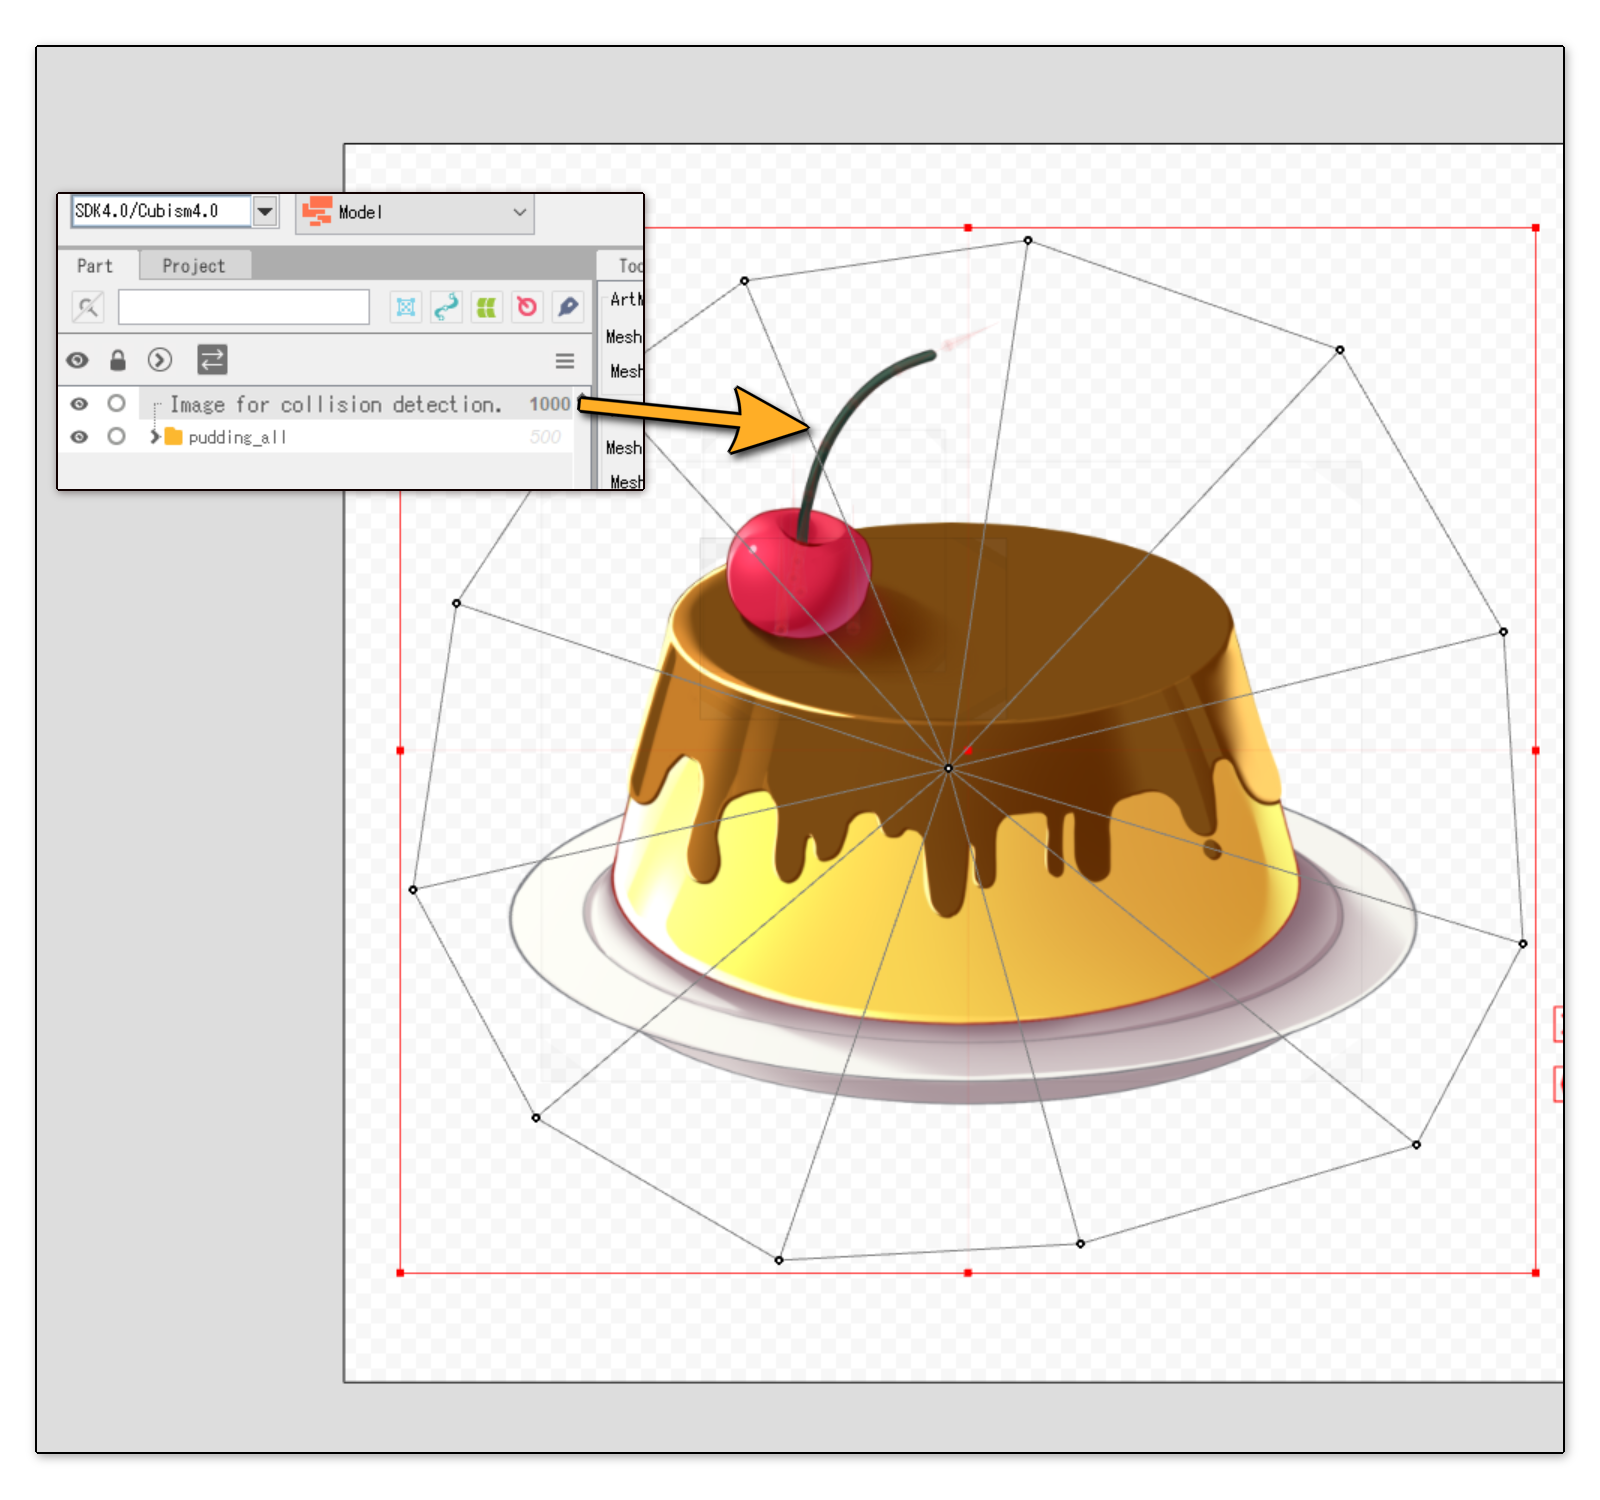
A simple fix is to add a "hitbox" ArtMesh to the Live2D model. That's an ArtMesh which is invisible and only used for click detection.
To create one, choose "Modeling" => "ArtMesh" => "Create ArtMesh for collision detection". You may then edit the created transparent ArtMesh into any shape you want. You can also create multiple "hitbox" ArtMeshes. Just make sure they are properly placed on the texture map when exporting the model from Live2D Cubism.
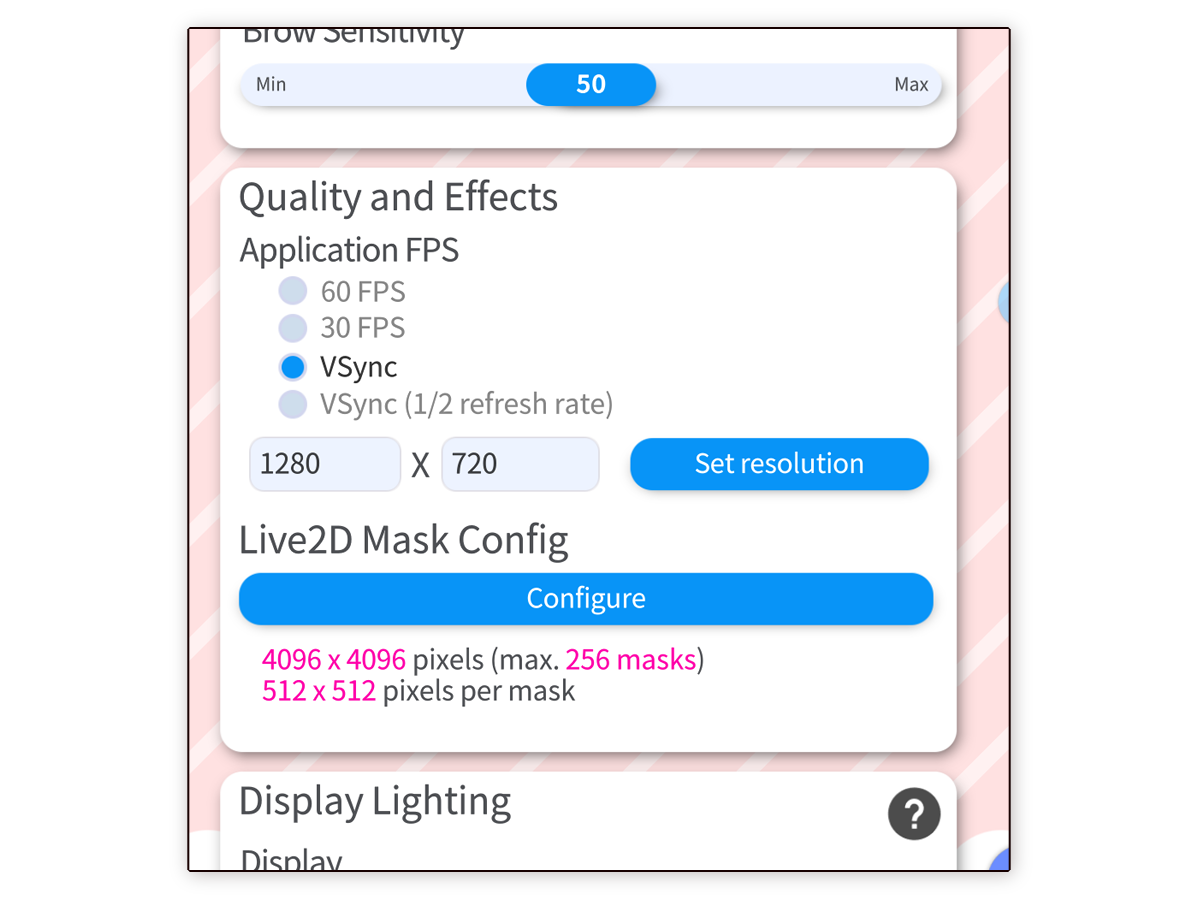
Live2D has certain limits for clipping masks. By default, 64 masks are allowed for all loaded models combined. This number can be increased by using the "Live2D Mask Config" in VTube Studio.
If you increase the number of masks, make sure the resolution per mask is high enough, otherwise some bigger masks may have blurred outlines. The setting "256 masks with 512x512 pixels per mask" is recommended.
![]() If you have any questions that this manual doesn't answer, please ask in the VTube Studio Discord
If you have any questions that this manual doesn't answer, please ask in the VTube Studio Discord![]() !!
!!
![]()
- Introduction & Requirements
- Known Issues
- Where to get models?
- Android vs. iPhone vs. Webcam
- Getting Started
- Loading your own Models
- Loading your own Backgrounds
- VTube Studio Settings
- Display Light Overlay
- Visual Effects
- Spout2 Background
- VTS Model Settings
- Expressions ("Stickers"/"Emotes")
- Animations
- Interaction between Animations, Tracking, Physics, etc.
- Streaming to Mac/PC
- Recording/Streaming with OBS
- Starting without Steam
- Starting as Admin
- Restore old VTS Versions
- NVIDIA Broadcast Face Tracker
- Google Mediapipe Face Tracker
- Tobii Eye-Tracker
- Hand-Tracking
- Lipsync
- Controlling multiple models with one Webcam or iPhone/Android device
- Connection Issues & Troubleshooting
- Taking/Sharing Screenshots
- Item System
- Live2D-Items
- Recoloring Models and Items
- Record Animations
- Multiplayer
- VNet Security
- Twitch Interaction
- Add Special ArtMesh Functionality
- Item Scenes & Item Hotkeys
- Plugins (YouTube, Twitch, etc.)
- VTube Studio Model File
- Copy config between models
- Sending data to VSeeFace
- Steam Workshop
- How to fix lag issues
- How to fix webcam issues
- Live2D Cubism Editor Communication
- FAQ
- Privacy Policy, Licensing and Further Terms