
In this project, my goal was to use the techniques and code examples presented in the Udacity course to control a car through a highway circuit a vehicle finite state machine and spline generated trajectories.
The goals / steps of this project are the following:
- Generate a Trajectory for the car to follow a lane or change lanes.
- Maintain Highway or Traffic speed
- Implement a state machine to plan the car's actions through the highway course.
- Car should drive 4.32 miles without incident.
My path planner for this project is based on the material presented in the course and the project walkthrough. The project can be broken down into two (3) main parts:
- Decomposition of the sensor fusion data
- The Vehicle state machine, and
- The trajectory generator.
Using the provided sensor fusion data of every other car driving in the same direction, we check the traffic conditions. Using Frenet coordinates s & d makes decomposing the data incredibly simple. Where s is the path along the highway and d is the perpendicular distance along the lane. Where the d coordinate of the left lane (closest to opposing traffic) is 0 - 4 meters, middle lane is 4 - 8 meters, and 8 - 12 meters is the right lane.
- Where is the other car located (in Frenet coordinates - s and d)? What is the other's velocity?
- Is there a car in front of me? and how close? is there a another car closer ?
- Is there a car near me on the left? or right?
- How many cars are in the lanes besides me on the horizon (150 meters)? (used for a lane decision cost function)
The Vehicle state is broken up into 3 parts:
- Keep Lane
- Lane change Left
- Lane change right
This behavior follows the current lane and follows the following rules:
- If there is no car ahead of me, maintain the highway speed of 49.0 - 49.6 mph.
- If the closest car ahead of me is by less than 28 meters but further than 5 meters, set change lane flag to true, and match the car's speed. Using a reasonable braking force, decrease speed till we match the ahead car's speed.
- If the closest car ahead of me is by less than 10 meters but further than 5 meters, set change lane flag true, and match the car's speed. Using a stronger braking force, decrease speed till we match the ahead car's speed.
Using the first two (2) rules, the behavior is pretty robust, I added the last rule to deal with sudden changes, for example car ahead slams on the break, or nearby lane cuts into our lane.
When the lane change flag is risen, and the nearby lane is clear of traffic, i.e. no cars nearby (left or right) for - 15m to 30m. Transition into the desired lane. During lane change, set flag changing lane to true. The changing lane flag, is used to prevent multiple lane changes without completing the initial lane change. Once the car reaches the desired lane, the flag is set false and the car is free to change its lane if it requires.
When both lanes are free of traffic, the total sum of cars ahead (up to 150m) is used as a cost function to determine which lane is more ideal to change into, which is generally what I would do if I was trying to navigate traffic, I would look for the emptier lane.
Using Frenet coordinates of the desired lane and current lane, and the spline tool, I was able to generate smooth, jerk minimal trajectories. Similar to the project walkthrough, using the car's current location (in x-y coordinates) and desired location ahead in s coordinates and the desired d coordinate [left lane d is 2m, middle lane is 6m and right lane is 10m] which is converted to its x-y coordinates. We can use the spline tool to create a smooth trajectory from current position to desired position. Before creating the spline the x-y coordinates are shifted to the car's framework, similar to the rotation-shift used in MPC controller. Once the spline is generated, we resample it using our desired position and speed, and provide those values to our simulator.
In regard to the vehicle state affecting the trajectory generation, because we use a lane variable to determine our desired location, regardless if we stay in the same lane or switch lanes, the general algorithm stays the same. The only difference is the S coordinate spacing ahead we fit our spline to. If the car is in the keep lane state, the spacing is 25m along the S axis, or if we are switching lanes the spacing is 30 meters ahead. The smaller spacing keeps the car closer to the center of the lane, while the larger spacing generates smoother trajectories while switching lanes.
From the simulator runs, generally I can get 20 - 30 miles without incident, to the max of 64 miles.

The following image is an example of Lane Change Left

The following image is an example of Lane Change Right

The following image is an example of a Keep lane and maintain speed

The following is a YouTube video of a trial run.
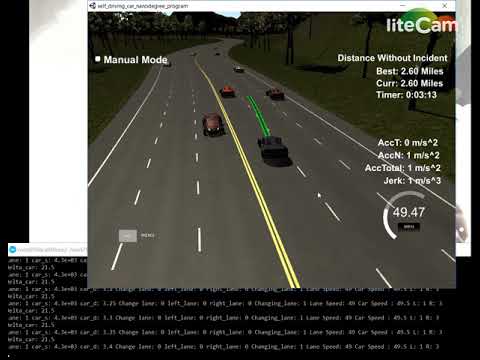
Currently I’m using binary cost functions to determine the car's behavior, [0 or 1; if 1 do this..]. However, from multiple runs, I can see that combinations of various factors lead to unwanted behavior. For my future improvements, I would like to generate multiple spline generations (using a gaussian distribution of desired location) and calculate cost based on:
- Jerk minimization
- Acceleration minimization
- Collision prevention and select the best trajectory. Currently even though I specify a smooth lane change, depending on the curvature of the lane, the car experiences different accelerations, some higher than 10 m/s, which would be prevented if the cost function was calculated on the spline.
Self-Driving Car Engineer Nanodegree Program
You can download the Term3 Simulator which contains the Path Planning Project from the [releases tab (https://github.com/udacity/self-driving-car-sim/releases).
In this project your goal is to safely navigate around a virtual highway with other traffic that is driving +-10 MPH of the 50 MPH speed limit. You will be provided the car's localization and sensor fusion data, there is also a sparse map list of waypoints around the highway. The car should try to go as close as possible to the 50 MPH speed limit, which means passing slower traffic when possible, note that other cars will try to change lanes too. The car should avoid hitting other cars at all cost as well as driving inside of the marked road lanes at all times, unless going from one lane to another. The car should be able to make one complete loop around the 6946m highway. Since the car is trying to go 50 MPH, it should take a little over 5 minutes to complete 1 loop. Also the car should not experience total acceleration over 10 m/s^2 and jerk that is greater than 10 m/s^3.
Each waypoint in the list contains [x,y,s,dx,dy] values. x and y are the waypoint's map coordinate position, the s value is the distance along the road to get to that waypoint in meters, the dx and dy values define the unit normal vector pointing outward of the highway loop.
The highway's waypoints loop around so the frenet s value, distance along the road, goes from 0 to 6945.554.
- Clone this repo.
- Make a build directory:
mkdir build && cd build - Compile:
cmake .. && make - Run it:
./path_planning.
Here is the data provided from the Simulator to the C++ Program
["x"] The car's x position in map coordinates
["y"] The car's y position in map coordinates
["s"] The car's s position in frenet coordinates
["d"] The car's d position in frenet coordinates
["yaw"] The car's yaw angle in the map
["speed"] The car's speed in MPH
//Note: Return the previous list but with processed points removed, can be a nice tool to show how far along the path has processed since last time.
["previous_path_x"] The previous list of x points previously given to the simulator
["previous_path_y"] The previous list of y points previously given to the simulator
["end_path_s"] The previous list's last point's frenet s value
["end_path_d"] The previous list's last point's frenet d value
["sensor_fusion"] A 2d vector of cars and then that car's [car's unique ID, car's x position in map coordinates, car's y position in map coordinates, car's x velocity in m/s, car's y velocity in m/s, car's s position in frenet coordinates, car's d position in frenet coordinates.
-
The car uses a perfect controller and will visit every (x,y) point it recieves in the list every .02 seconds. The units for the (x,y) points are in meters and the spacing of the points determines the speed of the car. The vector going from a point to the next point in the list dictates the angle of the car. Acceleration both in the tangential and normal directions is measured along with the jerk, the rate of change of total Acceleration. The (x,y) point paths that the planner recieves should not have a total acceleration that goes over 10 m/s^2, also the jerk should not go over 50 m/s^3. (NOTE: As this is BETA, these requirements might change. Also currently jerk is over a .02 second interval, it would probably be better to average total acceleration over 1 second and measure jerk from that.
-
There will be some latency between the simulator running and the path planner returning a path, with optimized code usually its not very long maybe just 1-3 time steps. During this delay the simulator will continue using points that it was last given, because of this its a good idea to store the last points you have used so you can have a smooth transition. previous_path_x, and previous_path_y can be helpful for this transition since they show the last points given to the simulator controller with the processed points already removed. You would either return a path that extends this previous path or make sure to create a new path that has a smooth transition with this last path.
A really helpful resource for doing this project and creating smooth trajectories was using http://kluge.in-chemnitz.de/opensource/spline/, the spline function is in a single hearder file is really easy to use.
- cmake >= 3.5
- All OSes: click here for installation instructions
- make >= 4.1
- Linux: make is installed by default on most Linux distros
- Mac: install Xcode command line tools to get make
- Windows: Click here for installation instructions
- gcc/g++ >= 5.4
- Linux: gcc / g++ is installed by default on most Linux distros
- Mac: same deal as make - [install Xcode command line tools]((https://developer.apple.com/xcode/features/)
- Windows: recommend using MinGW
- uWebSockets
- Run either
install-mac.shorinstall-ubuntu.sh. - If you install from source, checkout to commit
e94b6e1, i.e.git clone https://github.com/uWebSockets/uWebSockets cd uWebSockets git checkout e94b6e1
- Run either
We've purposefully kept editor configuration files out of this repo in order to keep it as simple and environment agnostic as possible. However, we recommend using the following settings:
- indent using spaces
- set tab width to 2 spaces (keeps the matrices in source code aligned)
Please (do your best to) stick to Google's C++ style guide.
Note: regardless of the changes you make, your project must be buildable using cmake and make!
Help your fellow students!
We decided to create Makefiles with cmake to keep this project as platform agnostic as possible. Similarly, we omitted IDE profiles in order to ensure that students don't feel pressured to use one IDE or another.
However! I'd love to help people get up and running with their IDEs of choice. If you've created a profile for an IDE that you think other students would appreciate, we'd love to have you add the requisite profile files and instructions to ide_profiles/. For example if you wanted to add a VS Code profile, you'd add:
- /ide_profiles/vscode/.vscode
- /ide_profiles/vscode/README.md
The README should explain what the profile does, how to take advantage of it, and how to install it.
Frankly, I've never been involved in a project with multiple IDE profiles before. I believe the best way to handle this would be to keep them out of the repo root to avoid clutter. My expectation is that most profiles will include instructions to copy files to a new location to get picked up by the IDE, but that's just a guess.
One last note here: regardless of the IDE used, every submitted project must still be compilable with cmake and make./
A well written README file can enhance your project and portfolio. Develop your abilities to create professional README files by completing this free course.