This repository contains all the 3D models, PCB production files, and ESPHome software configurations to build the Desktop Air Quality Monitor featured on the channel.
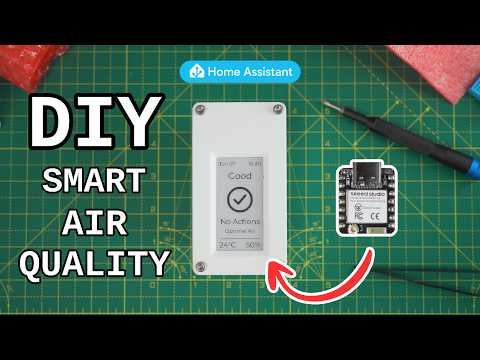
The device uses an ESP32 and the Sensirion SEN66 to track 9 different air quality metrics (PM1, PM2.5, PM4, PM10, VOCs, NOx, CO2, Temperature, and Humidity) and displays them on an e-ink screen. It connects natively to Home Assistant and the firmware is written using ESPHome.
3D Files can be found on Printables, on Makerworld, or in the releases tab.
If you just want the final ready-to-go files, check the Releases tab on the right!
All source files are organized into their respective folders:
- 📂
enclosure/-.stepand.3mfmodels for the custom 3D printed housing. - 📂
PCB/- Full KiCad project files and theproductionfolder containing the Gerbers, BOM, and CPL files required for manufacturing. - 📂
firmware/- ESPHome.yamlconfiguration files, plus precompiled bin files that you can flash directly to your board (Minimal and Home Assistant versions available).
This project comes in 2 flavours - the minimal "just get the sensor working" variant, and the full variant that uses a custom PCB and a 3D printed housing.
To build this version, you will need:
- Sensirion SEN66
- Seeed XIAO ESP32-C6 microcontroller
- A JST-GH to Dupont cable to connect them
Assemble by connecting the 3V, GND, SDA and SCL pins as shown in the video.
Method A: "As Fast As Possible" (No Coding Required)
- If you plan to use the device with Home Assistant, download
Firmware_minimal_with_Home_Assistant_bins.zip, if you plan to use it standalone useFirmware_minimal_air_sensor_bins.zipfrom the Releases tab on the right side of this page. - Plug your ESP32 (C3, C5, C6, or S3) into your computer via USB.
- Using a Web Serial compatible browser (like Chrome or Edge), go to web.esphome.io.
- Click "Connect", select your board's COM port, and upload the
.binfile that matches your specific ESP32 model. - Connect to the device's fallback Wi-Fi network to add it to your home network!
Method B: Do this if you already have Home Assistant (or want to customise your setup)
- Open the
Softwarefolder and grab the relevant.yamlconfig file. Copy its contents. - Paste it into your ESPHome Builder dashboard.
- Edit your Wi-Fi credentials, encryption keys, and anything else you want to try.
- "Install" to compile and flash directly to your board.
To build this version, you will need:
- Sensirion SEN66
- Seeed XIAO ESP32-C6 microcontroller
- 2.13" e-ink Monochrome Display (Note: this MUST be monochrome, the current PCB design DOES NOT WORK with colour epaper)
- Custom epaper driver board PCB (see below)
- 4x M3 size heat set inserts. I used Ruthex.
- 4x M3 bolts for the front + 1x M3 bolt to keep the PCB in place in the enclosure. CNC Kitchen sell these.
- A cable to connect the SEN66 to the board
- I used a stemma cable, cut it in half, and soldered it to a JST-GH 1.25mm pre-crimped cable.
- Alternatively if you will use the dupont headers on the board you can buy premade cables like these (note this cable won't attach to the stemma convenience connector on the PCB!)
I designed the PCB to be manufactured and assembled by JLCPCB. The ordering process is shown in the video. JLCPCB also offer 3D Printing Services through JLC3DP, so you could have the enclosure made too if you dont have a 3D printer, and they also offer CNC machining services through JLCCNC, if you wanted to make one from metals for a super unique finish.
- Head to the Releases tab and download the
PCB_fabrication_files.zip. - Upload the Gerber zip to JCLPCB.
- Enable PCBA (PCB Assembly) to have the tiny SMD components soldered for you.
- Upload the BOM and positions from the zip file.
- Order and wait for the goods to arrive.
Download the 3D_Files.zip from the Releases tab and print the enclosure.
- The
.3mffile is pre-configured and ready to print. - The
.stepfile is provided if you want to modify the housing in any way.
Same method as the Method B: firmware steps above. The yaml, images, and extra code for the display and air algorithm is provided for you in the firmware/The Everything Bagel folder, but you'll need to compile it yourself in ESPHome Builder or the ESPHome CLI.
If you are connecting this to Home Assistant and want the UI dashboard card shown in the video, you will need to install HACS (Home Assistant Community Store) and download the Air Quality Card by KadenThomp36. The thresholds and algorithms in my aqi_algo.h match the WHO 2021 recommendations also used by this card, so the recommendations shown on the physical display on this Air Quality device should match those on this card/dashboard.
Patreon for anyone interested, so I can continue making projects like this. Thanks!
Some of the links on this page are affiliate links and help support these projects at no cost to you.