Repository navigation
Measured terrain
For exact terrain shapes, use the Toolbox to export a heightmap, edit it in an image or 3D editor, then import it again. The Toolbox does not have a general terrain brush with numeric X/Z placement.
For the standard Redux HG2 files created by these tools:
| Measurement | Value |
|---|---|
| One terrain zone | 1280 × 1280 m |
| Height samples per zone | 256 × 256 |
| Horizontal sample spacing | 5 m |
| One stored height unit | 0.1 m |
| A 2 × 2 zone map | 2560 × 2560 m, with a 512 × 512 height image |
Examples:
- 100 m between sample positions = 20 sample intervals.
- A 10 m rise over 100 m is a 10% grade, about 5.7°.
- A stored HG2 height of 1000 represents 100 m. In the lossless 16-bit PNG, that value is 8000: PNG value = HG2 height × 8.
These are sample positions, not image DPI. Keep the image's pixel dimensions unchanged.
Use an image editor that preserves 16-bit grayscale PNG data and supports numeric selections, guides and flips.
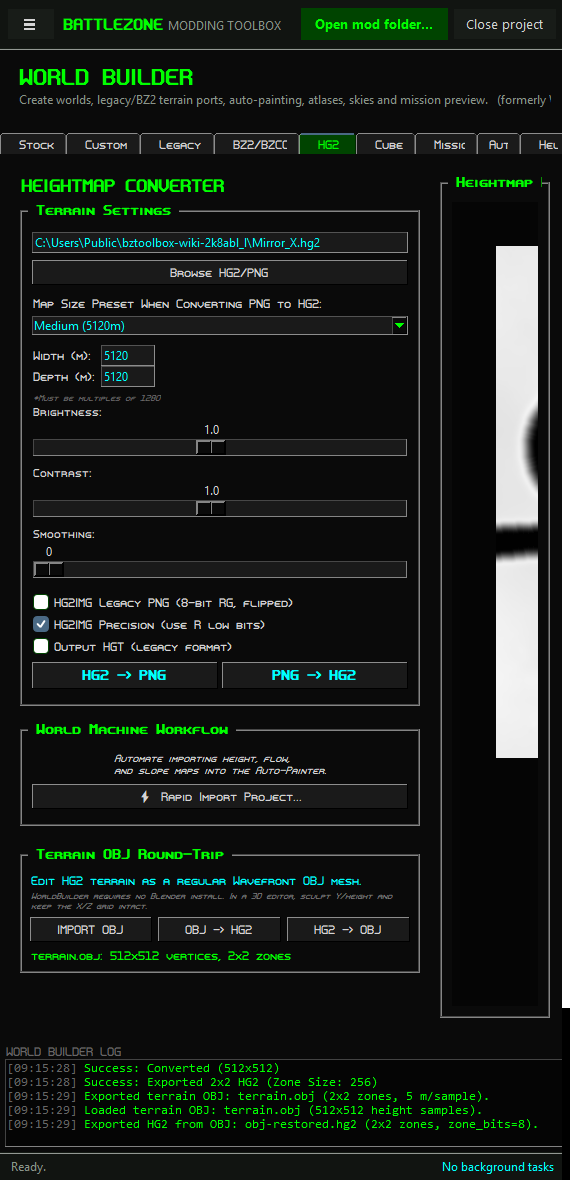
- Open World & Terrain → World Builder → HG2 Management.
- Click Browse HG2/PNG and load the original
.hg2. This also loads its zone counts. - Turn HG2IMG Legacy PNG (8-bit RG, flipped) off. Leave Output HGT (legacy format) off.
- Keep Brightness: 1.0, Contrast: 1.0 and Smoothing: 0.
- Click HG2 -> PNG. It writes
<name>_edit.pngbeside the source. - Edit that PNG. Keep it 16-bit grayscale and keep its dimensions. Save a copy if you want to preserve the export.
- In the same World Builder session, click Browse HG2/PNG and load the edited PNG. Loading a PNG keeps the zone counts from the HG2 you loaded first.
- Check the same switches and slider values, then click PNG -> HG2. The result is
<png-name>_export.hg2beside the PNG. - Load that result and check it. Copy it into the world folder under the terrain name expected by your TRN.
Load the original HG2 first. In v0.1.29, the visible Map Size Preset, Width (m) and Depth (m) fields are not wired to the zone counts used by PNG conversion. Do not rely on those fields to size a fresh PNG import. The loaded HG2's dimensions are the tested route.
For a 512 × 512 image:
- X reflection pairs column
cwith511 - c. - Z reflection pairs row
rwith511 - r. - A half-turn pairs
(c, r)with(511 - c, 511 - r).
For X symmetry, copy columns 0–255, flip the copy horizontally, and place it at columns 256–511. Use an exact-size selection and no scaling. For four matching quarters, also repeat the operation across the rows.
The mirror seam falls between samples. A 512-sample row spans 511 intervals: 2555 m between its first and last samples, within a nominal 2560 m world. Do not assume image-edge coordinates, the sample midpoint and the mission's world centre are interchangeable.
PNG row direction is also different from the north-up mission display. Use an asymmetric landmark to check orientation before aligning mission objects to an edited image.
- In World Builder → HG2 Management, load the
.hg2with Browse HG2/PNG. - Under Terrain OBJ Round-Trip, click HG2 -> OBJ and choose a destination.
- Open the OBJ in your 3D editor. The exported mesh uses X/Z for the horizontal grid and Y for height, with distances in metres. Check your editor's import-axis settings.
- Use numeric selection and height tools to edit the terrain. Keep every vertex's exported X/Z position intact. Do not subdivide, decimate, remesh, rotate or scale the grid.
- Export an OBJ, preserving its coordinates. Back in the Toolbox, click IMPORT OBJ and inspect the preview and reported dimensions.
- Click OBJ -> HG2 and save the result.
The OBJ is centred for editing; its coordinates are not the mission's absolute coordinates. Changing Y is supported. Moving the X/Z grid to match mission coordinates breaks the round trip. An unchanged OBJ round trip was checked to preserve every height sample.
For a point (x, z) and a chosen symmetry centre (cx, cz), the planning formulas are:
| Operation | Partner position |
|---|---|
| X reflection | (2*cx - x, z) |
| Z reflection | (x, 2*cz - z) |
| Half-turn | (2*cx - x, 2*cz - z) |
For example, around (1280, 1280), a half-turn sends (500, 700) to (2060, 1860). Choose the centre from your actual mission/world bounds. These formulas calculate positions; the Toolbox has no general UI to enter them for mission objects. Object headings and team assignments also need separate handling.