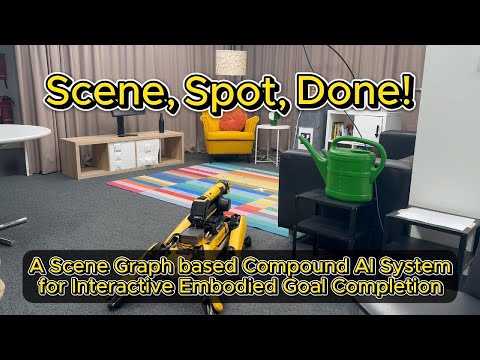
Heads up: this setup is a bit involved, since we will explain not only some example code, but also the enttire setup, including acquiring the point clouds, aligning them, setting up the docker tools and scene graphs and so on and so forth. So bear with me here. In case u run into issues, don't hesitate to leave an issue or just send me an email :)
Set the environment variable LSARP to the path of the L-SARP folder. Just to make sure we're all on the same page ... I mean path ;) Example:
export LSARP=/home/cvg-robotics/zeno_ws/L-SARP/- Create a virtual environment:
python3 -m venv venv source venv/bin/activate - Install required packages:
pip install -e .
We need two point clouds for the scene understanding: a low resolution point cloud captured by Spot (autowalk) and a high resolution one captured through a 3D lidar scan with e.g. the 3D Scanner App (iOS)
Update the configuration file (configs/config.yaml):
pre_scanned_graphs:
  low_res: '<low_res_name>' # Name for the low-resolution scan (acquired during autowalk with spot)
high_res: '<high_res_name>' # Name for the high-resolution scan (acquired through 3D lidar scan with e.g. Ipad)- Position Spot in front of the AprilTag and start the autowalk (control spot to walk around the office, point cloud gets captured in the meantime)
- Zip the resulting data and unzip it into
$LSARP/data/autowalk/- The point cloud should be at:
$LSARP/data/autowalk/<low_res_name>.walk/point_cloud.ply
- The point cloud should be at:
- Use the 3D Scanner App (iOS) to capture the point cloud
- Ensure the fiducial is visible during the scan
- Export (with the 3D Scanner APP):
- All Data as a zip file.
- Point Cloud/PLY file with "High Density" enabled and "Z axis up" disabled.
- Unzip the "All Data" into $LSARP/data/prescans/ and copy the PLY file into this folder as well.
# Make it executable (only need to do this once)
chmod +x setup_scripts/align_pointclouds.sh

# Run the script
./setup_scripts/align_pointclouds.sh
The script will:
- Read scan names from config.yaml
- Create required directories if needed
- Copies the low resolution point cloud data to $LSARP/data/point_clouds/<low_res_name>.ply
- Copies the high resolution point cloud data to $LSARP/data/prescans/<high_res_name>/pcd.ply
- Run point cloud alignment
- Save aligned results to
$LSARP/data/aligned_point_clouds/
# Make the script executable
chmod +x setup_scripts/setup_mask3d.sh

# Run the script
./setup_scripts/setup_mask3d.sh
The script will:
- Set up Mask3D repository and download the checkpoint that we want to use
- Pull and run the Mask3D Docker container
- Renames the high-resolution point cloud (pcd.ply) to mesh.ply (required for Mask3D)
- Processes mesh.ply and create a semantic instance segmentated mesh (mesh_labeled.ply)
- Copies certain files to the correct location for further processing by the repo
- YoloDrawer: Required for drawer interactions in the scene graph.
- OpenMask: Required for
search_all_drawers.py. - GraspNet: Required for
gs_grasp.pyand openmask feature extraction
Refer to the Spot-Compose repository documentation for Docker downlaod and setup.
NOTE If u plan on using the graspnet Docker, make sure to run this one first, and the other containers afterwards! Othwerwise the container won't work...No idea why
Just to make sure we don't run into pathing/ import issues
export PYTHONPATH=$LSARP:$LSARP/source:\$PYTHONPATHIn case you are using the OpenMask functionalities:
python3 $LSARP/source/utils/openmask_interface.pyCreate a hidden .environment.yaml file to store sensitive configurations:
spot:
  wifi-network: <password>
  spot_admin_console_username: <username>
  spot_admin_console_password: <password>
  wifi_default_address: 192.168.50.1
  wifi_password: <password>
  nuc1_user_password: <password>
api:
  openai:
key: <api key>This is an over view for workstation networking. Again, this information can also be found in the Spot-Compose repository.
On the workstation run
$LSARP/shells/ubuntu_routing.sh(or $LSARP/shells/mac_routing.sh depending on your workstation operating system).
Short Explanation for the curious: This shell script has only a single line of code: sudo ip route add 192.168.50.0/24 via
In this command:
192.168.50.0/24 represents the subnet for Spot.
<local NUC IP> is the IP address of your local NUC device.
If you're working with multiple Spot robots, each Spot must be assigned a distinct IP address within the subnet (e.g., 192.168.50.1, 192.168.50.2, etc.). In such cases, the routing needs to be adapted for each Spot. For example:
sudo ip route add 192.168.50.2 via <local NUC IP>First, ssh into the NUC, followed by running ./robot_routing.sh to configure the NUC as a network bridge. Note that this might also need to be adapted based on your robot and workstation IPs.
python3 -m source/scripts/my_robot_scripts/light_switch_demo.pypython3 -m source/scripts/my_robot_scripts/scene_graph_demo.pypython3 -m source/scripts/my_robot_scripts/search_swing_drawer_dynamic.py@misc{engelbracht2024spotlightroboticsceneunderstanding,
title={SpotLight: Robotic Scene Understanding through Interaction and Affordance Detection},
author={Tim Engelbracht and René Zurbrügg and Marc Pollefeys and Hermann Blum and Zuria Bauer},
year={2024},
eprint={2409.11870},
archivePrefix={arXiv},
primaryClass={cs.RO},
url={https://arxiv.org/abs/2409.11870},
}
This project is licensed under the MIT License.