The video was well explained and easy to follow. The code is up on Github here:
https://github.com/Hujjat/css3gen if you get stuck.
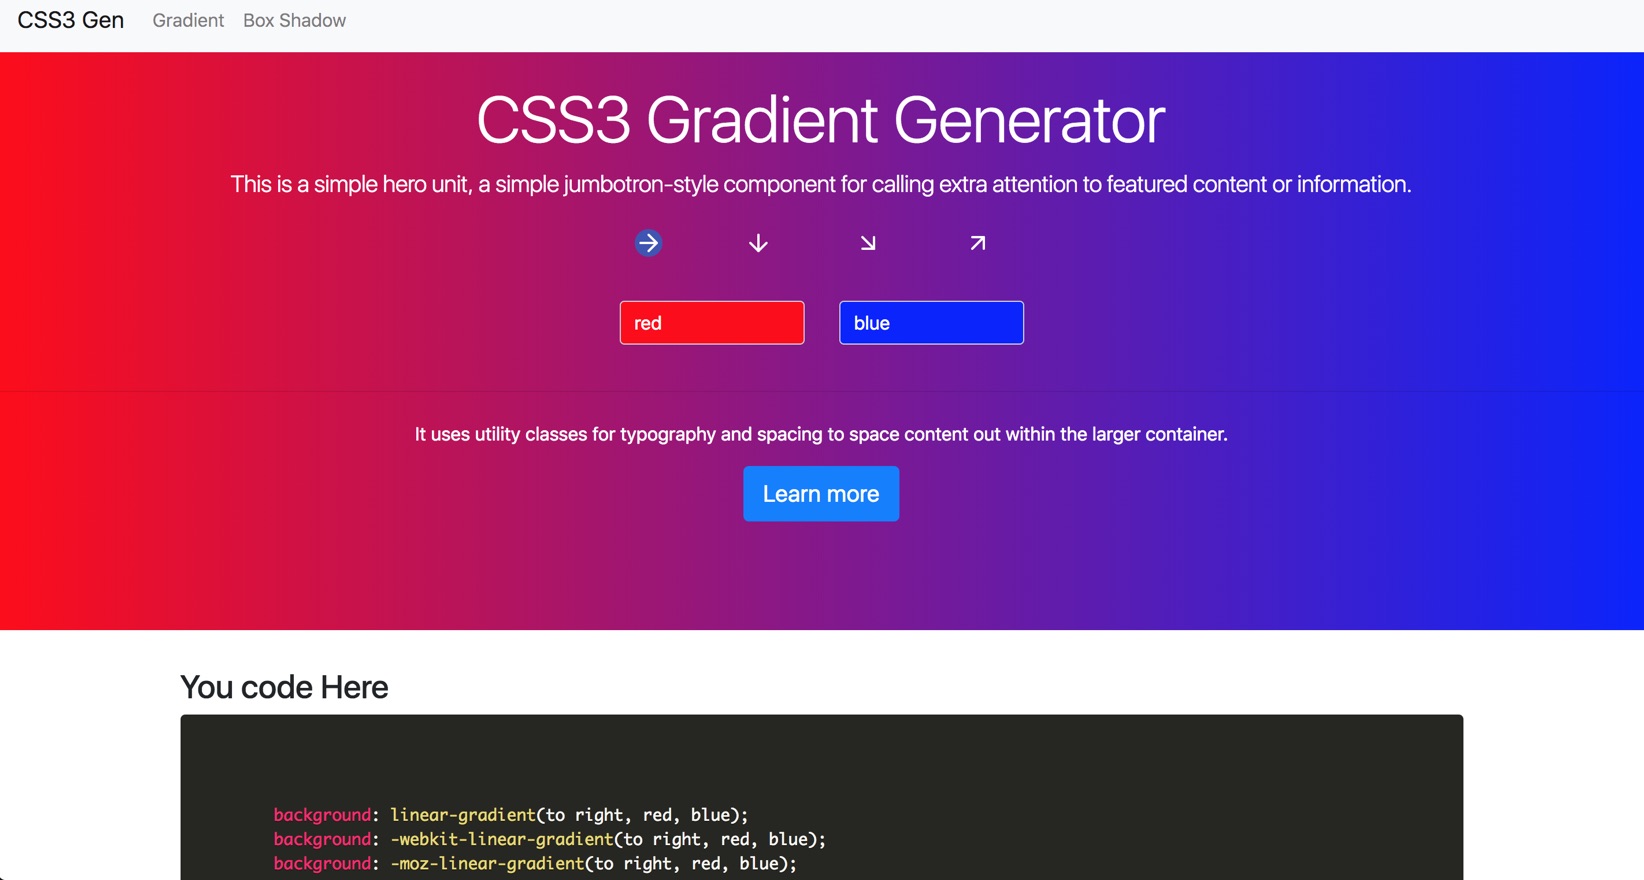
A demo of the live site lives here:
https://www.youtube.com/redirect?redir_token=h-KihiUZSVcEdmN_HCvESM1Txud8MTU0MDI2MzQyM0AxNTQwMTc3MDIz&q=https%3A%2F%2Fhujjat.github.io%2Fcss3gen-demo&event=video_description&v=BR1ocCDjcRE
These two links are in the show notes of the YouTube video.
Starting at:
https://www.youtube.com/watch?v=BR1ocCDjcRE&index=1&list=PLB4AdipoHpxa0blRQrCg6sCZk8g2nt5Qg
MacBook-Pro:~ jasonmayberry $ ng new css3gen --routing
MacBook-Pro:Desktop jasonmayberry $ cd css3gen/
MacBook-Pro:css3gen jasonmayberry $ npm install bootstrap jquery popper.js --save
"styles": [
  "src/styles.css",
  "./node_modules/bootstrap/dist/css/bootstrap.min.css"
],
"scripts": [
  "./node_modules/jquery/dist/jquery.slim.min.js",
  "./node_modules/popper.js/dist/umd/popper.min.js",
  "./node_modules/bootstrap/dist/js/bootstrap.min.js"
],Bootstrap not applied
https://youtu.be/Qh3rlm3tFrM?t=38
FIX:
Must also add to "angular.json" in the "options: object":
"styles": [
  "src/styles.css",
  "./node_modules/bootstrap/dist/css/bootstrap.min.css"
],
"scripts": [
  "./node_modules/jquery/dist/jquery.slim.min.js",
  "./node_modules/popper.js/dist/umd/popper.min.js",
  "./node_modules/bootstrap/dist/js/bootstrap.min.js"
]
MacBook-Pro:css3gen jasonmayberry $ ng g c navbar
From: https://getbootstrap.com/docs/4.0/components/navbar/
<nav class="navbar navbar-expand-lg navbar-light bg-light">
 <a class="navbar-brand" href="#">Navbar</a>
 <button class="navbar-toggler" type="button" data-toggle="collapse" data-target="#navbarSupportedContent" aria-controls="navbarSupportedContent" aria-expanded="false" aria-label="Toggle navigation">
   <span class="navbar-toggler-icon"></span>
 </button>
 <div class="collapse navbar-collapse" id="navbarSupportedContent">
   <ul class="navbar-nav mr-auto">
     <li class="nav-item active">
       <a class="nav-link" href="#">Home </a>
     </li>
     <li class="nav-item">
       <a class="nav-link" href="#">Link</a>
   </ul>
 </div>
</nav> <app-navbar></app-navbar>
MacBook-Pro:css3gen jasonmayberry $ ng g c gradient
MacBook-Pro:css3gen jasonmayberry $ ng g c boxshadow
Had to replace:
<div class="jumbotron text-center" [style.background-image]="'linear-gradient(' + to right +',' + this.color1 + ',' + this.color2 + ')'">
from the video with:
<div class="jumbotron text-center" [style.background-image]="'linear-gradient(' + this.to_right +',' + this.color1 + ',' + this.color2 + ')'">
and add this to "gradient.component.ts" :
to_right = 'to right';
This project was generated with Angular CLI version 6.2.3.
Run ng serve for a dev server. Navigate to http://localhost:4200/. The app will automatically reload if you change any of the source files.
Run ng generate component component-name to generate a new component. You can also use ng generate directive|pipe|service|class|guard|interface|enum|module.
Run ng build to build the project. The build artifacts will be stored in the dist/ directory. Use the --prod flag for a production build.
Run ng test to execute the unit tests via Karma.
Run ng e2e to execute the end-to-end tests via Protractor.
To get more help on the Angular CLI use ng help or go check out the Angular CLI README.