This repository contains the coursework project for students enrolled in the Programming Applications and Programming Languages (M30235) and User Experience Design and Implementation (M32605) modules at the University of Portsmouth.
The Student Union has an e-commerce website, which you can access via this link: shop.upsu.net
In short, your task is to recreate the same website using Flutter. You must not start from scratch, as you need to begin by forking the GitHub repository that contains the incomplete code. The getting started section of this document will explain more. Once you have completed the application, you will submit the link to your forked repository on Moodle for assessment and demonstrate your application in a practical session. See the submission and demonstration sections for more information.

You have three options for your development environment:
- Firebase Studio (browser-based, no installation required)
- University Windows computers (via AppsAnywhere)
- Personal computer (Windows or macOS)
Below is a quick guide for each option. For more information, you can refer to Worksheet 0 — Introduction to Dart, Git and GitHub and Worksheet 1 — Introduction to Flutter.
Firebase Studio:
-
Access idx.google.com with a personal Google account
-
Create a new Flutter Workspace (choose the Flutter template in the "Start coding an app" section)
-
Once the Flutter Workspace is created, open the integrated terminal (View → Terminal) and link this project to your forked GitHub repository by running the following commands (replace
YOUR-USERNAMEin the URL):rm -rf .git && git init && git remote add origin https://github.com/YOUR-USERNAME/union_shop.git && git fetch origin && git reset --hard origin/main
This command should remove the existing Git history, initialize a new Git repository, add your forked repository as the remote named
origin, fetch the data from it, and reset the local files to match themainbranch of your forked repository. After running the above commands, open the Source Control view in Visual Studio Code and commit any local changes. This will create a commit that points to your forked repository. In the terminal you can push the commit to GitHub with:git push -u origin main
If you're unsure that you're connected to the correct repository, check the remote with:
git remote -v
This should show the URL of your forked repository (
https://github.com/YOUR-USERNAME/union_shop.gitwhereYOUR-USERNAMEis your GitHub username).
University Computers:
- Open AppsAnywhere and launch the following in the given order:
- Git
- Flutter And Dart SDK
- Visual Studio Code
Personal Windows Computer:
-
Install Chocolatey package manager
-
Run in PowerShell (as Administrator):
choco install git vscode flutter -y
Personal macOS Computer:
-
Install Homebrew package manager
-
Run in Terminal:
brew install --cask visual-studio-code flutter
After installation, verify your setup by running:
flutter doctorThis command checks your environment and displays a report of the status of your Flutter installation.
For detailed step-by-step instructions, refer to Worksheet 1 — Introduction to Flutter, which covers the complete setup process for all three options.
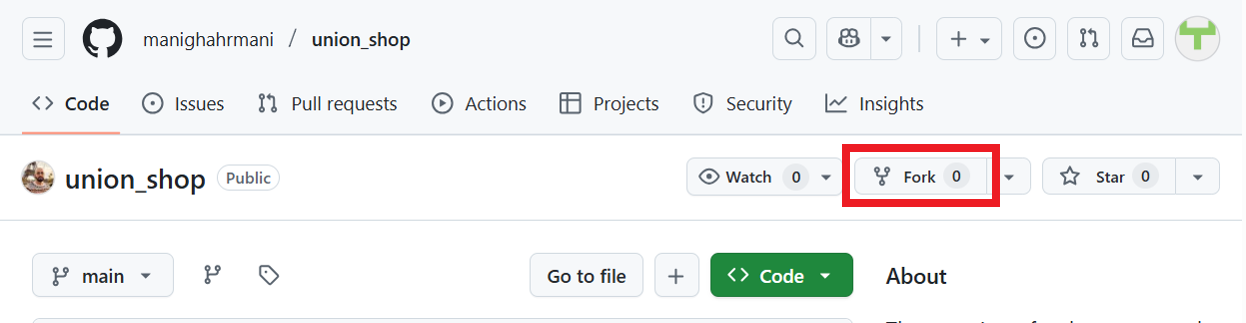
Go to the repository containing the code for the coursework and click on the fork button as shown in the screenshot: github.com/manighahrmani/union_shop/fork (Alternatively, just use this link: github.com/manighahrmani/union_shop/fork.)
Do not change anything and click on the Create fork button. You should then have a public fork of my repository with a URL like (YOUR-USERNAME replaced with your username): github.com/YOUR-USERNAME/union_shop
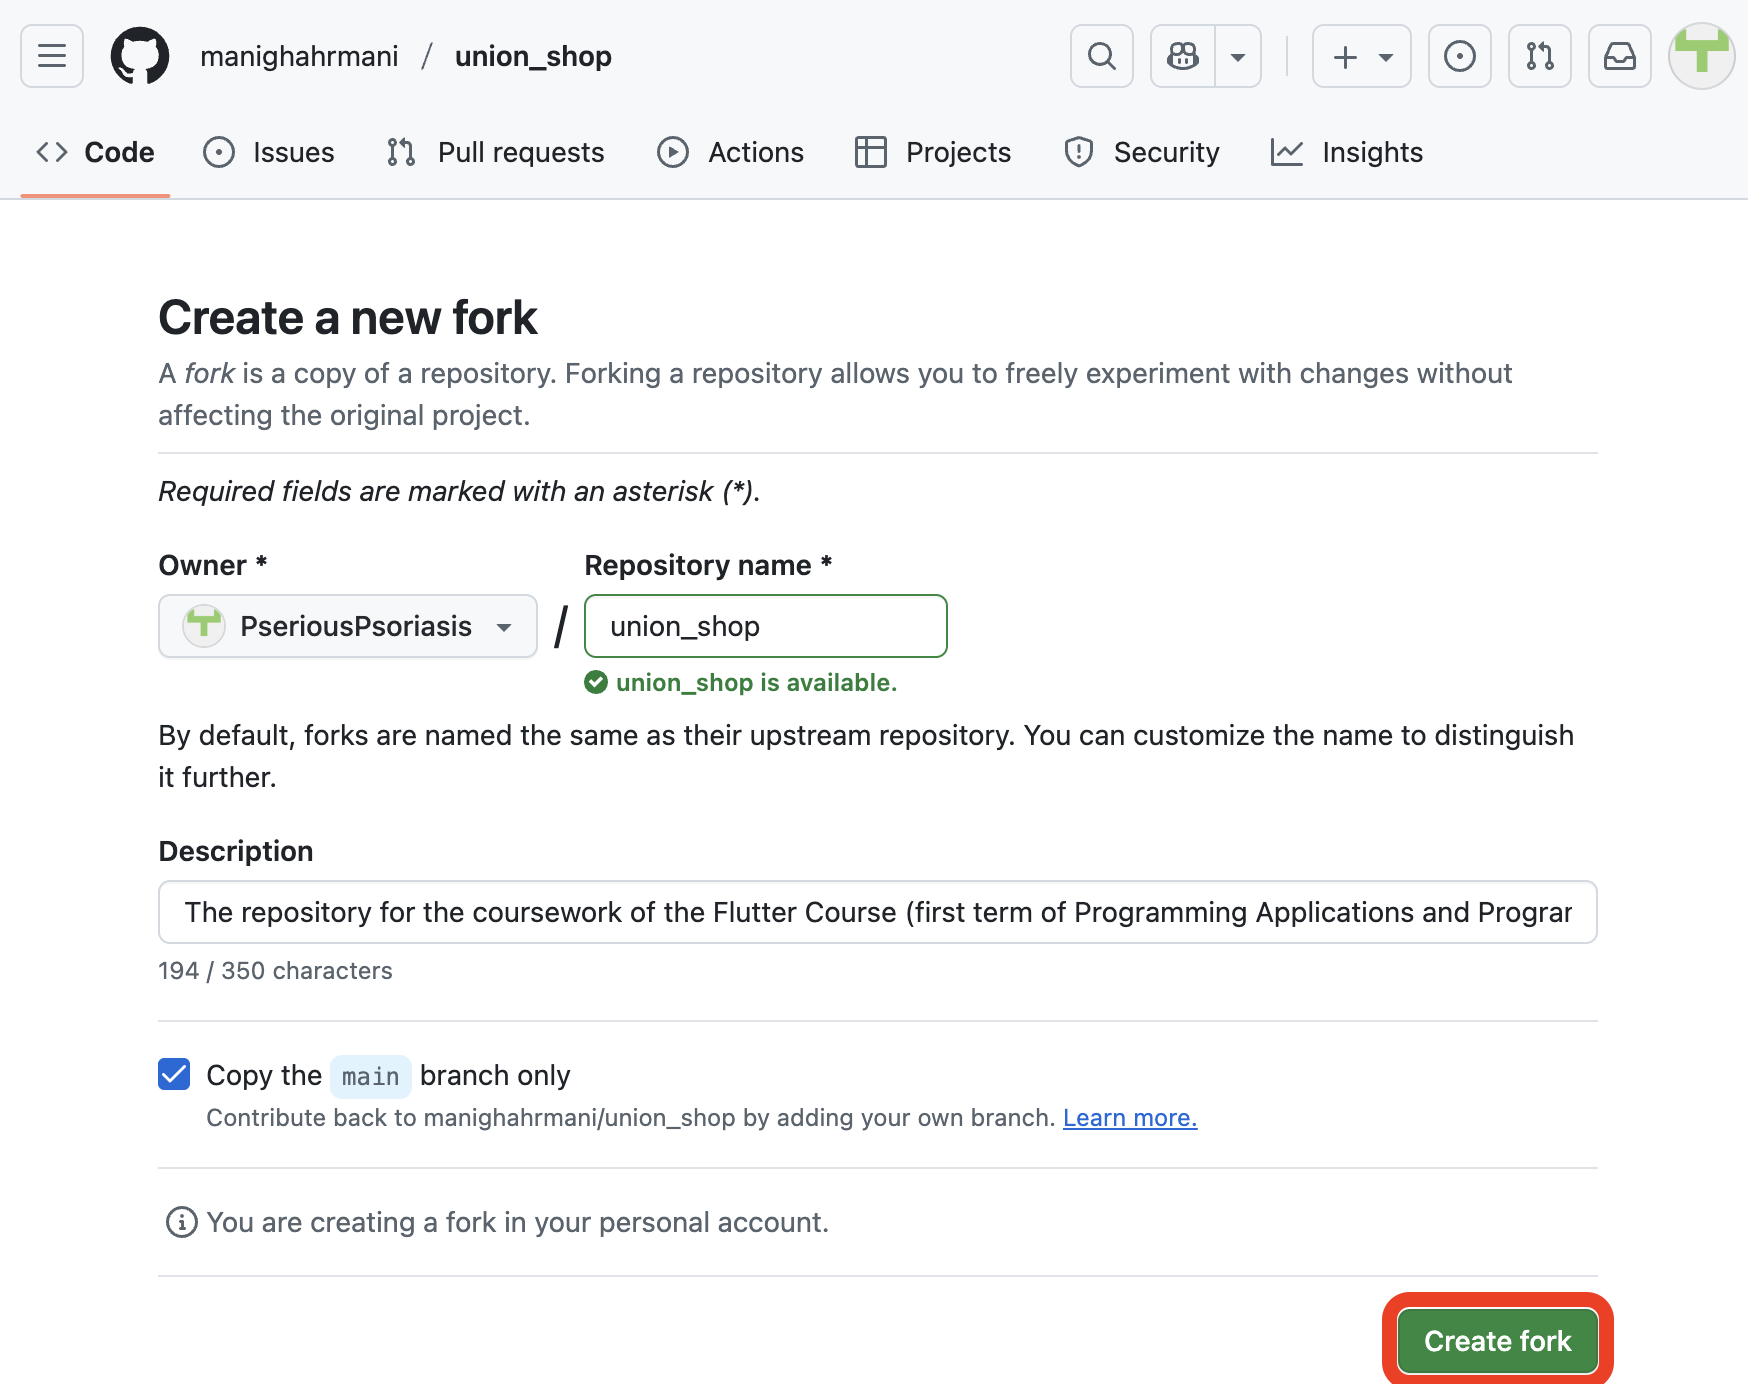
Note that the name of this created fork must be “union_shop”. If you already have a repository with this name, you need to rename it beforehand.
If you are using Firebase, access idx.google.com with a personal Google account. Create a new Flutter Workspace named union_shop (choose the Flutter template in the “Start coding an app” section). Once the Flutter Workspace is created, open the integrated terminal (View → Terminal) and link this project to your forked GitHub repository by running the following commands (replace YOUR-USERNAME in the URL):
rm -rf .git && git init && git remote add origin https://github.com/YOUR-USERNAME/union_shop.git && git fetch origin && git reset --hard origin/main This command should remove the existing Git history, initialize a new Git repository, add your forked repository as the remote named origin, fetch the data from it. It should also reset the local files to match the main branch of your forked repository. After running the above commands, open the Source Control view and commit any local changes.
Otherwise, open a terminal, change to your desired directory, and run the following commands:
git clone https://github.com/YOUR-USERNAME/union_shop.git
cd union_shop
Replace YOUR-USERNAME with your actual GitHub username.
Your editor should automatically prompt you to install the required dependencies when you open the project. If not, open the integrated terminal (open the Command Palette with Ctrl+Shift+P or Cmd+Shift+P and type "Terminal: Create New Terminal") and run the following command:
flutter pub getThis application is primarily designed to run on the web and should be viewed in mobile view using your browser's developer tools. We recommend using Google Chrome.
Select Chrome as the target device and run the application either from the main.dart file or by entering the following command in the terminal:
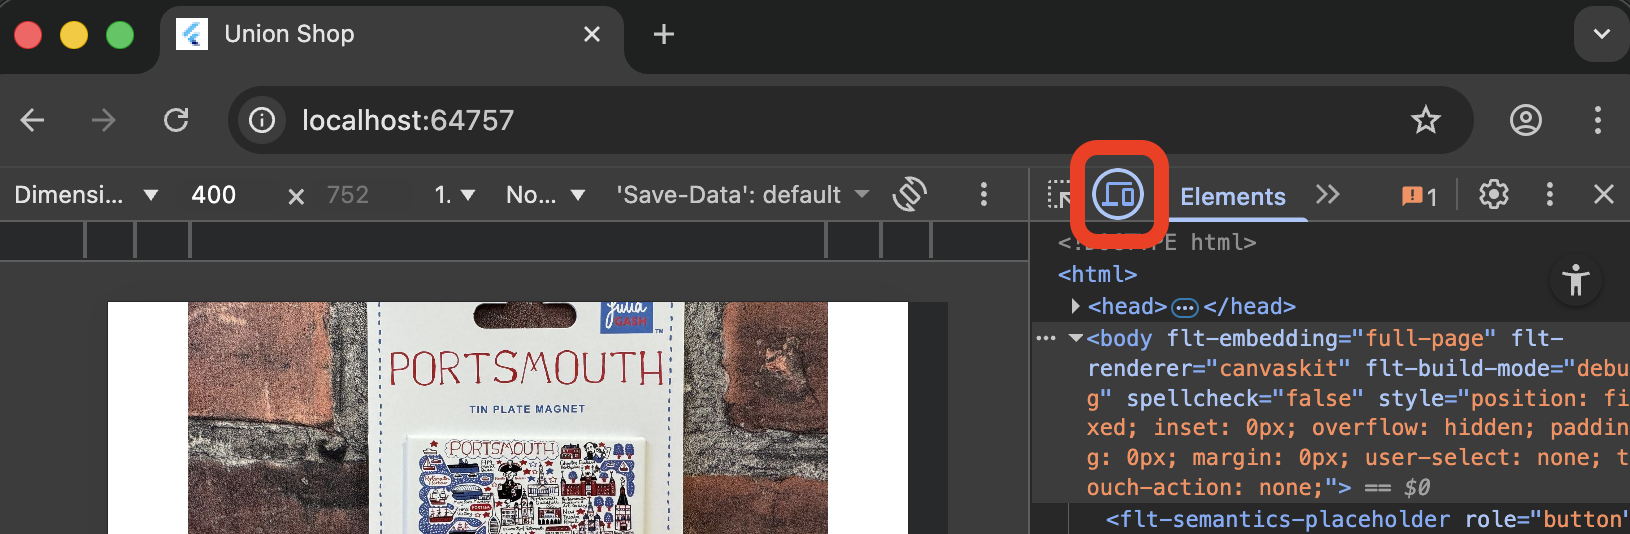
flutter run -d chromeOnce the app is running in Chrome, open Chrome DevTools by right-clicking on the page and selecting "Inspect" (or use the shortcut F12). Click the "Toggle device toolbar" button as shown in the screenshot below.
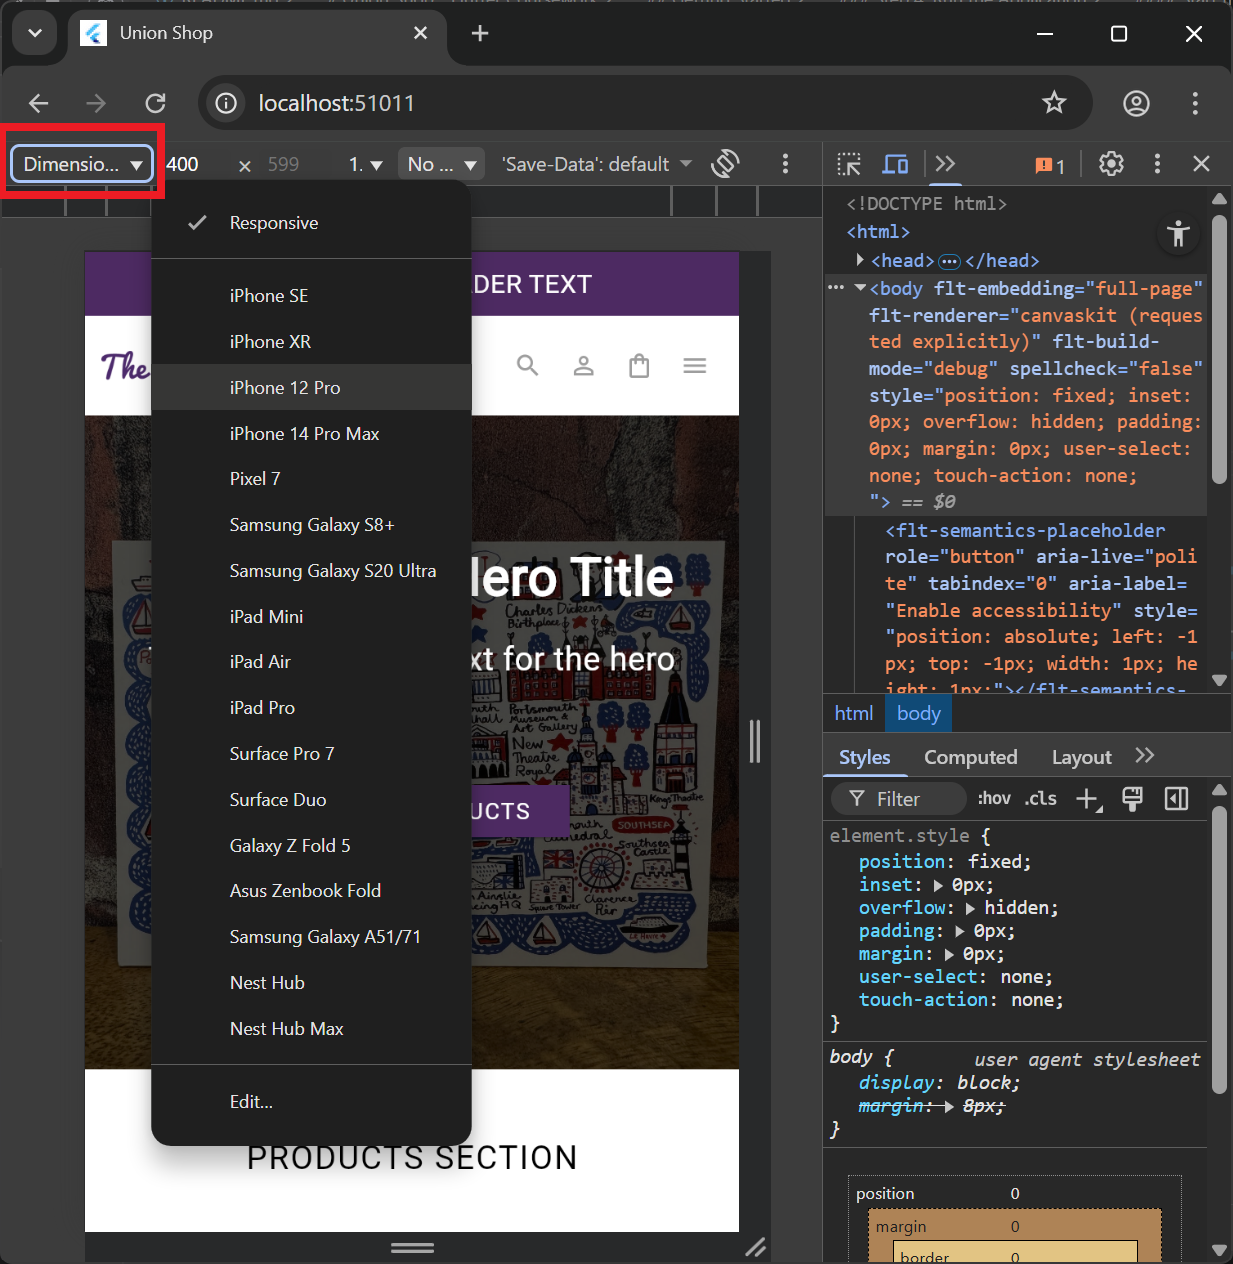
From the Dimensions menu, select a mobile device preset (e.g., iPhone 12 Pro, Pixel 5):
This assessment is worth 55% of the marks for the module's assessment item 1 (the remaining 45% comes from the weekly sign-offs). The mark for the assessment is divided into two components:
- Application (functionality) (30%): Demonstrated through a live demo during practical
- Software Development Practices (25%): Assessed through your repository
For info on the overall assessment structure, visit the Flutter Course homepage.
30% of the coursework mark comes from functionality demonstrated through a live demo during practical sessions. More information about the demo sessions is provided in the demonstration section.
Your objective is to reimplement as many features from the existing Union Shop website as you can in your forked repository using Flutter.
The table below is an almost comprehensive list of features present on the website, sorted by difficulty. Each feature has a corresponding percentage value indicating its weight in the 30% application mark and a reference link to the relevant page on the actual website.
| Feature | Description | Marks (%) | Reference |
|---|---|---|---|
| Basic (40%) | |||
| Static Homepage | Homepage layout and widgets with static content (hardcoded data* acceptable, mobile view focus) | 5% | Homepage |
| Static Navbar | Top navigation bar with menu (links do not have to work at this stage, mobile view focus) | 5% | Homepage |
| About Us Page | Static about us page* with company information (separate page from homepage) | 5% | About Us |
| Footer | Footer with dummy* links and information present in at least one page | 4% | Homepage |
| Dummy* Collections Page | Page displaying various collections of products (hardcoded data* acceptable) | 5% | Collections |
| Dummy* Collection Page | Page displaying products within one collection including dropdowns and filters (hardcoded data* acceptable, widgets do not have to function) | 5% | Collection Example |
| Dummy* Product Page | Product page showing details and images with dropdowns, buttons and widgets (hardcoded data* acceptable, widgets do not have to function) | 4% | Product Example |
| Sale Collection | Page showing sale products with discounted prices and promotional messaging (hardcoded data* acceptable, widgets do not have to function) | 4% | Sale Items |
| Authentication UI | Login/signup page with the relevant forms (widgets do not have to function) | 3% | Sign In |
| Intermediate (35%) | |||
| Navigation | Full navigation across all pages; users should be able to navigate using buttons, navbar, and URLs | 3% | All pages |
| Dynamic Collections Page | Collections page populated from data models or services with functioning sorting, filtering, pagination widgets | 6% | Collections |
| Dynamic Collection Page | Product listings of a collection populated from data models or services with functioning sorting, filtering, pagination widgets | 6% | Collection Example |
| Functional Product Pages | Product pages populated from data models or services with functioning dropdowns and counters (add to cart buttons do not have to work yet) | 6% | Product Example |
| Shopping Cart | Add items to cart, view cart page, basic cart functionality (checkout buttons should place order without real monetary transactions) | 6% | Cart |
| Print Shack | Text personalisation page with associated about page, the form must dynamically update based on selected fields | 3% | Personalisation |
| Responsiveness* | The layout of the application should be adaptive and the application should function on desktop in addition to mobile view (no need to test it on real devices) | 5% | All pages |
| Advanced (25%) | |||
| Authentication System | Full user authentication and account management (you can implement this with other external authentications like Google, not just Shop), includes the account dashboard and all relevant functionality | 8% | Account |
| Cart Management | Full cart functionality including quantity editing/removal, price calculations and persistence | 6% | Cart |
| Search System | Complete search functionality (search buttons should function on the navbar and the footer) | 4% | Search |
Below are explanations for some of the terminology used in the table:
*Pages refer to distinct screens or views in your application that users can navigate to. See line 22 of lib/main.dart or the navigateToProduct function in the same file for an example of how to define routes for different pages.
*Hardcoded data refers to data (text or images) that is directly written into your code files rather than being fetched from a database or external service. For example, you can create a list of products with an AI-generated image and text descriptions directly in your Dart code instead of retrieving them from a backend.
*Dummy data is data that is often hardcoded or (AI) generated for display or testing purposes. It is not meant to represent real-world data stored in your services.
*Responsiveness refers to the ability of your application to adapt its layout and design based on the screen size and orientation of the device it is being viewed on. Your app should primarily focus on mobile view but to achieve full marks in this section, it should also function correctly on wider screens (desktop view).
In addition to functionality, you will be assessed on your software development practices demonstrated throughout the project (worth 25% of the coursework mark). These marks are awarded after the demo based on evidence in your repository.
The table below outlines the aspects that will be evaluated and the mark (from the 25%) allocated to each:
| Aspect | Description | Marks (%) |
|---|---|---|
| Git | Regular, small, meaningful commits* to your repository throughout development; clear commit messages | 8% |
| README | A comprehensive, well-formatted and accurate README file* (delete the current README file first) | 5% |
| Testing | Tests covering all or almost all of the application; passing tests | 6% |
| External Services* | Integration and utilization of cloud services | 6% |
Below are some explanations for the terminology used in the table:
*Regular, small, meaningful commits: worksheet 2 onwards on the Flutter Course homepage have demonstrated how to use Git effectively. You need to follow the practice taught in the worksheets.
*README: Refer to worksheet 4 for guidance on writing a good README file.
*External Services refer to third-party cloud services like Firebase or Azure that your application integrates with. This could include services like user authentication, database, or hosting the application live on the web. To get marks for this, you must integrate at least two separate external services. You are only awarded marks if your README documents this integration and explains how it is used in your application (e.g., provide a live link to the website if you have hosted it).
You need to submit the link to your forked repository on Moodle before the deadline. Open the Moodle page for Programming Applications and Programming Languages (M30235) or User Experience Design and Implementation (M32605) and find the submission section titled "Item 1 - Set exercise (coursework) (CW)". See below:
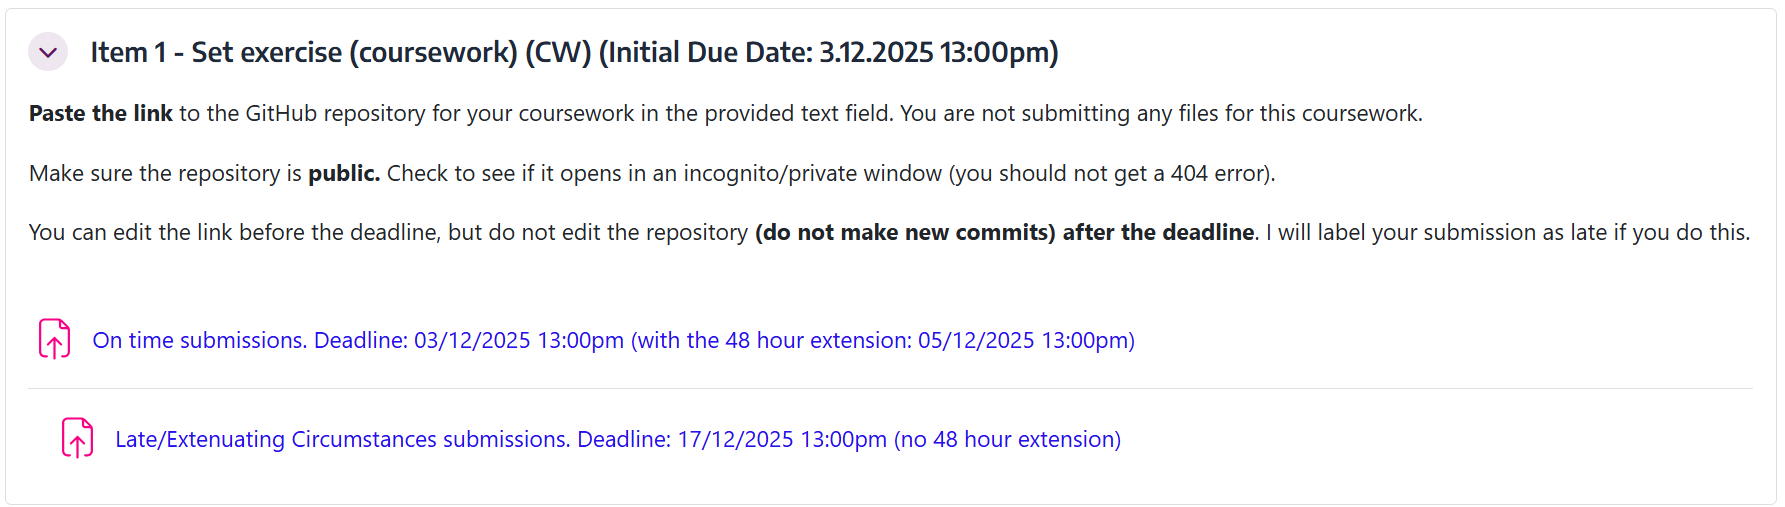
Open the On time or the Late/Extenuating Circumstances submission link and click on Add submission. There you will find an editable Online text field. Paste the link to the GitHub repository for your coursework in the provided text field and click on Save changes. You are not submitting any files for this coursework.
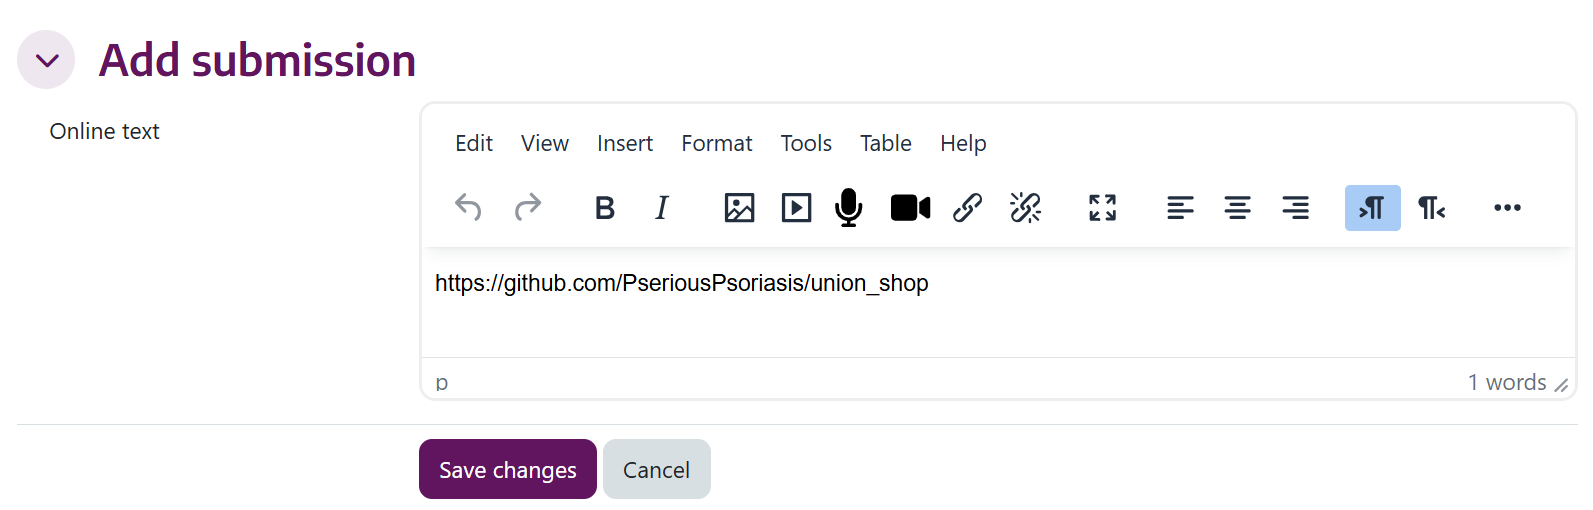
Make sure the repository is public. Check to see if it opens in an incognito/private window (you should not get a 404 error).
The demos take place during your usual timetabled practical sessions in weeks 19 or 20 (Friday 12/12/2025 or Friday 19/12/2025). More information about the demo sessions will be provided closer to the time.
During the demo, you will have up to 10 minutes to demonstrate your application to staff. You must clone your repository and run the application live. You need to be prepared to show the features you have implemented and answer any questions about your code.
This starter repository that you will fork provides a minimal skeletal structure with:
- Homepage (
lib/main.dart): A basic homepage - Product Page (
lib/product_page.dart): A single product page - Widget Tests: Basic tests for both of the above pages (
test/home_test.dartandtest/product_test.dart)
Here is an overview of the project structure after forking:
union_shop/
├── lib/
│   ├── main.dart           # Main application and homepage
│   └── product_page.dart   # Product detail page
├── test/
│   ├── home_test.dart      # Homepage widget tests
│   └── product_test.dart   # Product page widget tests
├── pubspec.yaml            # Project dependencies
└── README.md               # This file
Note that this is the initial structure. You are expected to create additional files and directories as needed to complete the coursework. You can also reorganize the project structure as you see fit.
If you have questions or encounter issues while working on this coursework, use the dedicated Discord channel to ask for help. Before posting a new question, check the existing posts to see if your question has already been answered. You can also attend your timetabled practical sessions to get face-to-face support from teaching staff.
If you are facing external extenuating circumstances that are affecting your ability to complete this coursework, you should submit an Extenuating Circumstances Form as soon as possible. You are also welcome to contact me on Discord for additional support without needing to disclose the private details of your situation.
The worksheets listed on the homepage are your primary learning resource for Flutter development. Work through these worksheets systematically as they provide the foundation you need to complete the coursework successfully. Refrain from using other online resources such as Stack Overflow, YouTube tutorials, or other websites for this coursework as they may contain outdated or incorrect information that could lead you astray.
Starting early is crucial for success in this coursework. The earlier you begin, the more time you have to learn, experiment, and seek help when needed. You should aim to work on the coursework alongside the worksheets rather than leaving everything until the end. As you complete each worksheet, implement the corresponding features in your coursework application. This approach allows you to apply what you learn immediately and build your application incrementally.
When planning your implementation, prioritize features based on the difficulty levels outlined in the marking criteria. Start with the basic features to establish a solid foundation before moving on to intermediate and advanced functionality. This strategy ensures you secure marks early and have a working application even if you run out of time for the more complex features.
Version control is an essential part of this coursework. Commit your changes regularly to Git with clear, descriptive commit messages. Each commit should represent a small, meaningful unit of work rather than large batches of changes. This practice creates checkpoints you can return to if something goes wrong and demonstrates your development process to assessors. To commit and push your changes, use the following commands:
git add .
git commit -m "Brief description of what you changed"
git push
If you make a mistake and need to revert to a previous commit, you can view your commit history with git log --oneline, find the commit hash where things were working (for example, abc1234), and revert to that commit with git reset --hard abc1234. If necessary, you can force push with git push --force. In extreme cases where your repository is completely broken and unrecoverable, you can start fresh by deleting your forked repository on GitHub (Settings → Danger Zone → Delete this repository), forking the original repository again from github.com/manighahrmani/union_shop, and cloning your fresh fork.
AI tools are valuable during development, and you are encouraged to use them. However, you must apply the best practices taught in the worksheets, particularly those covered in Worksheet 6. AI-generated code should be reviewed, understood, and adapted to fit your application properly. Blindly copying AI suggestions without understanding them will likely result in poor code quality and may not meet the requirements. Use AI as a learning aid and coding partner rather than a replacement for your own understanding and decision-making.