How do I turn a beat into an illustration? #56


|
A walkthrough of the Illustrate this moment feature — what it needs, how the prompt gets written for you, and how to make a character look the same across several pictures. |
Replies: 1 comment
|
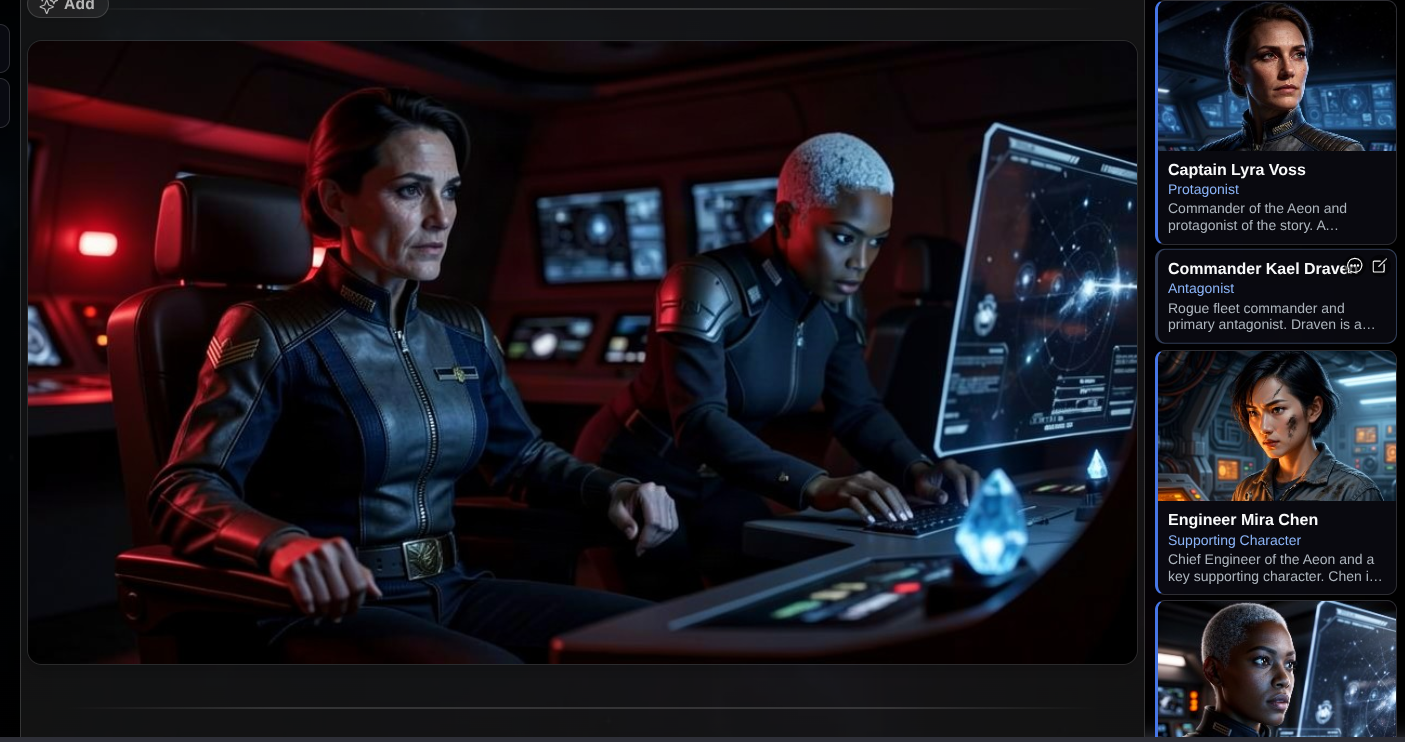
Illustrate this moment takes a beat you've already generated and turns it into a picture placed directly in your prose. You don't write an image prompt — it reads the beat and writes one for you, which you then edit.
Before you start: you need an image backend
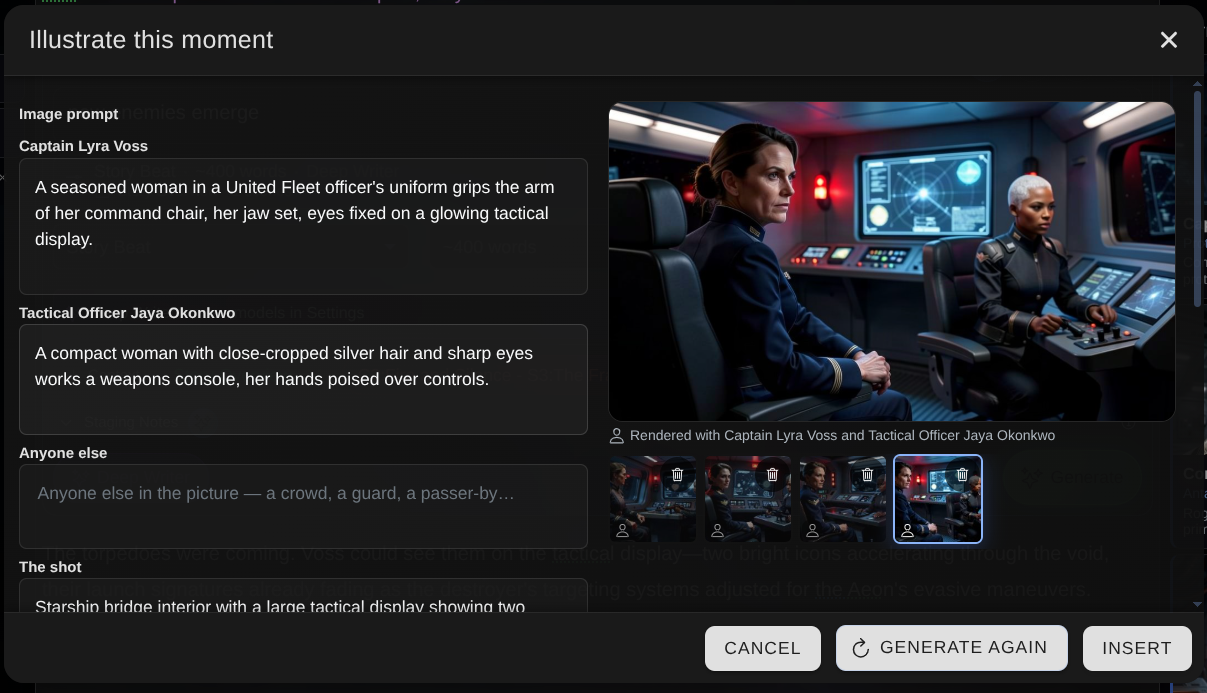
If none of those is in place, the Illustrate button is visible but disabled, and hovering it tells you why. Step 1 — Generate the beat firstIllustrate works from what the beat actually says, so generate the prose before illustrating it. The button stays disabled while a beat is still streaming, and while it has neither prose nor a prompt to read. Step 2 — Press Illustrate this momentIt's the tinted button leading the beat's header row. Step 3 — Check the prompt — it's already writtenThe app reads the beat's prose, your staging notes, and the codex entries relevant to that beat, then writes the image prompt. It comes back split into separate fields rather than one long line:
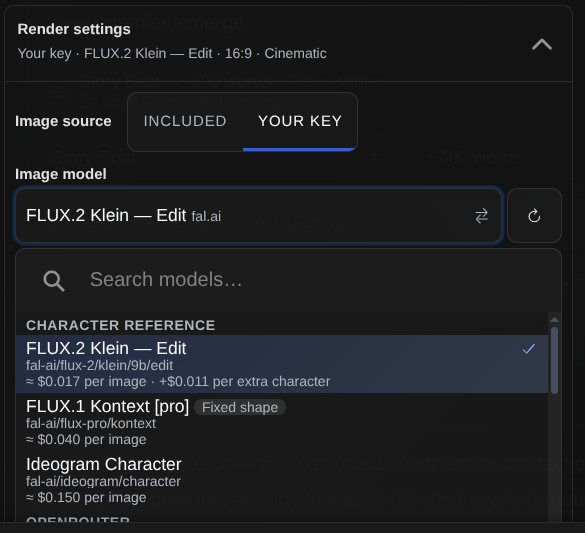
Every field is editable — type over anything you don't like. Splitting it this way means you can fix how one person looks without rewriting the whole description. Below the fields you'll see the Style and Genre lines that get applied at render time; those aren't editable text, they're settings (see step 5). If the app can't write a prompt, it says so and leaves the field empty rather than filling it with something misleading — press Try again, or just describe the moment yourself and carry on. Step 4 — Who's in this pictureUnder the prompt is a switch per character. Turning someone on or off rewrites the prompt for the new cast, keeping any wording you typed by hand. Turning a character off only excludes them — switch them back on and their description returns exactly as it was, your edits included. Step 5 — Render settings
Step 6 — Generate, then chooseEach render appears as a preview. Up to four are kept side by side (the oldest drops off), so you can compare and pick. Each finished preview tells you whether a character portrait guided it. Nothing is saved anywhere until you press Insert. Cancelling discards every preview. Step 7 — InsertThe picture lands in your prose directly after the beat, with the cursor placed underneath it so you can keep writing. The prompt is stored as the image's alt text. Later pictures for the same beat are appended after the earlier ones, so nothing you've written gets pushed around. Removing the picture from your prose also cleans up the stored file, so deleted images don't linger in your story's media. Making a character look like themselvesBy default everyone in the picture is described in words, which means the same character can come out looking different from one render to the next. To pin their appearance, a codex portrait can be sent to the image model as a reference:
Three things have to line up:
The Included image model can't accept portrait photos — that's the main reason to bring your own fal.ai key for this feature. Each reference model also takes a limited number of photos at once; anyone beyond that limit is described in words instead. Whenever a reference can't run, the dialog says which of the three reasons applies, and every finished picture records whether it used one. Where the related settings live
If something goes wrong
|

Illustrate this moment takes a beat you've already generated and turns it into a picture placed directly in your prose. You don't write an image prompt — it reads the beat and writes one for you, which you then edit.
Before you start: you need an image backend
If none of t…