The ultimate goal of the React Router practices is to create a nav bar where
you can choose Home, Stocks, and Movies components. You will be able to
see the actual components and nested components based on the borders created in
index.css. Ultimately, you will be able to navigate from one component to
another by clicking on the links in the navbar. When you click on the Movies
component you will see clickable movie titles. When you click on the titles you
will then see the MovieDetails component showing the movie title, image and
description.
For this first practice, you will learn how to set up a router and create routes that will allow you to navigate to different components.
Clone the starter repo, which you can access through the Download Project
button at the bottom of this page.
cd into the practice's root directory and run npm install. To start your
app, run npm run dev.
Look in src/App.jsx. You should see a list of components for:
- Home
- Stocks
- Movies
Take a look at the code that has already been created in the application. Notice the hierarchy of your components. Each component is represented by a folder that holds a component file and an index.js. The index.js file simply imports the component from the component file and exports it again. This architecture enables you to import each component by using the relative path to the folder (since a folder import will return index.js if it exists).
Run your app. You should see an App Component box with a black border. Inside,
there should be three boxes with orange outlines, one for each of the Home,
Stocks, and Movies components.
You are now going to adapt the app so that each of the three sub-components appears only at its specified route.
First, you need to set up your router to give you access to all of React
Router's features. For this practice, use [createBrowserRouter] for your
router.
In src/App.jsx, import createBrowserRouter and RouterProvider from
react-router-dom. Create a new const variable router and set it
equal to createBrowserRouter invoked. (You will supply an argument to
createBrowserRouter soon, but for now, just invoke it without any arguments.)
Then in App, remove the three components--you will render them with routes in
the next step--and replace them with the RouterProvider component, passing in
router as the router prop. Your App.jsx should now look something like
this:
// src/App.jsx

import { createBrowserRouter, RouterProvider } from 'react-router-dom';
import Home from './components/Home';
import Stocks from './components/Stocks';
import Movies from './components/Movies';

const router = createBrowserRouter();

function App() {
  return (
    <div className='app'>
      <h1>App Component</h1>
      <RouterProvider router={router} />
    </div>
  );
}

export default App;
This code won't run yet--you still need to pass some routes to
createBrowserRouter--but you're well on your way!
Now you want to create routes for each of the app's three main components. You
should have Home render at path /, Stocks render at path /stocks, and
Movies render at path /movies. So, e.g., at http://localhost:5173/stocks,
the app should look like this:
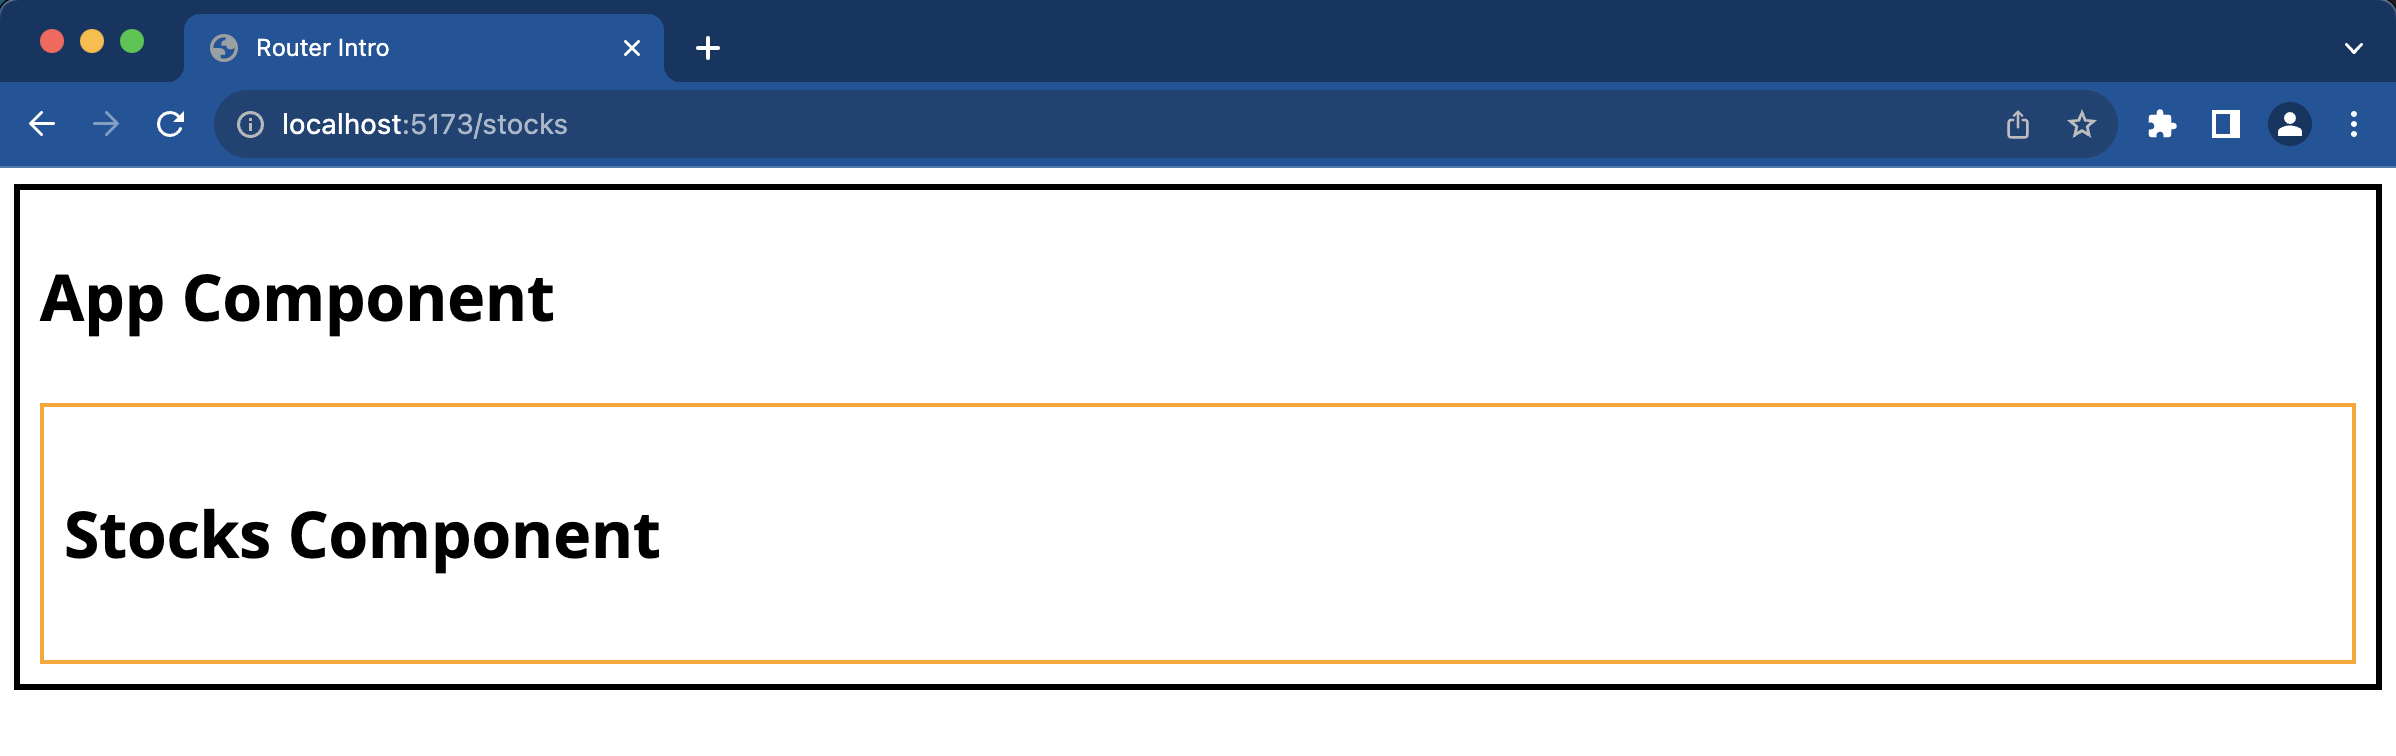
How can you do this? Pass an array of route objects to createBrowserRouter,
with one route object for each route/component. Remember that a route object is
just a simple JS object ({}) with keys like path, element, and children.
For example, a route object that renders the Home component at path / would
look like this:
{
  path: '/',
  element: <Home />
}
When you have created all of your route objects and passed them to
createBrowserRouter, take a look at your browser. You should now see only the
Home component being rendered inside App. In the address bar, append
/stocks to the original URL; you should now see the Stocks component alone
inside App. Replace /stocks with /movies to test that your Movies
component renders.
When each route successfully renders its component, you're ready to move on!
Your app is now rendering each component at its own route. Great job! But what if someone tries to access a route that does not correspond to one of your components, e.g., http://localhost:5173/potato? (Try it now to see what happens.)
You probably see this Unexpected Application Error:
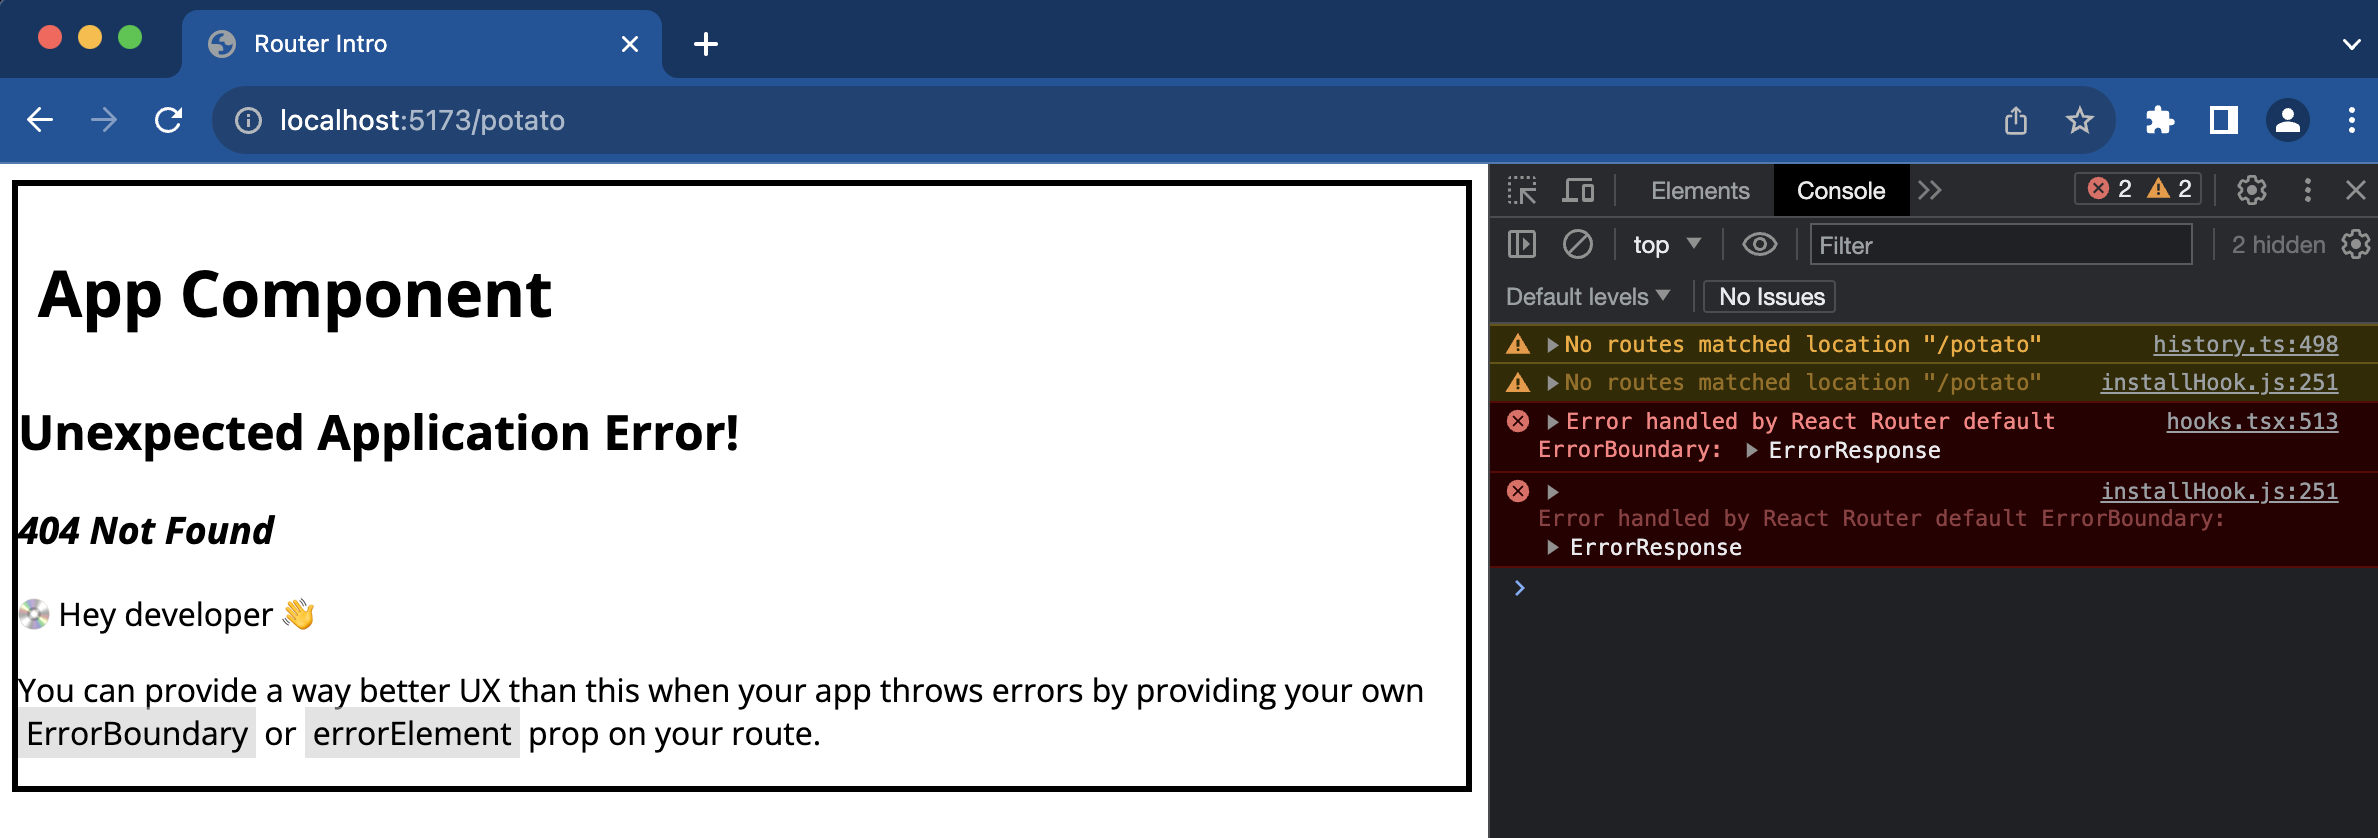
That's not good! If you look at the console on the right of the image, you can
see the problem: No routes matched location "potato". (Why does the error
appear twice in the console? Remember that React.StrictMode renders your
components twice in development.)
To fix this, add a default route (path: '*') to your router that will match
any otherwise unmatched path. (Where you insert this new route into the array
you send to createBrowserRouter is up to you: your router matches routes based
on most specific match, not order!) Set this default route's element to be an
h1 tag around the text, Page Not Found.
Now when you go to http://localhost:5173/potato, you should see this:
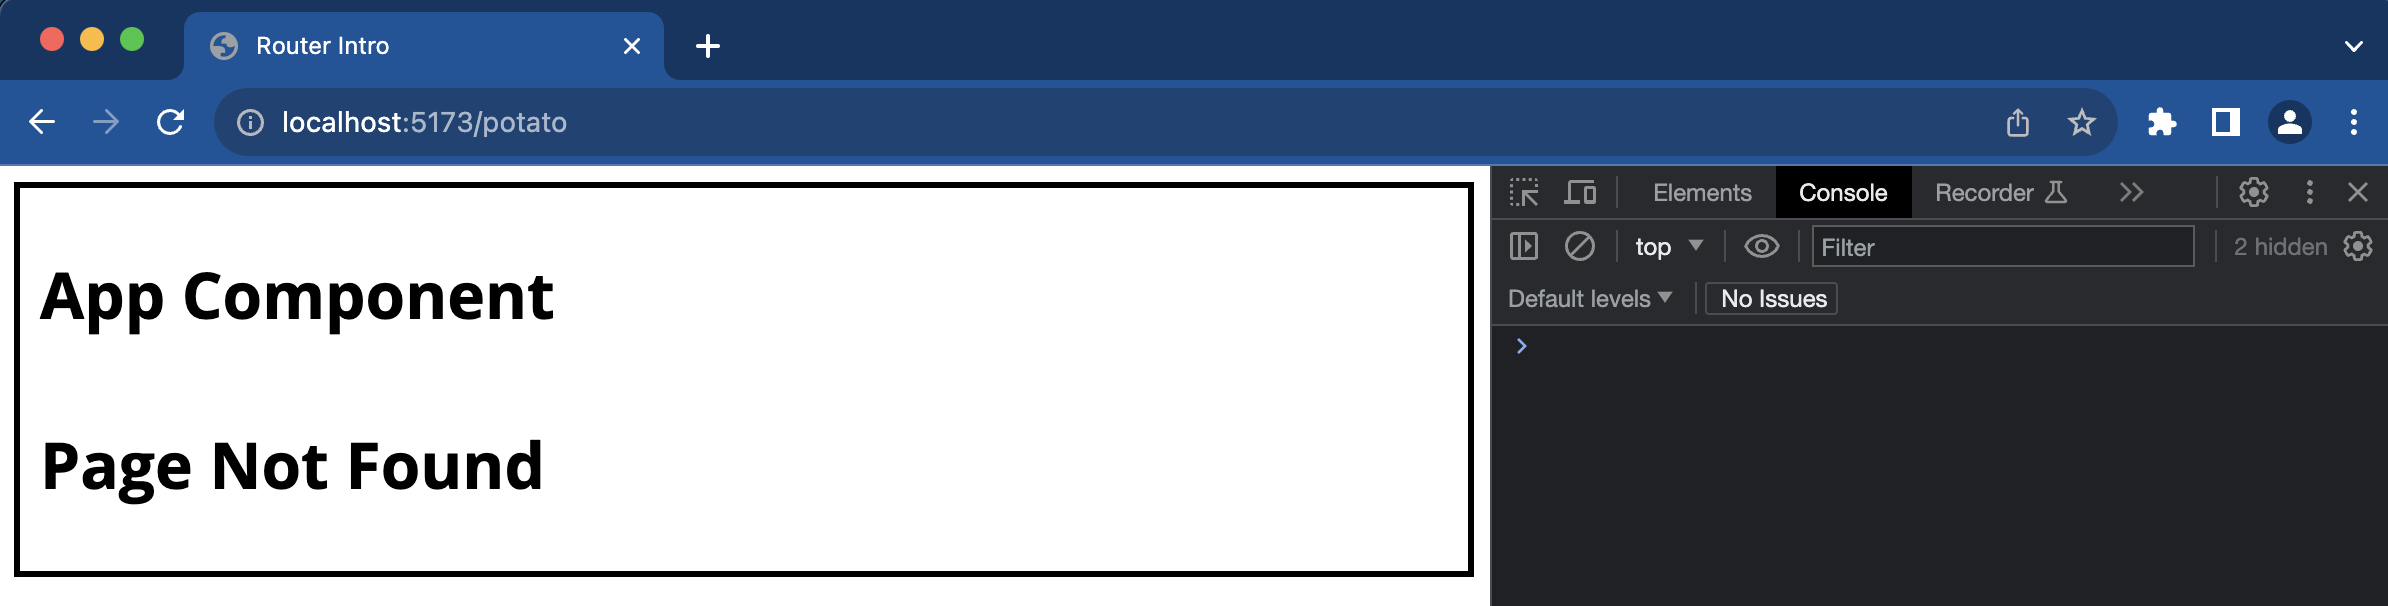
And no more error messages in the console. Nice!
If you still have time, try to set up your router using JSX instead of route objects. The conversion should be fairly straightforward. If you need help, look back at the "React Router - Routes" reading.
Tip: You'll need to add createRoutesFromElements and Route to your
imports from react-router-dom.
Congratulations! In this practice you have learned how to
- Set up
createBrowserRouterandRouterProviderto enable React Router in the entire application - Create route objects specifying which component should be mounted at each path
- Create a default route