The idea is to leverage the individual project implementation of the No-SQL databases for backend database and create a full stack of distributed web application which be able to scale out on all layers and be able have network partition tolerance.
- Yinghua Qin
- Kody Han
- Lakshmi Maduri
- Sweety Sojrani
- Vera Wang
- Catalog - Lakshmi
- Payment - Sweety
- Login/Signup - Yinghua
- Create/Process order - Vera
- Kong Gateway - Kody
- Frontend: All Members
After evaluating several Kubernetes services on the cloud, including the Amazon EKS, Azure AKS and Google Cloud Container Server. We designed to use the Google cloud container service - based on a cost comparison consideration. We also use the Postgrad Database which could form a clustering on Kubernetes. Postgrad is a rational database with free license.
On the front-end layer, we use the nodejs. It also connect to the Google Analytics for data analysis.
In this version, we moved the frontend from Heroku to the Google Kubernetes service.

In this version, we use Heroku as the front end deployment.

Here are the micro services we implemented.
CMPE Team Project Starbucks Online Store
In this Front End UI folder, run below command to download the node modules
npm install
Run the application
node server.js
npm install -g nodeclipse
npm install -g express
npm install -g express-generator
Install the Eclipse plugins
-
Start Eclipse, then select Help > Install New Software...
-
Enter the update site URL into the Work with text box: http://www.nodeclipse.org/updates/
-
Choose "1st Nodeclipse Code" and "Enide Tools Collection"
-
Restart Eclipse
-
Switch to Node perspective (e.g. Window -> Open Perspective -> Other ... -> Node).
-
Start to write code
-
Run as node application in Eclipse IDE
-
Go to browser to open http://localhost:3000/
Build a container image. Upload to the docker hub .
docker build .
docker login --username=qinyinghua --email=yinghua.qin@sjsu.edu

docker images

docker tag d9550141ed3e qinyinghua/starbucksnodejs:0.2

docker push qinyinghua/starbucksnodejs

docker run -it -p 80:4000 -p 81:3000 --name starbucks qinyinghua/starbucksnodejs:0.2
Create the Kubernetes deployment, service, pod configuration YAML files.
kubectl create -f kubernetes-namespace.yaml
kubectl create -f starbucks-deployment.yaml
kubectl create -f starbucks-service.yaml
As only the front end part will deploy to Heroku, so create a new folder cmpe281team and copy the front end source code there.
$ heroku login
$ heroku git:clone -a cmpe281team
$ cd cmpe281team

$ git add .
$ git commit -am "make it better"
$ git push heroku master

After that, found some issue of Heroku yaml file parsing.
Try to fix it by running:

npm install js-yaml
npm install yaml
npm install config

node server.js




-
-
Setting up the Go at EC2 instance for Go API Application
-
Go to the Mongo Query Router EC2 instance.
Install go:
wget https://dl.google.com/go/go1.11.1.linux-amd64.tar.gz
tar -C /usr/local -xzf go1.11.1.linux-amd64.tar.gz
export PATH=$PATH:/usr/local/go/bin

vi ~/.profile
	export GOPATH=$HOME//goapi
	export PATH=$PATH:/usr/local/go/bin:$GOPATH/bin

source ~/.profile
cd ~/goapi
go build goapi
./goapi      //start Go API service
-
-
-
Adding data collection steps
-
Document the setting of data collection
Go to the Mongo Query Router EC2 instance.
sudo systemctl restart mongodb
mongo
use cmpe281
db.createCollection("cmpe281")

db.cmpe281.insert( { "user_id":1, "name":"oliver", "password":"123" })
db.cmpe281.insert( { "user_id":2, "name":"harry", "password":"456" })
db.cmpe281.insert( { "user_id":3, "name":"emma", "password":"789" })
db.cmpe281.insert( { "user_id":4, "name":"sophia", "password":"124" })
db.cmpe281.insert( { "user_id":5, "name":"jack", "password":"125" })
db.cmpe281.insert( { "user_id":1, "name":"oliver1", "password":"a123" })
-

-
-
Implemented and deployed the Go API is deployed to my individual project EC2 instance.
-
It connects to my individual project Mongo NoSQL Database Cluster with Sharding through the Mongo Query Router.
-
Document how to use the login API
Run following curl command to test the login success case
curl -H "Content-Type: application/x-www-form-urlencoded" -X POST http://13.56.125.192:3000/login \
   -d "name=oliver1" \
   -d "password=a123"

curl -H "Content-Type: application/x-www-form-urlencoded" -X POST http://localhost:3000/login \
-d "name=oliver&password=a123"
Change the password from a123 to wrong_password to test the login fail case
curl -H "Content-Type: application/x-www-form-urlencoded" -X POST http://localhost:3000/login \
-d "name=oliver&password=wrong_password"

-


-
Implemented the front end UI framework
Home Page

Login

Login Success - Show My Card Balance

Add Card

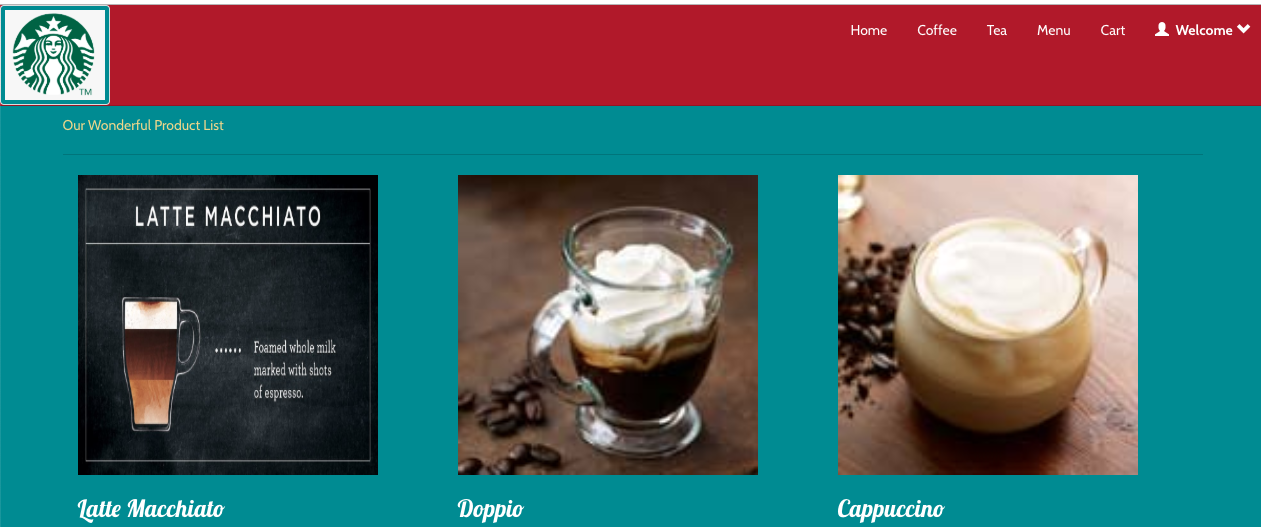
Product List

One Product - click "Pay Now" to pay

Paid


-
- Implemented the Login nodejs page
- Implemented the go api for login
-
- Implemented the sign up nodejs page
- Implemented the go api for sing up
- Implemented storage of images in AWS S3
- Created AWS CloudFront distribution which connects to AWS S3
-
SSH into mongo shell of EC2 Instance
-
Create database cmpe281
use cmpe281;
-
Create collection 'products' and insert documents into it
db.products.insert([ { "name": "Latte Macchiato", "description": "Creamy whole milk with barista", "price": 5, "image_url": "https://globalassets.starbucks.com/assets/fb9eda922982444ea9871de8cbd29b67.jpg", "count": 12 }, { "name": "Doppio", "description": "Two bold shots of expresso with cream", "price": 7, "image_url": "https://globalassets.starbucks.com/assets/d01fdcb3707c4c98ac575e89f3293b38.jpg", "count": 10 }, { "name": "Cappuccino", "description": "Deeply delicious expresso with a light airy foam", "price": 8, "image_url": "https://globalassets.starbucks.com/assets/2237ef1d9dab486695b8e6269d41ab0a.jpg", "count": 3 } ]); ``` db.products.insert([ { "name": "Cinnamon Dolce Latte", "description": "Steamed milk and cinnamon dolce syrup added to classic expresso", "price": 10, "image_url": "https://globalassets.starbucks.com/assets/79883bdbd5634757a5ae1c8126f75451.jpg", "count": 14 }, { "name": "Caffe Mocha", "description": "Rich expresso with bitter-sweet mocha and steamed milk", "price": 9, "image_url": "https://globalassets.starbucks.com/assets/bc15a5ca9d744b66bda07254f2f50013.jpg", "count": 16 }, { "name": "Chai Latte", "description": "Black tea infused with cinnamon and clove with steamed milk and light foam", "price": 4, "image_url": "https://globalassets.starbucks.com/assets/f344c66e8de74a4faf5c65f4060cf1f7.jpg", "count": 15 } ]); db.products.insert([ { "name": "Pumpkin Spice Chai Tea Latte", "description": "Pumpkin and spices go great with steamed milk and light foam", "price": 6, "image_url": "https://globalassets.starbucks.com/assets/727b21c60eec40208098cb94903ebca0.jpg", "count": 20 }, { "name": "Honey Citrus Mint Tea", "description": "Herbal tea with steamed lemonade and a touch of honey is perfect for the cold weather!", "price": 3, "image_url": "https://globalassets.starbucks.com/assets/4bffd5c29ee644a5b810610c322f741a.jpg", "count": 30 }, { "name": "Morning Muffin", "description": "This healthy muffin has zucchini, carrots, crunchy nuts and a dash of cane sugar", "price": 2, "image_url": "https://globalassets.starbucks.com/assets/3f3ff719711d45b2993903a7a8d1549d.jpg", "count": 5 }, { "name": "Iced lemon pond cake", "description": "A moist lemon cake with sweet icing", "price": 2, "image_url": "https://globalassets.starbucks.com/assets/12014fa89261475798a3c3b7dcc54552.jpg", "count": 4 } ]); ```- cd into the node_js_api directory
- Run
npm install
- Run
npm start
ornode app.js
- Start Mongo cluster and create orders collection
- Use Kubernetes to start server
- Tested with Postman
Create order API
curl -X POST \
  http://localhost:3000/order \
  -H 'Content-Type: application/json' \
  -d '{"UserId": "vera",
 "Items": [{
 	"Name": "Soy Latte",
 	"Price": "$3.5",
 	"Quantity": 1
 },
 {
 	"Name": "Cappucino",
 	"Price": "$4.0",
 	"Quantity": 1
 },
 {
 	"Name": "Macchiato",
 	"Price": "$3.0",
 	"Quantity": 1
 }]
}'

Get Order Status

curl -X GET \
  http://localhost:3000/order/1fe8d86b-298f-46d9-998a-d80d7713e554 \
  -H 'Content-Type: application/json' \
  -d '{"UserId": "vera"}'

Complete Order

curl -X POST \
  http://localhost:3000/order/1fe8d86b-298f-46d9-998a-d80d7713e554 \
  -H 'Content-Type: application/json' \
  -d '{"UserId": "vera"}'

Get orders history

curl -X GET \
  http://localhost:3000/orders \
  -H 'Content-Type: application/json' \
  -d '{"UserId": "vera"}'
- Login to Google Cloud Platform
https://console.cloud.google.com
- Create new project
- Go to project

- Go to Project Settings
- Select IAM on left sidebar
- Edit permissions of your member ID and give role "Kubernetes Engine Admin"

- Search the Marketplace for Kong or visit
https://console.cloud.google.com/marketplace/details/kong/kong
- Press Configure

- Deploy in default namespace

A Kong gateway redirects http requests to an upstream url (typically Kong listens for requests on port 8000). Conveniently, Kong can be configured via HTTP requests on a different port (typically 8001). This allows for security by controlling traffic to the admin port.
curl -X POST http://<kong-ip>:<kong-admin-port>/apis \
  --data name='test' \
  --data upstream_url='http://url.com' \
  --data uris='/example'
This adds API named 'test' to Kong. A get to http://:/example redirects to http://url.com Similarly, http://:/example/extension redirects to http://url.com/extension
curl -X POST http://35.202.2.250:8001/apis --data name='order' --data upstream_url='http://orderAPI-elb-907723796.us-west-1.elb.amazonaws.com:80' --data uris='/order'
curl -X DELETE http://<kong-ip>:<kong-admin-port>/apis/<API-name>
curl -X POST http://<kong-ip>:<kong-admin-port>/apis/<api-name> \
  -- data "name=<plugin-name>"
  -- data "config.data=<param>"
curl -X DELETE http://<kong-ip>:<kong-admin-port>/apis/<api-name>/plugins/<plugin-name>
- Push Docker image to Docker hub
- Create a new cluster: a. Via the GCP UI
b. The command line
gcloud container clusters create nodejs-cluster --num-nodes=3 --zone-us-central1-a
- Deploy from Docker Hub to Kubernetes as a service
kubectl run starbucksnodejs --image=qinyinghua/starbucksnodejs:0.2 --port 4000 --port 3000
- Expose ports on Kubernetes
kubectl expose deployment starbucksnodejs --type=LoadBalancer --port 80 --target-port 4000